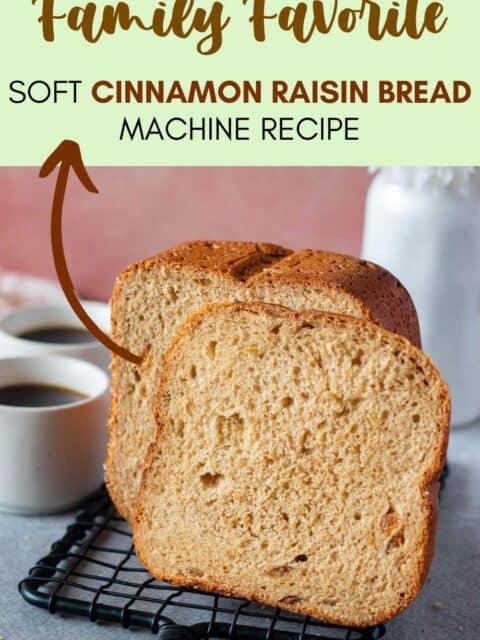
There’s nothing quite like the aroma of freshly baked cinnamon bread filling your kitchen. This cinnamon raisin bread machine recipe is one of those delicious bread machine recipes that makes a soft, sweet loaf—the kind of homemade bread you can easily bake in your own bread maker, perfect for breakfast, French toast, or snacking.
Bread Machine Cinnamon Raisin Bread
There’s something extra special about the smell of cinnamon bread baking on a cool day — it instantly makes your home feel cozy and festive.
This bread machine recipe takes all the effort out, leaving you with a soft, sweet loaf that’s perfect for toasting, buttering, or serving alongside a hot cup of tea.
As it bakes, your home fills with the cozy aroma of cinnamon and raisins, and soon you’ll have a warm, fluffy loaf ready to slice.
If you love this, you might also enjoy my soft and pillowy Japanese Milk Bread or the lightly sweet Honey Wheat Bread — both made in a bread machine. They are equally simple and perfect for breakfast.
Ingredients
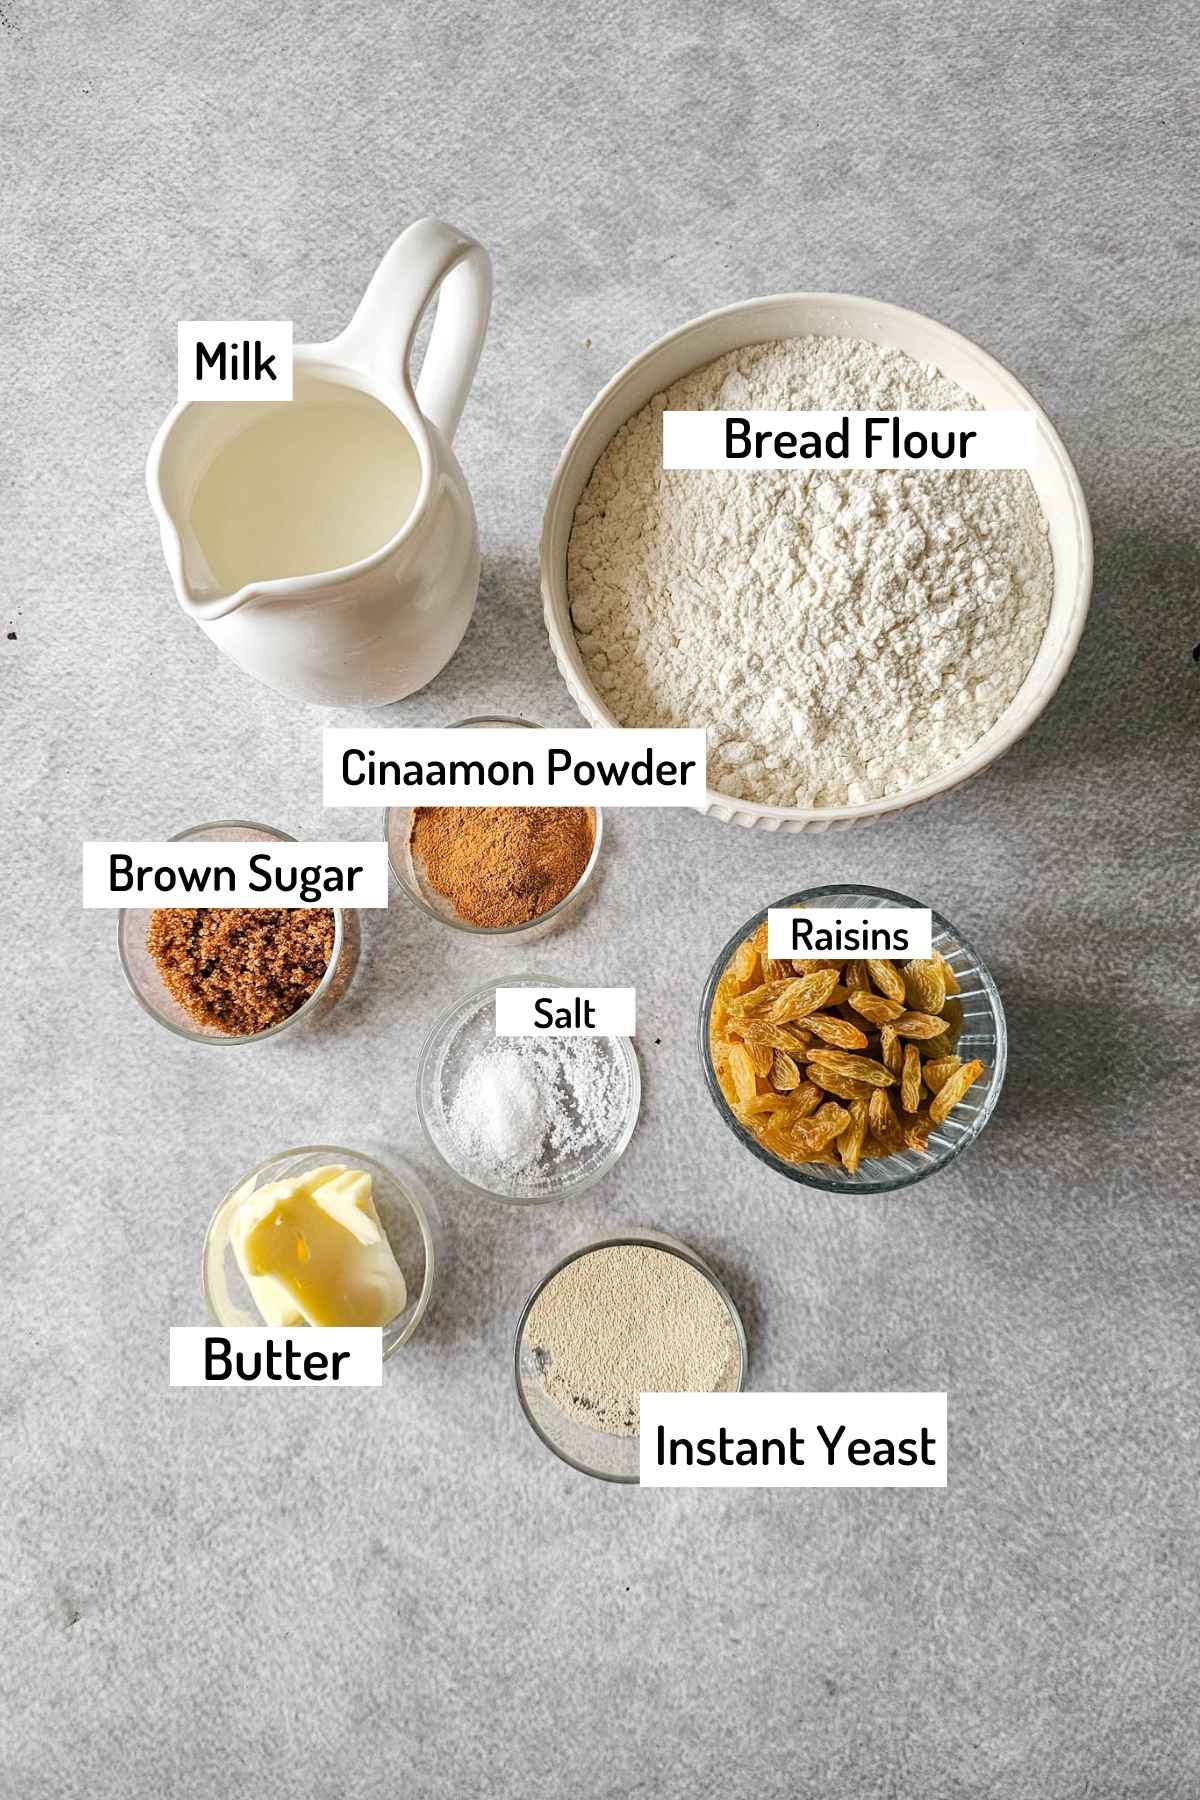
Wet Ingredients:
- 3/4 cup (180ml) Lukewarm Milk
- 2 tbsp (28 g) Unsalted softened butter
- 2 tbsp (25 g) Brown sugar
- 1/2 tsp salt
Dry Ingredients:
- 2 3/4 cups (330 g) bread flour or all-purpose flour
- 1 1/4 tsp ground cinnamon
- 2 tsp (6 g) instant yeast
Add-ins (to be added later or using fruit/nut dispenser):
- 2/3 cup (100 g) raisins
Ingredient Notes
Milk – Use room temperature or slightly warm milk to help the yeast activate properly. Too hot can kill the yeast, and too cold can slow down the rise, so the liquid temperature does matter here.
Sugar - I am using dark brown sugar to get a nice colouration, but white sugar will work just fine.
Bread Flour – Bread flour gives the loaf a better structure and chew. All-purpose flour can be used if bread flour isn’t available, though the loaf may be a little softer.
Instant Yeast – Instant yeast can be added directly to the flour without proofing, which makes it perfect for bread machines. Ensure it’s fresh for optimal rise; old yeast can hinder dough growth. You can also use bread machine yeast, which is simply a type of instant yeast specially labeled for bread makers. While you can use active dry yeast, it requires proofing before adding, so I prefer using instant or bread machine yeast for the easiest and most reliable results. Old yeast can hinder dough growth.
Raisins – Both regular dark raisins and golden raisins work well in this recipe. It’s best to soak them in warm water for 10–15 minutes before adding — this keeps the bread dough consistent, preventing them from sinking to the bottom of the loaf. Be sure to pat them dry before mixing in.
Please scroll to the end of the post to print the recipe card
Step by Step Instructions
Step 1: Soak the Raisins
Start by soaking the raisins in warm water for 10–15 minutes to make them plump and juicy. Once soaked, drain them and pat them completely dry — this prevents excess moisture from affecting the dough.
Step 2: Prepare the Bread Machine Pan
Ensure the kneading paddle is securely in place. Layer the ingredients in the bread pan following this order:
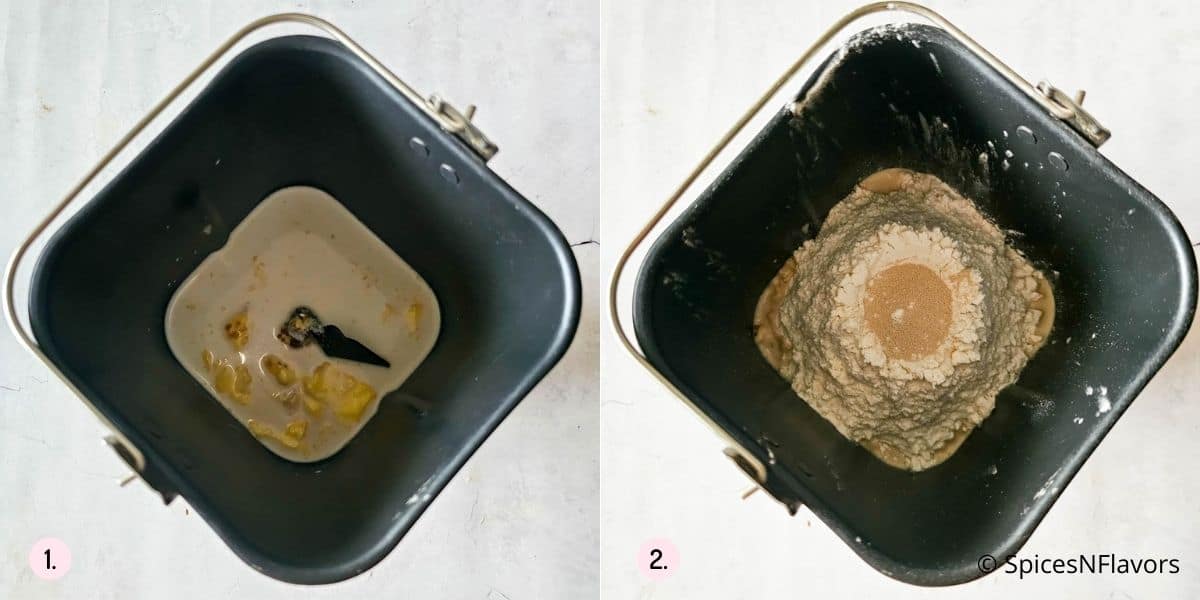
- Wet ingredients – milk and softened butter, sugar, and salt (image 1).
- Dry ingredients – bread flour, cinnamon, and yeast (make a small well in the flour for the yeast) (image 2).
📌 Tip: Following the layering recommended by your bread machine ensures proper kneading, proofing, and baking.
Step 3: Set the Bread Machine
Select the Sweet Bread setting on your machine, choose 750 g loaf size, and set the crust to medium. Press start and let the machine begin its first kneading and resting cycle.
Step 4: Add the Raisins and Adjust Dough
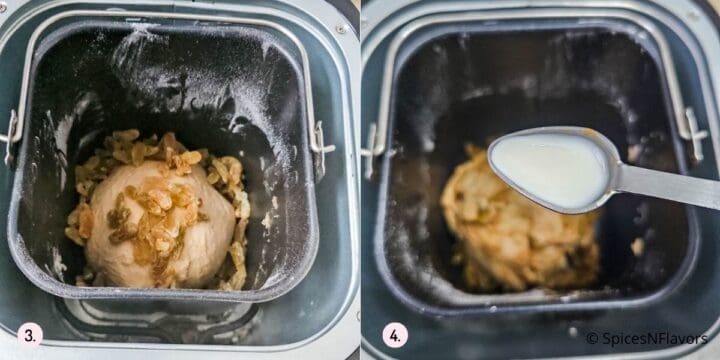
About 15 minutes into the cycle, when the dough begins its second knead, pause the bread machine and add the drained and dried raisins (image 3).
At this stage, I added 1 tsp of milk because the dough felt slightly dry (image 4).
If the dough ever feels too sticky, you can add 1 tbsp flour—only if needed.
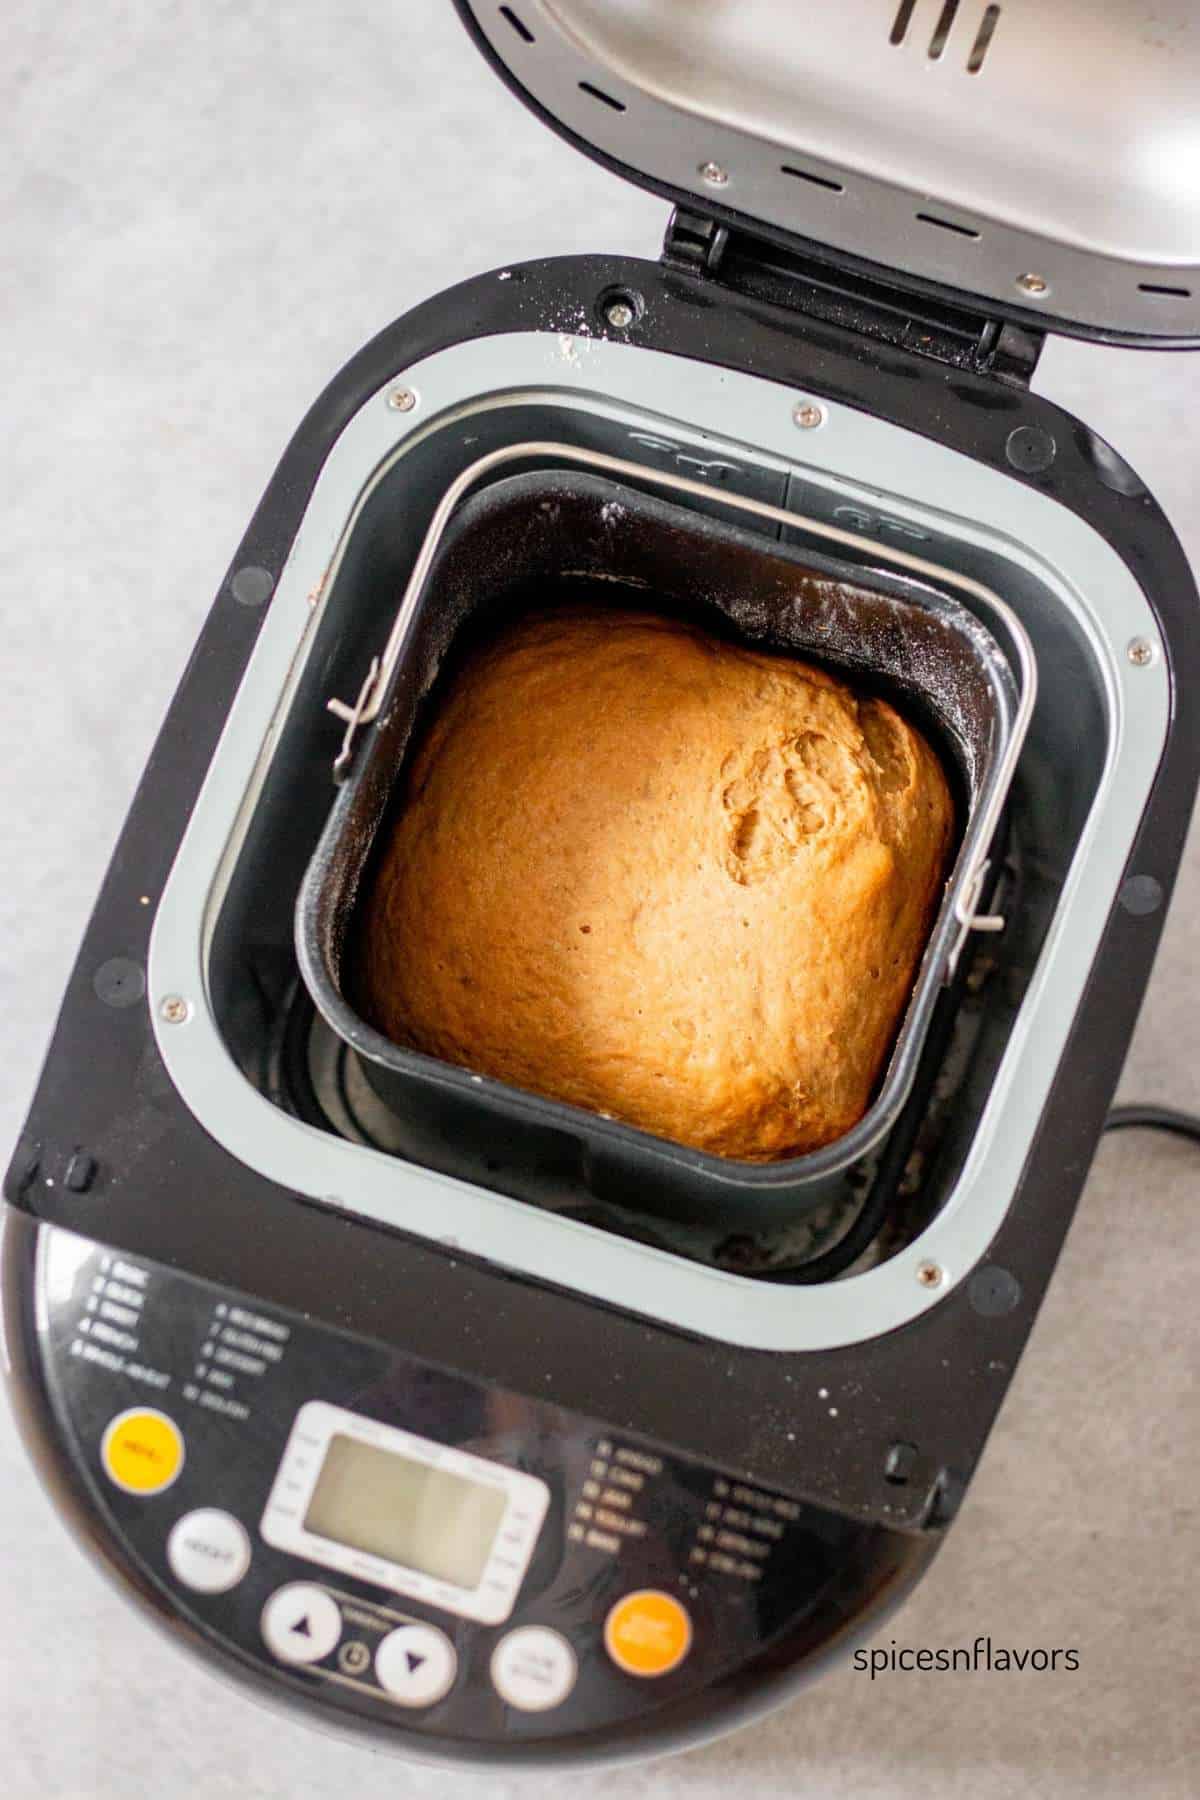
Close the lid and resume the cycle, letting the machine complete kneading, proofing, and baking.
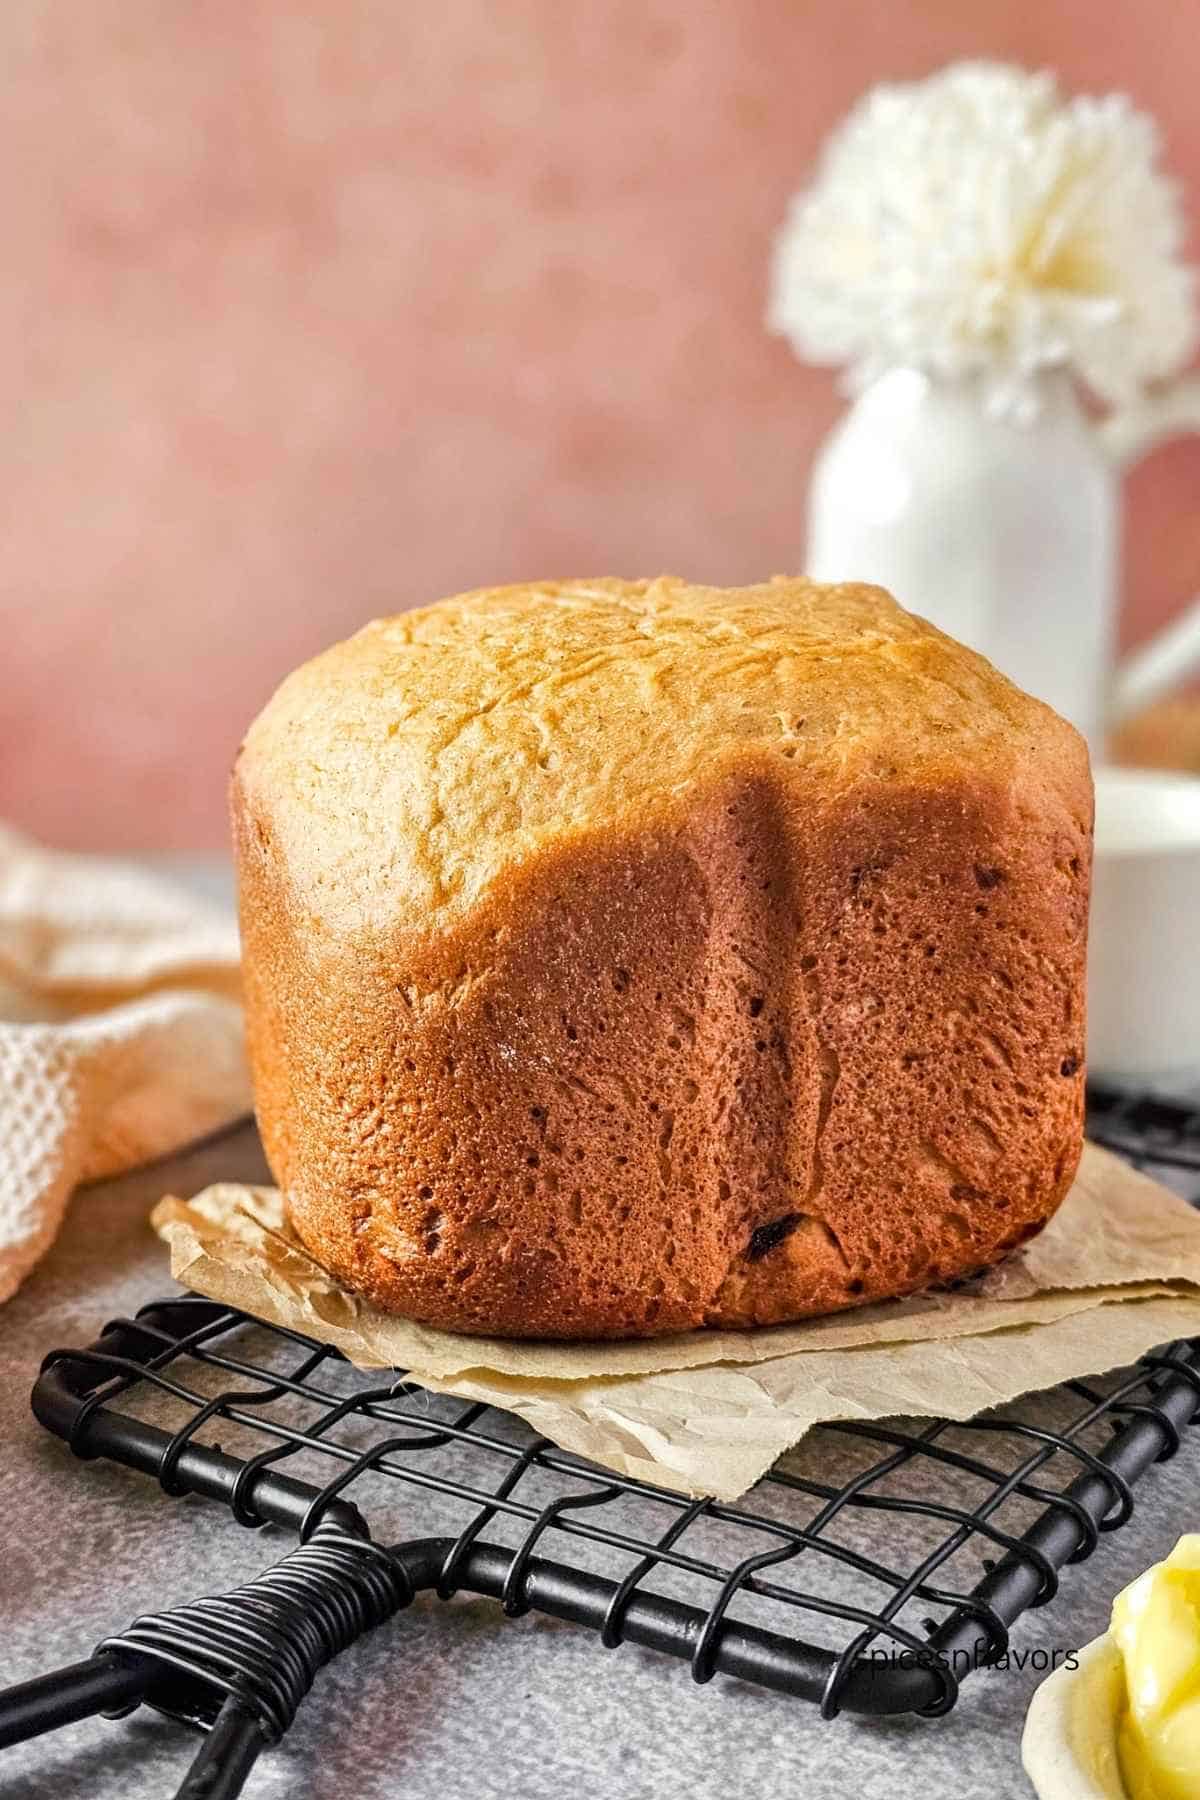
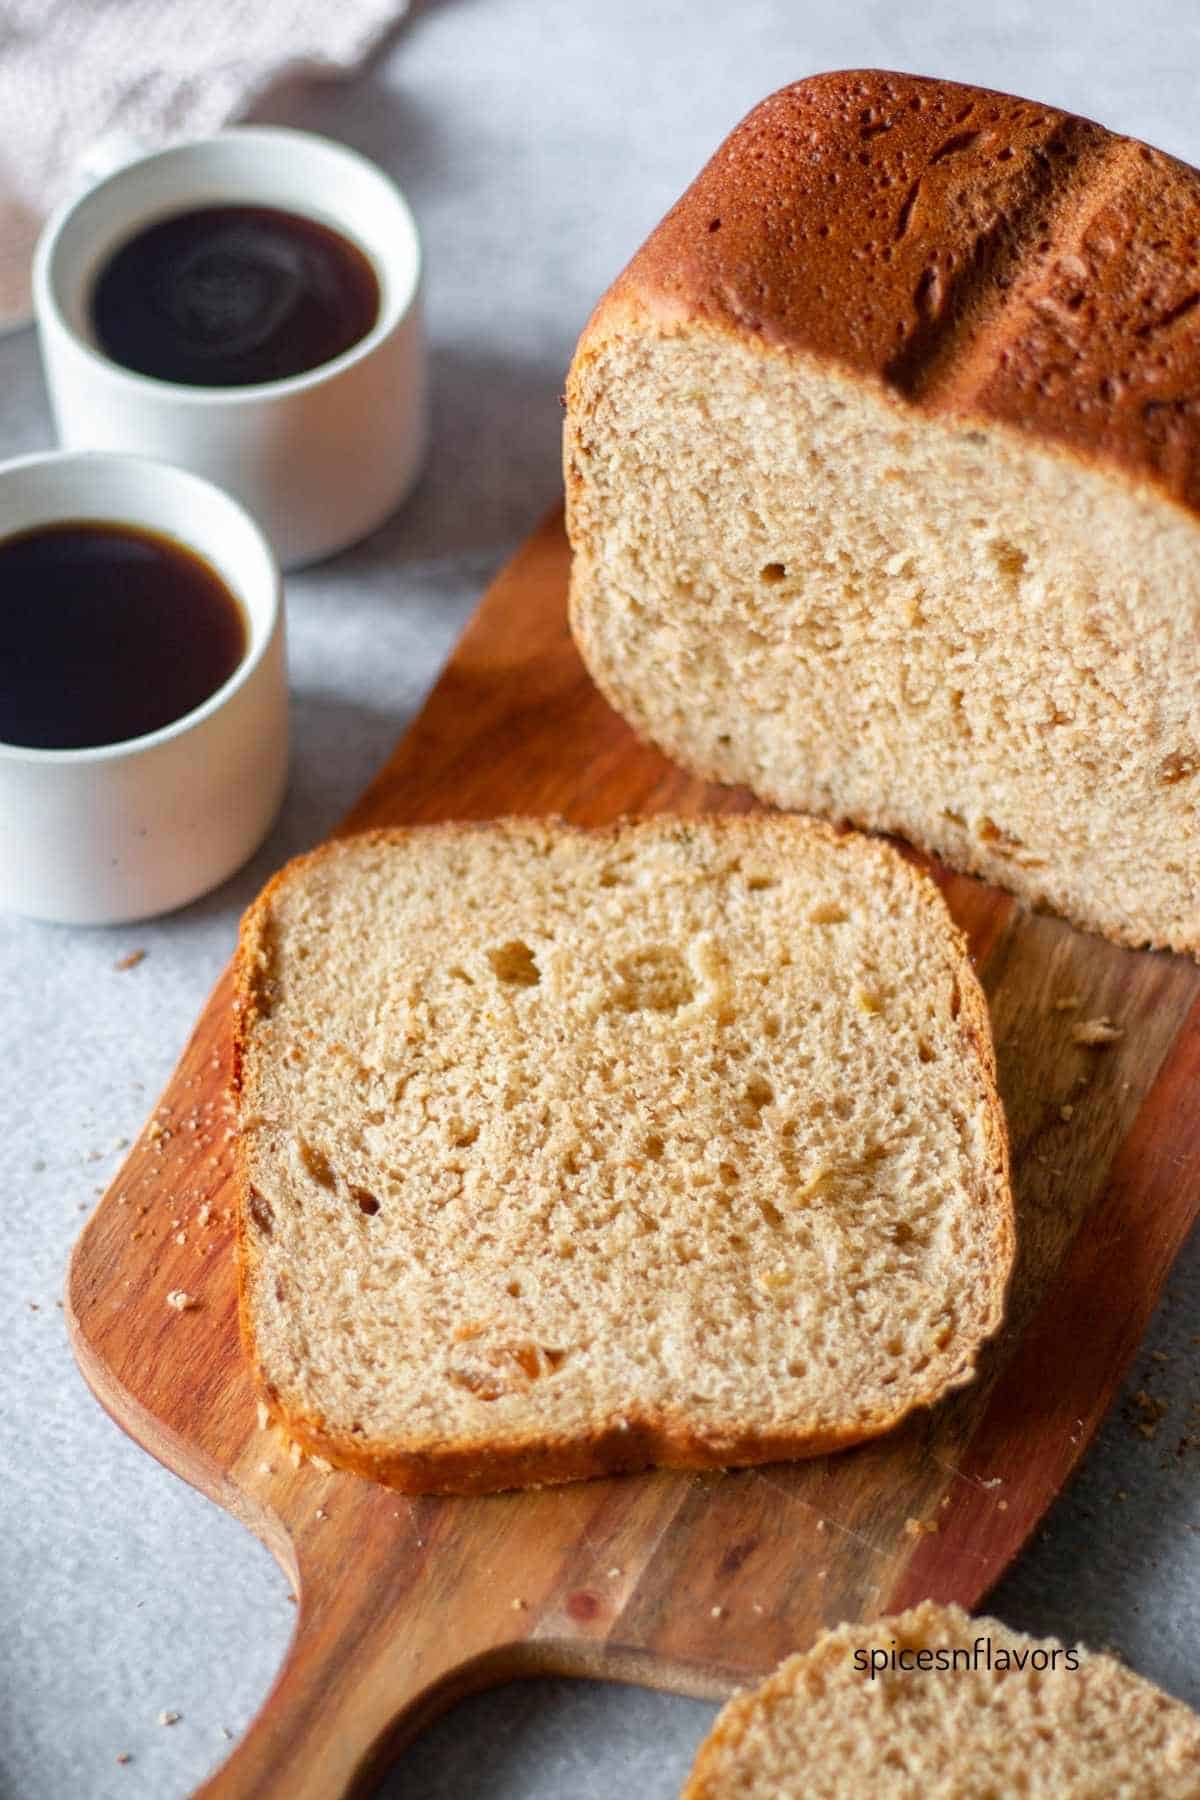
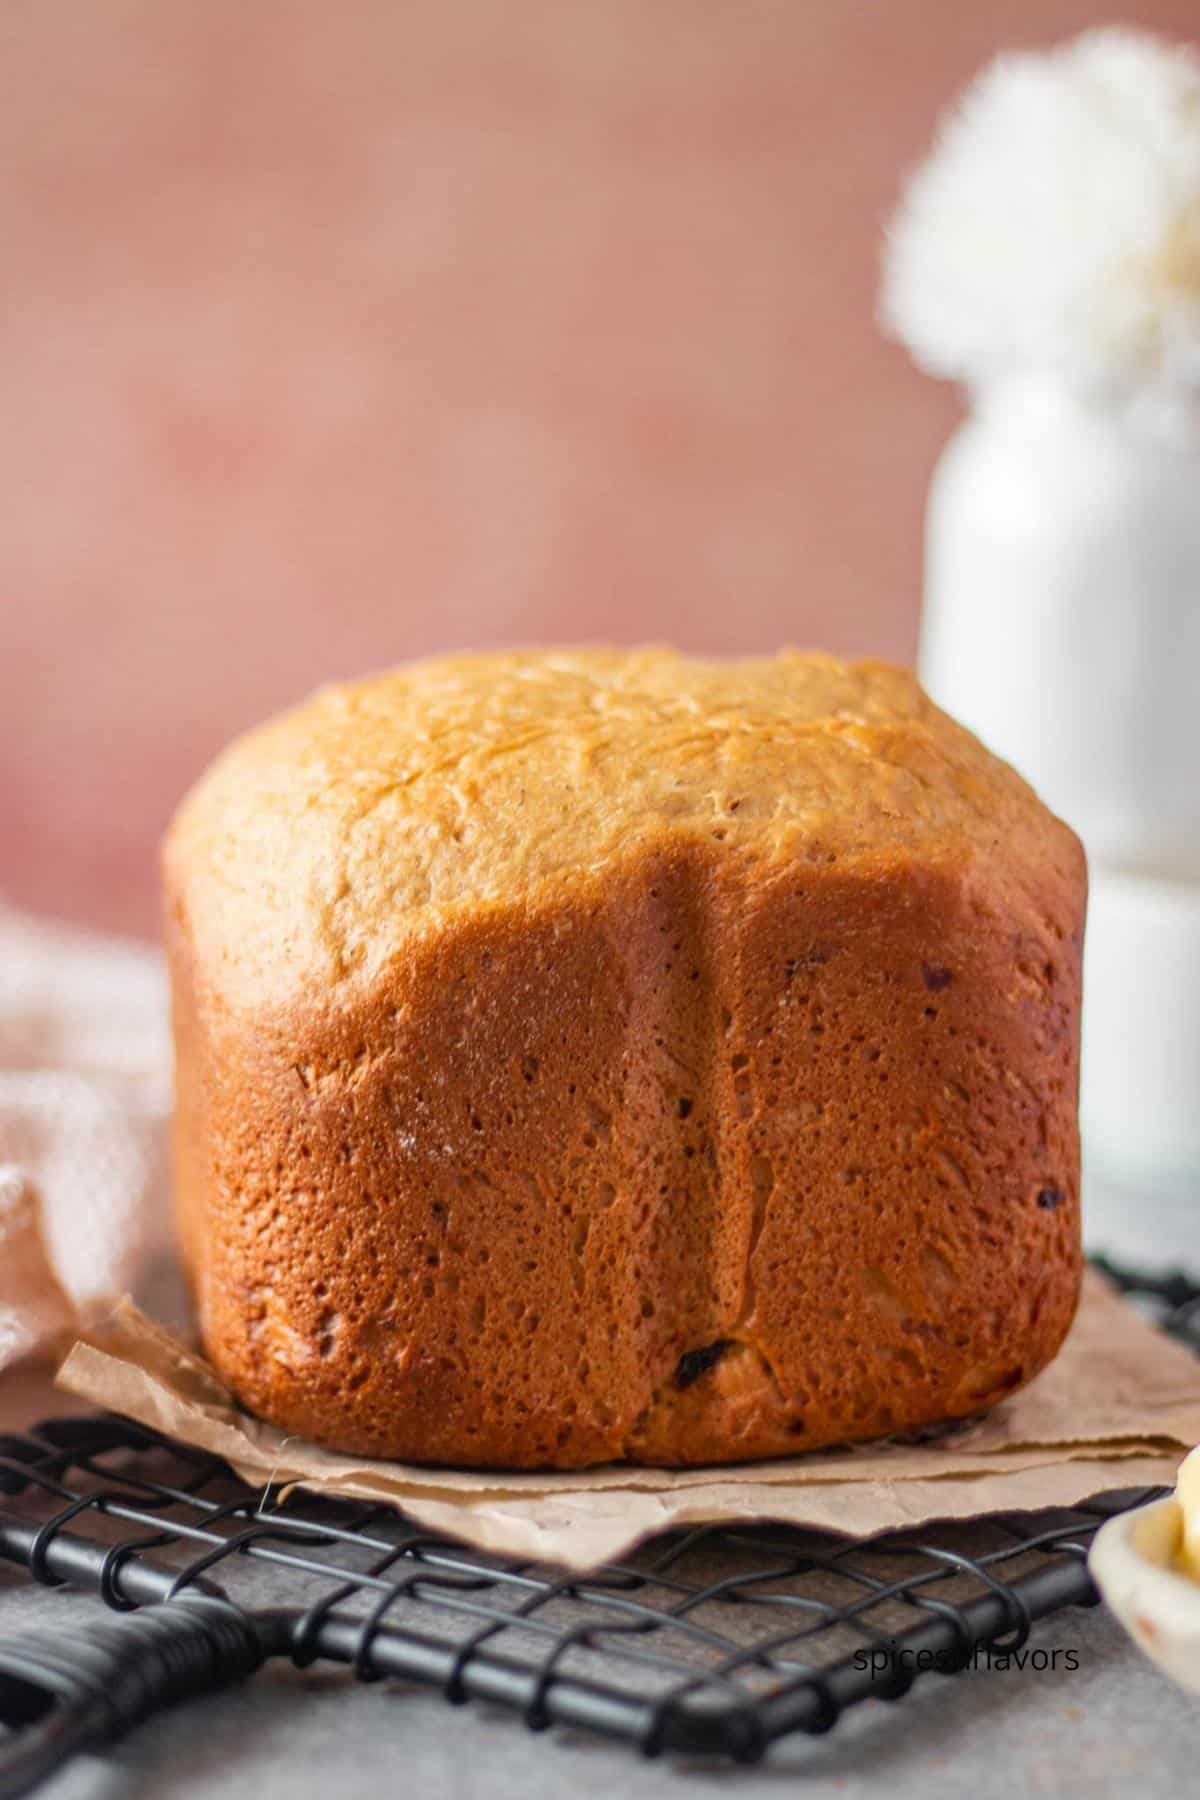
Step 6: Cool
Once the bread machine completes its dough cycle, carefully remove the bread pan using oven mitts. Let the bread rest in the pan for 5 minutes, then transfer it to a wire rack to cool completely before slicing.
Storage Instructions
- Room Temperature: Once the bread has completely cooled, store it in an airtight container or a resealable plastic bag or wrap it in aluminum foil to preserve the cinnamon flavor and soft texture. It will stay fresh for 2–3 days at room temperature. A slice of cinnamon raisin bread is perfect toasted with cream cheese, maple syrup, or butter the next day.
- Freezing: For longer storage, slice the bread and wrap it tightly in plastic wrap or foil, then place it in a freezer-safe bag. It can be frozen for up to 2 months. Thaw slices at room temperature or lightly toast them before serving for the best results.
📌 Tip: Keep the bread wrapped tightly and avoid refrigeration, as cold temperatures can dry out the soft, fluffy texture of this cinnamon raisin loaf.
Best Tips
- Pat the Raisins Dry: Always drain and pat the soaked raisins completely dry before adding them to the dough. This prevents excess moisture that can make the bread soggy.
- Check Dough Consistency: When adding raisins during the second knead, adjust the dough if needed — add 1 tsp milk if it feels slightly dry, or 1 tsp flour if it’s too sticky.
- Avoid Adding Extra Milk: Stick to the milk quantity listed in the recipe. Too much liquid can cause the bread to sink.
- Do Not Disturb the Dough Cycle: Let the bread machine complete the kneading, proofing, and baking cycles without interruption.
- Keep the Lid Closed: Do not open the lid after the kneading process, that is, after you have added the raisins; the second rise or second time the dough is kneaded; this ensures even rising and a nicely domed loaf.
- Use Fresh Yeast: Fresh instant or bread machine yeast gives the best rise. Old or expired yeast may lead to dense bread.
- Alternative Method to Avoid Sinking Raisins: If you’re worried the raisins will sink to the bottom of the pan, you can remove the dough after the kneading cycle, fold in the raisins, and place the dough in a lightly greased loaf pan. Let it proof at room temperature until it roughly doubles in size, then bake it in the oven
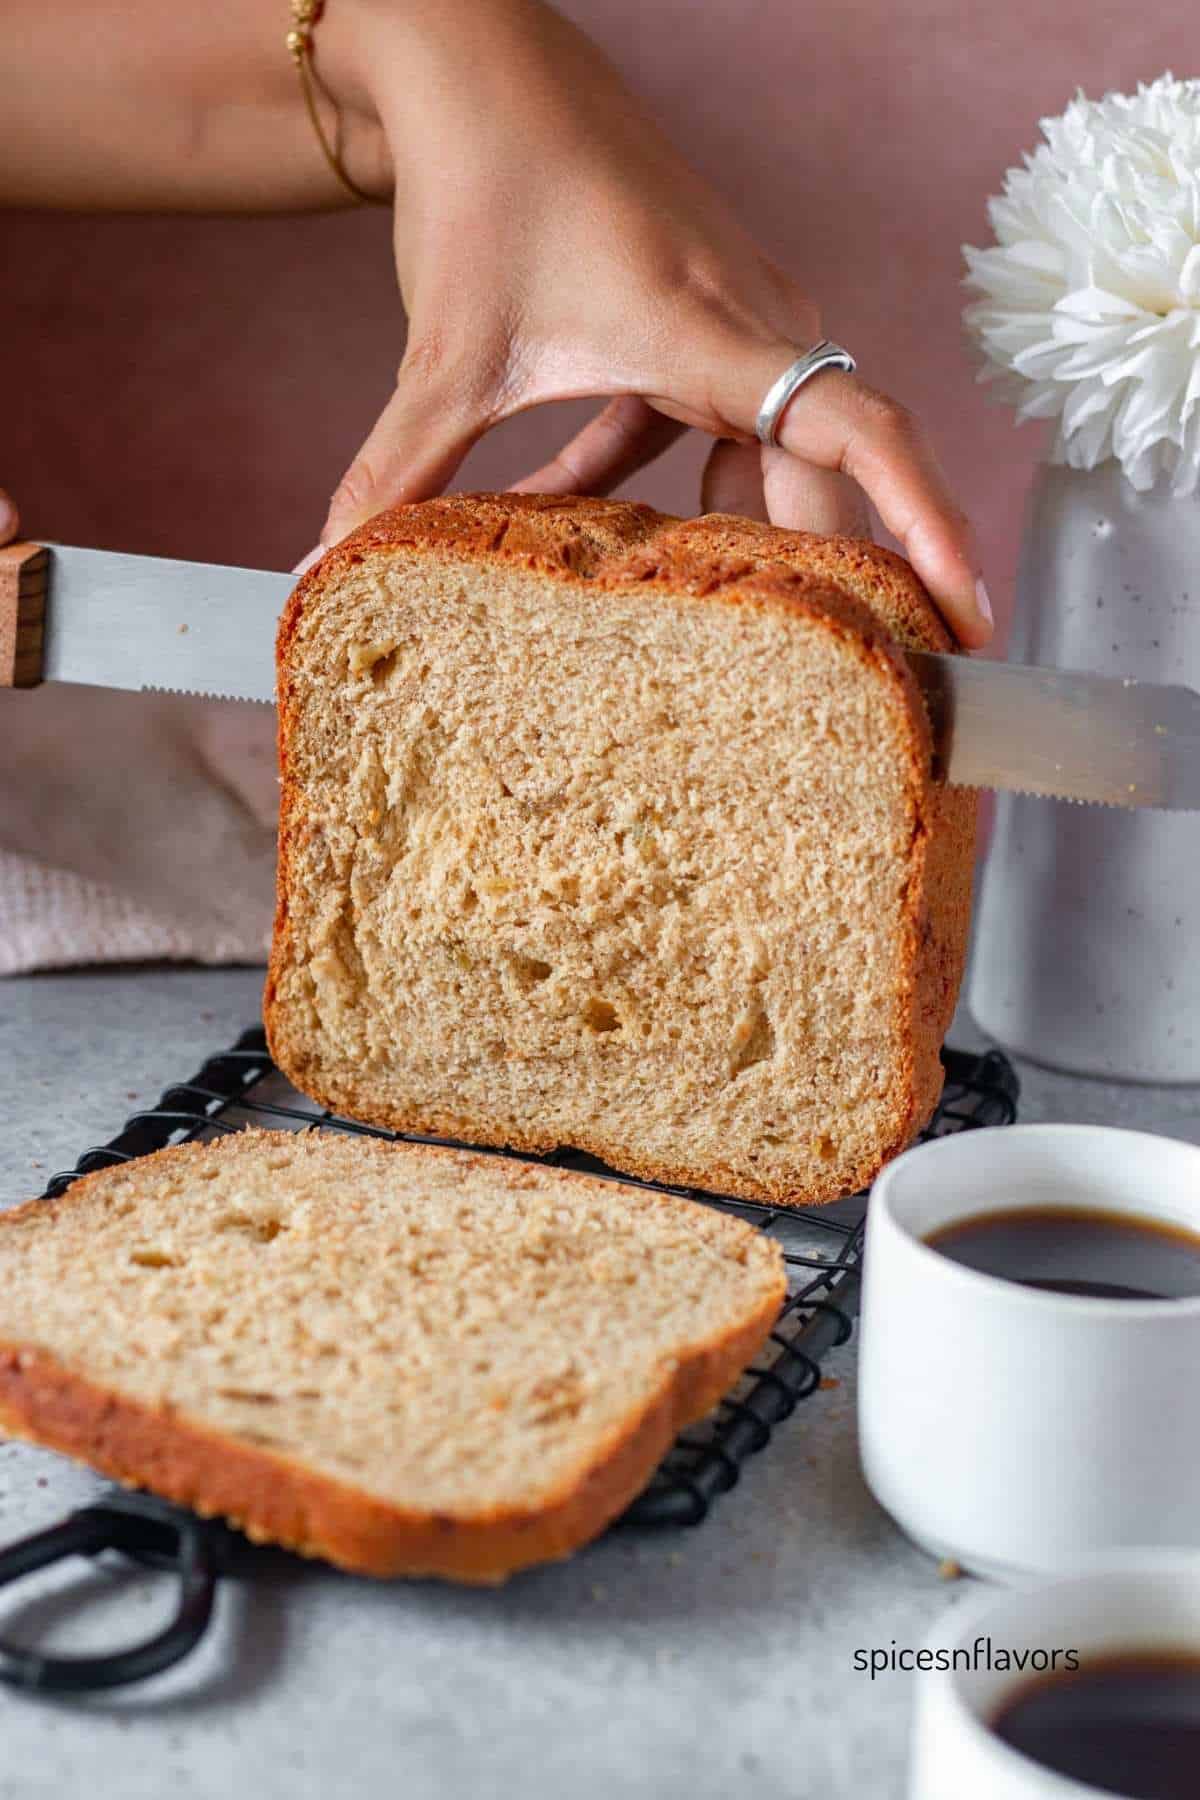
- Cool Before Slicing: Let the bread cool completely on a wire rack to set the crumb. Slicing too early can make the loaf gummy.
Frequently Asked Questions
Bread can sink if the dough has too much liquid, the yeast is overactive, or it was over-proofed. In this recipe, it’s important to stick to the milk quantity listed, avoid adding extra during kneading, and follow the bread machine cycles without opening the lid after the knead. Ensuring the raisins are properly soaked and dried also prevents excess moisture from weighing down the loaf. The main problem with sinking bread is too much liquid in most cases, so measure the recipe’s ingredients carefully
Yes! You can make this cinnamon raisin bread by hand or using a stand mixer. Knead the dough until smooth, allow it to rise in a greased bowl until doubled in size, fold in the soaked and dried raisins, shape it into a loaf pan, proof again until nearly doubled, and then bake in a preheated oven at 180°C (350°F) for 30–40 minutes or until golden and cooked through.
Related Recipes

Wish to Join US for the love of BAKING? Subscribe to our newsletter and Youtube channel. Follow along on Facebook, Instagram, and Pinterest for all the latest updates!

Easy Cinnamon Raisin Bread Machine recipe (Egg-free)
Ingredients
Wet Ingredients
- 180 gms (3/4 cup) Lukewarm Milk
- 28 gms (2 tbsp) Softened Butter
- 25 gms (2 tbsp) Brown Sugar
- 1/2 tsp Salt
Dry Ingredients
- 330 gms (2+3/4) cups Bread Flour
- 1+1/4 tsp Cinnamon Powder
- 6 gms (1.5 tsp) Instant Yeast
Add-ins (to be added later or using fruit/nut dispenser)
- 100 gms (2/3 cup) Raisins
Instructions
Step 1: Soak the Raisins
- Start by soaking the raisins in warm water for 10–15 minutes to make them plump and juicy. Once soaked, drain them and pat them completely dry — this prevents excess moisture from affecting the dough.
Step 2: Prepare the Bread Machine Pan
- Ensure the kneading paddle is securely in place. Layer the ingredients in the bread pan following this order:
- Wet ingredients – Milk, Softened butter, Sugar, and salt.Dry ingredients – Bread flour, cinnamon, and yeast (make a small well in the flour for the yeast). 📌 Tip: Following the layering recommended by your bread machine ensures proper kneading, proofing, and baking.
Step 3: Set the Bread Machine
- Program: Sweet BreadLoaf Size: 750 gms Crust Color: MediumPress start to begin mixing and kneading.
Step 4: Add the Raisins and Adjust Dough
- About 15 minutes into the cycle, when the dough begins its second knead, pause the bread machine and add the drained and dried raisins
- At this stage, I added 1 tsp of milk because the dough felt slightly dry
- If the dough ever feels too sticky, you can add 1 tbsp flour—only if needed.
- Close the lid and resume the cycle, letting the machine complete kneading, proofing, and baking.
Step 5: Cool
- Once the bread machine completes its dough cycle, carefully remove the bread pan using oven mitts. Let the bread rest in the pan for 5 minutes, then transfer it to a wire rack to cool completely before slicing.
Notes
- Always pat raisins dry to avoid soggy bread.
- Do not add extra milk beyond the recipe; too much liquid causes the loaf to sink.
- This recipe was tested in manual mode, so the raisins were added after the first kneading and just before the second kneading cycle.
- If your bread machine has a fruit/nut dispenser, you can simply place the raisins in the dispenser at the beginning, and the machine will add them at the correct stage automatically — no need to pause or check the dough
- Avoid opening the lid after kneading — it disrupts proofing.
Leave a Reply