These ciabatta rolls or buns have a crispy, crackling crust, open pores, and a delicate crumb, giving them a distinctive flavor and texture that is truly a delight to eat. And the best part? They're easy to make and require absolutely no kneading.

Homemade Ciabatta Bread Rolls: What to expect?
Unlike regular bread rolls, ciabatta bread rolls are a classic example of a high-hydration dough.
To give you an idea, regular white bread has about 60% hydration whereas ciabatta bread has 80%.
Due to this high amount of water content, ciabatta bread rolls typically have:
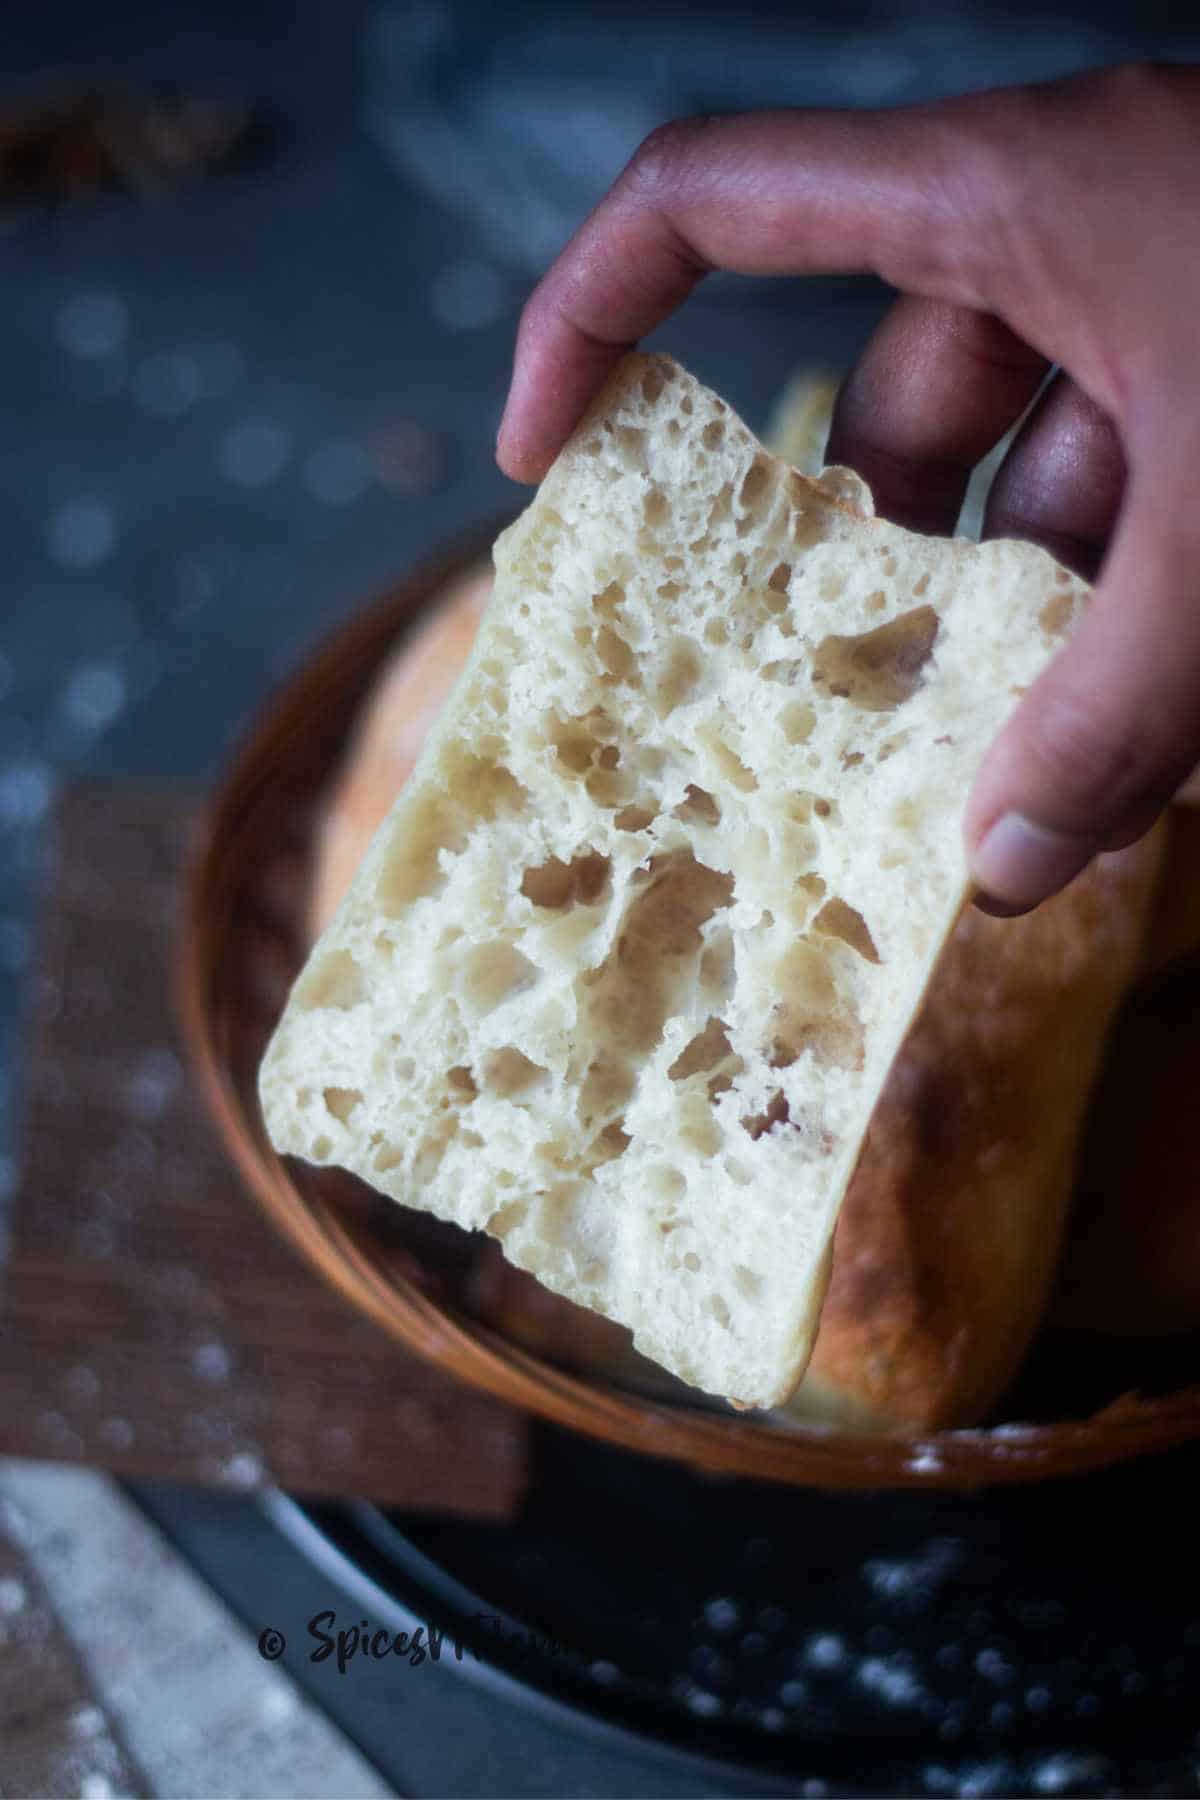
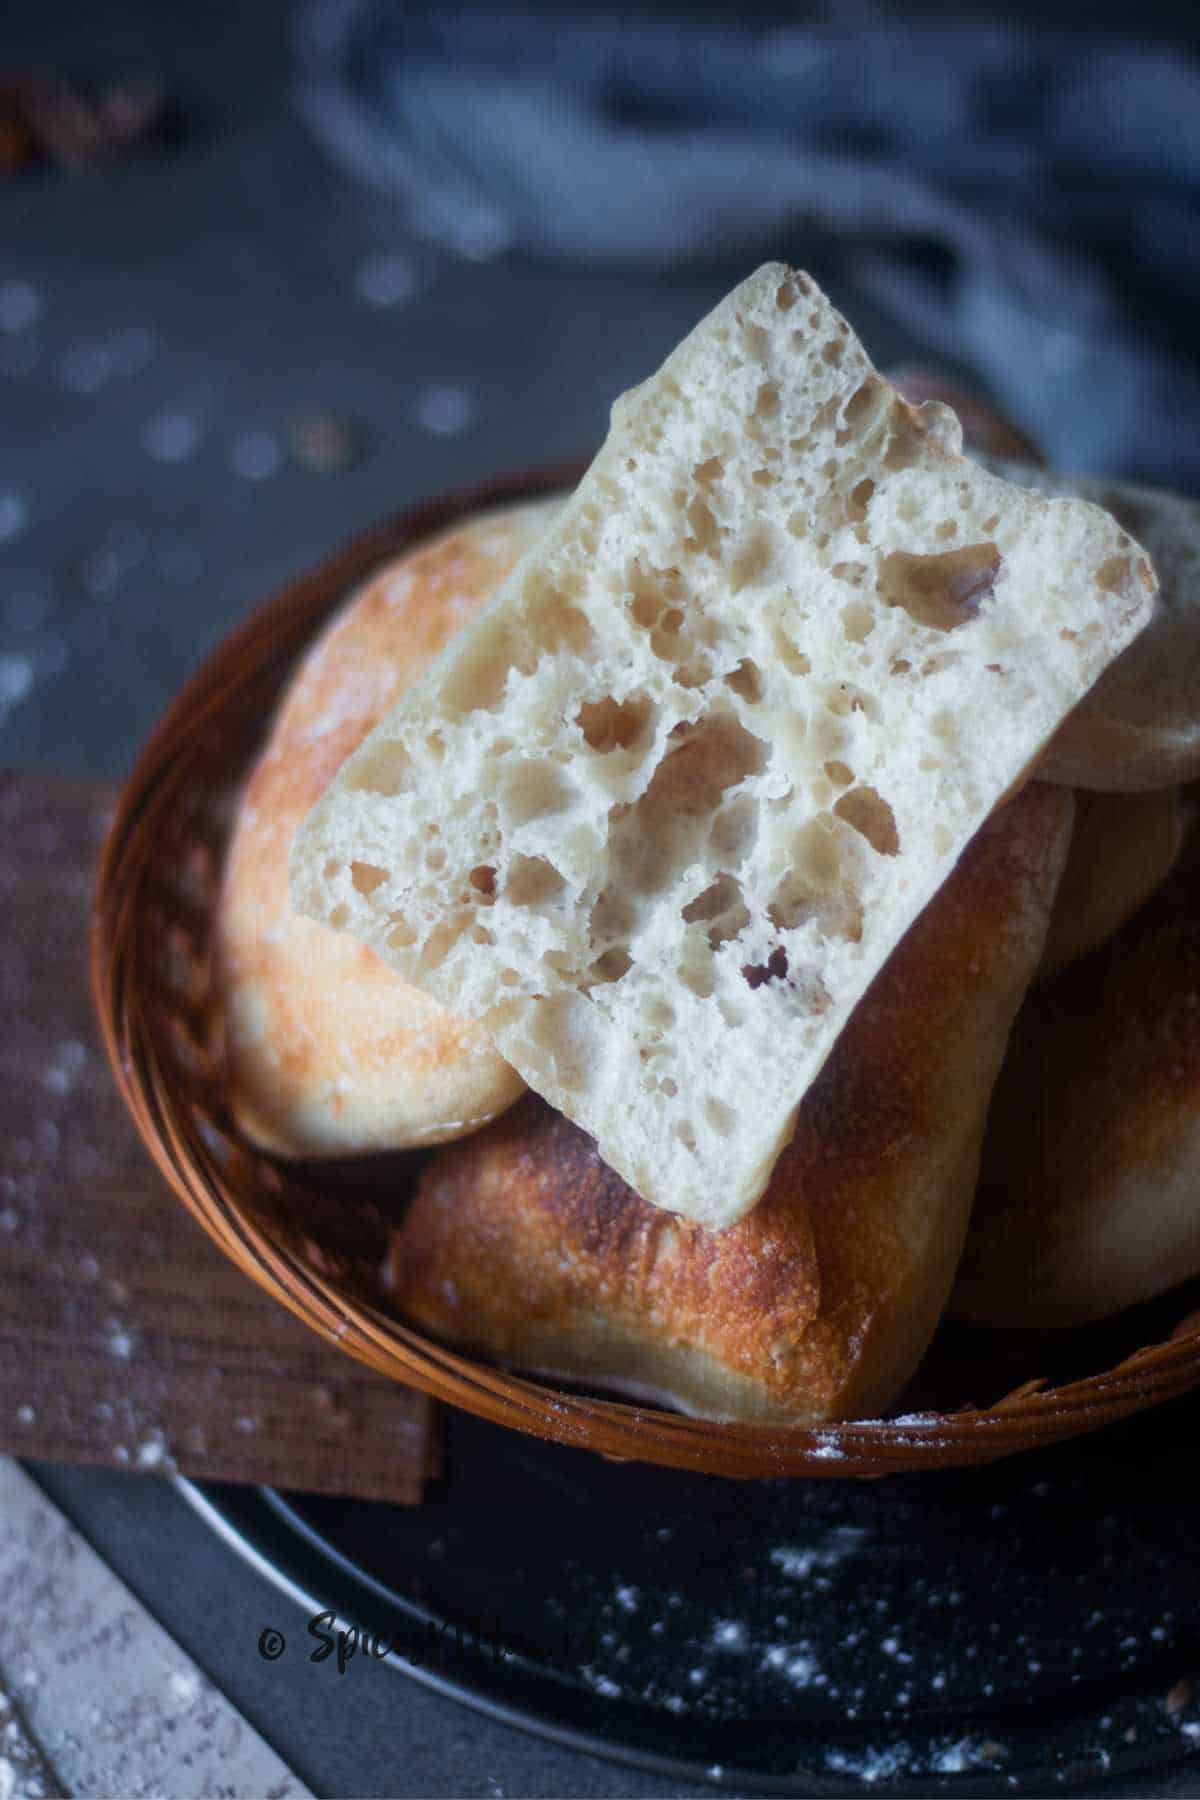
- A crackling crust on top with large open pores when sliced.
- Ciabatta dough is tricky to handle and hence I have covered a step-by-step method to make your job easier.
- You need not worry about shaping the dough, the more rustic the more artistic bread you make.
Consider checking our Sourdough Starter recipe for a better understanding of dough hydration.
We are also not using any biga or poolish (a preferment usually added in ciabatta bread dough or other Italian bread like Panini Bread).
Rather we are using a slow fermentation method to achieve the same texture making our job a lot easier.
Fun Fact
There is a fun fact about our homemade ciabatta bread rolls recipe that I thought you might enjoy,
Ciabatta Bread is often known as Italian slipper bread because of its long and lean uneven shape.
Ingredients:
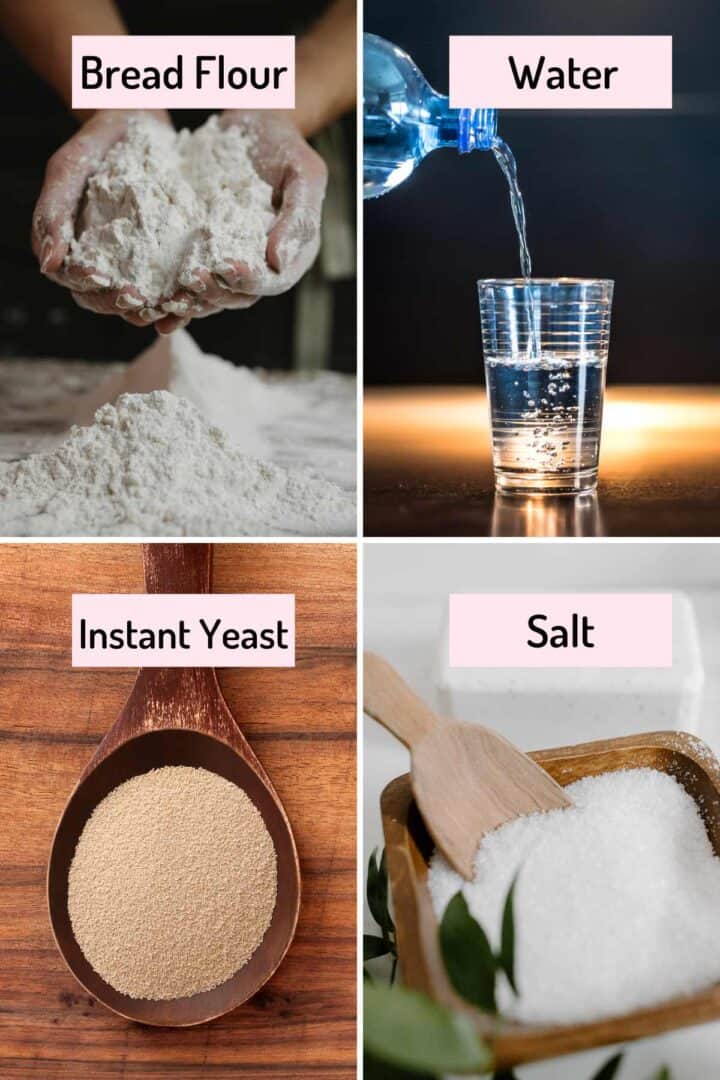
The best part about this recipe is that it uses only 4 simple ingredients - Flour, Yeast, Salt, and Water
Print the detailed recipe along with step-by-step instructions from the recipe card shared at the end of the post.
- Flour - Preferably use Bread Flour for this recipe. But if you cannot find it you can use all-purpose flour or any flour with more than 11% protein content would do.
- Yeast - I prefer using Instant Yeast for all my homemade Bread recipes for the sole reason that it does not call for any type of activation.
- Water - Use lukewarm water. Too hot would kill the dough and too cold will not activate the yeast.
- Oil - It is not mandatory but if you want you can use 10% fat which is 30 gms of olive oil in this recipe. I skipped it today.
Step-by-Step Tutorial
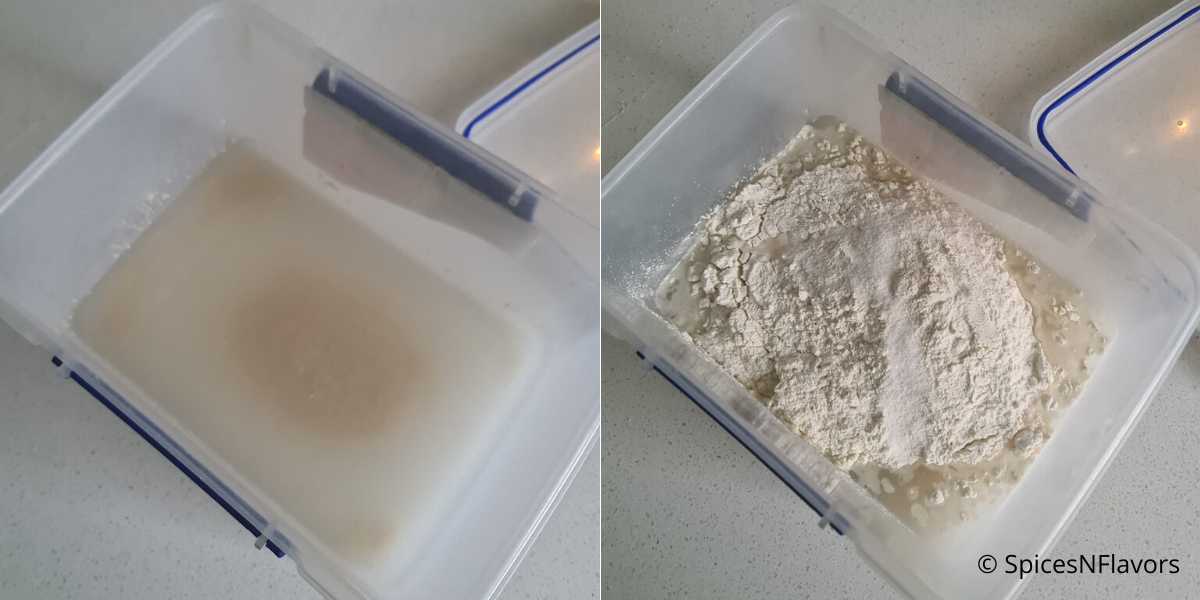
In a large bowl, I prefer using a large container with a lid (you will know why), add lukewarm water, and sprinkle in the yeast. Mix the two together.
Dump in the flour followed by the salt and bring it all together to form a dough using a wooden spoon.
Make sure to never bring salt in direct contact with the yeast as salt retards the activity of the yeast causing it to slow down in the proofing stage.
Pro Baking Tip - 1
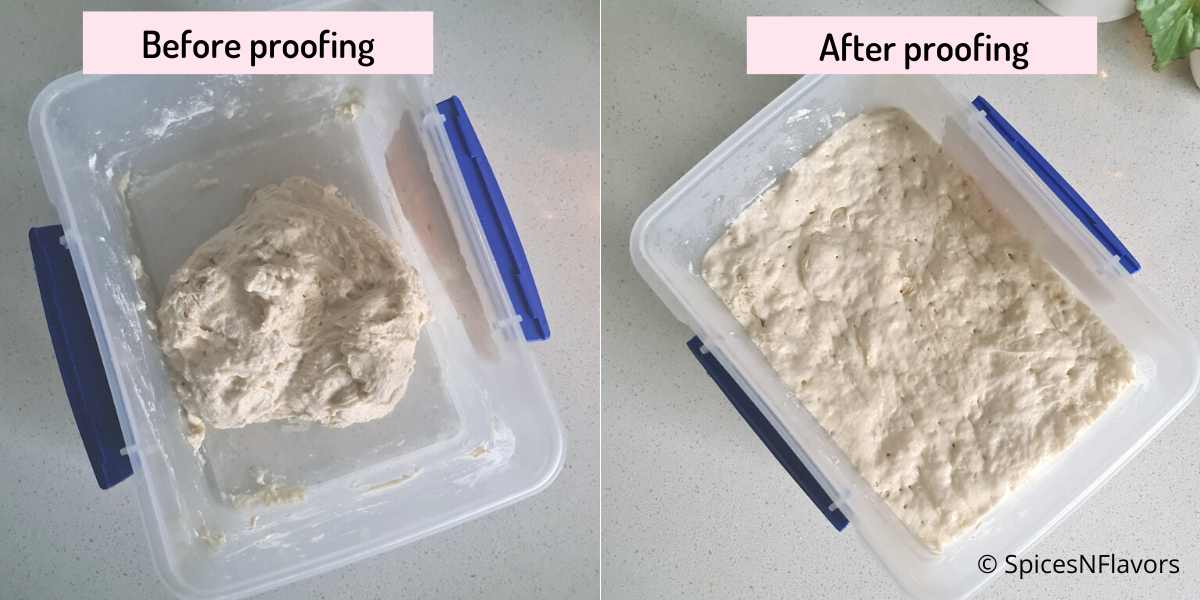
Once the flour is all mixed in, close the container with a lid (now you know why 🙂 ) and let it prove for 3 hours in a warm place or simply on your countertop at room temperature.
After 3 hours, you would see that the dough has risen well with excellent yeast activity that is so visible.
Stretch and Fold
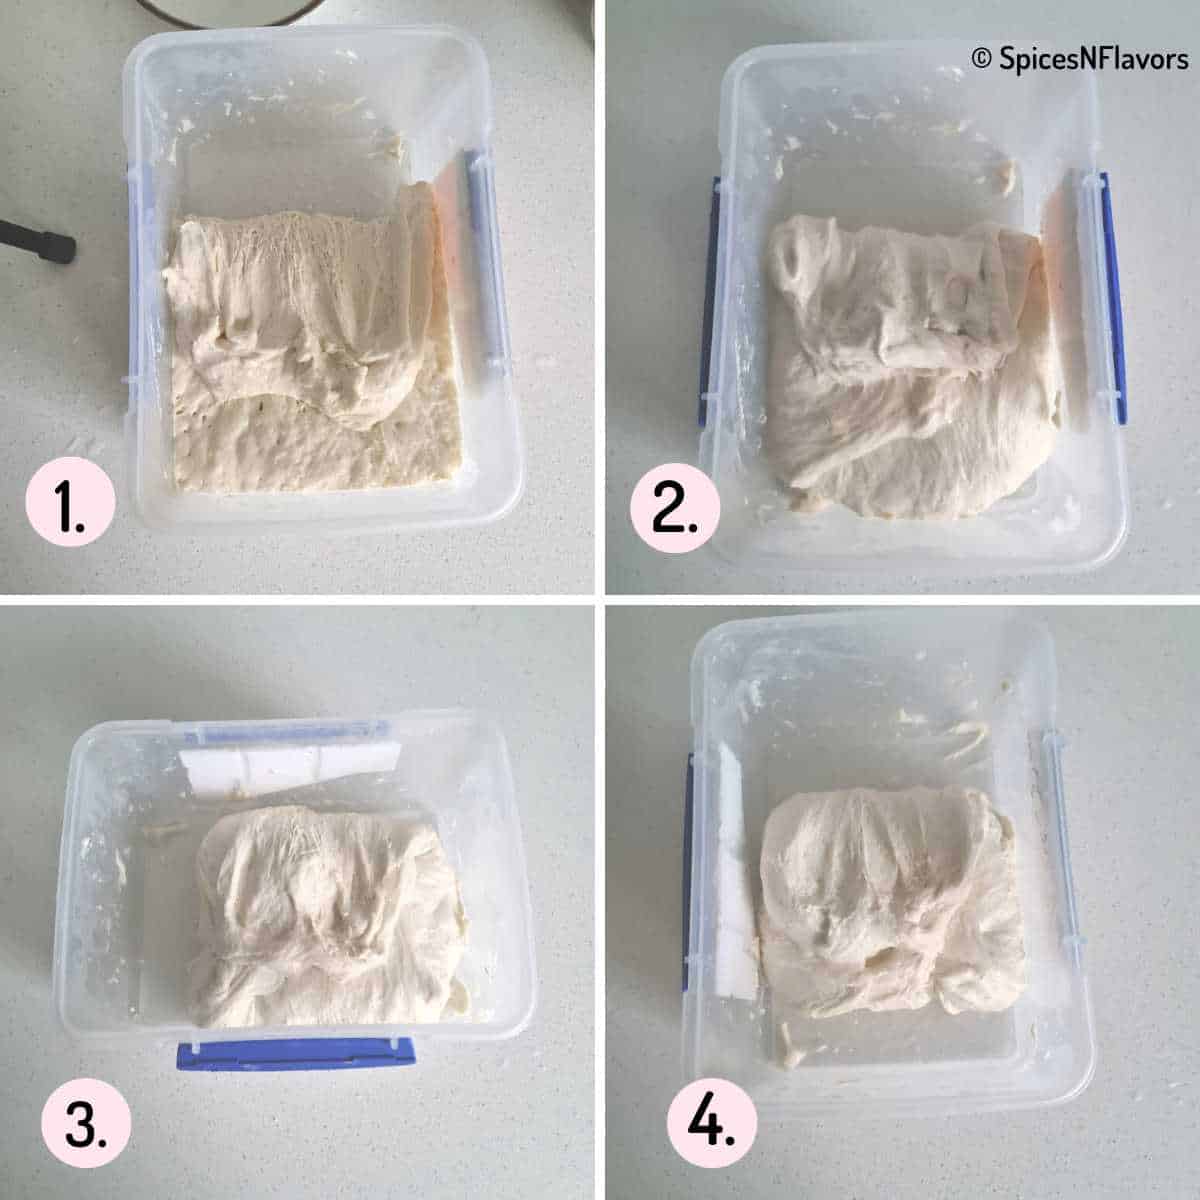
Time for stretch and fold technique to develop gluten structure. In the span of the next 1.5 hours, we will be doing the stretch and fold technique 3 times.
Wet your hands and then lift the dough from one side that is stretch it from one side and bring it to the center to fold over. Repeat this from all four sides of the container by giving it a quarter turn each time. (images 1-4)
Close the lid and allow it to prove for the next 30 mins. After which come back and repeat the steps all over that is wet your hands, do the stretch and fold in all 4 directions, prove for 30 mins.
So in all, you do 3 sets of folds in a total of 1.5 hours.
Shaping
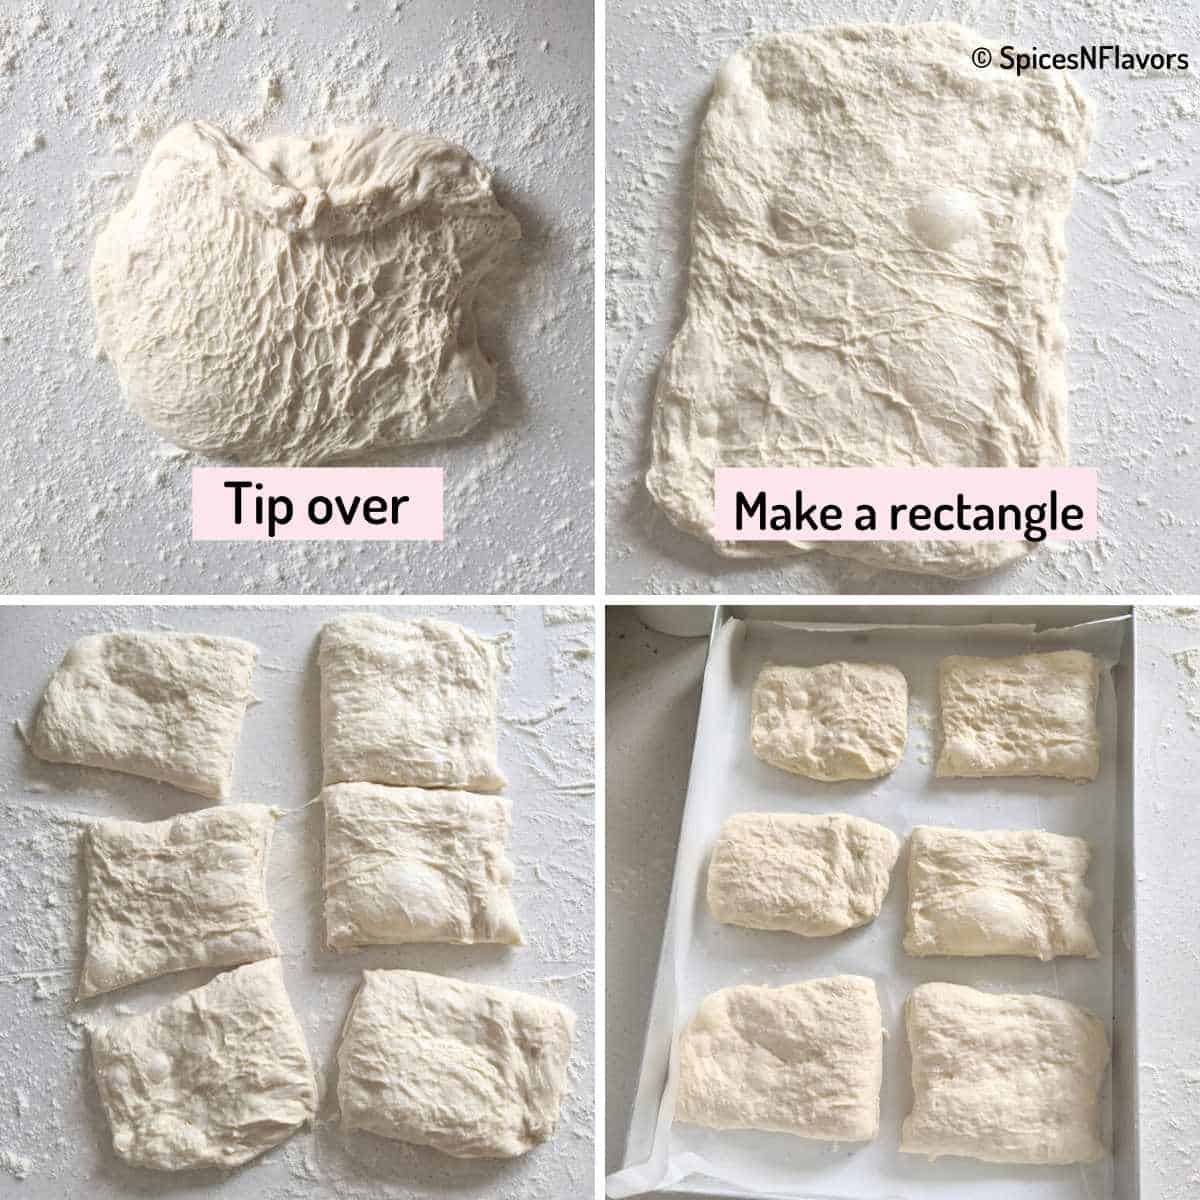
After the final proof time, tip the container over a well floured work surface. You do not have to do anything, the dough would slide down on its own.
At this stage, you will observe the dough is super bouncy with nice big bubbles.
The only thing you need to do is to take care not to deflate that aeration. These air pockets are responsible for creating those open pores once the bread is baked.
So slowly and gently stretch the dough to bring it to a rectangular shape. Then divide it into 6 rectangles using a bench scraper.
Don't worry about dividing it into equal parts, that's the best part of this great recipe.
Gently lift them up using two bench scrapers at a time and transfer the dough to a baking tray lined with parchment paper.
Cover with a clean kitchen towel and let the dough rest for about 30 minutes.
Baking
Meanwhile, preheat your oven to the highest temperature available. In my case, it is 250 degrees Celsius. You would also require hot boiling water while putting the bread to bake so keep that ready too.
After 30 minutes, first, place a baking pan filled with hot boiling water on the lower rack of the hot oven and then place the proofed bread dough on the middle rack.
Add some ice cubes in the bottom of the oven to create steam, or if you have a spray bottle, you can spray some mist of water on top of the dough too.
Just remember to work quickly so that the temperature doesn't fall.
Then quickly close the oven door, and reduce the oven temperature to 210 degrees Celsius for 20 minutes. You can bake for an additional 4 to 6 minutes to get an extra-crusty crust if desired.
Once baked transfer it to a wire rack and allow it to cool completely before slicing and enjoying.
Storage Instructions:
For best results, it is always recommended to eat these homemade ciabatta rolls warm and fresh. The recipe makes just 6 rolls so I am assuming you won't have any leftovers.
But if you do then simply store them in an airtight container for up to 2 days.
Or wrap each ciabatta bun in aluminum foil and then place it in a ziplock bag and freeze for 2 months.
Best Pro Tips:
- No matter which bread recipe you are making, make sure that you are using ingredients in the right order and right temperature. For example, always use lukewarm water - not too cold nor too hot. Yeast and Salt should never be added together as salt retards yeast activity.
- This being a high-hydration sticky dough, it is not possible to knead the dough. So make sure you are giving ample time for slow fermentation which results in better gluten structure forming air bubbles while the dough rise leading to a chewy texture and airy crumb.
- Always use (a) wet hands while handling the dough, (b) dust the dough with enough flour in the shaping stages and (c) use a bench scrapper with gentle hands when needed. This would make it easier to do the stretch and fold technique as well as to shape the dough.
- The best part is you need not worry about shaping the bread dough. The more rustic the shaping is the more artistic the final output would be. Just note that in the process you are very careful about not deflating the well-risen dough.
- Do not forget to use the preheated oven. The bread dough has to hit the hot oven to get the crusty top.
- Add steam to the oven. This is crucial especially in the initial few minutes of baking for the bread to get a good oven spring. You can do this by adding ice cubes to the bottom of your oven or by adding a mist of water on top of the bread dough. Whichever method you choose make sure to act quickly so that there is minimal fluctuation in the oven temperature.
Frequently Asked Questions?
Even though you can make sourdough ciabatta rolls; you do not need an active sourdough starter for this recipe. I consider this an easiest ciabatta bread recipes as you can make it using just 4 simple ingredients. You can also use the biga or poolish method and reduce the amount of yeast that goes into making it if desired.
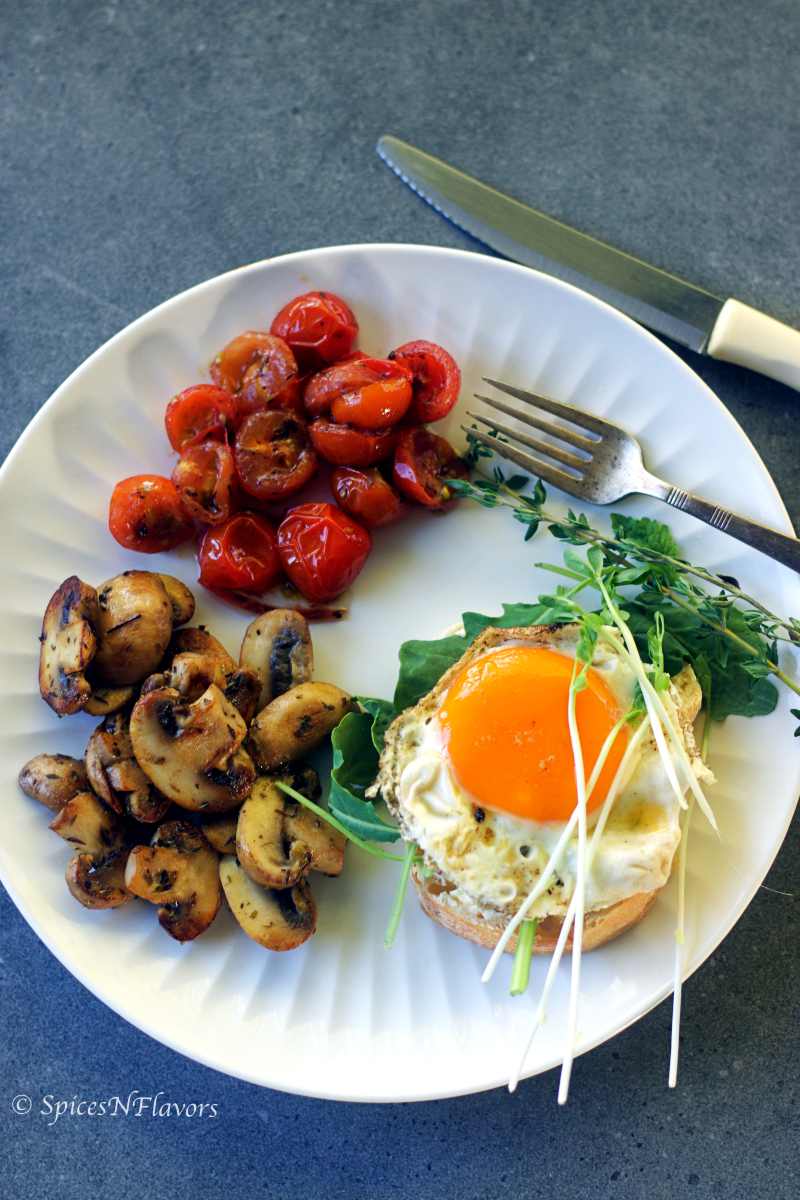
1. The best and easiest option is ciabatta bread with olive oil. You can also add some dried herbs, balsamic vinegar, and chili flakes to flavor the oil if you prefer. 2. My personal favorite (as seen in the image below) is to slice the fresh bread horizontally gently toast it on a pan and serve it topped with some fresh green leaves and poached eggs along with hollandaise sauce with some sauteed mushrooms and tomatoes on the sides.
3. You can never go wrong with a Ciabatta Garlic Bread recipe.
4. It is also a great bread for making sandwiches of choice.
5. Ciabatta bread with mozzarella cheese is a great option too.
6. Apart from that use them as croutons, for french toast, or dip in soups.
Yes. The slow fermentation dough method works great for Italian bread recipes like this ciabatta buns or panini bread. After the initial 2 hours of proofing, you can keep the container with the dough in the fridge overnight or for up to 24 hours. Then take the dough out and start doing the stretch and fold technique in the span of 1.5 hours as mentioned in the recipe card.
As mentioned the ciabatta dough is a high hydration dough meaning it is a slack dough with lots of water content which makes it impossible to knead in a bowl of a stand mixer with a dough hook attachment like a regular bread recipe which actually strengthens the gluten strands creating the bread structure once baked. So to get the same effect we follow the folding process in this recipe. The stretch and fold technique redistributes the yeast all around helping to create the air pockets and also strengthening the gluten strands which helps the bread to hold and get that oven spring whilst baking.
Ciabatta is a type of Italian bread that is known for its irregular shape and porous texture. Even though it is made from regular bread ingredients like flour, water, yeast, salt, and olive oil; what makes it different from other bread is the high hydration that is the water content in the bread. The dough is typically wetter and stickier than other types of bread dough, making it difficult to knead and hence is often shaped by hand to give it its distinctive shape. Ciabatta has a crisp crust and a soft, airy crumb with large pores as compared to sandwich bread.
Related Recipes
Wish to Join US for the love of BAKING? Subscribe to our Youtube channel. Follow along on Facebook, Instagram, and Pinterest for all the latest updates!
Ciabatta Roll Recipe using just 4 ingredients
Ingredients
- 240 ml (1 cup) Lukewarm Water
- 1 tsp Salt
- 300 gms (2.5 cups) Bread Flour
- 1 tsp Yeast
Instructions
Preparing the Dough
- In a large container with a lid add lukewarm water, and sprinkle in the yeast. Mix the two together.
- Dump in the flour followed by the salt and bring it all together to form a dough using a wooden spoon.
- Once the flour is all mixed in, close the container with a lid and let it prove for 3 hours in a warm place or simply on your countertop at room temperature.
- After 3 hours, you would see that the dough has risen well with excellent yeast activity that is so visible. At this stage we will start doing the stretch and fold technique to develop gluten structure. In the span of the next 1.5 hours, we will be doing the stretch and fold technique 3 times.
- Wet your hands and then lift the dough from one side that is stretch it from one side and bring it to the center to fold over. Repeat this from all four sides of the container by giving it a quarter turn each time.
- Close the lid and allow it to prove for the next 30 mins. After which come back and repeat the steps all over that is wet your hands, do the stretch and fold in all 4 directions, prove for 30 mins. So in all, you do 3 sets of folds in a total of 1.5 hours.
Shaping
- After the final proof time, tip the container over a well floured work surface. You do not have to do anything, the dough would slide down on its own.
- Slowly and gently stretch the dough to bring it to a rectangular shape. Then divide it into 6 rectangles using a bench scraper.
- Gently lift them up using two bench scrapers at a time and transfer the dough to a baking tray lined with parchment paper.
- Cover with a clean kitchen towel and let the dough rest for about 30 minutes.
Baking
- Meanwhile, preheat your oven to the highest temperature available. In my case, it is 250 degrees Celsius. You would also require hot boiling water while putting the bread to bake so keep that ready too.
- After 30 minutes, first, place a baking pan filled with hot boiling water on the lower rack of the hot oven and then place the proofed bread dough on the middle rack.
- Add some ice cubes in the bottom of the oven to create steam, or if you have a spray bottle, you can spray some mist of water on top of the dough too.Just remember to work quickly so that the temperature doesn't fall.
- Then quickly close the oven door, and reduce the oven temperature to 210 degrees Celsius for 20 minutes. You can bake for an additional 4 to 6 minutes to get an extra-crusty crust if desired.
- Once baked transfer it to a wire rack and allow it to cool completely before slicing and enjoying.
Video
Notes
- No matter which bread recipe you are making, make sure that you are using ingredients in the right order and right temperature. For example, always use lukewarm water - not too cold nor too hot. Yeast and Salt should never be added together as salt retards yeast activity.
- This being a high-hydration sticky dough, it is not possible to knead the dough. So make sure you are giving ample time for slow fermentation which results in better gluten structure forming air bubbles while the dough rise leading to a chewy texture and airy crumb.
- Always use (a) wet hands while handling the dough, (b) dust the dough with enough flour in the shaping stages and (c) use a bench scrapper with gentle hands when needed. This would make it easier to do the stretch and fold technique as well as to shape the dough.
- The best part is you need not worry about shaping the bread dough. The more rustic the shaping is the more artistic the final output would be. Just note that in the process you are very careful about not deflating the well-risen dough.
- Do not forget to use the preheated oven. The bread dough has to hit the hot oven to get the crusty top.
- Add steam to the oven. This is crucial especially in the initial few minutes of baking for the bread to get a good oven spring. You can do this by adding ice cubes to the bottom of your oven or by adding a mist of water on top of the bread dough. Whichever method you choose make sure to act quickly so that there is minimal fluctuation in the oven temperature.


Leave a Reply