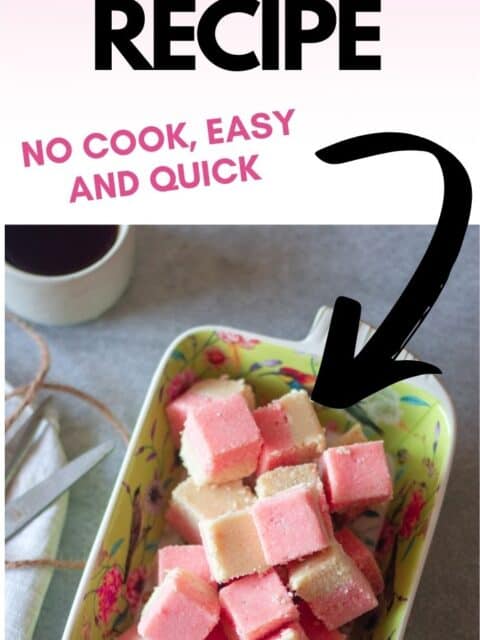
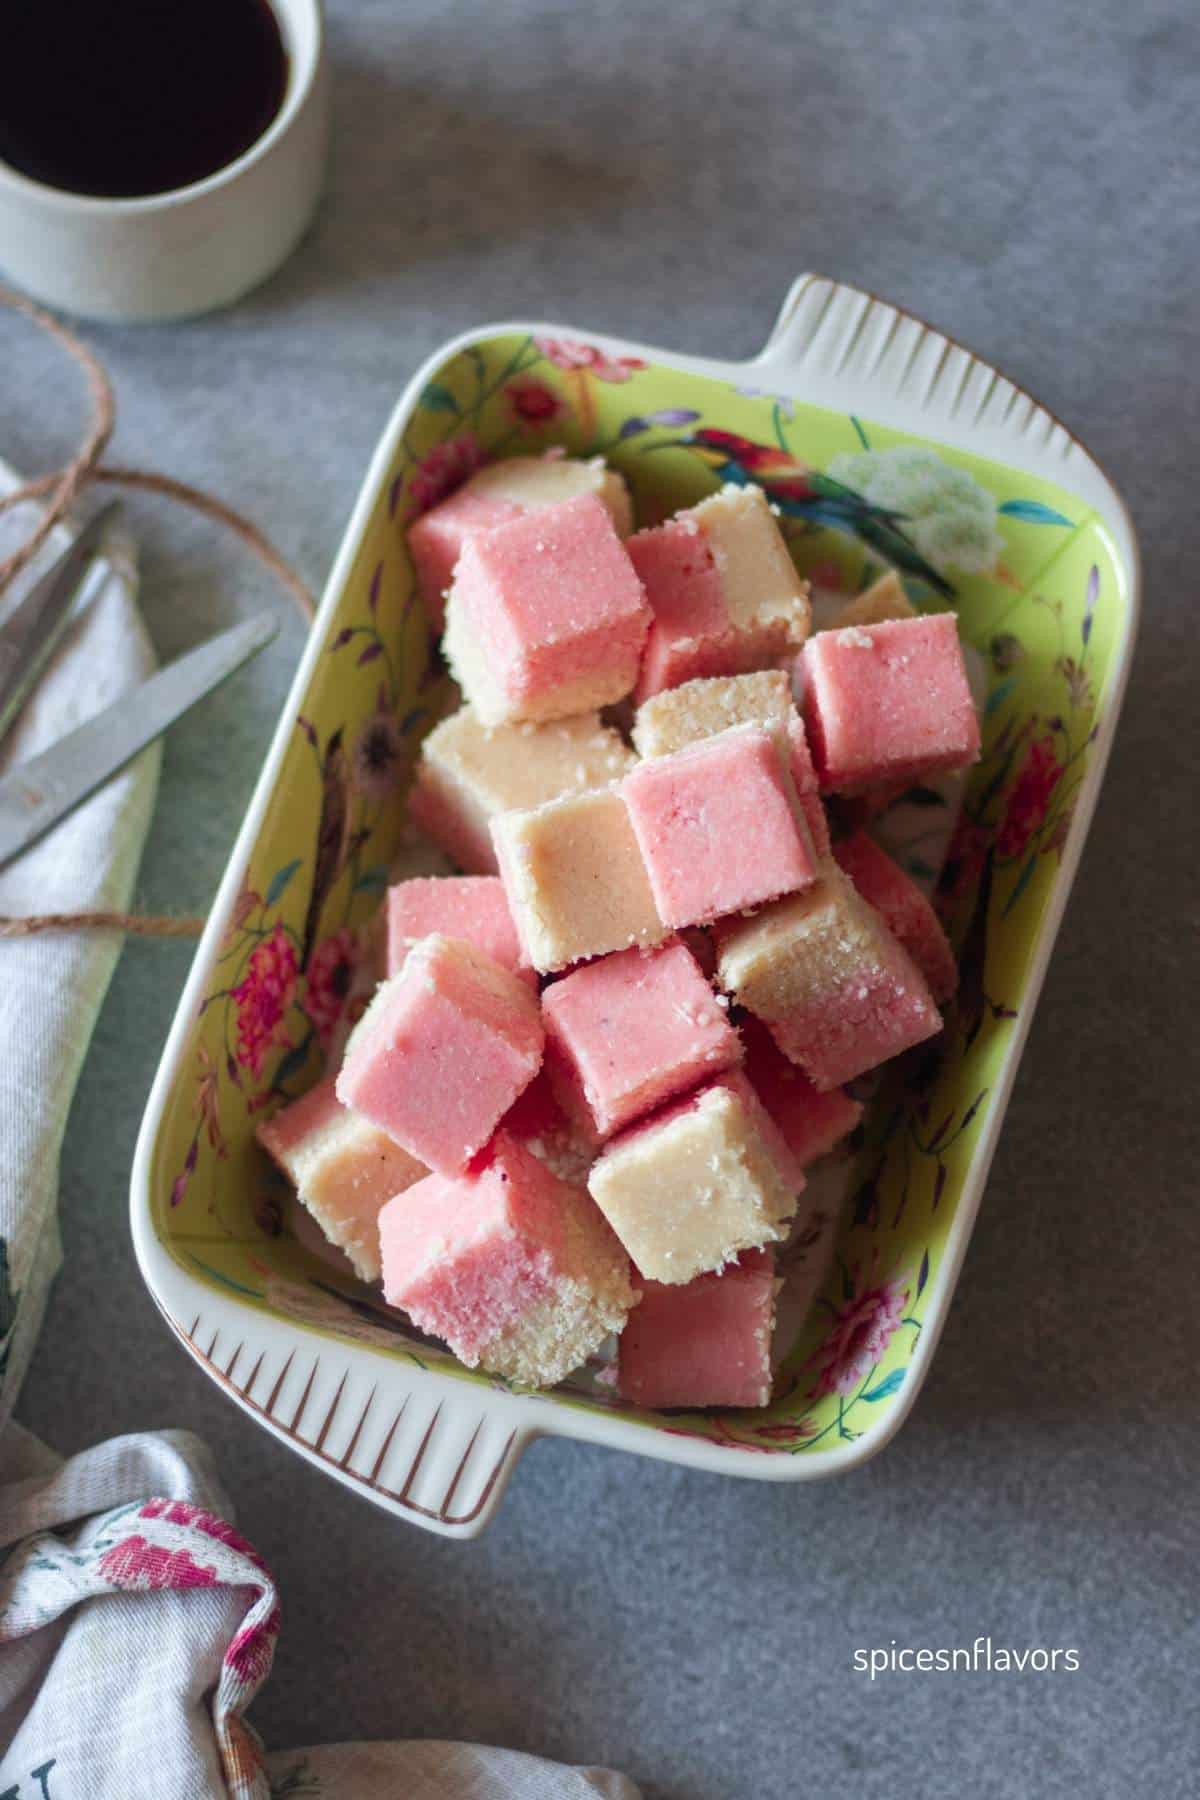
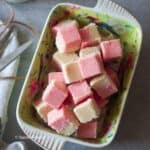
This easy coconut ice recipe is the perfect Christmas time treat, made with simple ingredients and cut into small squares for sharing. A classic sweet treat, this pink coconut ice adds charm and flavor to your holiday celebrations!
This year, skip the store-bought gifts and create thoughtful DIY edible gift boxes featuring Coconut Ice.
Its vibrant pink-and-white layers and chewy sweetness make it a standout treat, perfect for adding a festive touch to your holiday gifting.
Coconut Ice is a beloved sweet treats recipe enjoyed in Britain, South Africa, and New Zealand. It has a similar taste to the Indian coconut burfi, showcasing how one delicious recipe can travel across cultures and become a worldwide favorite.
Pack it alongside homemade cookies, hot chocolate mix, truffles, or spiced nuts for a delightful variety of flavors.
Arrange the treats in a decorative box or basket, lined with parchment paper or holiday-themed tissue. Add a personal touch with a handwritten note or recipe for Coconut Ice, and finish with a festive ribbon.
Ingredients
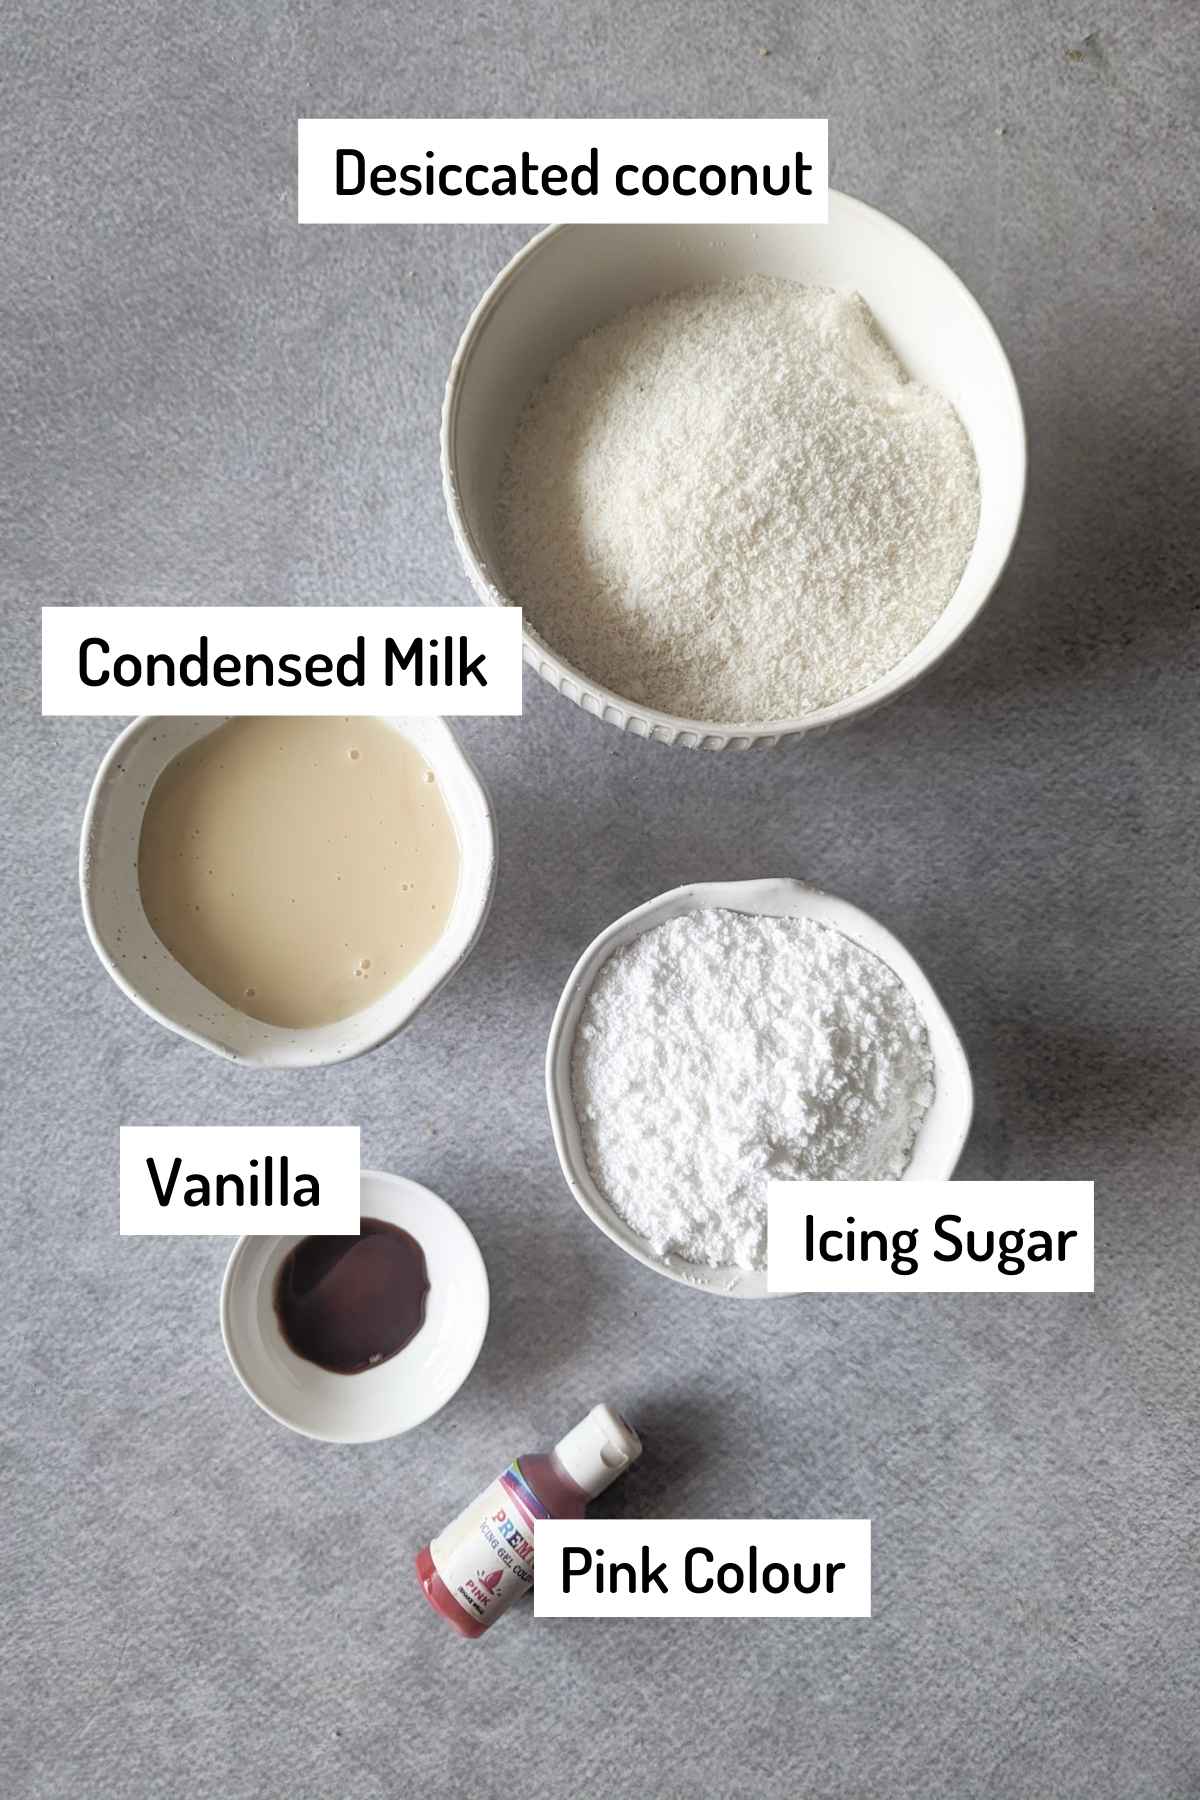
Ingredient Notes
- Desiccated Coconut - Use unsweetened desiccated coconut for the best balance of sweetness. Even though you can make this recipe with fresh coconut avoid it, as it adds moisture and may affect the shelf life.
- Icing Sugar - Sift the icing sugar to remove any lumps for a smoother mixture. It also sweetens the Coconut Ice evenly without any graininess.
- Vanilla Extract - A little vanilla enhances the flavor without overpowering the coconut, making it a classic choice for Coconut Ice. Use pure vanilla extract for the best taste and aroma. You can also experiment with flavors like rose essence for the pink layer to add a floral touch or even almond extract for a nutty twist!
- Pink Food Coloring - Gel food coloring works well to create the signature pink layer. Add sparingly for a soft, festive hue. For a holiday twist, you can also use green and red food coloring for Christmas, giving your Coconut Ice a vibrant, seasonal touch.
Scroll to the end of the post to print out the recipe card for later.
Step by Step Instructions:
Start by lining a 7x7 inch (18x18 cm) cake pan with parchment paper, ensuring the paper covers the bottom and sides for easy removal later.
Prepare the Base Layer
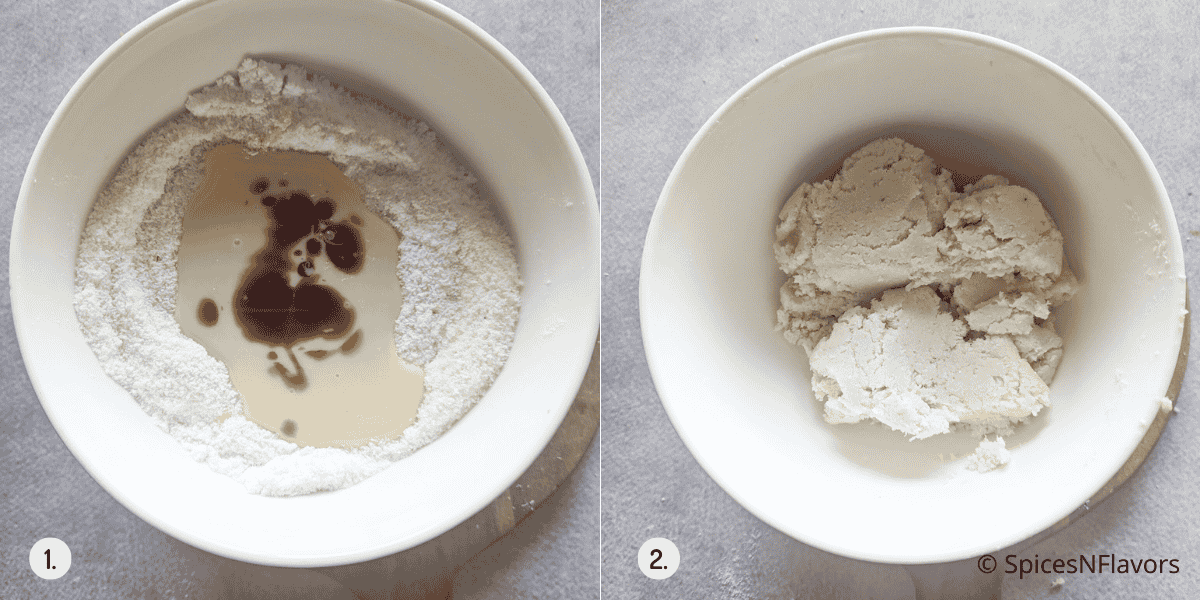
In a large mixing bowl, combine 150g desiccated coconut, 100g icing sugar, and 160g sweetened condensed milk. Add 1/2 tsp vanilla extract and mix until well combined (image 1).
Press the white mixture firmly into the prepared tin, smoothing the surface with a spatula or the back of a spoon or glass (image 2).
Prepare the Pink Layer
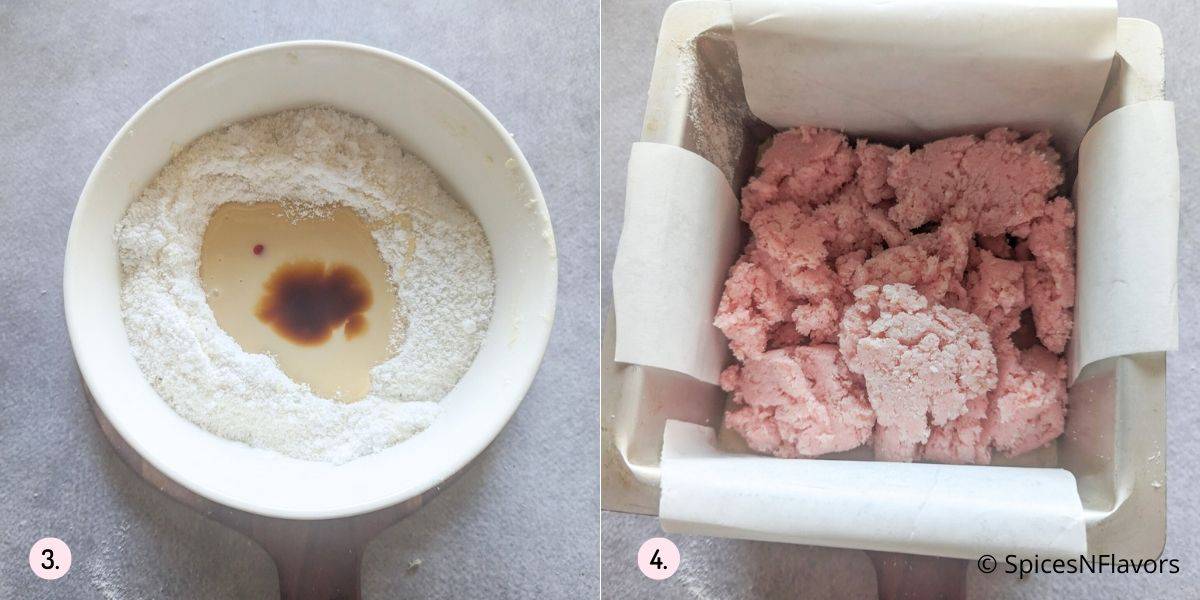
In the same large bowl, repeat the same process with the remaining half of the ingredients except for adding a few drops of pink food colouring. Stir until evenly colored to get a pink mixture (image 3).
Gently spread the pink coconut mixture on top of the white layer in the pan, pressing it down evenly (image 4).
Chill and Set
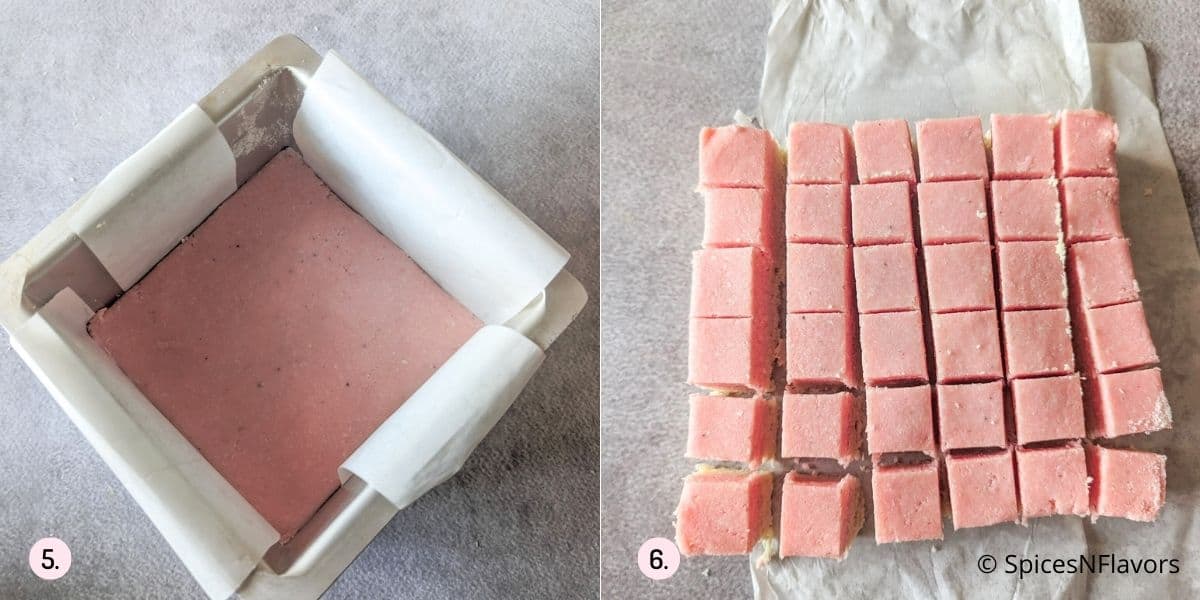
Cover the pan with a cling film and Refrigerate the coconut ice for at least 2 hours, or until firm (image 5).
Cut Into Squares
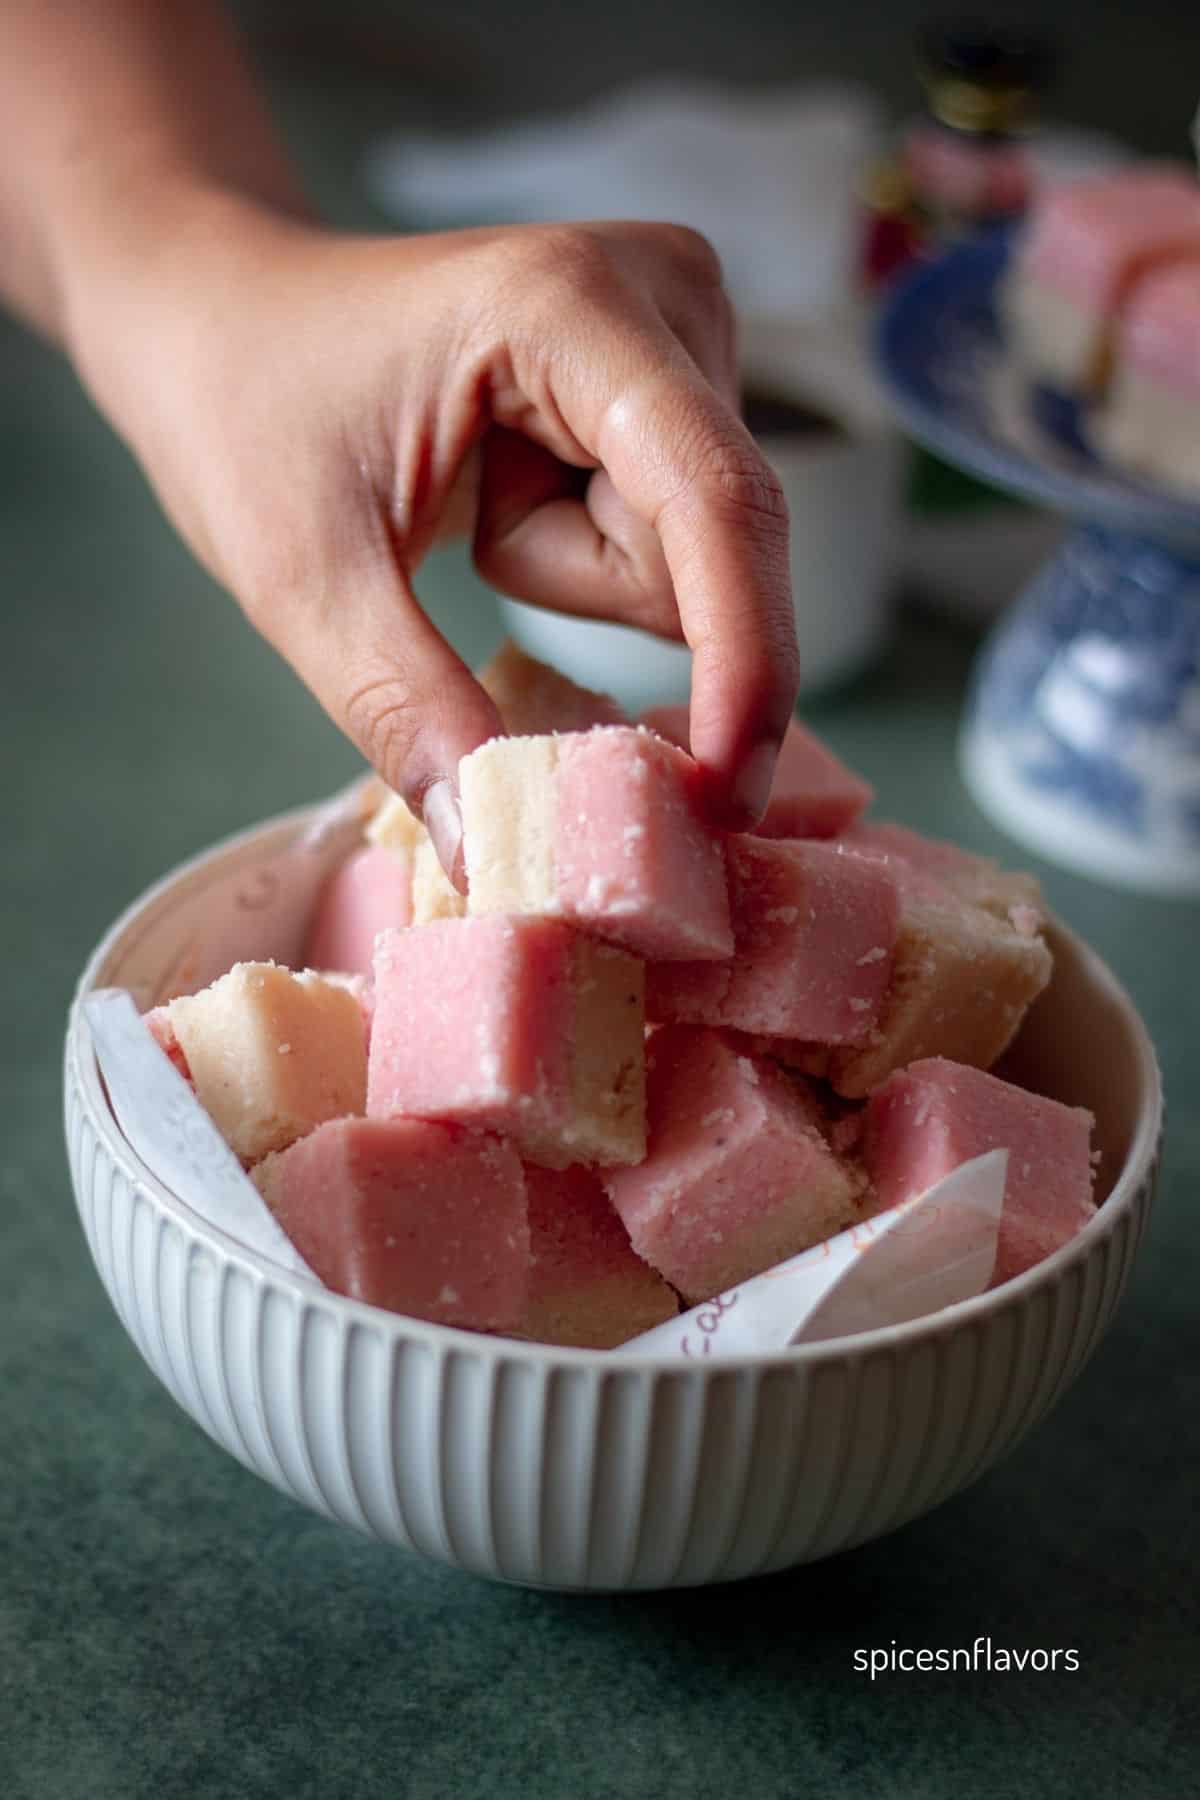
Once set, remove it from the pan by lifting the parchment paper. Using a sharp knife, carefully cut the coconut ice into 1-inch pieces. Wipe the knife with a damp cloth between cuts for clean, neat edges (image 6).
Serve immediately or store it in an airtight container.
Storage Instructions
- Room Temperature: You can also store it in an airtight container at room temperature for up to 2-3 days if you plan to consume it quickly.
- Refrigeration: Store your Coconut Ice squares in an airtight container in the refrigerator. This will keep it fresh for up to 1 week. The cold temperature helps maintain its chewy texture and prevents it from becoming too soft.
- Freezing: If you want to keep it longer, you can freeze Coconut Ice. Place the cut squares in a single layer on a baking sheet and freeze until solid. Then transfer them to an airtight container or zip-top bag, layering parchment paper between the squares to prevent sticking. Frozen Coconut Ice can last for up to 2-3 months. To serve, thaw it in the fridge overnight or for a few hours before enjoying it.
Make ahead Instructions:
Follow the storage instructions above to make and store your coconut ice in advance.
Just ensure it is tightly wrapped or in an airtight container to maintain its freshness. It makes a great addition to holiday gift baskets or treat boxes!
Best Tips:
- Sifting the icing sugar before mixing ensures there are no lumps, leading to a smooth and even texture in the Coconut Ice.
- Ensuring the right amount of moisture is important for non-dry, non-crumbly Coconut Ice. Too little moisture will make it dry and hard, while too much can make it soggy. Adjust the amount of condensed milk to achieve the perfect consistency.
- When pressing the coconut mixture into the pan, use a spoon or the back of a glass to firmly press it down. This ensures that the layers hold together well and don't crumble when sliced.
- Chill the Coconut Ice in the refrigerator, not the freezer, to ensure it sets properly. Freezing it too soon can make the texture too hard, affecting the soft and chewy bite.
- When adding color to the second layer, use a few drops of food coloring at a time. You can always add more if you want a deeper color, but it's easier to start with less.
- For best results allow the Coconut Ice to chill for at least 2 hours to set fully. This ensures it will hold together when cut into squares. If you're short on time, you can let it set overnight.
- Use a sharp knife to slice the Coconut Ice into small squares. For clean edges, wipe the knife with a damp cloth between cuts.
- To make the Coconut Ice extra flavorful, add a small amount of coconut milk for a richer taste. However, keep in mind that this may reduce the shelf life.
Variations
- Rose Essence: Add a few drops of rose essence to the pink layer for a floral twist, perfect for adding a festive touch. Or coconut essence to the white layer to further enhance it.
- Orange or Lemon Zest: Stir in some fresh orange or lemon zest into the white layer to add a citrusy flavor that pairs wonderfully with coconut.
- Add finely chopped pistachios or cashews to either layer for added texture and a nutty flavor. The nuts add a delightful crunch to the otherwise smooth treat.
- After cutting the coconut ice into squares, dip them in melted milk or dark chocolate for a chocolatey contrast. Once coated, allow them to set in the fridge for a delicious chocolate-covered treat.
- Swap the sweetened condensed milk with coconut condensed milk or use a plant-based sweetener to make this recipe vegan-friendly.
- Get creative with multiple colored layers by using different food colors for each layer. This is especially fun for holidays like Christmas or Easter, where you can create red, green, and white layers.
Frequently Asked Questions
Yes, you can use fresh coconut, but it must be grated finely and drained of excess moisture. Keep in mind that the shelf life may be shorter.
While condensed milk is key for the sweet, creamy texture and no-cook method of making Coconut Ice, it is possible to make it with just coconut and sugar using a cooking method. In this case, you would need to melt the sugar with water or a syrup to bind the coconut together to form a soft ball stage, which takes a bit more effort compared to the simple no-cook version with condensed milk. If you’re looking for a no-cook option, condensed milk is necessary for achieving the smooth and firm texture without cooking.
If the mixture is too crumbly, it could be due to not enough moisture from the condensed milk or overmixing the ingredients. Try adjusting the amount of condensed milk or mixing gently.
Absolutely! You can use different colour of your choice, like red or green for Christmas, or even multiple colors for a fun twist.
Yes, you can use a larger pan, but the layers may be thinner. 7x7 inch or 8x8 inch pans work best for achieving the ideal thickness. While a 6x6 inch pan is also fine, you may find that the layers turn out longer and thinner, as I experienced with my own batch. A larger pan also makes slicing easier, as you can mark 1-inch sections, ensuring even pieces when cutting. If you decide to use a bigger pan, be sure to adjust the ingredient quantities accordingly to maintain the right proportions.
Related Recipes
Wish to Join US for the love of BAKING? Subscribe to our newsletter and Youtube channel. Follow along on Facebook, Instagram, and Pinterest for all the latest updates!
Easy No Cook Coconut Ice Recipe
Ingredients
- 3 cups Desiccated coconut
- 1 cup Icing Sugar
- 1 cup Sweetened Condensed Milk
- 2 tsp Vanilla
- Pink Food Colour
Instructions
- Line a 7x7 inch square pan with parchment paper or lightly grease it. This will help you remove the coconut ice easily once it's set.
- In a large bowl, combine 1 ½ cups desiccated coconut, ½ cup powdered sugar. Stir well until evenly mixed.
- Pour in 1/2 cup sweetened condensed milk and 1 tsp vanilla into the coconut mixture and stir until the mixture is thick, sticky, and well combined.
- Transfer the coconut mixture to the prepared pan and press it down firmly using the back of a spoon, spatula or your hands to create an even layer.
- In the same bowl, combine the remaining 1 ½ cups desiccated coconut, ½ cup powdered sugar, 1/2 cup condensed milk, 1 tsp vanilla extract and few drops of pink food colour. Stir well.
- Gently press the pink-colored coconut mixture onto the first layer in the pan. Make sure it’s even and flat. You can also use a spoon to smooth the surface.
- Cover the pan with plastic wrap or a lid and refrigerate for at least 2 hours or until the coconut ice is firm and set.
- Once set, remove the coconut ice from the pan and transfer it to a cutting board. Slice it into 1-inch squares or desired size using a sharp knife.
- Enjoy immediately or store in an airtight container in the refrigerator for up to 1 week or at room temperature for 2-3 days.
Notes
- The consistency of the mixture should be sticky but not too wet. If the mixture seems too dry, add a tiny bit more condensed milk. And if it is too wet then add little desiccated coconut.
- You can substitute the pink food coloring with any color of your choice or leave it out for a classic white coconut ice. For Christmas, red and green coloring can give it a festive look.
- Sifting the icing sugar before mixing ensures there are no lumps, leading to a smooth and even texture in the Coconut Ice.
- When pressing the coconut mixture into the pan, use a spoon or the back of a glass to firmly press it down. This ensures that the layers hold together well and don't crumble when sliced.
- Chill the Coconut Ice in the refrigerator, not the freezer, to ensure it sets properly. Freezing it too soon can make the texture too hard, affecting the soft and chewy bite.
- When adding color to the second layer, use a few drops of food coloring at a time. You can always add more if you want a deeper color, but it's easier to start with less.
Leave a Reply