
Don't blame me if you get addicted to this Eggless Tiramisu recipe. That coffee soaked soft homemade ladyfingers and melt in your mouth velvety cream will surely make you fall in love with it!!

Why this recipe works?
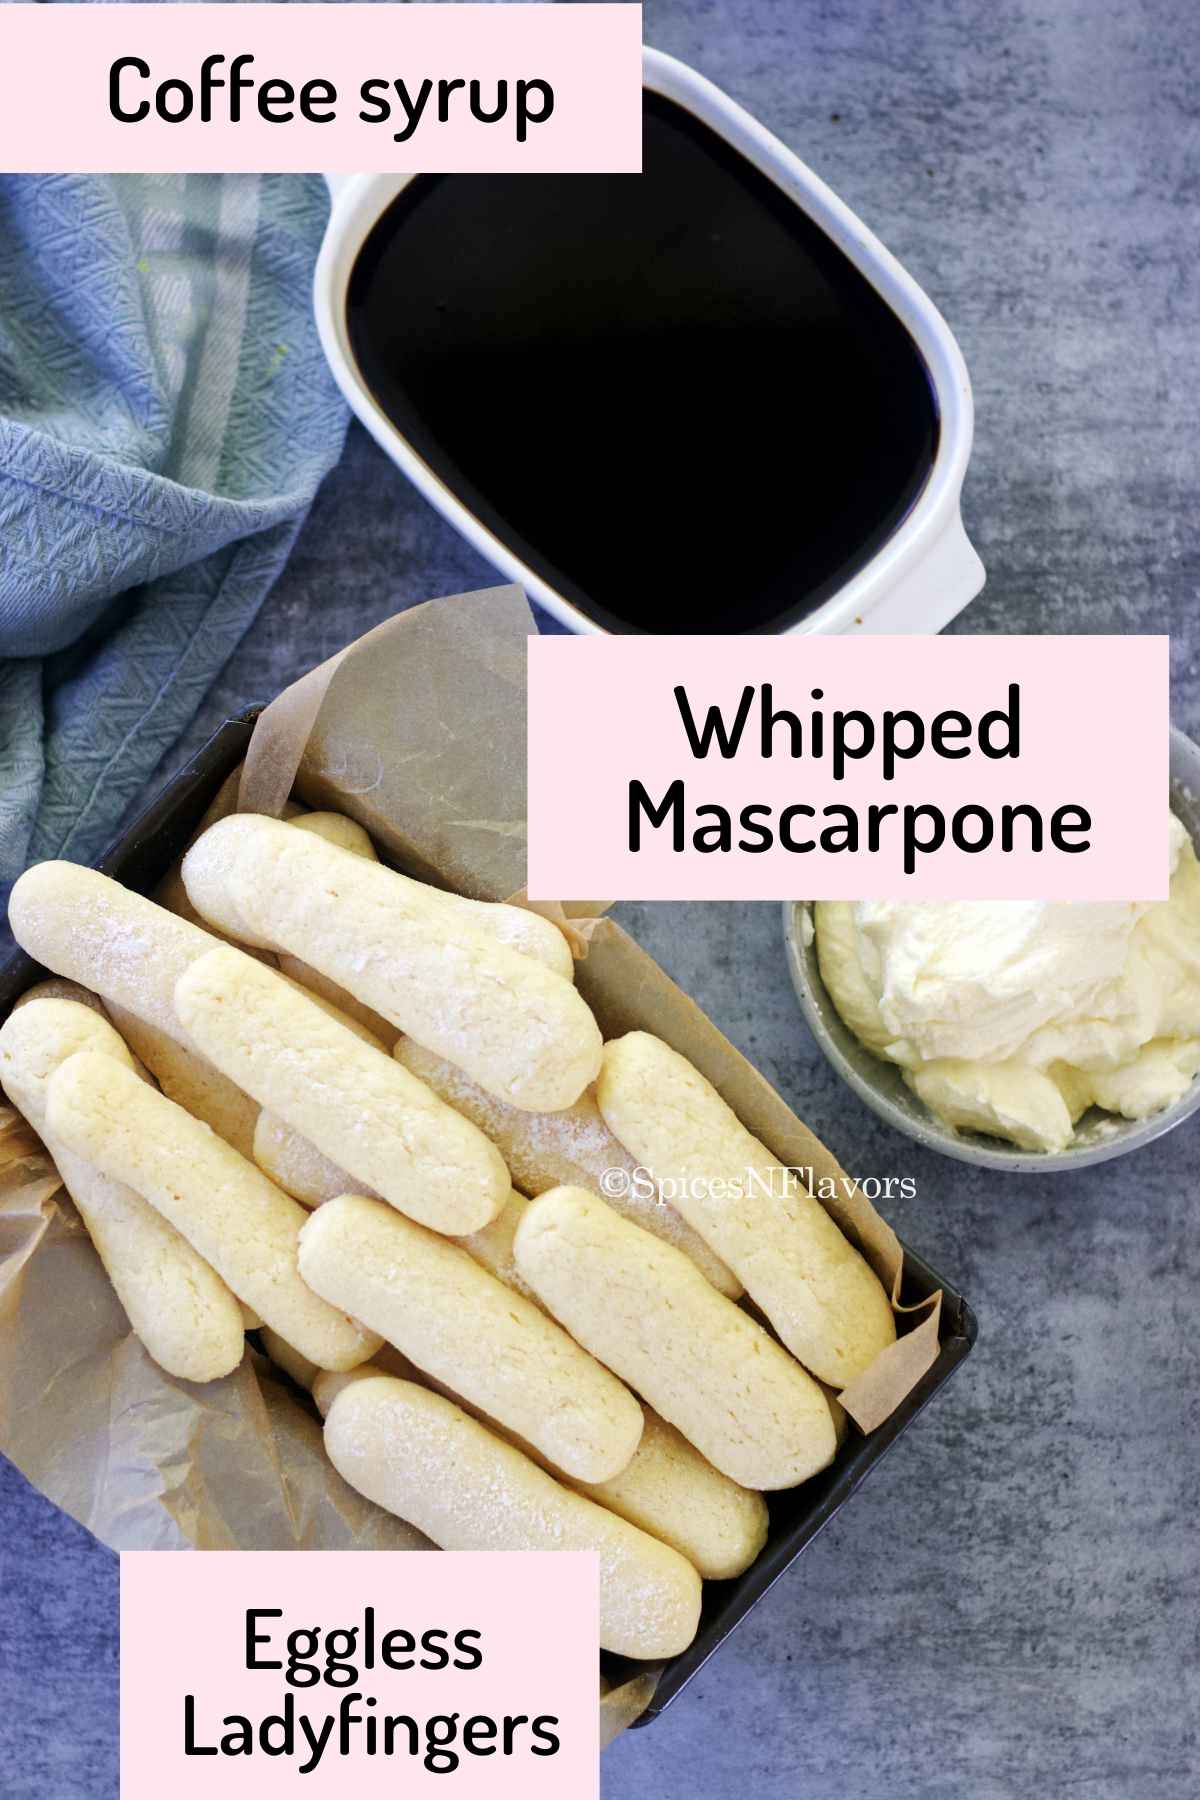
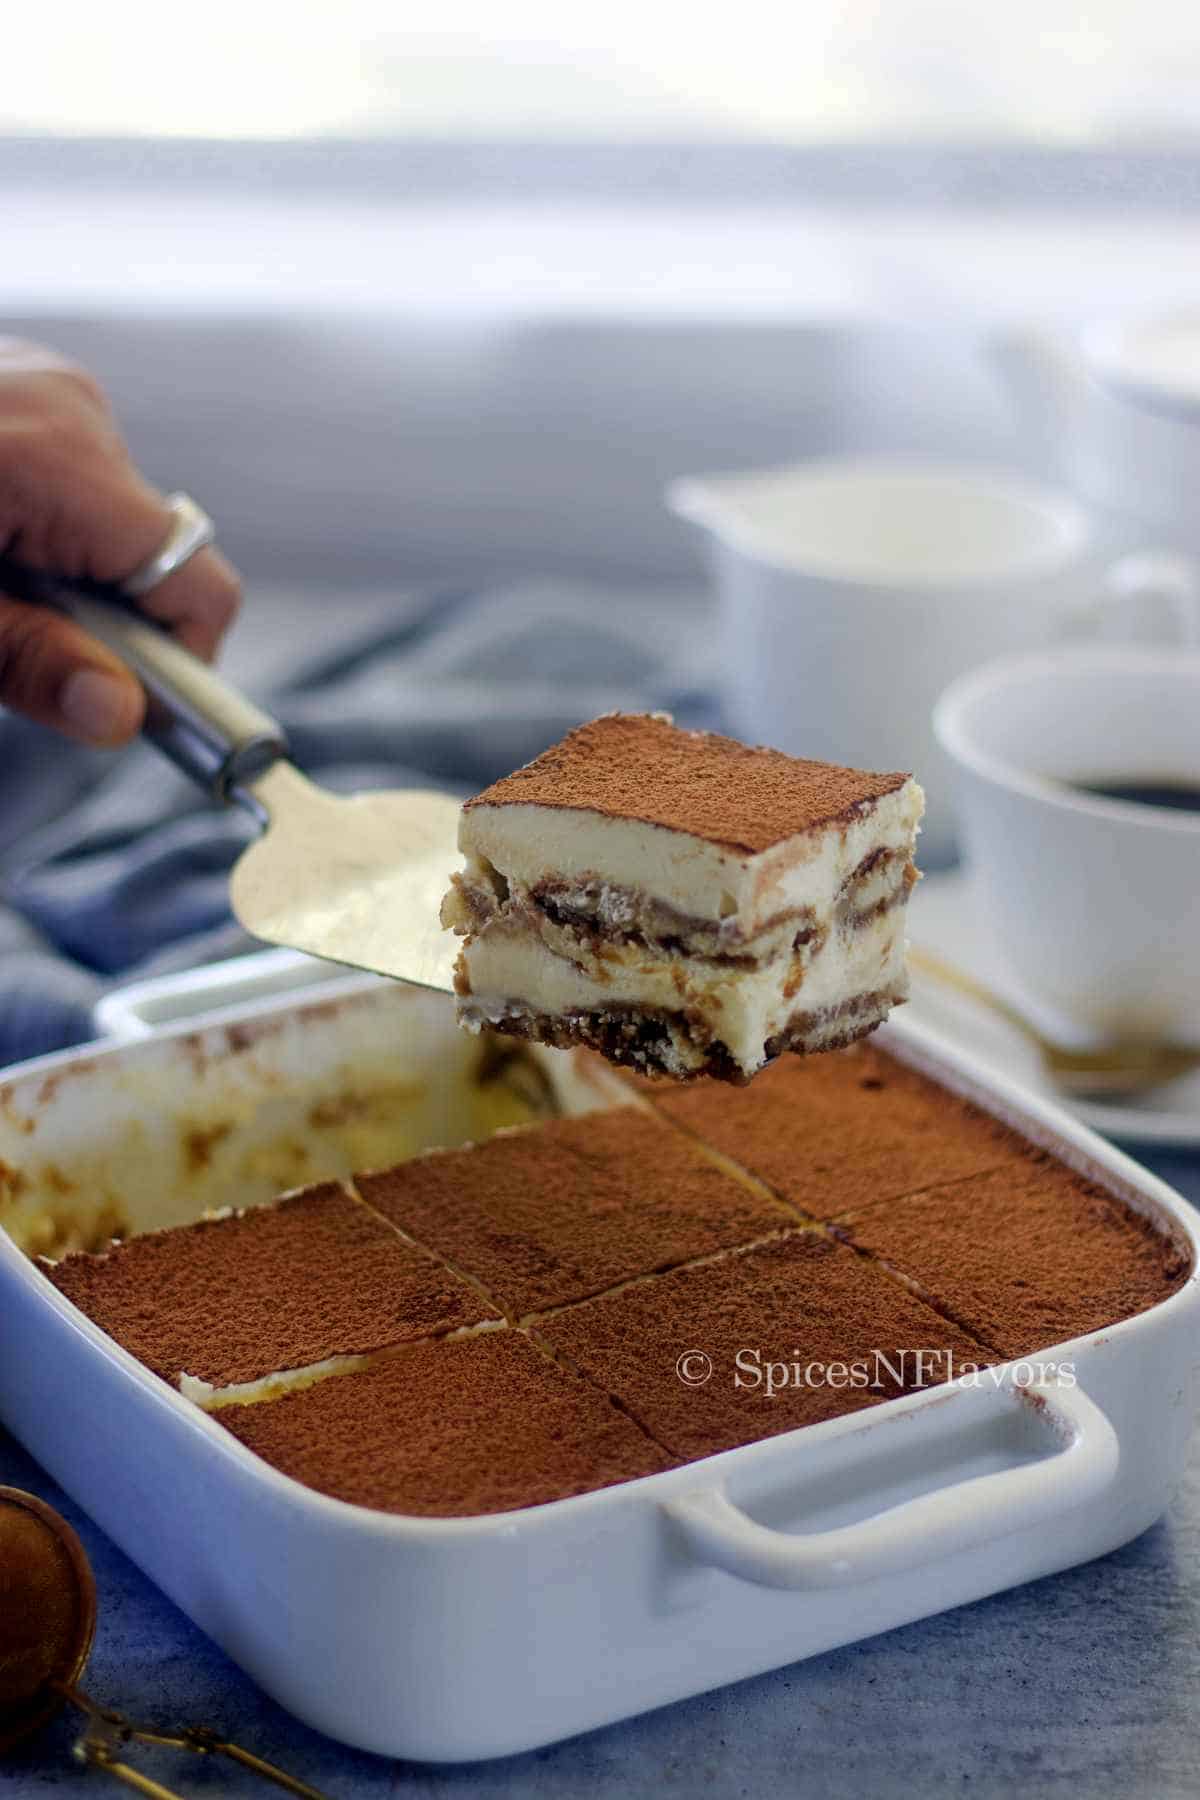
Tiramisu is a popular Italian dessert; composed of delicate coffee soaked ladyfingers , then layered with a velvety mascarpone cream, and dusted with cocoa powder for a finishing touch.
Usually it also has an addition of coffee liquor to it making it unsuitable for some of us to consume. Btw, I do have a separate recipe post on Easy Tiramisu recipe without alcohol in 10 mins. Consider checking that too.
And that is exactly why this recipe works!!!
- Eggless: You heard it right. If you are not comfortable using raw eggs in your classic tiramisu recipe or simply do not consume eggs at all then this tiramisu recipe without eggs is the one for you.
- From Scratch: Since all the elements in the recipe are made from scratch you can be rest assured that it is totally an Egg-Free recipe and I promise it would taste so much better than the store bought ones as the secret ingredient is always LOVE.
- Alcohol Free: I have made an alcohol free version here. However if you would like to make it with a kick of coffee liquor then find the details for the same in the notes section.
- Learning from my mistake: Of course, I failed in my first attempt at making eggless ladyfingers so this is your best bet at learning from my mistake so that you don't have to go through it.
Homemade Ladyfingers - My failed attempt
The first time I tried this recipe, my ladyfingers literally flattened out.
You need to know that eggless ladyfingers won't be as fluffy and light as the egg based authentic recipe but it still needs to:
- Hold its shape while baking.
- Should not spread too much.
- Needs to have a structure.
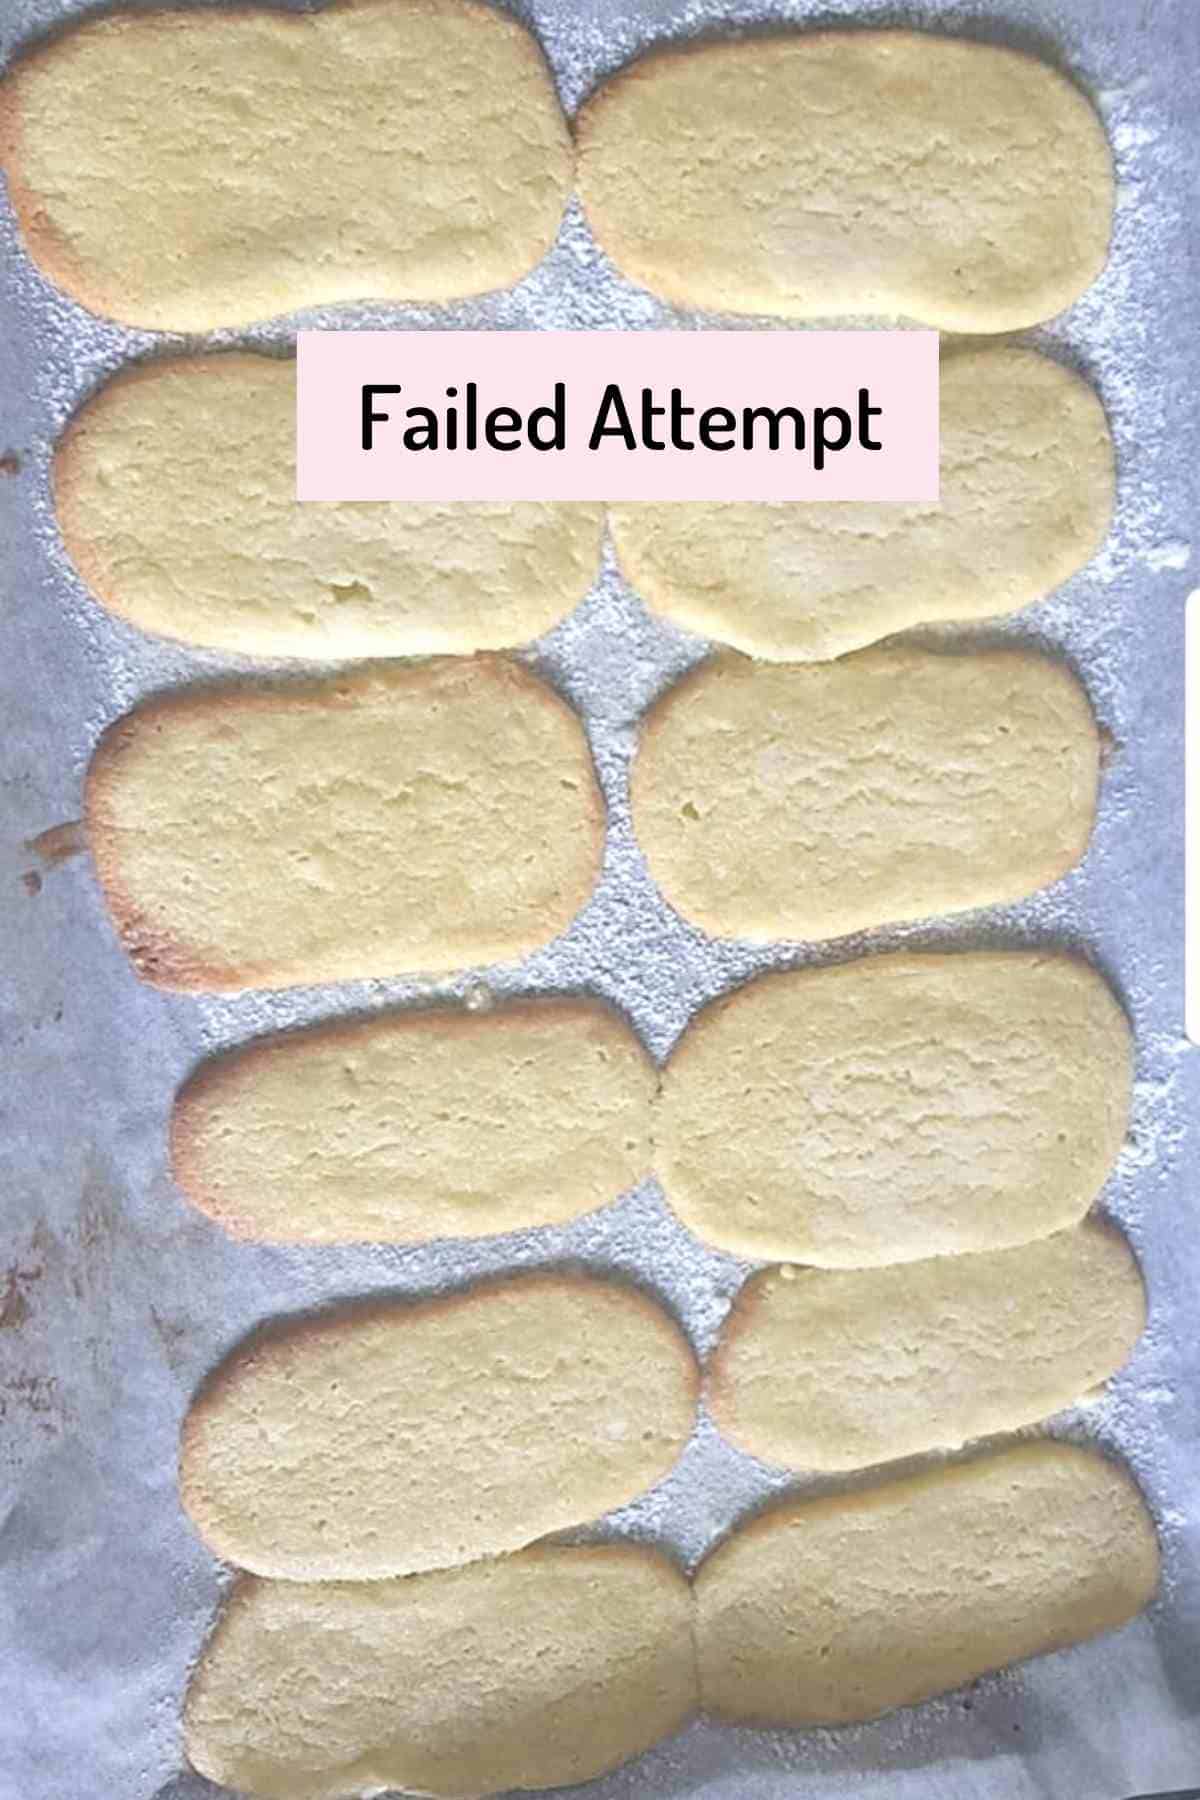
So from the image you can see that it did not stand up to any of the above points. It was totally flat with a crispy texture and no structure at all.
Here are my mistakes and how I rectified it:
- Too much air: One reason for the cookie to spread is the air in the batter. Beating the butter for long is the culprit so to rectify that in my second attempt I timed myself so that I do not over beat the butter.
- Not enough structure: The sugar in the batter was not enough to give the cookie a proper structure. So I tweaked the recipe and increased the sugar and flour a bit to achieve the perfection.
How to make Tiramisu - Step by Step
Step 1: Homemade Ladyfingers

Start by beating room temperature softened butter and sugar in a bowl. Beat for about 3 to 5 mins until the mixture looks creamy and mixed through (pic 1-2).
Do not mix for long.
Add vanilla and mix that through (pic 3).
Sieve together the flour, baking powder and salt on top of the bowl. Make sure to add only half of it (pic 4).
Mix it and then add half of the weighed out milk (pic 5). Mix that as well and finally incorporate the rest of the dry ingredients followed by the remaining half of the milk and combine to form a batter (pic 6).
The batter won't be solid as a cookie dough and also won't be flowy like a cake batter. It would be in a pipeable consistency.
Transfer the batter to a piping bag and cut off the tip about 2 cms away from the tip.

On a baking tray lined with a parchment paper, pipe fingers of about 3.5 inches and leave about 1 inch gap between two fingers (image 7).
You can place a template beneath the parchment paper for accuracy.
BAKER's tip: If you feel that the dough is out of shape, wet your fingers and using wet fingers try to give them a proper shape.
Dust generously with icing sugar (pic 8).
Bake in a preheated oven of 180°C for 8 to 12 mins or until slightly crisp on the sides and soft in the centre with pale colour (pic 9).
Let it cool in the pan itself for 5 mins, then transfer to a wire rack to cool completely.
Step 2 - Coffee Syrup
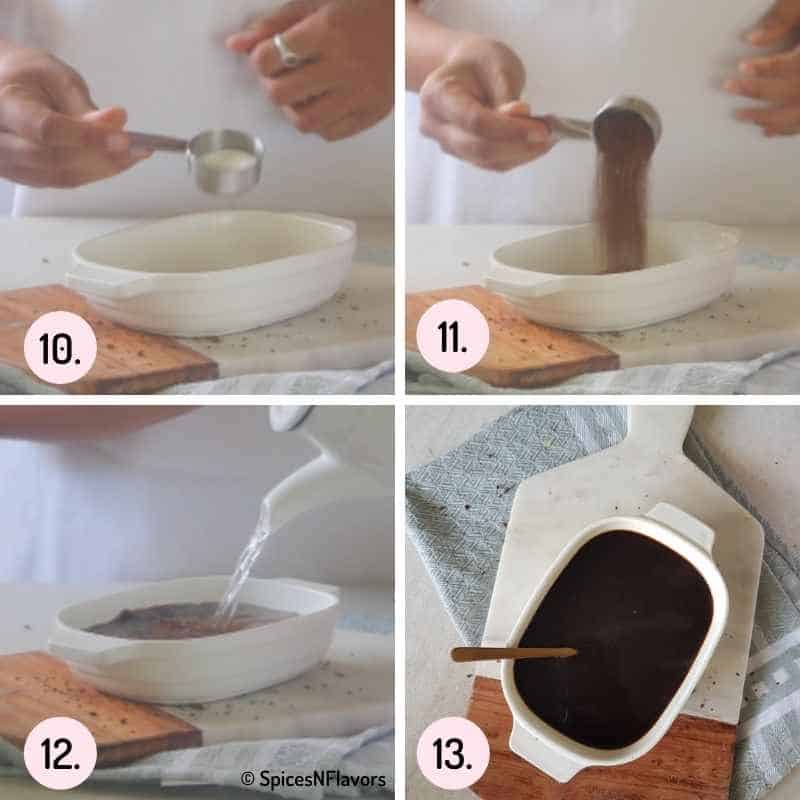
In a mixing bowl, add the sugar and coffee powder. (Pic 10-11)
Pour hot boiling water on top and stir together to dissolve the sugar and coffee in it (pic 12-13).
Cool completely before using.
If you have an espresso machine please feel free to use it.
This is also the time to incorporate coffee liquor if you wish to make it with a kick.
Step 3 - Whipped Mascarpone Cream

Whip together heavy whipping cream and sugar in a mixing bowl until almost stiff peaks form (pic 14).
In a separate mixing bowl, add the mascarpone cheese (pic 15).
Fold the prepared whipped cream in batches into the mascarpone cheese until combined (pic 16).
Step 4 - Assembly

Take a dish or a cake pan. I am using 7x7 inches pan.
Dip the ladyfinger in the coffee syrup for about 1 to 2 seconds and remove immediately (pic 17).
Cover the base of the dish or ramekin with the ladyfingers soaked in coffee (pic 18).
Layer half of the prepared whipped mascarpone cream and repeat the steps (pic 19-21).
Cover with the cling wrap and refrigerate overnight or for a minimum of 4 hours.
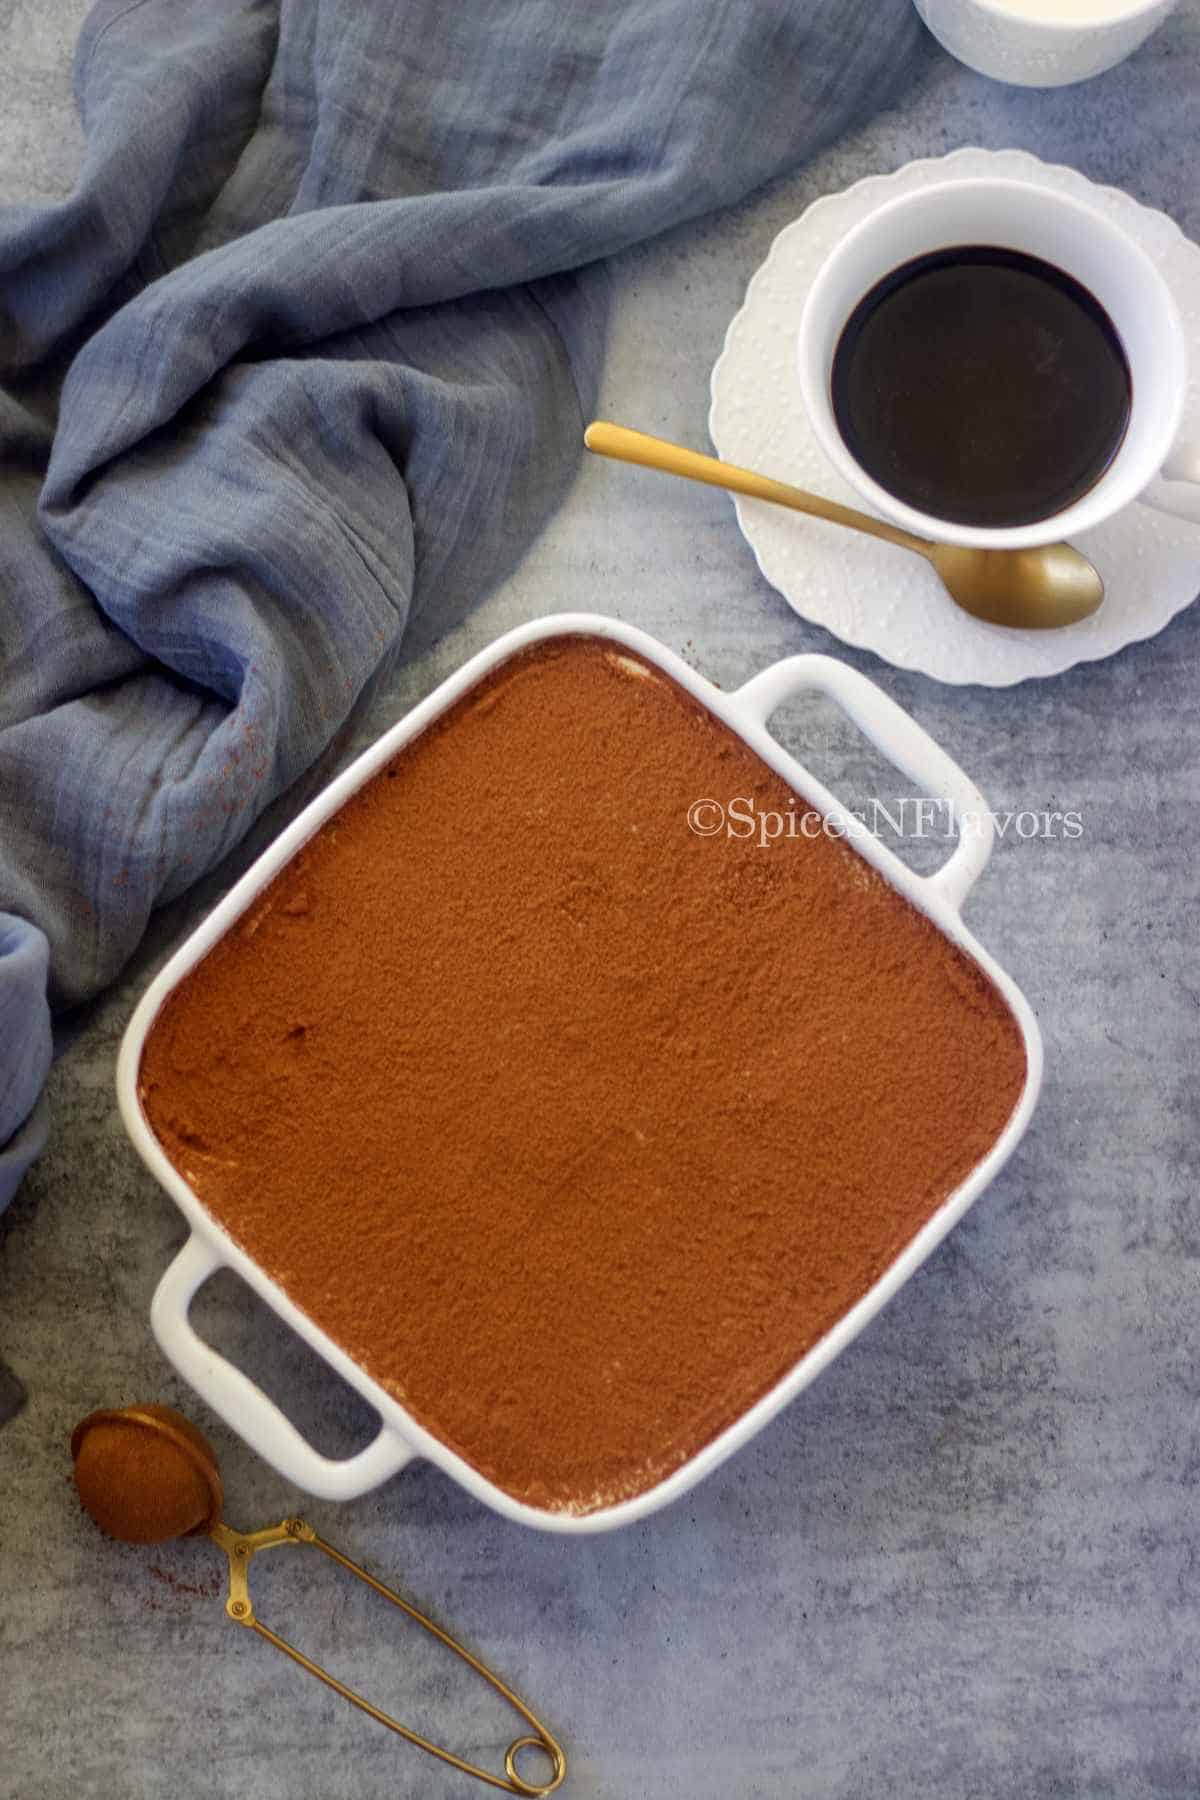
Generously dust with cocoa powder right before serving (pic 22).
Baker's Tips:
- Creaming: Do not cream the butter and sugar for long. Just beat them for about 3 to 5 mins or so until they are combined and looks creamy.
- Precision: Make use of a template to be precise while piping. Find out how to make the template by watching the video shared in the recipe card or click here.
- Shaping: Wet your fingers while shaping the finger dough right before baking so that the dough doesn't stick to your hands.
- Baking: You do not want a crispy cookie. Rather it should be soft in the centre and crisp around the edges hence take care of the baking time.
- Beating the Heavy Cream: There is a very fine line between stiff peaks and overbeating the cream. I would say beat the cream to a stage where it is still not reached the stiff peaks stage as you would be mixing the whipped cream to the mascarpone in later stages which would mean there are chances of over-whipping the cream accidentally.
- Lightly dip the ladyfingers in the coffee syrup or else it would become soggy, soft and eventually fall apart.
- Layering the tiramisu is the key to make visually pleasing dessert. If layered properly you could see each layer individually once the tiramisu is sliced.
- Me Time: Yes the tiramisu needs some "Me Time" in the refrigerator to give away the most flavour and also to firm up a bit so that it is easier for you to slice and serve.
Storage (Make ahead) Instructions:
Tiramisu is often made with stale ladyfingers. So you can definitely make it ahead of time and store the ladyfingers in an air tight container for upto 2 weeks.
The assembled tiramisu can be stored in the fridge for upto 5 days. Just make sure to cling wrap it.
Can I freeze Tiramisu?
Yes, you can freeze them for upto 3 months. Just make sure to cling wrap it well.
Recipe FAQ's
If you do not want to get into the hassle of making everything from scratch. Simply use store-bought ladyfingers and assemble everything instantly in 10 mins. Just make sure to read the label of ingredients as generally store-bought ladyfingers do have eggs in them.
You can easily convert this recipe to make a cake. Simply use a vanilla sponge cake base and substitute the vanilla essence with coffee essence. Instead of simple syrup soak the cake with the prepared coffee syrup mentioned in this recipe. Fill and frost using the cream again mentioned in this recipe. Decorate as you like.
For individual serving it would be easier to assemble everything into a glass or shot glass. Just break the tiramisu to fit the size of your glass. Then dip it in coffee syrup and assemble in the glass followed by the mascarpone cream. Repeat the layers till you reach the top. Dust with cocoa powder and serve.
Mascarpone is the key ingredient of the recipe. The closest substitution for 8 oz mascarpone would be 7 oz cream cheese and 1 oz sour cream. If you do not find sour cream then simply use cream cheese instead.
Related Recipes:
- Easy Tiramisu recipe without alcohol
- Eggless Lemon Blueberry Trifle
- Rasmalai Trifle
- Chocolate Yogurt Mousse Tart
Wish to Join US for the love of BAKING? Subscribe to our newsletter and Youtube channel. Follow along on Facebook, Instagram, and Pinterest for all the latest updates!

Easy Eggless Tiramisu with Homemade Ladyfiners
Ingredients
Homemade Ladyfingers (makes 30 cookies)
- 1/2 cup (113 gms) Butter softened
- 1/2 cup (100 gms) Castor Sugar
- 1/2 tsp Vanilla Extract
- 1 3/4 cups (210 gms) All purpose Flour/Maida
- 1/4 tsp Baking Powder
- 1/4 tsp Salt
- 100 gms Milk
Coffee Syrup
- 2 tbsp Instant Coffee Powder (good quality)
- 2 tbsp Sugar
- 200 ml Hot Boiling Water
Whipped Mascarpone Cream
- 300 ml Heavy Whipping Cream
- 100 gms Icing Sugar
- 250 gms Mascarpone Cheese
Cocoa powder for dusting
Melted Chocolate for Decoration (optional)
Instructions
Step 1 - Homemade Ladyfingers
- Start by beating room temperature softened butter and sugar in a bowl. Beat for about 3 to 5 mins until the mixture looks creamy and mixed through (pic 1-2).Do not mix for long.
- Scrape the bowl, add vanilla and mix that through.
- Sieve together the flour, baking powder and salt on top of the bowl. Make sure to add only half of it.
- Mix it and then add half of the weighed out milk. Mix that as well and finally incorporate the rest of the dry ingredients followed by the remaining half of the milk and combine to form a batter.
- Transfer the batter to a piping bag and cut off the tip about 2 cms away from the tip.
- Start piping straight lines of 3.5 inches leaving a gap of 1.5 inches between each one on top of the baking tin lined with parchment paper. (For even piping you can consider making a template of straight lines of about 3.5 inches leaving a gap of 1.5 inches between each line. Place it on your baking tray and top with another parchment paper on which you want to pipe and bake).
- If you feel that the dough is out of shape, wet your fingers and using wet fingers try to give them a proper shape.
- Dust generously with icing sugar. Bake in a preheated oven of 180°C for 8 to 12 mins or until slightly crisp on the sides and soft in the centre with pale colour.
- Let it cool in the pan itself for 5 mins, then transfer to a wire rack to cool completely.
Step 2 - Coffee Syrup
- To make the coffee syrup In a mixing bowl, add the coffee powder and sugar.
- Pour hot boiling water on top and stir together to dissolve the sugar and coffee in it. Cool completely before using.
Step 3 - Whipped Mascarpone Cream
- To make the whipped mascarpone cream Whip together heavy whipping cream and sugar in a mixing bowl until almost stiff peaks form.
- In a separate mixing bowl, add the mascarpone cheese.
- Add the whipped cream to the mascarpone a little at a time and gently fold through using cut and fold method until combined.
Step 4 - Assemble
- Take a dish or a cake pan.The one that I am using is 7x7 inches. Dip the ladyfinger in the coffee syrup for about 1 to 2 seconds and remove immediately and place in the dish.
- Cover the base of the dish or ramekin with the ladyfingers soaked in coffee.
- Layer half of the prepared whipped mascarpone cream and repeat the steps until you reach the top.
- Cover with the cling wrap and this is the hardest part of the recipe which is to refrigerate overnight or for a minimum of 4 hours.
- Generously dust with cocoa powder right before serving. Add some chocolate decorations on top if you like.
Video
Notes
- Too much air: One reason for the ladyfingers to spread and loose its shape is the air in the batter. Beating the butter for long is the culprit so make sure that you do not over beat the butter.
- Over-mixing: Alternating between dry and wet ingredients while preparing the dough ensures that you are not over-mixing the batter. (This and 9 other tip has been included in my free baking ebook which you can download by clicking here).
- Scraping: Scrape the bowl before each addition to ensure that all the ingredients are mixed properly.
- Creaming: Do not cream the butter and sugar for long. Just beat them for about 3 to 5 mins or so until they are combined and looks creamy.
- Precision: Make use of a template to be precise while piping. Find out how to make the template by watching the video shared in the recipe card or click here.
- Shaping: Wet your fingers while shaping the finger dough right before baking so that the dough doesn't stick to your hands.
- Baking: You do not want a crispy cookie. Rather it should be soft in the centre and crisp around the edges hence take care of the baking time.
- Beating the Heavy Cream: There is a very fine line between stiff peaks and overbeating the cream. I would say beat the cream to a stage where it is still not reached the stiff peaks stage as you would be mixing the whipped cream to the mascarpone in later stages which would mean there are chances of over-whipping the cream accidentally.
- Lightly dip the ladyfingers in the coffee syrup or else it would become soggy, soft and eventually fall apart.
- Layering the tiramisu is the key to make visually pleasing dessert. If layered properly you could see each layer individually once the tiramisu is sliced.
- Me Time: Yes the tiramisu needs some "Me Time" in the refrigerator to give away the most flavour and also to firm up a bit so that it is easier for you to slice and serve.
- Do check the post to understand why I failed in my first attempt so that you don't fail and also for other details like storage instructions, FAQ's etc.
- I served my Tiramisu with some chocolate decorations on top. Click here to watch the video on "7 basic chocolate decorations every baker must know".
Jinal says
100 Gms of Icing Sugar would be equivalent to how much in terms of cup measurement?
Also how many ml would be 100 gms of milk?
sushma iyer says
Hi Jinal.. Sorry I don't have the conversions for the same.. you can always google it 🙂 thank you
Milan says
Is the texture after baking soft .. not like a biscuit hard?
sushma iyer says
Hi Milan.. no it wont be crispy or hard
Anchal Khanna says
Hello ! May I know if you have used dairy or non dairy whipping cream? Thanks
sushma iyer says
We only get Dairy Whipping Cream here.. so yes thats the one Anchal
Shikha Mahajan says
Hi. Thanks for the recipe. Can as n u plz tell what is the substitute for mascarpone cheese
Thanks
sushma iyer says
Hi Shikha.. without coffee and mascarpone it won't be tiramisu.. but if you want to substitute then you can try using cream cheese
Trupti Dilip Shah says
how much milk
sushma iyer says
Hi Trupti.. Sorry for missing it in the ingredient list.. It is 100 gms.. Have now updated it.. thank you for pointing out my mistake..
Please accept my apologies
Regards
Sushma