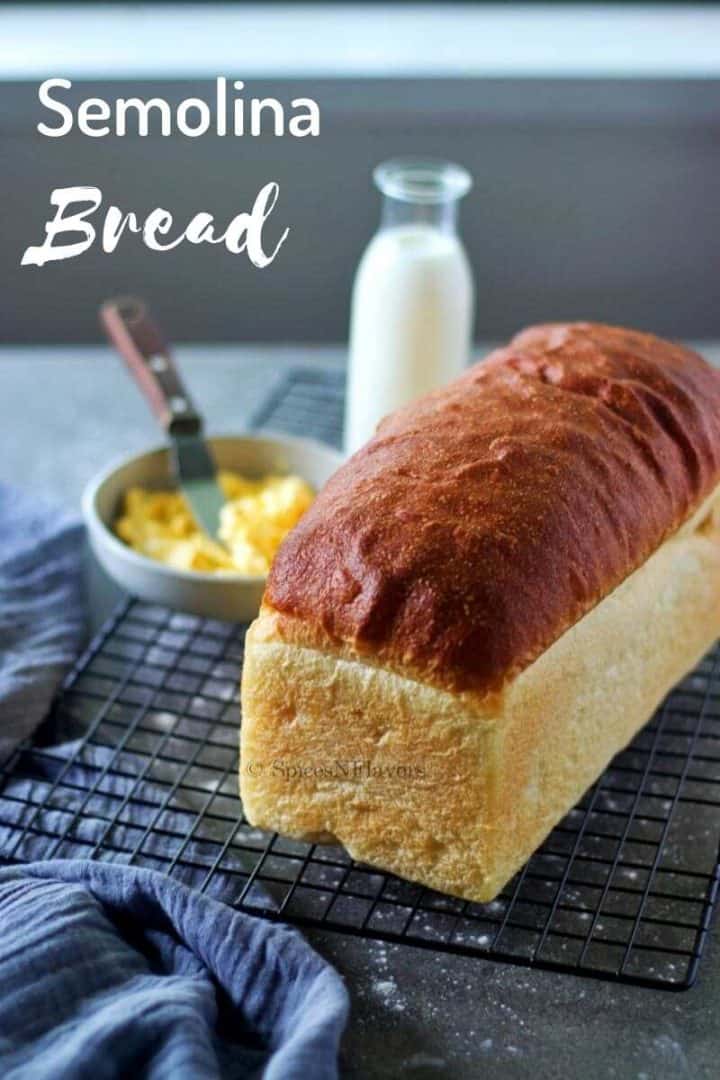
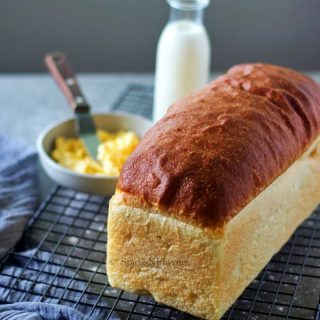
Don't blame me if you get hooked to this Semolina Bread Recipe because it is that addictive. Crackling crust with tender interiors, this bread made using 100% Semolina Flour is going to blow your mind.
Yeast has got a really bad reputation in general.
People find it difficult to tame and think it is best left to professionals instead!!
And why not?? When you can easily find bread in stores why even attempt to spend your time to knead it, wait for it to prove not once but twice then bake, cool, slice.. ufff
Sounds like a chore!!!
But let me tell you there is nothing like a good country style homemade artisan bread.
Why you should make your own Bread
- It is super super economical to make a bread at home.
- You know you would be using the best of the best ingredients - from organic flours to making it sugar free and preservative free.
- Mass produced bread taste bland and lack flavour as compared to the homemade ones.. (because love is the secret ingredient 😉 )
- Above all you get that sense of an achievement which is surreal.
And this semolina bread is one such recipe which would yield a beautiful loaf with a crackling crust on top and a chewy tender slice that can be used for toast, grilled sandwiches, bruschetta or croutons.
This same recipe can also be used to make semolina rolls, braided bread or artisan style bread.
But What is Semolina you may ask?
Semolina is a coarse textured flour (see image below) made from durum wheat which is used, mainly, to make dried pasta and the most common breakfast Upma in India.
Often used to make desserts too in Asian Countries.
Being a wheat based product it has a higher gluten content and has a nutty undertone and is also slightly yellow in colour.
High Protein + Nutty Undertone + Naturally yellow colour =
Best Flour for Bread Baking.
This makes the best crusty bread with an amazing soft and chewy tender texture.
For this recipe we would be using Chirotti Rava which is a very fine version of Semolina having a texture almost like a sand. It is easily available in Indian Stores.
If by any chance you do not find this variety then you can use any Semolina that is available to you, pulse it in the mixer to make Semolina Flour and then use or sometimes it would be also labelled as Durum Flour.
List of Ingredients you would need to make this Bread:
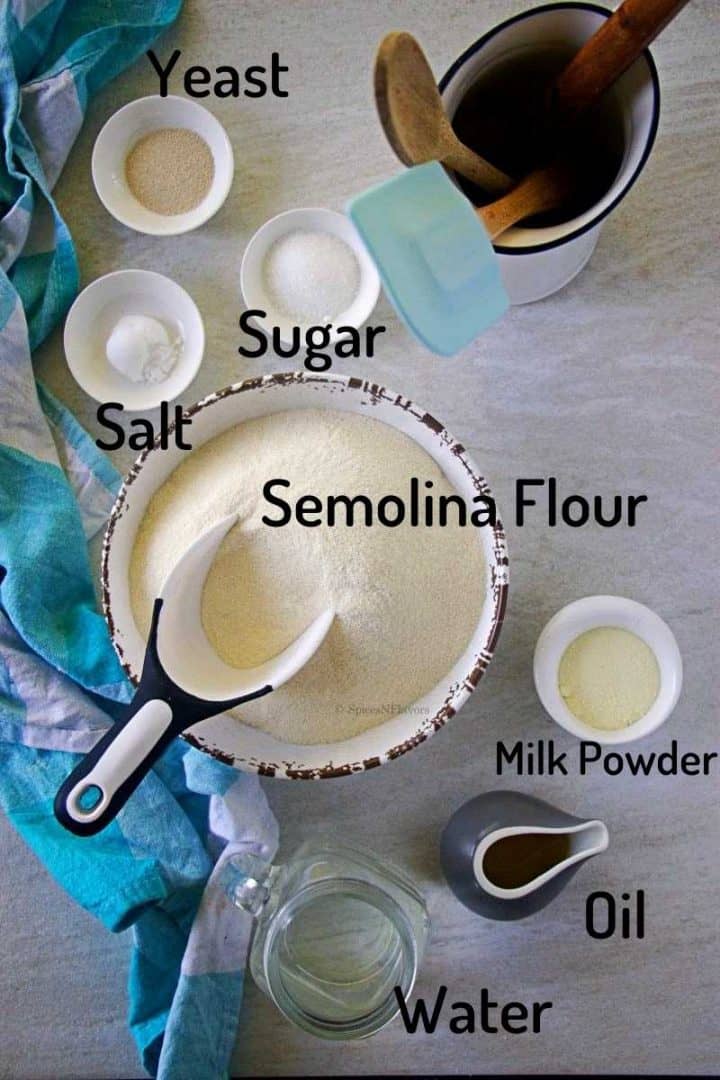
Semolina Flour:
As mentioned if buying from Indian Stores choose the variety named as Chirotti Rava which is super fine.
If not buy any Semolina that is available to you and pulse it to get to a texture as seen in the image above or in the video.
Or sometimes it would be labelled as Durum Flour too so you can use that as well.
Milk Powder:
If you are following my bread recipes you know I always add a little Milk Powder also known as dried Milk to my breads, it enriches the dough and also makes the bread soft and rich.
You can skip it if is not handy.
Yeast:
I am using Instant Yeast so can be directly added to the flour.
This is the Yeast that I recommend you to buy too if you like bread baking.
Of course you can use Active Dry Yeast too but in that case just make sure to activate it by dissolving in water with some sugar until foamy.
Salt and Sugar:
Apart from helping to build the bread texture it also helps in adding flavour to the bread.
Oil:
Use of olive oil helps to increase the nutritive value of the bread.
You can use any other variety of oil too.
Water:
We would need some liquid to bind everything into a dough.
So we would be using Lukewarm Water for the same.
You can also use Milk in place of Water or Milk and Water in 50:50 ratio.
Pretty basic ingredients there right!!
And here is how you combine everything into a dough.
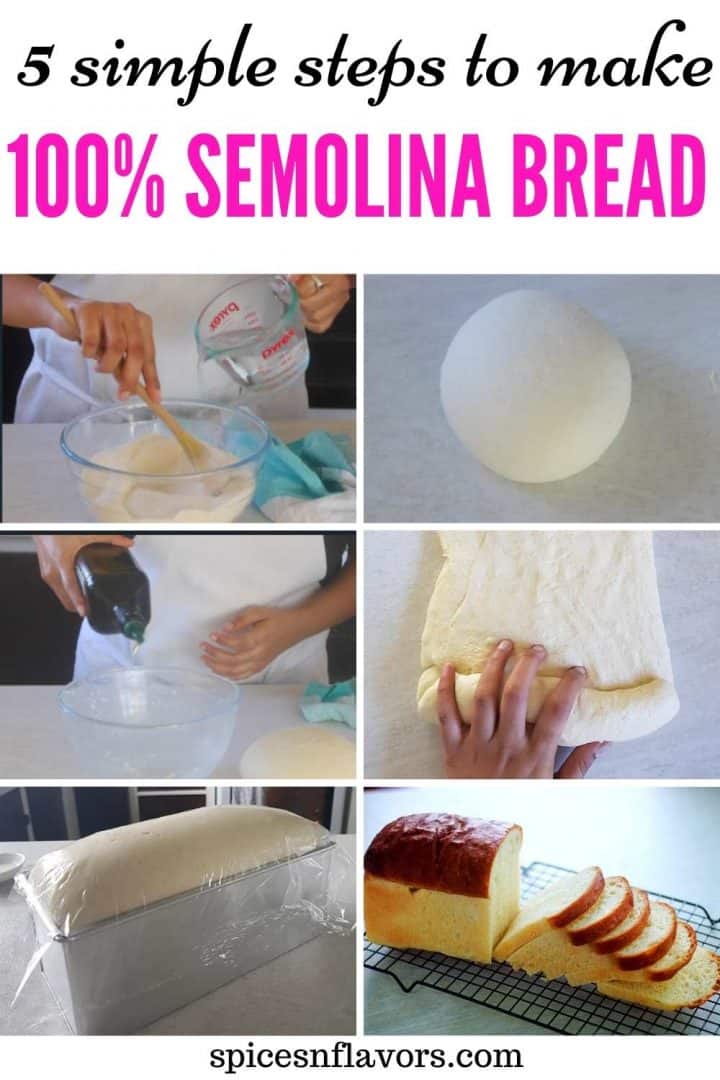
How to make Semolina Brand in a step by step tutorial format.
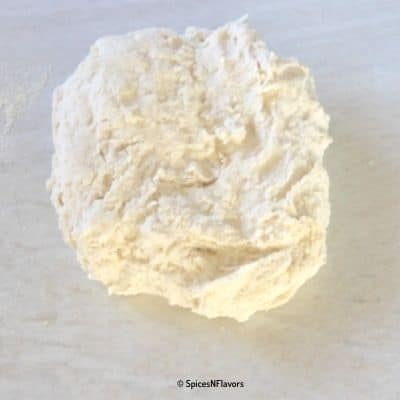
Step 1: Preparing the dough
Onto a mixing bowl, add in the semolina flour (pic 1), milk powder (pic 2) and salt (pic 3). Mix together.
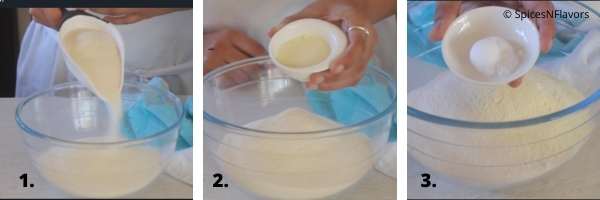
In goes the sugar (pic 4) and yeast (pic 5). Mix that through.
Add in all the water (pic 6) and combine it to a dough.

Transfer it to your work top and start kneading.
Being made of semolina this dough would be super sticky so to make it manageable to work with and knead it properly grease the work top with some oil.
Then transfer the dough and just knead.. knead.. knead..
You can check the video in the recipe card or by clicking here to understand how to knead this dough.
Add little oil at a time and knead it until you get a soft and smooth dough.
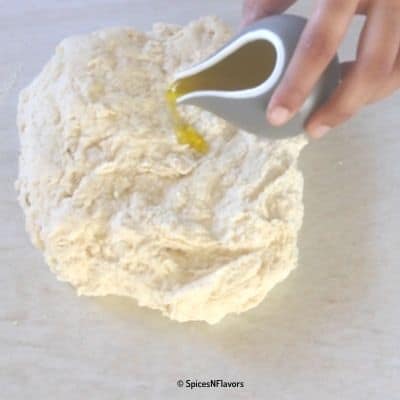
The reason to add little oil:
is that fat inhibits the development of gluten. So adding a little bit in stages rather than dumping all in would help us achieve a proper gluten structure in the dough.
Also you will observe the minute you add the oil the dough comes together really well, is not sticking anymore and is also easier to work with.
So each time your dough becomes sticky use oil to make it manageable to work with. That way you are not adding any extra flour to your dough and this ensures that the bread dough doesn’t dry up on you.
I am using a total of 3 tbsp of oil here and adding it a little at a time until the dough comes together.
I kneaded it for approximately 25 mins.
Though I love it but if at some point you are tired then definitely cover it with a tea towel for 3 to 5 mins. Take a break and come back again to knead it.
This being a dough made of semolina entirely you would need a little extra time to knead the dough and get it to the right stage.
So finally after 25 mins of kneading the bread dough should be soft supple and bouncy.. . No one would believe it to be made of sooji..
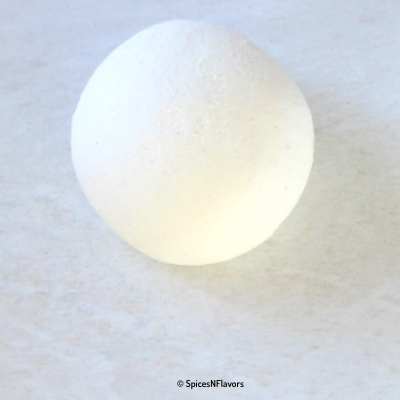
When you press a finger against it you would feel it moist.. that’s how the dough should be.
I understand not everyone likes kneading the dough by hands and not everyone have so much time to spare.
So for all of you I tried a batch in my stand mixer too.
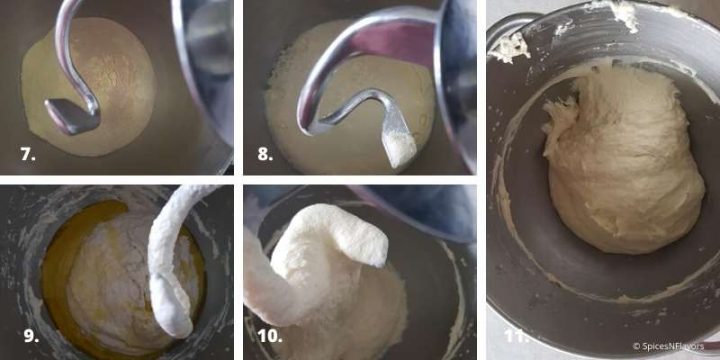
How to knead the Bread dough using a Stand Mixer?
To the bowl of your stand mixer, add the salt, semolina, milk powder, sugar and water (pic 7 -8).
Mix on lower speed to combine it and then once combined mix on high speed for 6 mins.
In the beginning you might have to use a spatula to scrape the sides and bring everything together.
After 6 mins add the oil (pic 9) and knead for another 6 mins until your dough starts leaving the sides but when you lift the mixer a blob of dough would still be sticking to the base of your bowl (pic 10).
So use a method that you are comfortable with - either kneading by hands or using a stand mixer.
Either way it is now ready to Proof the Dough.
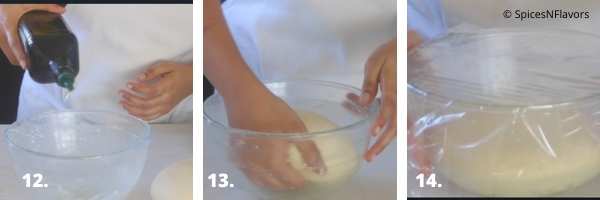
Step 2 - First Proofing.
Take the bowl in which you kneaded the dough, add some oil to grease it (pic 12).
Place your dough and coat the dough with oil too so that it doesn’t dry out (pic 13).
Cling wrap (pic 14), cover with a tea towel and allow it to proof for 1.5 hours until double in volume.
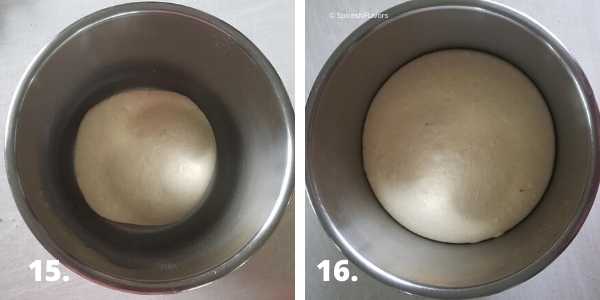
How to Proof the Dough in an Instant Pot.
If you own an Instant Pot with Yogurt Setting then you can reduce the proofing time by half by choosing to prove the dough in the Pot.
Yes instead of the bowl, put your dough into the greased pot.
Close with a glass lid.
Choose the Yogurt Mode. Set the time to 45 mins.
I have a detailed article on how to proof bread dough in Instant Pot you can refer that as that will help you in converting any bread recipe to an Instant Pot one.
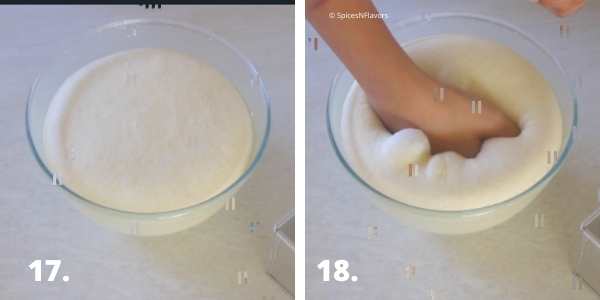
Step 3 - Shaping
So after 1.5 hours of proofing this is how the dough looks like (as pictured below - image 17). Look at the rising.. Beautiful!!!
But now time to deflate it.
Just give it a dishum (pic 18).. those lovely air pockets..
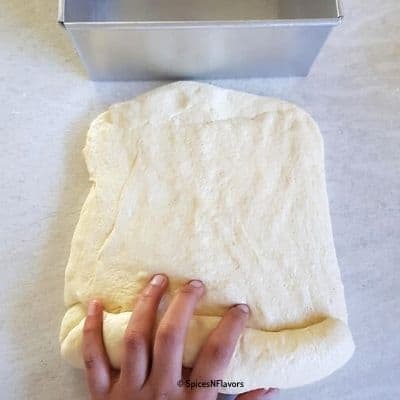
Simply transfer it to your greased counter top spread it out to a rectangle as per the size of the bread pan.
Make sure to remove all the air pockets at this stage or else once you bake the bread you would get air pockets on the bread too.. Nothing wrong with it just that it won’t be like a sandwich bread.. But I love this look 😀
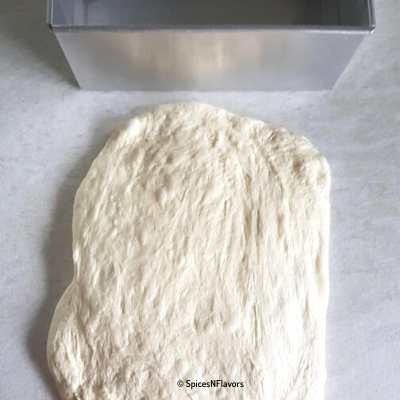
Ok now from the end nearest to you start rolling the dough into a log so that it fits the size of your baking pan making sure that you are pressing it and sealing it down really well so that you do not lose the shape of the dough while baking.
By the way I have tried this recipe in both 7.5 x 3.5 inches pan and also 9x5 inches pan and found amazing results with the 9x5 loaf so would suggest the same for you too.
The dough would be a bit sticky that’s ok you need that moisture in wheat based recipes.
Shape the log to the size of your bread pan.
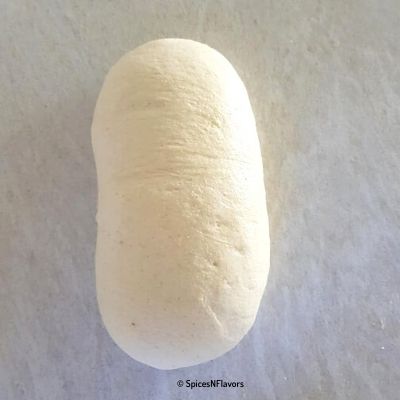
Transfer it to the pan. Cover with a cling wrap and allow it proof for the second time.
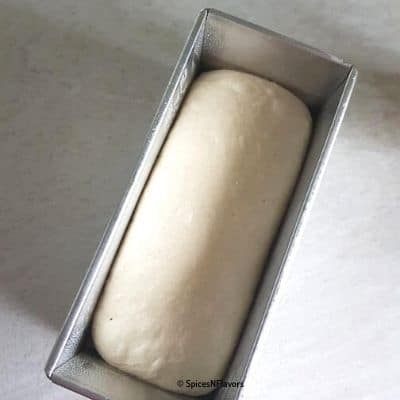
Do not go by the clock here. Proof it till it reaches the brim or a little over it.
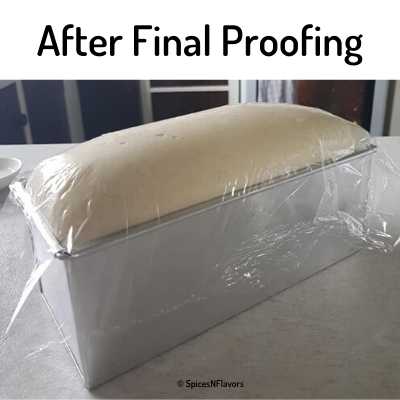
Took me around 45 mins for the 7.5x3.5 pan and around 1 to 1 hour 15 mins for the 9x5 one.
Step 4 - Baking
Once proofed brush the top with milk and bake in a preheated oven of 200°C for 35 to 40 mins until the bread sounds hollow and has a golden brown coloured crust on top.
Once baked brush the top of the bread with some butter to soften the crust.
Then let it cool in the pan itself for 3-4 mins.
Transfer to a wire rack to cool completely before slicing.
Tips to making Perfect Bread every single time:
- Semolina Flour tends to absorb more water than any other bread flour variety. So use the water mentioned in the recipe as the guide and adjust it according to your needs.
- Greasing your work top with oil would help you knead the dough easily without having the need to add extra flour which may cause the bread to become dry.
- This bread dough would take little extra time to knead using hands nearly 20 to 25 mins. So be patient or consider kneading using a stand mixer.
- While rolling the bread to shape it into a log make sure that you are pressing and sealing the edges well so that the bread does not open up while baking and lose its shape. Also ensure to place it seam side down.
- Semolina bread tends to get an amazing oven spring, so allow it to proof it till the bread reaches the brim and keep enough space for it to rise in the oven or else the top of the bread might touch the rods of the oven and burn.
- Once baked immediately apply some butter on top to soften the crust of the bread.
Different Variations to Try
Semolina Rolls: You can use the same recipe and shape it into a roll to make dinner rolls just like we make Laadi Pav.
Braided Bread: Again the same dough can be shaped into a braid to make the braided bread.
Semolina Bread with Sesame Seeds on top would give it a nice crunch and texture. Not only sesame seeds you can add any seeds of choice like pumpkin, poppy or sunflower seeds.
Cinnamon Bread or Nutella Bread: Once proofed shape the bread into a rectangle. Spread some cinnamon sugar mixture or Nutella on top and then roll to get the swirl effect.
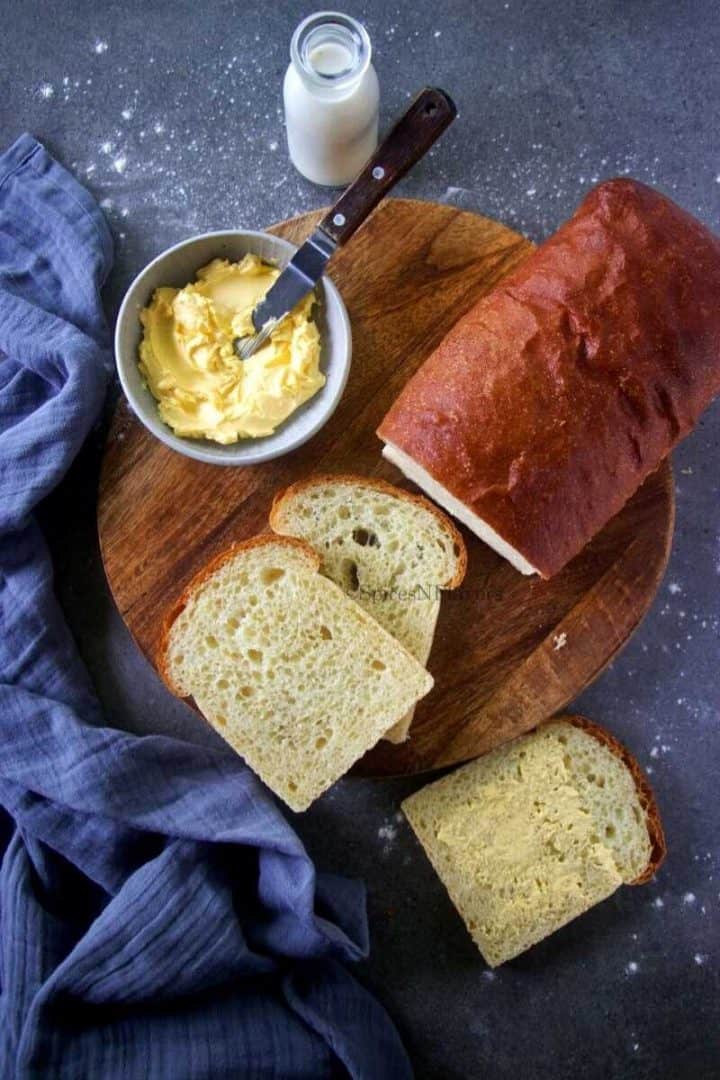
How to Serve the Bread.
You can serve the slice of bread with some butter and jam on the side.
Personally I feel, this bread tastes excellent when toasted. So crispy and nutty just perfect with a cup of tea.
You can also serve this a side to dip in soups or it even makes the best baguettes and croutons.
How long does the Bread Last?
This bread would stay good at room temperature for 3 to 4 days in an air tight container.
I do not recommend keeping bread in the fridge as it tends to dry down faster.
You can of course freeze this bread for up to 3 weeks.
I am sure you might be itching to know:
Is Semolina same as Semolina Flour.
No it is not same. Semolina is coarse in texture as compared to flour.
The one we are using today - Chiroti Rava resembles sand like texture.
Making Semolina Flour at home is super easy. Use any semolina that is easily available to you and then pulse it in the mixer until fine and use.
Can I use Roasted Rava/Semolina for this recipe?
No roasted won't work. You need Plain Rava just make sure to pulse it before using.
What does Semolina do in a Bread?
Semolina Flour has more protein and a tendency to absorb more water.
This makes it a breeze to work with higher hydration dough.
Also it provides a unique nutty flavour to the bread.
Also tackling few very common queries that you have been asking me on Instagram.
Why does my Bread develops a crack on the sides?
Or What causes my Bread to split while baking?
The major reason for your bread to split while baking is when the dough is too wet or too dry:
When your dough is too wet, it would create steam and make the bread rise and coupled with the gases released by Yeast, there is an uncontrollable rise in the bread which causes it to split around the sides which is generally the weaker point.
And when the dough is too dry, the heat of the oven creates a crust on top of the bread too soon due to lack of moisture even before it had time to rise and it kept getting harder. Since there was no easy way for the steam to escape through the hard crust, your sides tore.
So always feel your dough.. Check out our Video tutorial to understand it better.
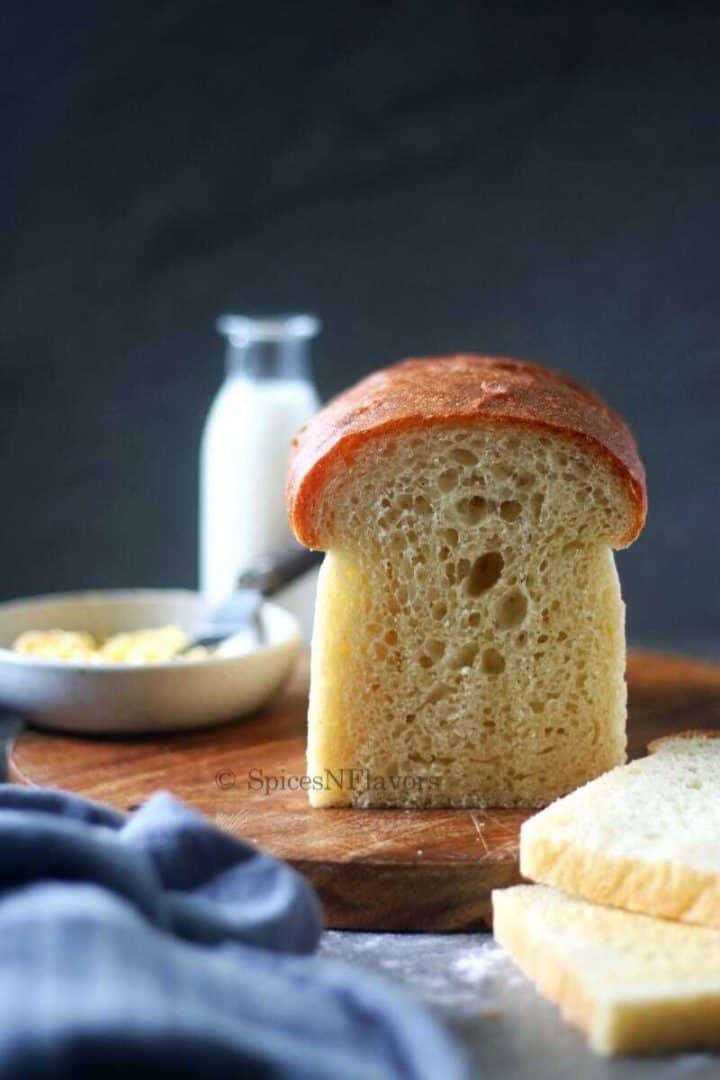
How do you make Tall Bread?
A simple trick to achieving tall bread is to allow it to prove it till the brim or a little over it whilst shaping. And making sure that you are using the right size pan.
Semolina has a tendency to rise more so this bread recipe is surely going to give you a tall bread slice for sure.
Why does my Bread turn crumbly?
Kneading is the process which develops Gluten in the dough which captures the steam while baking and gives the bread its structure. So when a bread is under kneaded there is not enough structure in the baked bread and hence becomes crumbly.
Is Semolina Bread Gluten Free?
No it is not. Semolina belongs to Wheat Family so has gluten in it.
What to do with Leftover Bread?
Here are few ideas to try:
- Make Bread Pudding
- Pulse it to make bread crumbs
- Cut it into small chunks to make croutons.
Wish to Join US for the love of BAKING? Subscribe to our newsletter and Youtube channel. Follow along on Facebook, Instagram, and Pinterest for all the latest updates!
Tag us on Instagram: @spicesandflavors to get featured on our stories.
Pin this for later:
100% Semolina Bread Recipe
Ingredients
- 3.5 cups Semolina Refer Notes
- 3 tbsp Milk Powder
- 1.5 tsp Salt
- 1 tbsp Sugar
- 1 tsp Instant Yeast
- 1.5 cups Warm Water
- 3 tbsp Olive Oil
Milk and Butter for brushing the bread
Instructions
Step 1 - Prepare the Dough
- In a mixing bowl combine together, semolina flour, milk powder and salt. Give a quick mix.
- Add in the sugar and yeast. Mix that through. Finally combine everything into a dough by adding the water.
- Grease the worktop with some oil and transfer the dough on to your worktop.
- Adding little oil at a time, start kneading the dough until it forms a soft, supple and bouncy dough. If kneading by hands this would take nearly 20 to 25 mins of your time.
- Alternatively, you can dump all the ingredients in the order - Salt, Semolina, Milk Powder, Sugar, Yeast and Water into your mixing bowl of the stand mixer. Knead for 6 mins. Add the oil and then knead again for another 6 mins until the dough starts leaving the sides of the bowl.
Step 2. - First Proofing
- Oil the container in which you kneaded the dough and once the dough is ready put it into the bowl and turn around to coat the dough with the oil too.
- Cling wrap and cover with a tea towel and allow it to proof for 1.5 hours until double in volume on your countertop.
How to Proof in an Instant Pot?
- Alternatively you can also choose to use your instant pot to proof the dough.
- Grease the inner pot with some oil. Put the prepared dough into it and coat the dough with oil too. Cover with a glass lid if you have one
- Choose the Yogurt setting and set the time to 45 mins.
Step 3 - Shaping
- Once proofed and double in volume, deflate the air bubbles by punching the dough and then transfer it to a work top.
- Spread it out into a rectangle according to the size of your pan.
- Then start rolling it from the end nearest to you making sure to seal it properly. Press the seams really well so that they do not open up while baking.
- Grease your baking pan (I recommend a 9x5 inches loaf pan) with some oil and then transfer the dough now shaped as a log into the bread pan with the seam side down.
Step 4 - Second Proofing
- Loosely cover with a cling wrap and a tea towel on top and allow it to rise till it reaches the brim of the bread pan by leaving it on your counter top itself.
- Do not go by the clock here but instead observe your dough. (It took me nearly 45 mins for the second proofing when I first tried this recipe in 7x5 inch pan and around 1 hour for a 9x5 inch pan)
- The timing would vary depending upon the climatic conditions of where you are living.
Step 5 - Baking
- Once proofed, brush the top of the bread with some milk taking care not to deflate the beautiful rise you have got.
- Bake the bread in a PRE-HEATED oven of 200°C (392°F) for 35 to 40 mins until the crust is golden brown and the bread sounds hollow when tapped.
- Upon baking, immediately brush the top of the bread with some butter - this softens the crust.
- Let it cool in the pan itself for 5 mins then invert it onto a wire rack to cool completely before slicing and enjoying it.
Video
Notes
- I used a 9x5 inch loaf pan for this bread recipe and got 14 slices from it.
- Use fine semolina for this recipe also known as "Chiroti Rava" easily available in Indian Stores. But if not then use any semolina of choice just make sure to pulse it to make Semolina Flour and then use. You can also look for "Durum Flour" in the stores.
- Milk Powder here is option you can skip that if you do not have it handy. It does softens the dough. So to replicate the effect you can substitute some portion of warm water with warm milk.
- I have used Instant Yeast (which is what I recommend for baking breads) so added it directly to the flour. If you are using the Active Dry ones or any other ones then make sure to activate it first with some sugar and water and then use in the recipe.
- The amount of water required for you might vary depending upon the brand of flour you are using, the weather conditions at your place etc so take this as a guide and adjust the water quantity by a tbsp or two here and there if need be.
- Greasing your work top with oil would help you knead the dough easily without having the need to add extra flour which may cause the bread to become dry.
- This bread dough would take little extra time to knead using hands nearly 20 to 25 mins. So be patient or consider kneading using a stand mixer.
- While rolling the bread to shape it into a log make sure that you are pressing and sealing the edges well so that the bread does not open up while baking and lose its shape. Also ensure to place it seam side down.
- Semolina bread tends to get an amazing oven spring, so allow it to proof it till the bread reaches the brim and keep enough space for it to rise in the oven or else the top of the bread might touch the rods of the oven and burn.
- Once baked immediately apply some butter on top to soften the crust of the bread.
Substitutions/Variations:
- Vegan Semolina Bread: Simply skip the milk powder in the recipe to make it vegan. Also avoid brushing the bread with dairy based milk before proofing and butter after baking
- Water: Substitute whole of the water or a portion of it with Milk to get even softer bread slice.
- Sesame Seeds/Oats : Right before baking consider sprinkling the top of the bread with sesame seeds, whole oats, poppy seeds, sunflower or pumpkin seeds if you prefer.
- Shaping: You can choose to shape the bread into rolls (like a Laadi Pav or Dinner Roll) to make Semolina Rolls or even braid them to make braided bread.
- Cinnamon Bread/Nutella: Once shaped into rectangle or before beginning to roll the bread, apply some cinnamon sugar mixture or spread some nutella and then roll to make cinnamon roll semolina bread.
How to Store and how long does this bread last?
Once cooled, store the bread in an air tight container for upto 3 days at room temperature. You can also freeze this bread for 3 weeks.Nutrition
Conclusion:
This Semolina Bread recipe is the one you need to try if you are looking for an alternative to Maida or All Purpose Flour baking.
With an incredibly tall loaf, soft and chewy texture and a crusty crust this Sooji bread recipe is one that you cannot resist.
Find step by step detailed pictorial recipe format on how to make bread in this post.
I will see you soon in my next one
Until then
Hugs
Sushma
Anshika Dagur says
Hi,
How can I make this bread in a bread maker?
I have a Kenwood BM450.( All the breads i make as per its recipe book have a somewhat hard crust and not usable as a sandwich bread 🙄)
Thanks
Anshika
sushma iyer says
Hi Anshika.. not sure about making it in Bread Maker; will try it soon and shall update. Sorry.
Jaya johari says
Hi maam tried your recipe it turns out really wonderful.inll really appreciate if you let me know how to 4x (four times)the recipe. Thanks😊
sushma iyer says
Hi Jaya.. simply multiply all the ingredients by 4.
Joani says
I used your recipe to try out my new kitchenaide mini and it turned out wonderful. I love the color and the crust is delicious. We enjoy it fresh and toasted as you mentioned. I followed the recipe exactly, your directions are thorough and I appreciate that!
sushma iyer says
Hey Joani.. that is wonderful to know.. thank you for sharing your feedback.. appreciate it 🙂
Fay says
Made this today. It was absolutely perfect. My new favourite bread recipe!
sushma iyer says
Yay Fay!! that sounds great thank you for sharing your feedback 🙂
Anu says
Hi, I tried your recipe following the instructions to T however my bread turned out hard and not fluffy. What could have went wrong?
sushma iyer says
Hi Anu.. there could be a couple of reasons and it is hard to point out. Usually a bread turns hard if it was not kneaded well so there is no gluten formation and no structure, if it was over-proofed so the yeast died and didnt help in the rise while baking, if the ingredients were not the right temperature so that could also deactivate the yeast, if the yeast is old and not fully activated, etc. My advise would be to give it a try one more time and keep checking at every step.
Ruth Isaac says
Thanks a million for this marvelous recipe. I have tried more than 50 different recipes for the perfect semolina bread. Yours is the only one that passed the test.
Ruth Isaac
Kuala Lumpur
🙏🙏🙏
sushma iyer says
Hi Ruth.. that is so good to know.. glad to see that you enjoyed the bread.. thank you for sharing your feedback with me.. appreciate it 🙂
Camila says
The best bread I ever done. Super simple and tasty! My new favorite recipe! Thank you
sushma iyer says
That is so good to know.. Thank you Camila
Supriya says
Lovely recipe. I tried this many times and everytime results were Lovely. I have a doubt, can we make baked vada paav (stuffed loaf) with this recipe?
sushma iyer says
Thats amazing.. glad you are liking it.. and yes you can make baked vada pav with this 🙂
Supriya says
Amazing recipe. Tried a lot other options for baking healthy bread and this recipe gave the most wonderful result. Baked it two times and my family loved it!!!!
sushma iyer says
Wo hoo.. That is awesome Supriya.. So pleased to learn that everyone enjoyed the bread. Thank you for sharing your wonderful feedback with us 🙂
Regards
Sushma
Hiral says
I don't have an oven...
Please guide me how can i make this bread without oven...
Thanks in advance...
sushma iyer says
Hi Hiral..
I have not tried this recipe in a cooker or a kadahi.. But generally just like an oven you have to preheat the kadahi and then place the bread tin inside it. Timing would be around the same but again I am not too sure you might have to experiment if you plan to try.. sorry about that..
Bens says
Hi Sushma, tried this bread and it came out soo soft and with a beautiful crust and crumb. Thanks for this wonderful recipe. Can you please let me know your cup measurement 200 or 250ml. I went with 420 gms weight.
sushma iyer says
Hi Bens.. Yay!!! I am so pleased to read through your comment.. glad to know that you liked the recipe.. And my 1 cup flour is 120 gms and 1 cup liquid is 250ml 🙂 hope this helps..
Regards
Sushma
Vidya says
I tried this semolina bread recipe. It was awesome! i used a 200ml cup, The 420gms rawa(semolina) i took, measured 2.5 cups. As i kneaded, it absorbed 1,5 cups warm water. i powdered the semolina in the grinder, the bread was excellent Thank you
sushma iyer says
Hi Vidya.. so pleased to see your feedback.. glad to know that the measurements worked out for you.. thank you
Sanjay Chopra says
I have made this bread three times & my grandson,daughter-in-law loved it.
But I made this with "no knead" process
Thank you
sushma iyer says
Hi Sanjay.. Thank you.. glad to know you liked it 🙂
Anusha says
Hi Sushma,
Thank you for the wonderful recipe. Can we use this semolina dough to make dilpasand?
sushma iyer says
Hi Anusha.. Not tried it yet.. Sorry
Sajini says
Hi .how much is 3.5 cups in grams ?can u pls guide
sushma iyer says
Hi Sajini..
It is 420 gms Thank you
Janhavi says
Tried second time, my family is in love with this white bread!!
Thank you,
Janhavi
sushma iyer says
That is amazing Janhavi.. Thank you for sharing your feedback with us.. appreciate it 🙂
Regards
Sushma
Niharika says
I have a tin larger than 9 inch, might be 12 inches. Then should it would take longer to bake and i would also double the recipe.
sushma iyer says
Hi Niharika..
I would say try 1.5 times the recipe. Your tin size is too long for this recipe
Vinitha Ninan says
Excellent recipe. Tried it and it came out just perfect! Thanks for the great tips too!
sushma iyer says
Hi Vinitha.. That sounds great thank you for taking the time to try it out and share your wonderful experience with us. appreciate it..
Regards
Sushma
Nutan says
Hi Sushma,
Very nice bread. planning to make. Just want to know which instant yeast do you use and is it available online?
Thank you
Nutan
sushma iyer says
Hi Nutan..
I live in New Zealand and use Edmonds. And sorry I don't have any online links for the same.
Regards
Sushma
Ritu mutiar says
Hi sushma ..I make many of your recipes and they always turn out good so thought of trying bread for the first time..my bread has cracked from sides in the oven after twenty five minutes of baking. What could be the reason ..is my loaf bread not too tall be the reason
sushma iyer says
Hi Ritu..
I have a video explaining exactly why this happens.. Here is the link to the same: https://www.youtube.com/watch?v=ljyXvC-HUJ4&t=182s Let me know if you still have any doubts.
Regards
Sushma
Dr Roshan Bhakta says
Hi Sushma, loved your recipe and most of all your description & scientific explanation like how kneading helps to create the gluten etc. You are definitely a trained professional. You've inspired me to try baking of which I've no experience. I'm a medical professional now in retirement,wanting to enjoy my hobbies.
sushma iyer says
Hello Dr.Roshan..
I am so pleased to hear from you.. glad to know that you are liking the science and appreciating the art behind baking.
I am also so inspired by your willingness to always keep on learning. Thank you for making me feel more productive for the day ahead.. Appreciate your time.. hope you get more value going forward.
Regards
Sushma
Payal Jain says
I am so thankful to you for sharing this foolproof recipe....it turned out amazing..i will be baking it more often now...thanx once again..
sushma iyer says
Hi Payal..
that is amazing.. so pleased to read through your comment.. thank you for sharing 🙂
Xhipra says
Excellent recipe. Can I add all the ingredients in a bread maker to make the bread?
sushma iyer says
Hi Xhipra. sorry I do not have experience with a bread maker so wont be able to help you
Mapleleaf 74 says
Yes, you can, just follow the cycle for basic white bread.best is before adding your ingredients just spray inside of the Bread machine container with cooking spray
Parker says
I notice that you want to make this in a bread maker. Just follow the stps as U do for bread made in a breadmaker. First the liquid, then finally the flour ? semolina, and yeast on top.As you must be aware that water goes in first, then the sugar, salt oil and last yhe flour yesst and milk powder you can add to the flour or semolina
Good luck
Alisha says
Hello Sushma
Cannot thank you enough for the recipe
I made pav last night
And bread too with this recipe
Few questions
1. I made pav in Air fryer dint get your kind dome or oven spring . Mine is Philips
Can you suggest right get temperature.. I baked at 180 degree Celsius
2. Three and a half cups made me use entire pack of 200 grams .. Is it right ?
My 1 cup = 240 ml
3. Can you please Share any online link Or company to understand how to buy Chiroti rava ? When I am typing Chiroti it’s showing durum wheat but according to my knowledge Chiroti is idli rava or rava made using rice . Please correct if I am wrong ....
Hope you keep sharing more such wonderful recipes and really helpful videos with valuable tips
sushma iyer says
Hi Alisha..
So pleased to learn that you had a successful attempt at making pav out of this recipe.. Thank you for the wonderful feedback.. appreciate it.
To answer your queries:
1. I don't own an Air Fryer and so never baked anything in it. The temperature that I have given here works for an oven or an OTG or would also work for Microwave convection mode.
2. It does not matter which cup size you are using. Suppose your 1 cup is 240ml then all the other that is 1/2 cup and 1/4 cup would be calibrated according to that so it should not make much of a difference in a recipe. But just to let you know my 1 cup flour = 120 gms and 1 cup Water = 250 ml.
3. All Rava is a durum wheat product and a form of semolina. You can use any rava for this recipe as a matter of fact. If it is not fine you can pulse it and then use. I did a quick check on Amazon and found so many brands selling it. It might be named as Bareek Rava or Fine Sooji. You can choose any.
Hope this helps
Regards
Sushma
Alisha says
Really great ful for your reply Sushma ji
I did typing error I used 500 grms packet of suji was why I was surprised at the quality used . Thank you for sharing your measurements
I will check right away from Amazon again . Thank you for clearing my confusion of Chiroti rava
Thanks a lot for your reply 😇🙏🏻
Parker says
In an airfryer use the one for cake setting,25 minutes at 400 should be just right.
Sangeetha says
Hi sushma
Can I make this recipe without yeast?
If yes, then how can I replace it?
sushma iyer says
Hi Sangeetha..
Sorry but I have not made this with a yeast replacer..
Nitika says
Can you please share the amazon link of baking loaf pan. I am unable to decide which one is good and cant find enough variety of aluiminium mould.Thanks
sushma iyer says
Hi Nitika..
The one on Amazon is not aluminium. I too looked for it. You can look for Pullman Loaf tins on Amazon. That's the one I am using. Order any if it is urgent or else wait till the lockdown ends and get it from ARIFE that's where I got it from.
Regards
Sushma
Shoba says
Hi Sushma. Good explanation for beginners. Thanks. One quick question. When you proof it the second time(in the bread pan), Do we leave it in counter top or have to keep in instant pot. Sorry, if it’s silly. Real beginner here.
sushma iyer says
Hi Shoba..
Please don't be sorry.. It is fine.. May be I should have been clear.. so you leave it on the counter top itself as the bread pan won't fit in the pot. Glad to know that you liked the recipe. Thank you
Regards
sushma
Bhumika Patel says
Hi, my bread cracked after I took out. The proofing rising was all good but when I baked it came out cracked and fall apart from the sides.
sushma iyer says
Hi bhumika..
There are two reasons why this happens: Either the bread is too dry or too wet.. If you read the post I have explained about that.. How much water did you add??
DIPA PATEL says
hi shshma mam 1cup rava how much grams pls tellme .3.5 cup rava how much grams? 1 cup water how much ml uses?
sushma iyer says
Hi Dipa..
1 cup water is 250 ml and 1 cup rava is 120 gms
Regards
Sushma
dipa says
thank u mam total 420 grams rava needed right
Shipra says
Can we make buns with this receipe?
sushma iyer says
Hi Shipra.. Yes you can
Regards
Sushma
Subhalakshmy says
Excellent explanation of how to bake the bread. Thank you😍
sushma iyer says
Hi Subhalakshmy..
So pleased to learn that you liked what I have shared. Thank you for sharing your wonderful feedback with us.. appreciate it
Regards
Sushma
Priyanka gupta says
Hi ! Awesome recipe will surely try. Wanted to know if we have semolina that has been partially roasted on dry flame can we use that? Or we need unroasted one from the packet?
Thanks in advance !
sushma iyer says
Hi Priyanka..
Thank you.. glad to know that you liked the recipe.. And for this you cannot use roasted rava.. You need unroasted only 🙂
Regards
Sushma
Sony says
Hi thanks for the detailed recipe.. cleared all my doubts .. so kind of you.. would like to know one more thing ,is it ok to use the hand blender with dough hooks to knead the dough?
sushma iyer says
Hi Sony..
Yes definitely you can use that if you have one.
Regards
Sushma