
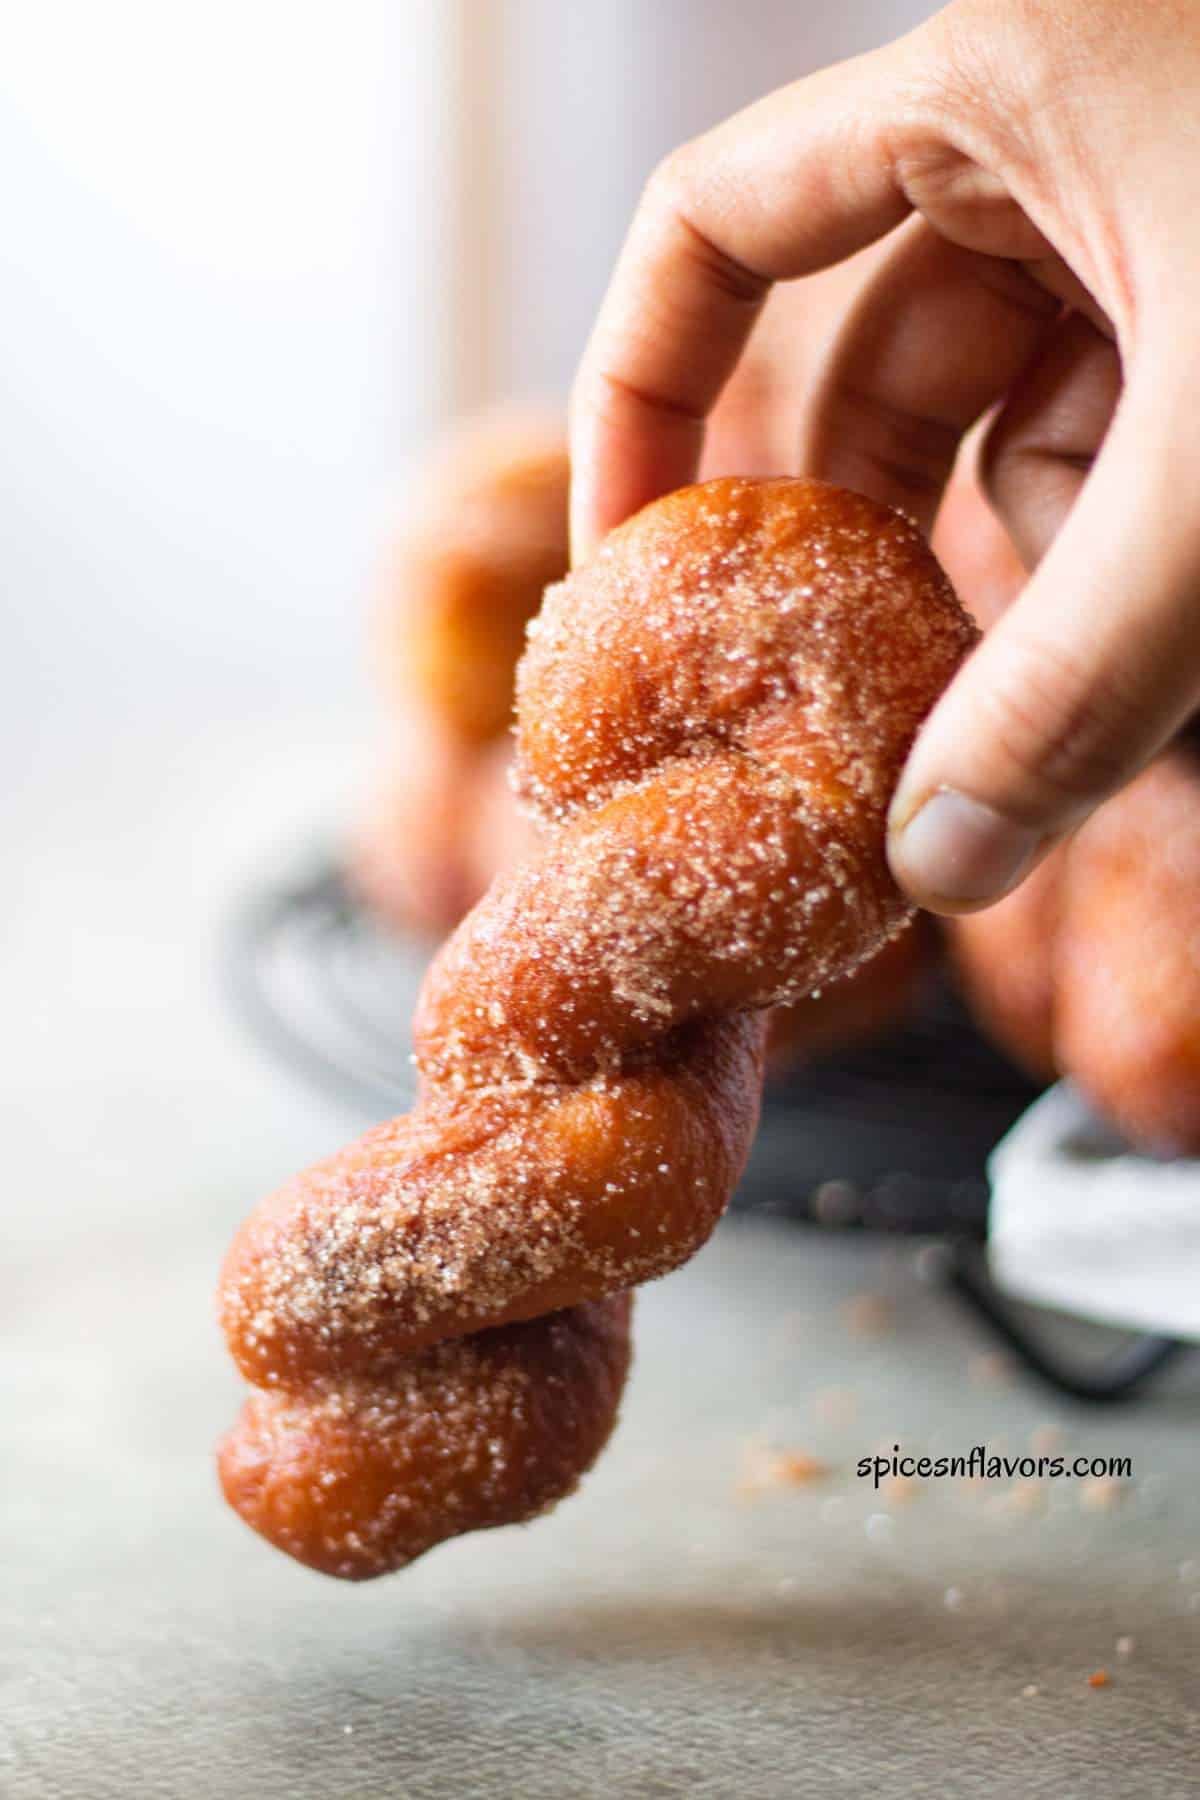
Are you craving for a delectable treat? This twisted doughnut recipe yields soft and fluffy donuts, known as kkwabaegi, making them the perfect favorite snack with their delicious twisted shape and hot, fresh goodness.
What are twisted donuts?
Twisted donuts are a popular type of fried dough pastry found across many Asian countries, each with different names and variations. In China, they are known as mahua, in the Philippines, they go by shakoy, in Japan, they're called sakubei, and in Korea, they are referred to as kkwabaegi.
They are made from a sweet, yeast-based dough; that is rolled into long ropes, twisted into a spiral, and deep-fried until golden brown.
The result is a light, airy, and slightly chewy donut that can be coated in sugar or glaze.
Known for their unique shape and delicious flavor, these donuts are often enjoyed as a snack or dessert.
Ingredients
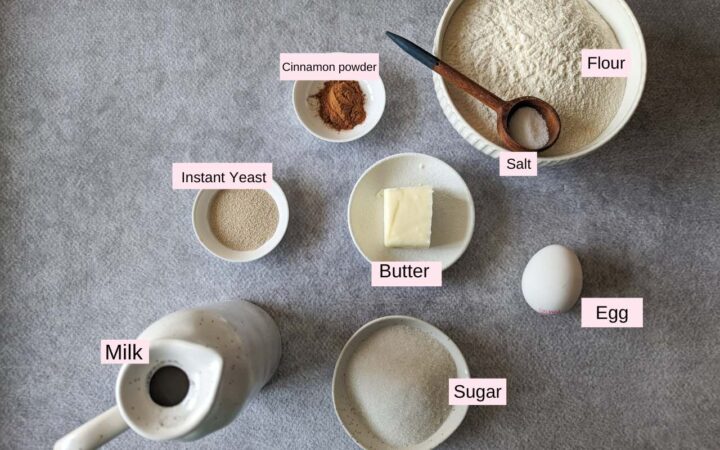
- 1 tsp Salt
- 4 cups Bread Flour
- 3 tbsp Sugar
- 2 tsp Instant Yeast
- 1 egg
- 1 cup Lukewarm Milk
- 3 tbsp Butter
Print the full recipe from the recipe card shared at the end of the post.
Ingredient Notes:
- Bread Flour: Has a higher protein content than all-purpose flour, which helps to develop the gluten needed for a chewy texture.
- Instant Yeast: I always prefer and recommend Instant yeast for all my bread recipes as it does not need to be dissolved and activated in water before mixing (unlike the active dry yeast) with the dry ingredients making it easier to work with.
- Egg: Adds richness and moisture to the recipe. You can refer to our finger doughnut recipe for egg-free version.
- Milk: Preferably use whole milk and make sure it is lukewarm to the touch.
- Butter: Adds flavor and tenderness to the dough. Ensure it's at room temperature for easier mixing.
Step by Step Instructions
Step 1: Prepare the Dough
In a large mixing bowl, combine 1 tsp salt, 4 cups of bread flour, 3 tbsp sugar and 2 tsp instant yeast. Mix these dry ingredients well using a whisk or a spoon. This helps distribute the yeast and sugar evenly throughout the flour.

Make a well in the centre and add the milk and egg to it.
Stir the mixture with a wooden spoon or a spatula until a dough forms. It will be sticky and shaggy at first (images 1 and 2).
Step 2: Kneading the Dough
Turn the dough out onto a lightly floured working surface.
Begin kneading by pushing the dough away from you with the heel of your hand, then folding it back over itself and repeating. Continue kneading for about 10 minutes.
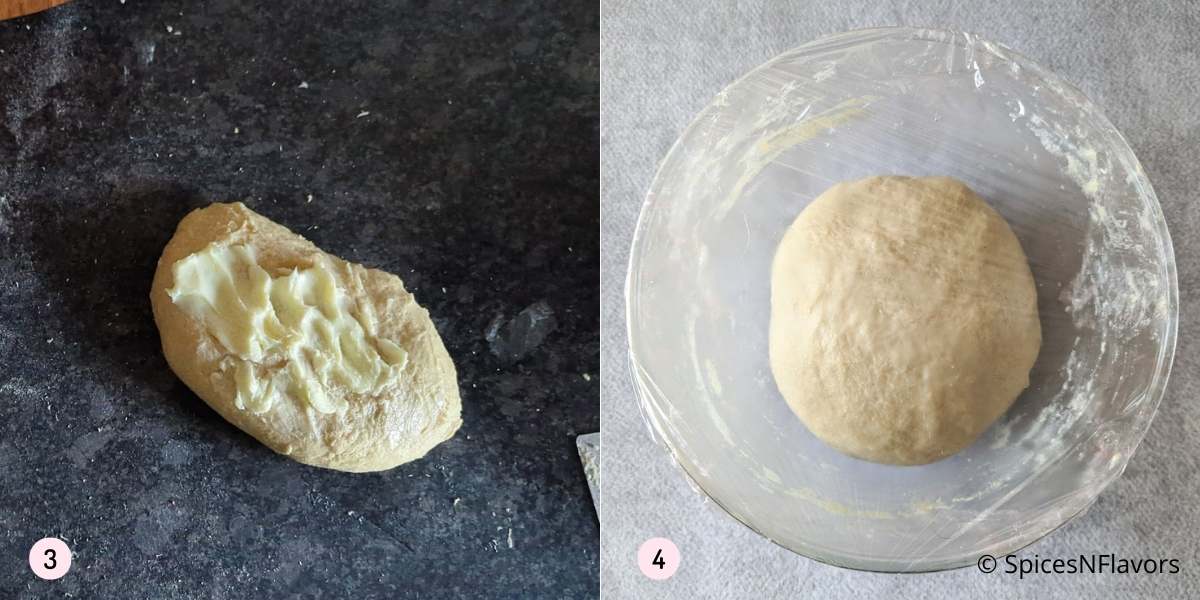
Gradually incorporate the butter into the dough and continue kneading for about 6-8 minutes, or until the dough is smooth and elastic and the dough feels tacky to the touch (images 3 and 4).
If using a stand mixer, add all the ingredients in the order listed, except for the butter. Knead on medium speed using a dough hook attachment for 6 minutes. Then, add the butter and knead for another 4 minutes, until you achieve a smooth and supple dough.
Step 3: First Proofing

Place the dough in a lightly greased bowl (you can use a bit of oil or cooking spray). (image 5)
Cover the bowl with a clean kitchen towel or plastic wrap and let the dough rise in a warm area for about an hour, or until it has doubled in size (image 6).
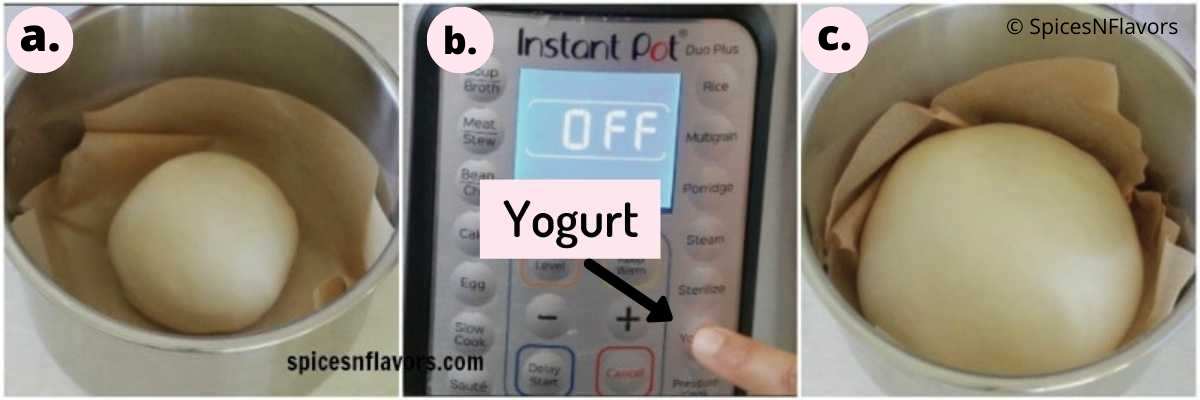
How to Proof Dough in the Instant Pot
Another way to proof the dough is by using an Instant Pot.
Lightly grease the inner pot with oil, place the dough inside, and cover it with a glass lid. Select the Yogurt Mode and set the timer for 30 minutes.
I have an in-depth post on Instant Pot Bread Proofing, which can be used to proof any type of bread dough.
Step 4 - Shaping
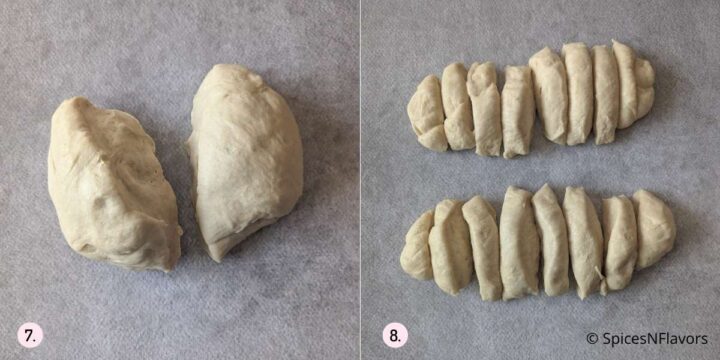
Once the dough has risen, punch dough to release any air bubbles.
Divide the dough into 16 equal pieces (images 7 and 8).
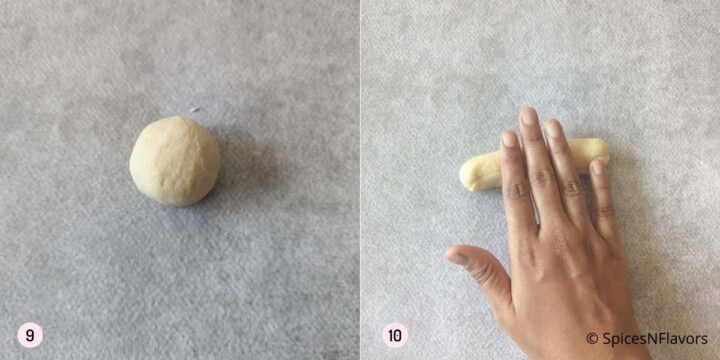
Roll each piece into a long rope of around 12 inches (images 9,10 and 11).
Method 1:

In method 1, bring the ends together to form a semicircle (image 12).
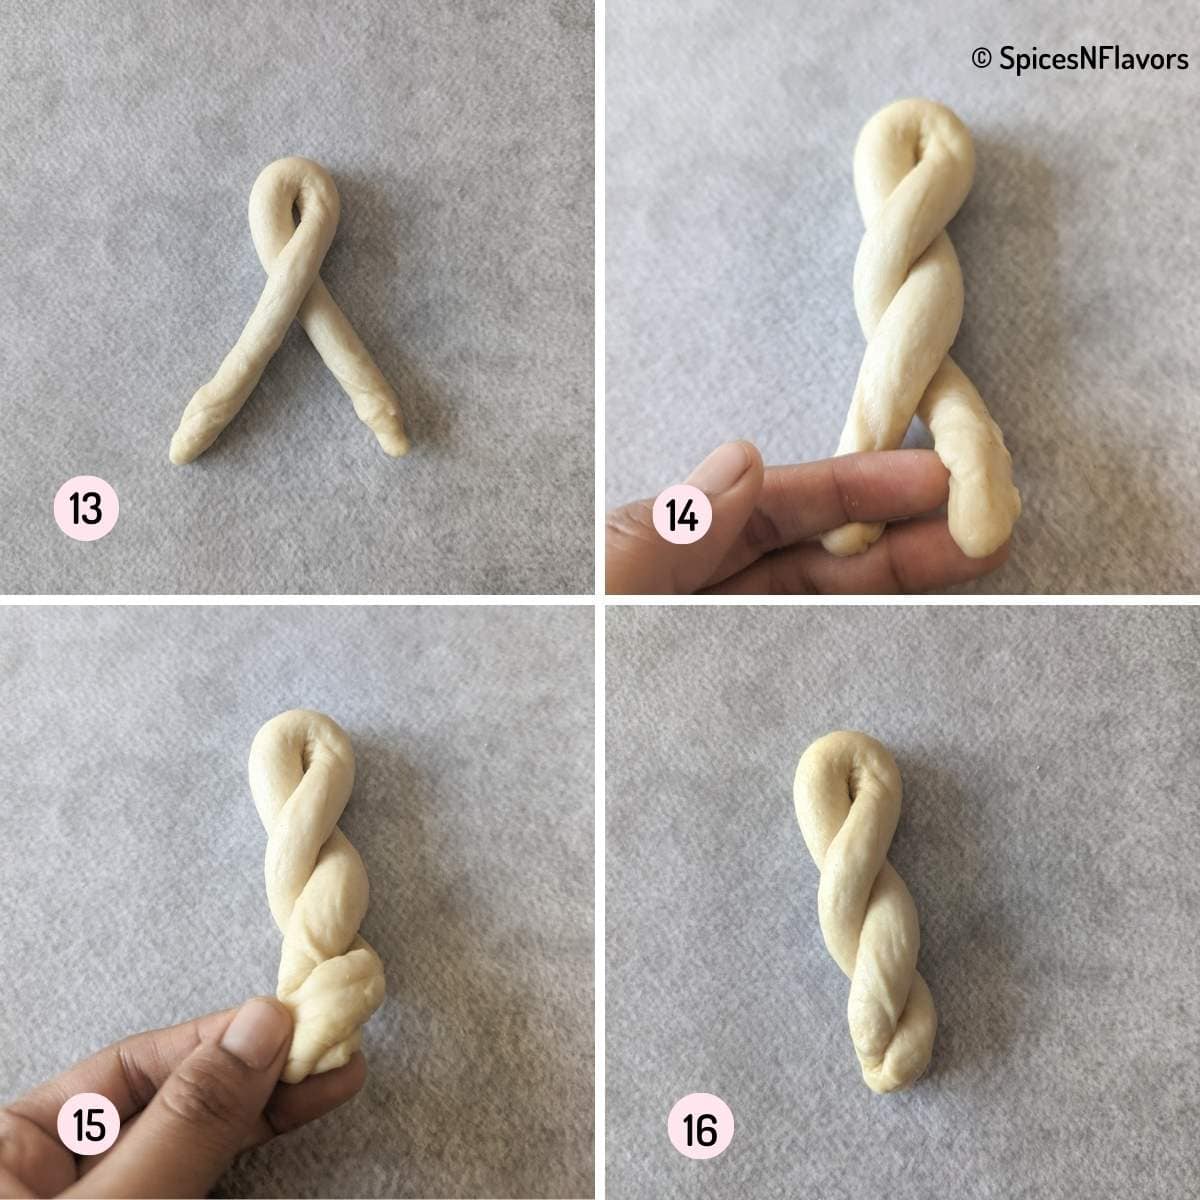
Now loop one on top of the other, creating spirals. Press the ends together firmly (images 13-16).
Method 2:
- The key to twisting the dough is rolling the two ends of a piece of dough in opposite directions. Roll one side of the dough away from you and the other towards you. This creates tension in the dough.
- When you lift the twisted dough up by its two ends, you’ll notice that it naturally twists into shape. You can then give it a little help to form the perfect shape for twisted donuts.
No matter which method you follow, make sure that you get three loops on top of each other, creating a long twisted dough.
Step 5 - Second Rise:
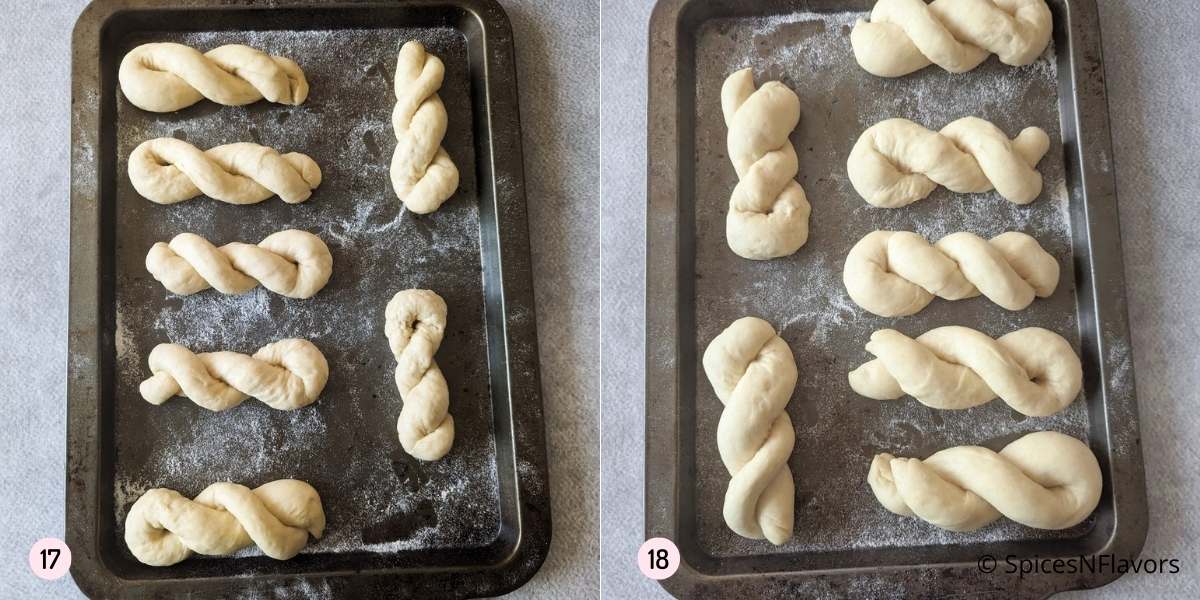
Place the twisted donuts on a baking sheet lined with parchment paper or dusted with some flour (image 17).
Cover them with a kitchen towel and let them rise again for about 20-30 minutes, or until they look puffy (image 18).
Step 6 - Prepare the Cinnamon Sugar Mixture
Meanwhile, in a wide-mouth bowl or plate mix sugar and cinnamon to form the mixture and set aside.
Step 7: Heat the Oil
- Also pour oil into a deep fryer or a large, heavy-bottomed pot to a depth of about 2 inches.
- Heat the oil to 350°F (175°C).
- If you don’t have a thermometer, test the oil temperature by dropping a small piece of dough into it. The dough should not float to the top right away. If it does, the oil is too hot. The dough should rise slowly and steadily, surrounded by small bubbles.
Step 8: Fry the Donuts
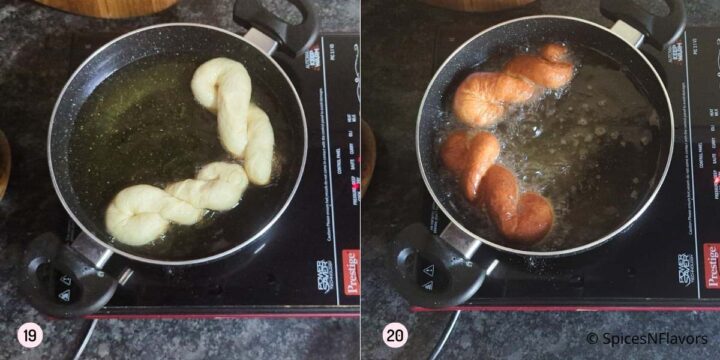
When frying, place the donuts upside down into the hot oil, meaning the top part should go in first (image 19).
Fry each donut carefully, one at a time, for about 2-3 minutes per side, or until they are a light golden brown (image 20).
A helpful trick is to cut the parchment paper beneath each donut and use the paper to gently lower the donut into the oil.
Once fried, use a slotted spoon to remove the donuts and transfer them to a plate lined with paper towel to drain any excess oil.
Step 9: Glaze the Donuts
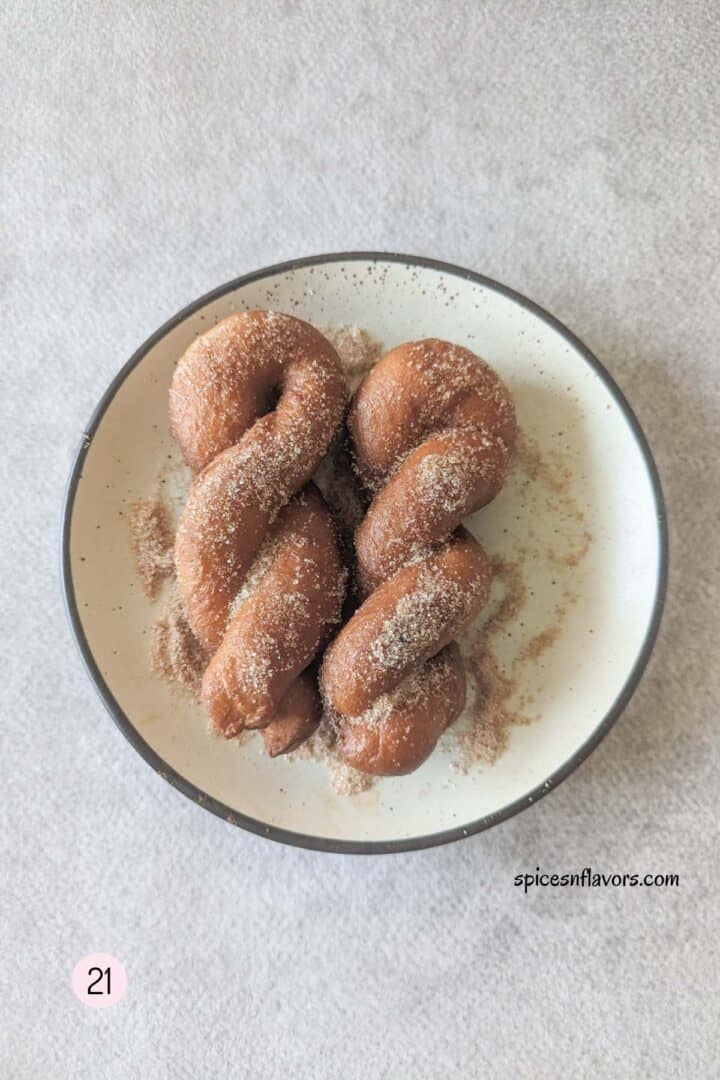
While the donuts are still warm coat them with the prepared cinnamon sugar mix (image 21).
These fried doughnuts are at their finest right after you make them, with a spongy, soft interior and steam rising as you break them apart.
I like to prepare a big batch so I can enjoy the fresh, warm kkwabaegi immediately and then freeze the extras.
Later, I just let them thaw at room temperature for a tasty treat or dessert.
Storage Instructions:
- Keep any leftover donuts in an airtight container at room temperature for up to 2 days. Make sure it is completely cooled before storing.
- They are best enjoyed fresh, so try to eat them within this time for the best flavor and texture.
Freezing Instructions:
If you want to keep the donuts for a longer period, freeze them. Place the cooled donuts in a single layer on a baking sheet and freeze until solid.
Transfer the frozen donuts to a resealable plastic bag or airtight container and store them in the freezer for up to 3 months.
Thawing Frozen Donuts:
When you’re ready to enjoy a frozen donut, let it thaw at room temperature for about 30 minutes.
For a bit of extra freshness, you can warm the donut in the microwave for about 10-15 seconds or reheat in an oven at 350°F (175°C) for 5 minutes or in a toaster oven for a few minutes.
Pro Tips:
- For making homemade bread, I prefer using Instant Yeast as it can be mixed directly with the rest of the ingredients without needing to be activated first. This simplifies the process and saves time.
- Use lukewarm milk at around 100°F (38°C) to form the yeasted dough. If the milk is too hot or too cold, it can prevent the yeast from working properly and affect the dough’s rise.
- Make sure the oil is heated to 350°F (175°C) for deep frying. If you don’t have a thermometer, you can test the oil by dropping a small piece of dough into it. The dough should rise slowly with small bubbles. If it rises too quickly, the oil is too hot.
- If the oil is too hot, the donuts will brown quickly on the outside while remaining undercooked inside. So temperature of the oil is crucial for achieving perfectly cooked donuts.
- Avoid overcrowding the pan when frying. Fry the donuts in small batches to keep the oil temperature consistent. Overcrowding can lower the temperature, resulting in soggy donuts.
- When twisting the doughnuts, make sure the center of the dough is slightly thinner than the edges. This technique helps create an even, tight twist that is characteristic of Korean twisted donuts.
- For longer twisted doughnuts, stretch the dough and perform the twist three times to create a more pronounced and attractive twist.
- Do not coat the hot donuts in the cinnamon-sugar mixture right away, as this can melt the sugar and make it sticky. Let the donuts cool slightly before coating.
- Use a deep-frying pot or a heavy-bottomed pan for even heat distribution during frying. A slotted spoon or spider is essential for flipping and removing the donuts from the oil.
- For easy handling, cut the parchment paper under the doughnuts and use it to gently lower them into the hot oil.
Frequently Asked Questions
If your donuts ended up greasy, here’s what might have gone wrong and how to fix it:
Oil Temperature Was Too Low: If the oil is not hot enough, the donuts will absorb too much. Always heat your oil to 350°F (175°C) for frying. If you don’t have a thermometer, you can test the temperature by dropping a small piece of dough into the oil. It should float up slowly with small bubbles around it. If it rises too quickly, the oil is too hot.
Overcrowding the Pan: Frying too many donuts at once can lower the oil temperature, resulting in greasy donuts. Fry your donuts in small batches to maintain the right temperature.
Improper Drainage: Make sure to drain the donuts on a wire rack or paper towels to get rid of excess oil after frying. This step is crucial to prevent the donuts from becoming greasy.
Dry donuts can be a common issue, but there are a few ways to ensure your donuts stay moist and delicious.
Check Dough Consistency: If your dough is too dry, it will result in dry donuts. The dough should be slightly tacky but not overly dry. Add a bit more milk to achieve the right consistency. Also, keep the dough covered with a damp towel all the time especially the second time of rising to prevent it from drying out.
Avoid Overcooking: Fry the donuts for about 2-3 minutes per side, or until they reach a light golden brown color. Overcooking can dry out the donuts, so keep a close eye on them while frying.
Related Recipes:
Wish to Join US for the love of BAKING? Subscribe to our newsletter and Youtube channel. Follow along on Facebook, Instagram, and Pinterest for all the latest updates!

Soft and Fluffy Twisted Doughnut Recipe - kkwabaegi
Ingredients
- 1 tsp Salt
- 4 cups (480 gms) Bread Flour
- 3 tbsp Sugar
- 2 tsp Instant Yeast
- 1 Egg
- 1 cup (250 gms) Lukewarm Milk
- 3 tbsp Butter
Instructions
Step 1: Prepare the Dough
- In a large mixing bowl, combine salt, bread flour, sugar, and instant yeast. Mix well to ensure the yeast and sugar are evenly distributed.
- Make a well in the center of the dry ingredients. Add the milk and egg to it. Stir the mixture with a wooden spoon or spatula until a shaggy dough forms. The dough will be sticky at first.
Step 2: Knead the Dough:
- Turn the dough out onto a lightly floured surface. Begin kneading by pushing the dough away from you with the heel of your hand, folding it back over itself, turning, and repeating. Continue kneading for about 10 minutes.
- Gradually incorporate the softened butter into the dough, kneading for an additional 6-8 minutes until the dough is smooth, elastic, and slightly tacky to the touch.
- Place the dough in a lightly greased bowl, cover with a clean kitchen towel or plastic wrap, and let it rise in a warm area for about an hour, or until it has doubled in size.
Step 3: Shaping
- Once the dough has risen, punch it down to release any air bubbles. Divide the dough into 16 equal pieces, each weighing approximately 52 grams.
- Roll each piece into a long rope, about 12 inches in length.
- Method 1: Roll the two ends of the dough in opposite directions, one side away from you and the other towards you, to create tension. Lift the dough by its ends, and it will naturally twist into shape. Assist as needed to form the perfect twist.
- Method 2: Roll the dough into a 12-inch rope, keeping the ends slightly thicker than the center. Loop the ends on top of each other to create spirals, pressing the ends together firmly. Aim for three loops to form a longer, twisted doughnut.
Step 4: Second Rise
- Place the twisted doughnuts on a baking sheet lined with parchment paper. Cover them with a kitchen towel and let them rise for about 20-30 minutes, or until puffy.
Step 5: Prepare for Frying
- Mix the sugar and cinnamon in a wide-mouth bowl or plate and set aside
- Pour oil into a deep fryer or large, heavy-bottomed pot to a depth of about 2 inches. Heat the oil to 350°F (175°C). If you don’t have a thermometer, test the oil with a small piece of dough. It should rise slowly and steadily with small bubbles.
Step 6: Fry the Doughnuts
- Carefully place the doughnuts upside down into the hot oil, one at a time. Fry each doughnut for about 2-3 minutes per side, or until light golden brown.
- Use a slotted spoon to remove the doughnuts from the oil and transfer them to a plate lined with paper towels to drain excess oil.
Step 7: Coat with Cinnamon Sugar
- While the doughnuts are still warm, coat them in the prepared cinnamon sugar mixture.
- These doughnuts are best enjoyed fresh and warm, with a spongy, airy interior and a crispy exterior.
Notes
- For making homemade bread, I prefer using Instant Yeast as it can be mixed directly with the rest of the ingredients without needing to be activated first. This simplifies the process and saves time.
- Use lukewarm milk at around 100°F (38°C) to form the yeasted dough. If the milk is too hot or too cold, it can prevent the yeast from working properly and affect the dough’s rise.
- Make sure the oil is heated to 350°F (175°C) for deep frying. If you don’t have a thermometer, you can test the oil by dropping a small piece of dough into it. The dough should rise slowly with small bubbles. If it rises too quickly, the oil is too hot.
- If the oil is too hot, the donuts will brown quickly on the outside while remaining undercooked inside. So temperature of the oil is crucial for achieving perfectly cooked donuts.
- Avoid overcrowding the pan when frying. Fry the donuts in small batches to keep the oil temperature consistent. Overcrowding can lower the temperature, resulting in soggy donuts.
- When twisting the doughnuts, make sure the center of the dough is slightly thinner than the edges. This technique helps create an even, tight twist that is characteristic of Korean twisted donuts.
- For longer twisted doughnuts, stretch the dough and perform the twist three times to create a more pronounced and attractive twist.
- Do not coat the hot donuts in the cinnamon-sugar mixture right away, as this can melt the sugar and make it sticky. Let the donuts cool slightly before coating.
- Use a deep-frying pot or a heavy-bottomed pan for even heat distribution during frying. A slotted spoon or spider is essential for flipping and removing the donuts from the oil.
- For easy handling, cut the parchment paper under the doughnuts and use it to gently lower them into the hot oil.
Leave a Reply