
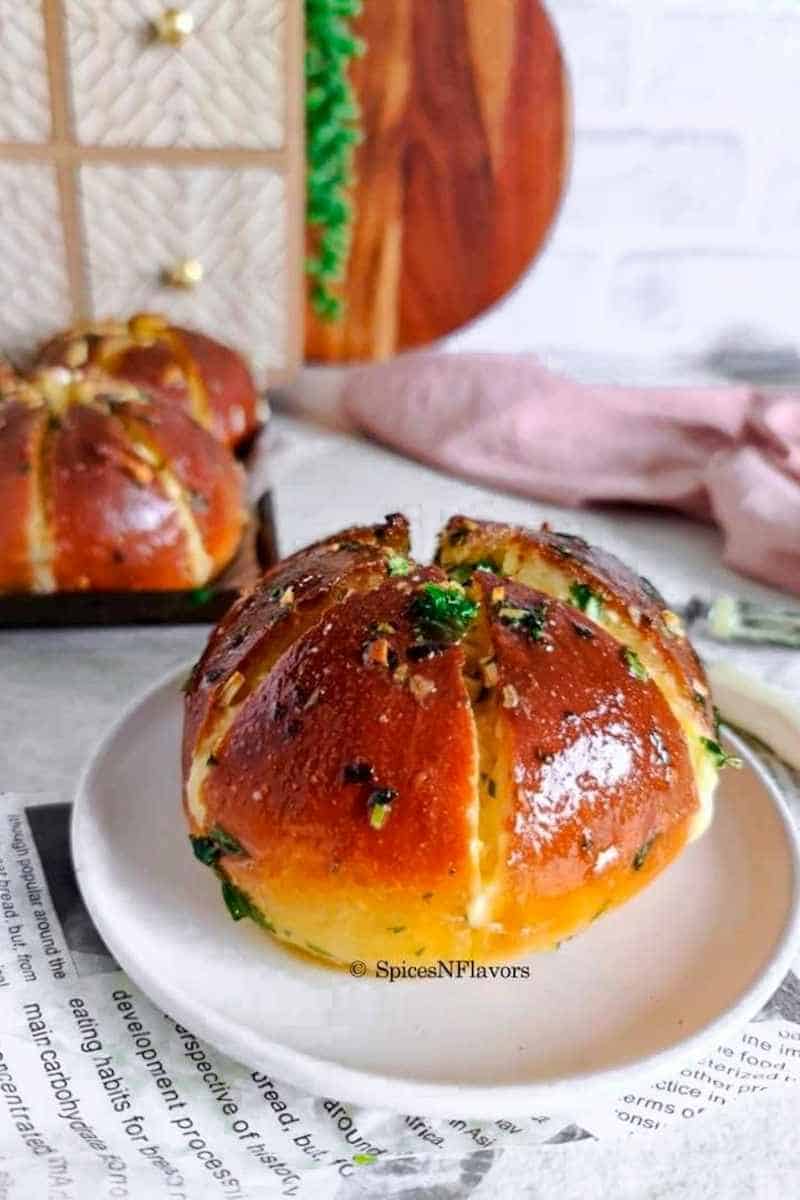
This Korean Cream Cheese Garlic Bread is your favourite garlic bread taken up a notch. I bet you would have never tasted anything like this - the soft and fluffy bread filled with a sweet and savoury buttery filling would leave you salivating for more!!
I have got you covered with an eggless garlic bread recipe and also few easy shortcuts to make it for a large crowd. Yes so perfect for Thanksgiving or Christmas Party.
What is Korean Cream Cheese Garlic Bread?
A classic Garlic Bread is made using a baguette that is then brushed with a garlic butter spread often flavoured with salt and fresh herbs. This Korean Cream Cheese Garlic Bread on the other hand is a classic twist to the regular garlic bread which incorporates an additional sweetened cream cheese filling and is made in a burger bun shaped bread. No wonder it is such a famous street food recipe.
How is Korean Cream Cheese Garlic Bread different than a regular Garlic Bread?
- Garlic Bread is made using a baguette bread whereas this Korean Garlic Bread is made using a brioche dough bun.
- The Korean Bread is filled with a whipped sweetened cream cheese filling giving it a nice cheesy and moist texture which is missing in the regular version. Even the Cheesy Garlic Bread version is different to this cream cheese filling.
- Garlic Butter Sauce made for the Korean version is a richer and custard-y sauce due to the addition of milk, eggs and few other enrichments whereas for the regular garlic bread we just use melted butter, little salt and garlic combined with few herbs if needed.
To put it across, Korean Cream Cheese Garlic Bread is a richer and cheesier version of the regular garlic bread.
Since it is loaded with cheese and butter, you can not consume more than 2-3 slices in one go so making it perfect to be made for a large crowd.
Why try this recipe?
- The Korean Garlic Cheese Bread has an unique flavour combination - the soft bread dough, sweetened cheese filling and the salty buttery garlic sauce makes it worth a try.
- From 1 Korean Garlic Bun you get 6 wedges which makes 3 servings. This recipe makes 4 buns so 24 wedges that is 12 servings. And hence makes a great Appetizer for any party of choice.
- Everything can be made ahead of time.
- If using a store bought bread, the recipe gets done in 10-15 mins.
- You can never go wrong with a cheesy bread recipe.

Ingredients needed:
This recipe has 3 parts:
- Preparing the Brioche Bun
- Sweetened Cream Cheese Filling
- Garlic Butter Custard Sauce
Brioche Bun Ingredients

- Yogurt: Yogurt here acts as a substitute to eggs. You can use 1 egg instead of yogurt in this recipe.
- Flour: Bread flour is the preferred flour, but feel free to sub with APF if Bread Flour is not available.
- Instant Yeast: I prefer and recommend using Instant Yeast as it can be added directly to the rest of the ingredients without having the need to activate it.
- Milk Powder: Is a form of enrichment. I use full fat milk powder but again skip it if unavailable.
For the Filling:
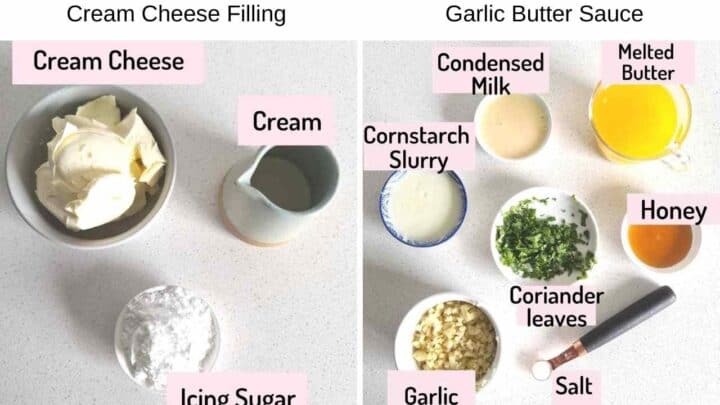
- Cream: I recommend using Dairy Whipping Cream or heavy cream for a richer and flavourful taste.
- Cornstarch Slurry: Acts as the egg replacement for custard sauce base. You can use 1 egg instead.
- Nutritional Yeast: Adding a tbsp of nutritional yeast to the garlic butter sauce would increase its flavour quotient. But since it cannot be served to little kids I skipped using it.
Egg Substitutions
This famous Korean Street Food Bread recipe traditionally has eggs in it. I have shared the egg-free version. So how do to substitute eggs?
When you understand the role of eggs it then becomes much easier.
- Eggs are used in the bread dough whenever you want to enrich it and to get a much softer and richer end product. The same can be achieved by substituting with yogurt.
- And the second egg was used in the garlic butter sauce to make it more custardy and to bind everything whenever the role is binding we can use a simple cornstarch slurry to achieve it.
Step by Step Instructions:
Step 1: Prepare the Korean Garlic Bun
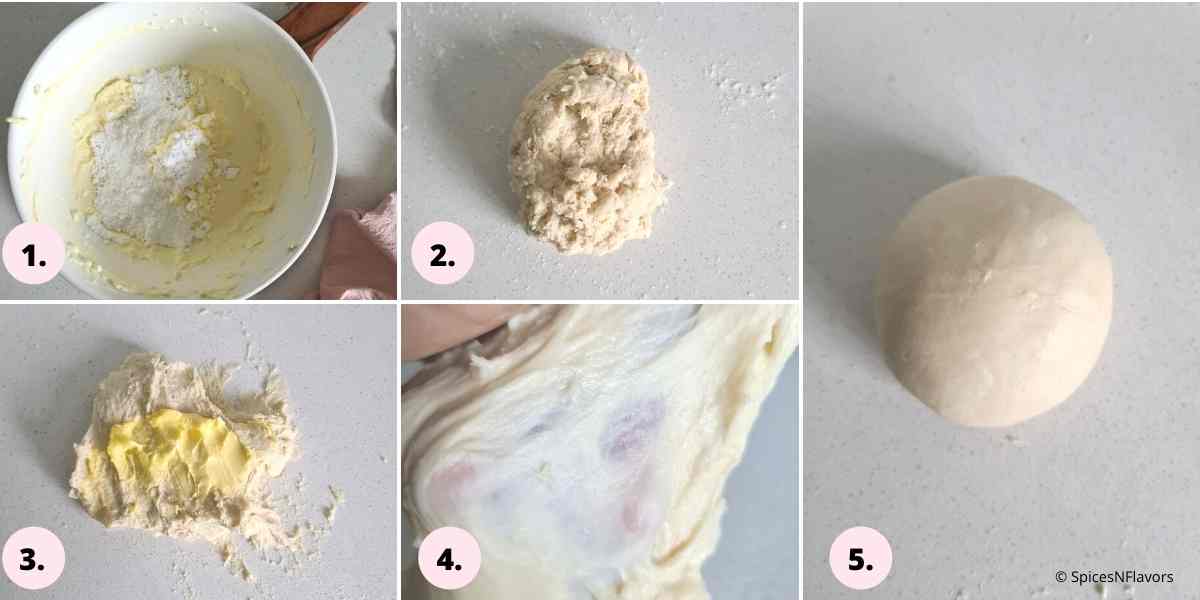
- Dump all the ingredients in a bowl starting with milk and yogurt. Give a gentle mix and add the dry ingredients starting with sugar, yeast, flour, milk powder and salt (image 1).
- Combine to form a shaggy mass of dough (image 2).
- Transfer to your worktop and knead for 5 mins. Then incorporate the softened butter (image 3) and knead until you get a soft and elastic dough. It took me around 20 mins to reach this stage. You can also try the window pane method to confirm (image 4-5).
- If using a stand mixer add the ingredients. Knead on med to high speed for 6 mins, then add the softened butter and knead again for another 8 mins.

- Lightly oil the same bowl in which you kneaded the dough, place the dough into it, cling wrap and allow for first proofing which is 1.5 hours. (image 6-7)
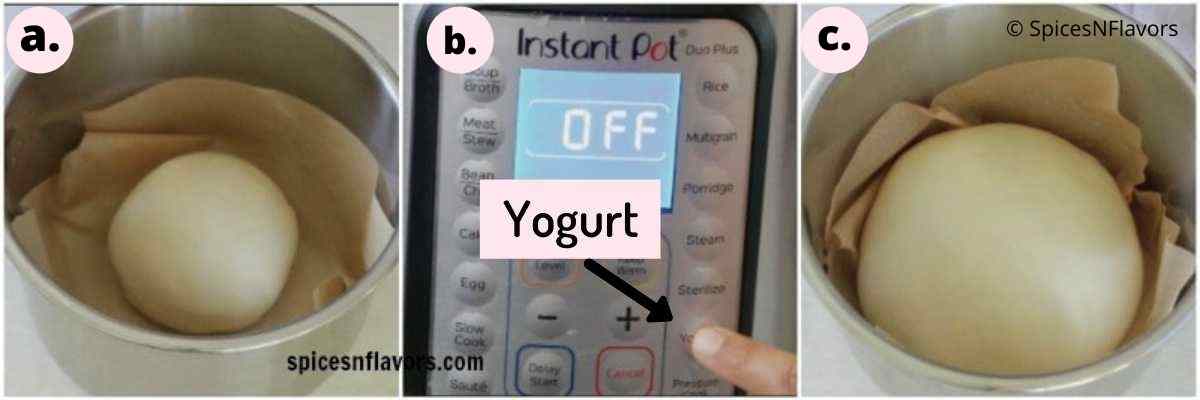
- Alternatively you can proof the dough in your Instant Pot too. Place the dough in the pot. Choose Yogurt Mode and set the time to 45 mins.
- I have a detailed post on Instant Pot Bread Proofing. Consider checking that out to understand how to proof any kind of dough.

- Once proofed, punch down the dough to remove any gases, transfer to your worktop and knead for another minute.
- Divide the dough into 4 equal parts (image 8).
- Take each part and shape to form a tight roundel by first tucking the sides to the centre and then pushing the dough with your thumb and fore fingers (image 9-11). This technique has been explained in a much detail in our Ladi Pav (Dinner Rolls) post. Feel free to refer it for additional details.

- Place the shaped dough onto a baking tray lined with parchment paper, loosely cover with a tea towel and proof again for 30 mins (image 13).
- Once proofed bake in the pre-heated oven of 180°C for 20 mins or until the top is golden brown and bottom of the bread sounds hollow when tapped (image 14).
- Once baked brush the top with some butter to soften the crust (image 15).
- Transfer to a wire rack to cool completely.
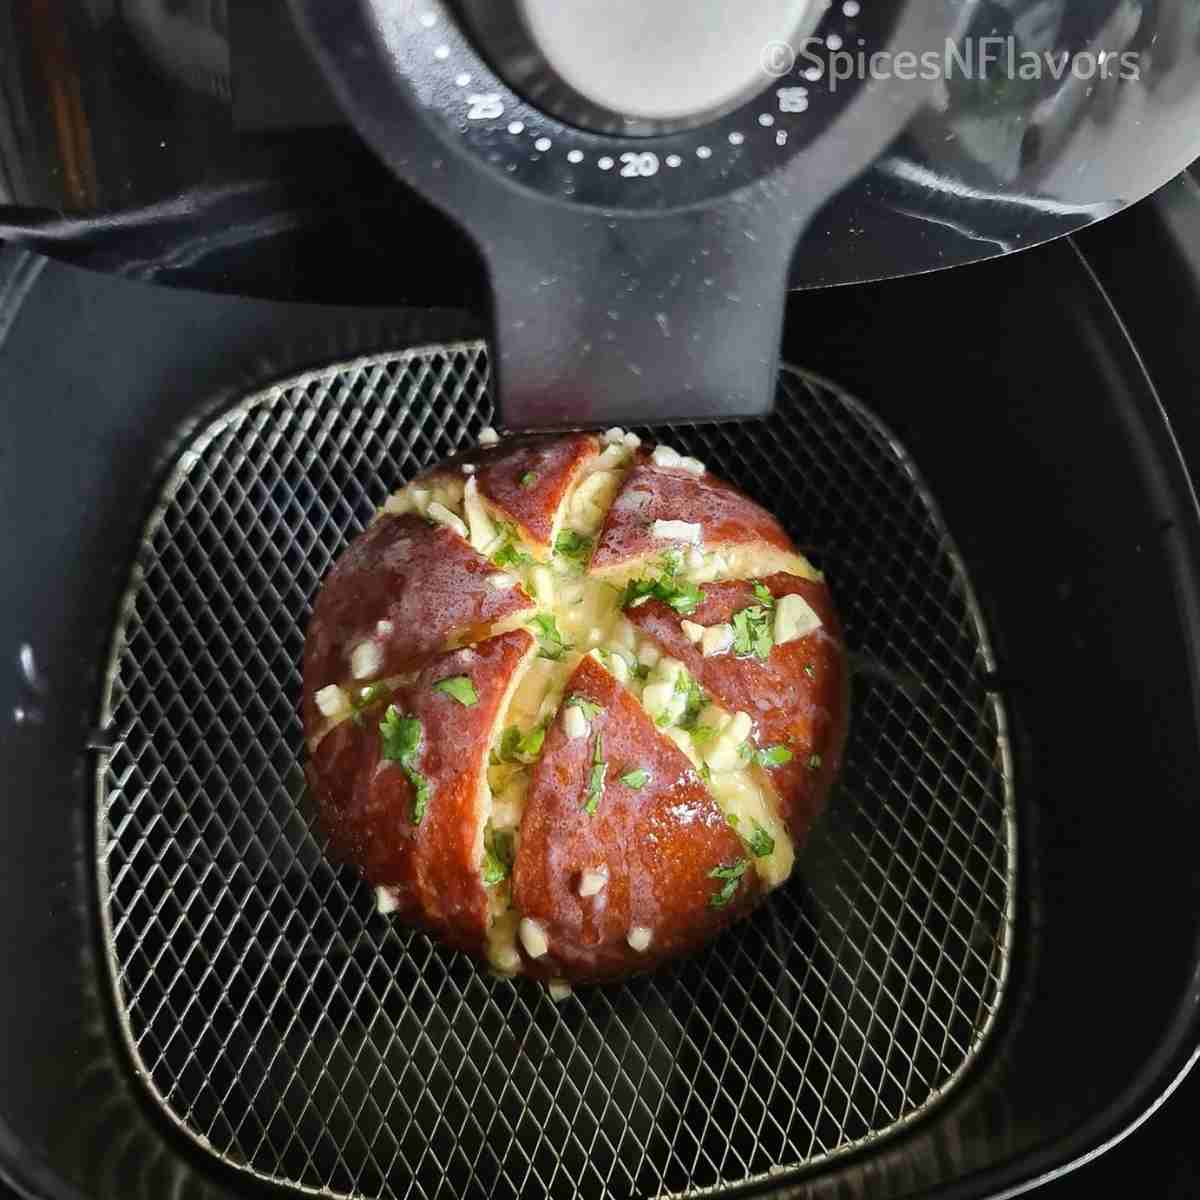
Air Fryer Baking

- Alternatively you can also bake the buns in an air fryer at 180°C for 10-12 mins.
- Please note one can easily fit 2-3 bread buns in the air fryer. You can see only one in the image above because I was recipe testing I just tested with one bread dough at a time just to confirm the time and to check whether it is similar to the oven version.
Step 2 - Cream Cheese Filling
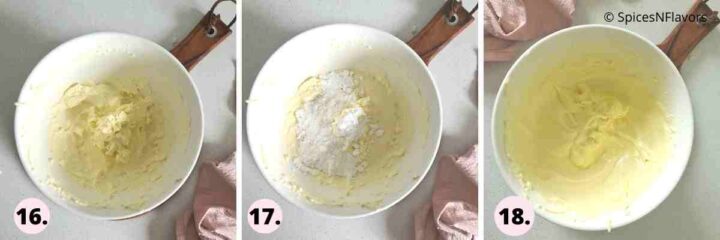
- In a bowl, whisk the softened cream cheese until smooth and creamy. (image 16)
- Add the whipping cream and icing sugar and beat until stiff peaks form. (image 17)
- Transfer to a piping bag and set aside. (image 18)
Step 3 - Garlic Butter Custard

- In a saucepan mix the milk and cornflour until the cornflour dissolves. Then cook them together until the it forms a sauce like consistency. Transfer to a separate bowl to cool completely (images 19-20). Alternatively you can skip this entire step and use 1 egg instead.

- To a separate bowl, add the melted butter, now cooled cornflour slurry, condensed milk, honey, chopped garlic, chopped coriander leaves and salt (image 21).
- Mix everything until it is homogenous (image 22).
Step 4 - Assembly
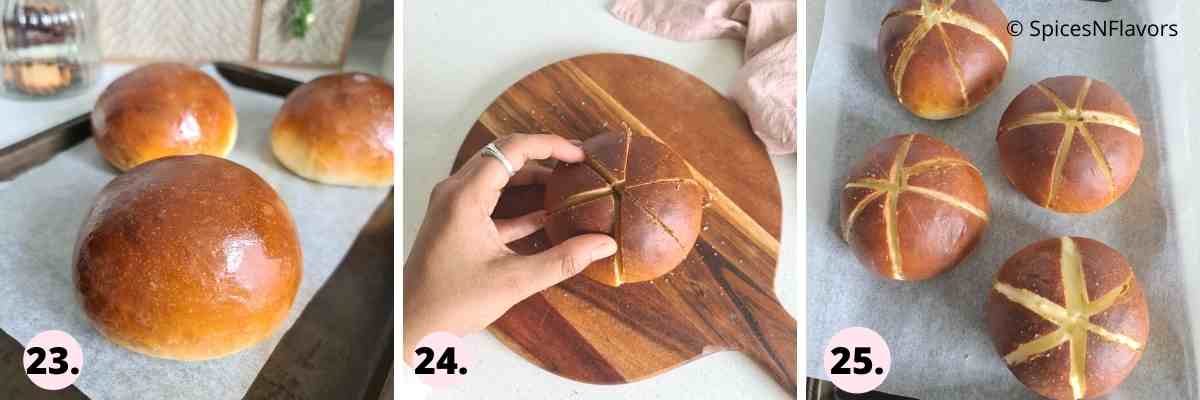
- Make 3 cuts on the bread bun to form 6 sides keeping the base of the bread intact (image 24).
- Pipe the prepared cream cheese filling on each side (image 25).

- Then take the entire bun and dunk it upside down on to the garlic butter custard sauce to coat the bread well. Turn it to the right position and spoon some extra sauce in between the slices and also on top of the bread. (imaeg 26-27)
- Place it on a baking tray lined with parchment paper. Repeat with the other 3 bread buns too (image 28).
- Bake in a preheated oven of 200°C for 10-12 mins or until the crust becomes crispy and the inside remains gooey and cheesy.
Alternatively you can also crisp up the bread bun in your air-fryer at 200°C for 5 to 8 mins. Remember to pre-heat the air fryer for 3 mins at 200°C before placing the buns.
Enjoy warm.
Storage Instructions:
Store the cooled garlic buns in an air tight container in the refrigerator for 2 days.
How to Freeze the Bread?

- Simply cut the bread into individual slices. Lay them on a baking tray and freeze for few hours.
- Once frozen store them in a zip lock bag or in air tight container for 2 months.
- When ready to eat, thaw them in a microwave for few seconds until fresh and warm to eat.
Make Ahead Instructions:
- The garlic bread buns can be made 2 days ahead of time. Wrap in an aluminium foil and store in an air tight container for 2 days at room temperature.
- You can make the cream cheese filling 2 days before and store them in the refrigerator. On the day of preparing remove the bowl from the fridge and let it sit on your counter top for the cream cheese to soften and become pipeable.
- Garlic Butter Sauce can also be made ahead of time but do not add garlic or coriander leaves to it. That is because since butter solidifies in the fridge you will have to microwave it before using. And the coriander leaves might wilt in microwave and the garlic will also change texture. So except for these ingredients add everything else and keep in fridge for 2 days.

Baker's Tips:
- I always prefer and recommend using Instant Yeast to make a Bread dough at home because it can be directly incorporated with the rest of the ingredients without having the need to activate it first.
- Whenever you are making a bread dough, ensure that your liquid ingredients - milk in this case is warm, neither hot nor cold and the yogurt or the eggs are at room temperature.
- Never add salt and yeast in one go as salt inhibits the activity of yeast and your dough would a little extra time to proof. Follow the order mentioned in the recipe.
- Adding milk and milk products like milk powder and yogurt enriches the dough and keep the end product soft, light and fluffy.
- Remember to dunk the buns very well in the garlic butter sauce so that all the sides as well as the interiors of the bread is filled with the sauce.
Recipe FAQ's
Just imagine your favourite garlic bread taken up a notch. Being an enriched dough the bread in itself is really soft and light with a creamy sweetened filling and a salted butter sauce. The Bread has the perfect balance of sweet and salty notes to it with a custardy and creamy filling. And since the bread is baked twice, it gets an amazingly crispy exteriors. So you have the crispy crunchy element, a creamy smooth filling and a soft and chewy bread - crispy, smooth and chewy all in one bite!! I bet this pull apart style garlic bread is going to be the best appetizer ever!!
Absolutely not. You can always use store bought bread to make this. I would recommend using a brioche bun for this recipe. Just make the filling at home, slice the bread, fill and bake. Won't take you more than 10 mins to put it together.
Ideally the famous Korean Street Food has 6 wedges in each bun which means it is sliced 3 times. And personally I believe the buns also look good when cut into 6 wedges and not 8 wedges. It is a personal choice though. The main point to remember is that you are keeping the base intact and not slicing it throughout irrespective of whether you are slicing it 3 times or 4 times.
You can substitute it with APF or maida. And if you want to make the whole wheat version I would recommend you follow our Whole Wheat Burger Buns bread recipe for the same.
Yes the filling recipe is so versatile that it would pair with many bread recipes like a sandwich bread or even a bagel.
Related Recipes:
Wish to Join US for the love of BAKING? Subscribe to our newsletter and Youtube channel. Follow along on Facebook, Instagram, and Pinterest for all the latest updates!

Korean Cream Cheese Garlic Bread
Ingredients
Bun Ingredients
- 125 ml (1/2 cup) Milk
- 60 gms (1/4 cup) Yogurt
- 30 gms (2 tbsp) Sugar
- 6 gms (1.5 tsp) Instant Yeast
- 240 gms (2 cups) Bread Flour
- 15 gms (2 tbsp) Milk Powder
- 1 tsp Salt
- 20 gms Unsalted Butter
Sweetened Cream Cheese filling
- 200 gms (approx 1 cup ) Cream Cheese softened
- 50 gms (1/4 cups) Cream
- 30 gms (3.5 tbsp) Sugar
Garlic Butter Sauce
- 50 gms (1/4 cup) Milk
- 1 tbsp Cornflour
- 113 gms (1/2 cup) Unsalted Butter melted
- 30 gms (1.5 tbsp) Condensed Milk
- 20 gms (1 tbsp) Honey
- 30 gms Chopped Garlic
- 5 gms Coriander leaves or Parsley
- 1/4 tsp Salt
Instructions
Step 1 - Prepare the Korean Garlic Bun
- Dump all the ingredients in a bowl starting with milk and yogurt. Give a gentle mix and add the dry ingredients starting with sugar, yeast, flour, milk powder and salt.
- Combine to form a shaggy mass of dough. Transfer to your worktop and knead for 5 mins. Then incorporate the softened butter and knead until you get a soft and elastic dough. It took me around 20 mins to reach this stage. You can also try the window pane method to confirm.
- If using a stand mixer add all the ingredients except for butter. Knead on med to high speed for 6 mins, then add the softened butter and knead again for another 8 mins.
- Lightly oil the same bowl in which you kneaded the dough, place the dough into it, cling wrap and allow for first proofing which is 1.5 hours. You can cut the time to 45 mins if proofing in the Instant Pot.
- To proof in the Instant Pot place the dough in the oiled inner pot. Choose the Yogurt mode and set the time to 45 mins.
- Once proofed, punch down the dough to remove any gases, transfer to your worktop and knead for another minute.
- Divide the dough into 4 equal parts.
- Take each part and shape to form a tight roundel by first tucking the sides to the centre and then pushing the dough with your thumb and fore fingers.
- Place the shaped dough onto a baking tray lined with parchment paper, loosely cover with a tea towel and proof again for 30 mins.
- Once proofed bake in the pre-heated oven of 180°C for 20 mins or until the top is golden brown and bottom of the bread sounds hollow when tapped.
- Once baked brush the top with some butter to soften the crust. Transfer to a wire rack to cool completely.
- Alternatively you can also bake the buns in an air fryer at 180°C for 10-12 mins. Do remember to preheat the air fryer for 3 mins.
Step 2 - Cream Cheese Filling
- In a bowl, whisk the softened cream cheese until smooth and creamy.
- Add the whipping cream and icing sugar and beat until stiff peaks form.
- Transfer to a piping bag and set aside.
Step 3 - Garlic Butter Custard Sauce
- In a saucepan mix the milk and cornflour until the cornflour dissolves. Then cook them together on med flame until it forms a sauce like consistency. Transfer to a separate bowl to cool completely.
- To a separate bowl, add the melted butter, now cooled cornflour slurry, condensed milk, honey, chopped garlic, chopped coriander leaves and salt. Mix everything until it is homogenous.
Step 4 - Assembling the Korean Garlic Bread
- Make 3 cuts on the bread bun to form 6 wedges keeping the base of the bread intact.
- Pipe the prepared cream cheese filling on each side.
- Then take the entire bun and dunk it upside down on to the garlic butter custard sauce to coat the bread well. Turn it to the right position and spoon some extra sauce in between the slices and also on top of the bread.
- Place it on a baking tray lined with parchment paper. Repeat with the other 3 bread buns too.
- Bake in a preheated oven of 200°C for 10-12 mins or until the crust becomes crispy and the inside remains gooey and cheesy.
- Alternatively you can also crisp up the bread bun in your air-fryer at 200°C for 5 to 8 mins. Remember to pre-heat the air fryer for 3 mins at 200°C before placing the buns.
- Enjoy warm.
Video
Notes
- Yogurt in the Bread Dough - Use 1 egg instead
- Bread Flour - with APF or Maida.
- Milk Powder - Can be skipped if not available easily.
- Milk and Cornstarch in the Garlic Butter Sauce - Skip preparing the cornstarch slurry and instead use 1 egg.
- I always prefer and recommend using Instant Yeast to make a Bread dough at home because it can be directly incorporated with the rest of the ingredients without having the need to activate it first.
- Whenever you are making a bread dough, ensure that your liquid ingredients - milk in this case is warm, neither hot nor cold and the yogurt or the eggs are at room temperature.
- Never add salt and yeast in one go as salt inhibits the activity of yeast and your dough would a little extra time to proof. Follow the order mentioned in the recipe.
- Adding milk and milk products like milk powder and yogurt enriches the dough and keep the end product soft, light and fluffy. I use full fat milk powder by Nestle (not sponsored).
- Don't shy away from dunking the buns very well in the garlic butter sauce. You want all the sides as well as the interiors of the bread to be filled with the sauce.
- You can use store bought bread to make this recipe instead of making the bread from scratch. I would recommend using a brioche bun for this recipe. Just make the filling at home, slice the bread, fill and bake. Won't take you more than 10 mins to put it together.
- Being an enriched dough with a heavy and rich filling you cannot eat more than 2-3 wedges at a time. The recipe makes 4 buns and each bun makes 6 wedges so in all you get 24 wedges which can be served to 12 people.
- Adding a tbsp of nutritional yeast to the garlic butter sauce would improve its flavour quotient but remember not to serve it to children below 13 years of age.
sindhu says
it's a little too sweet for me , otherwise the bread is such a HIT
sushma iyer says
I’m so glad you enjoyed the bread Sindhu! 😊 I totally get what you mean about the sweetness—everyone’s taste is a little different. You could try reducing the sweetness a bit next time, and it should be just perfect for you. So happy it was still a hit otherwise! 🎉
Priyanka says
Hello ma'am,
Thankyou so much for a detailed video and recipe🙏 I wanted to try these buns for my daughter, during her summer holidays munching. I have a query-- for How many days we can store the second proofing dough in fridge?
As am planing to make in 2 days, 1 day kneading and 2nd day baking.
sushma iyer says
Hello Priyanka! Thank you so much for your kind words 😊
I’m so happy to hear you’re planning to try the buns for your daughter!
Regarding your question—I'm really sorry, but I haven’t personally tried storing the dough after second proofing, so I won’t be able to guide you on that.
If you do try it, I’d love to hear how it goes. Wishing you happy baking!
Priya says
Hello ma'am,
Please suggest a good brand of yeast available in india. Wanted to try this recipe for my child, this summer vacation 😊
sushma iyer says
Hi Priya.. sorry I have never tried any Indian brand for yeast.
Farhin says
For baking what is the rod mode both coil on or only bottom coil on ??
sushma iyer says
Hi Farhin.. I always bake with both the rods on