
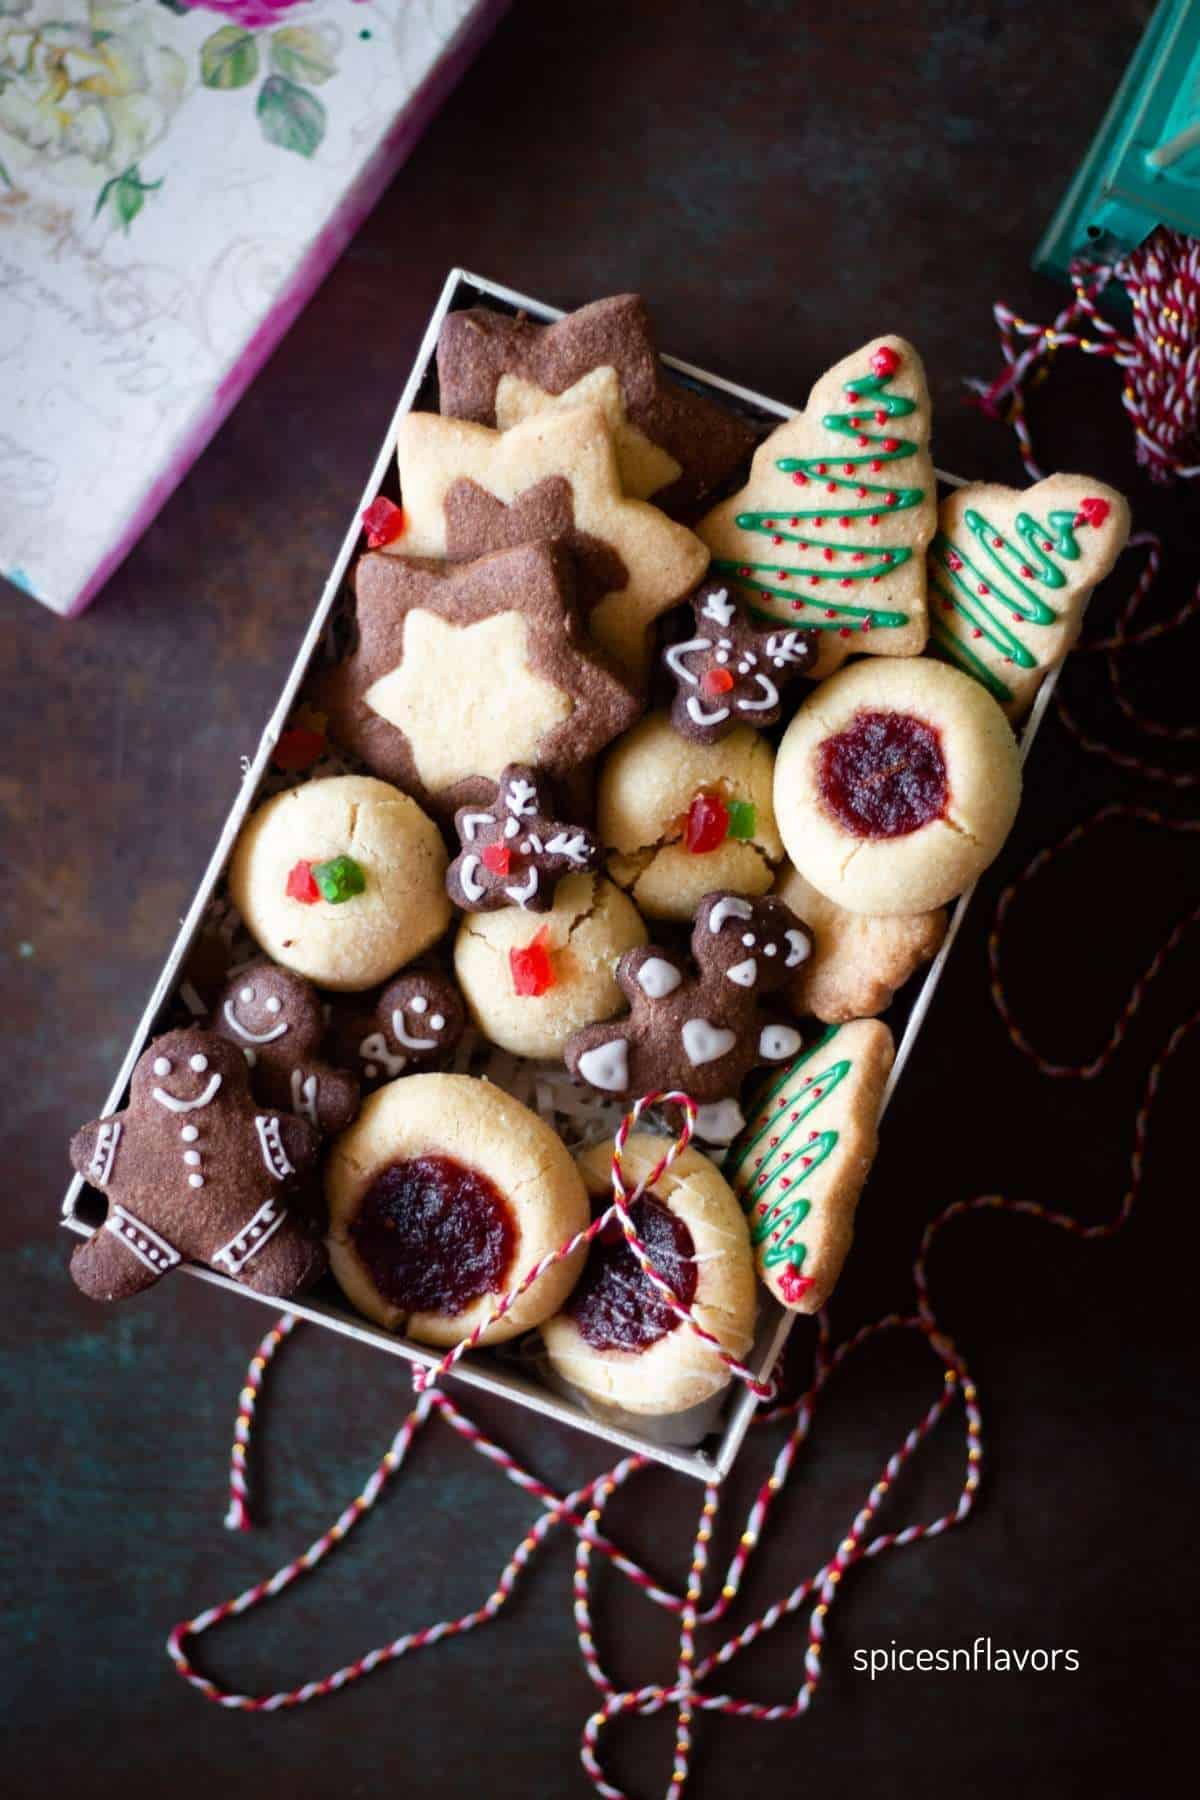
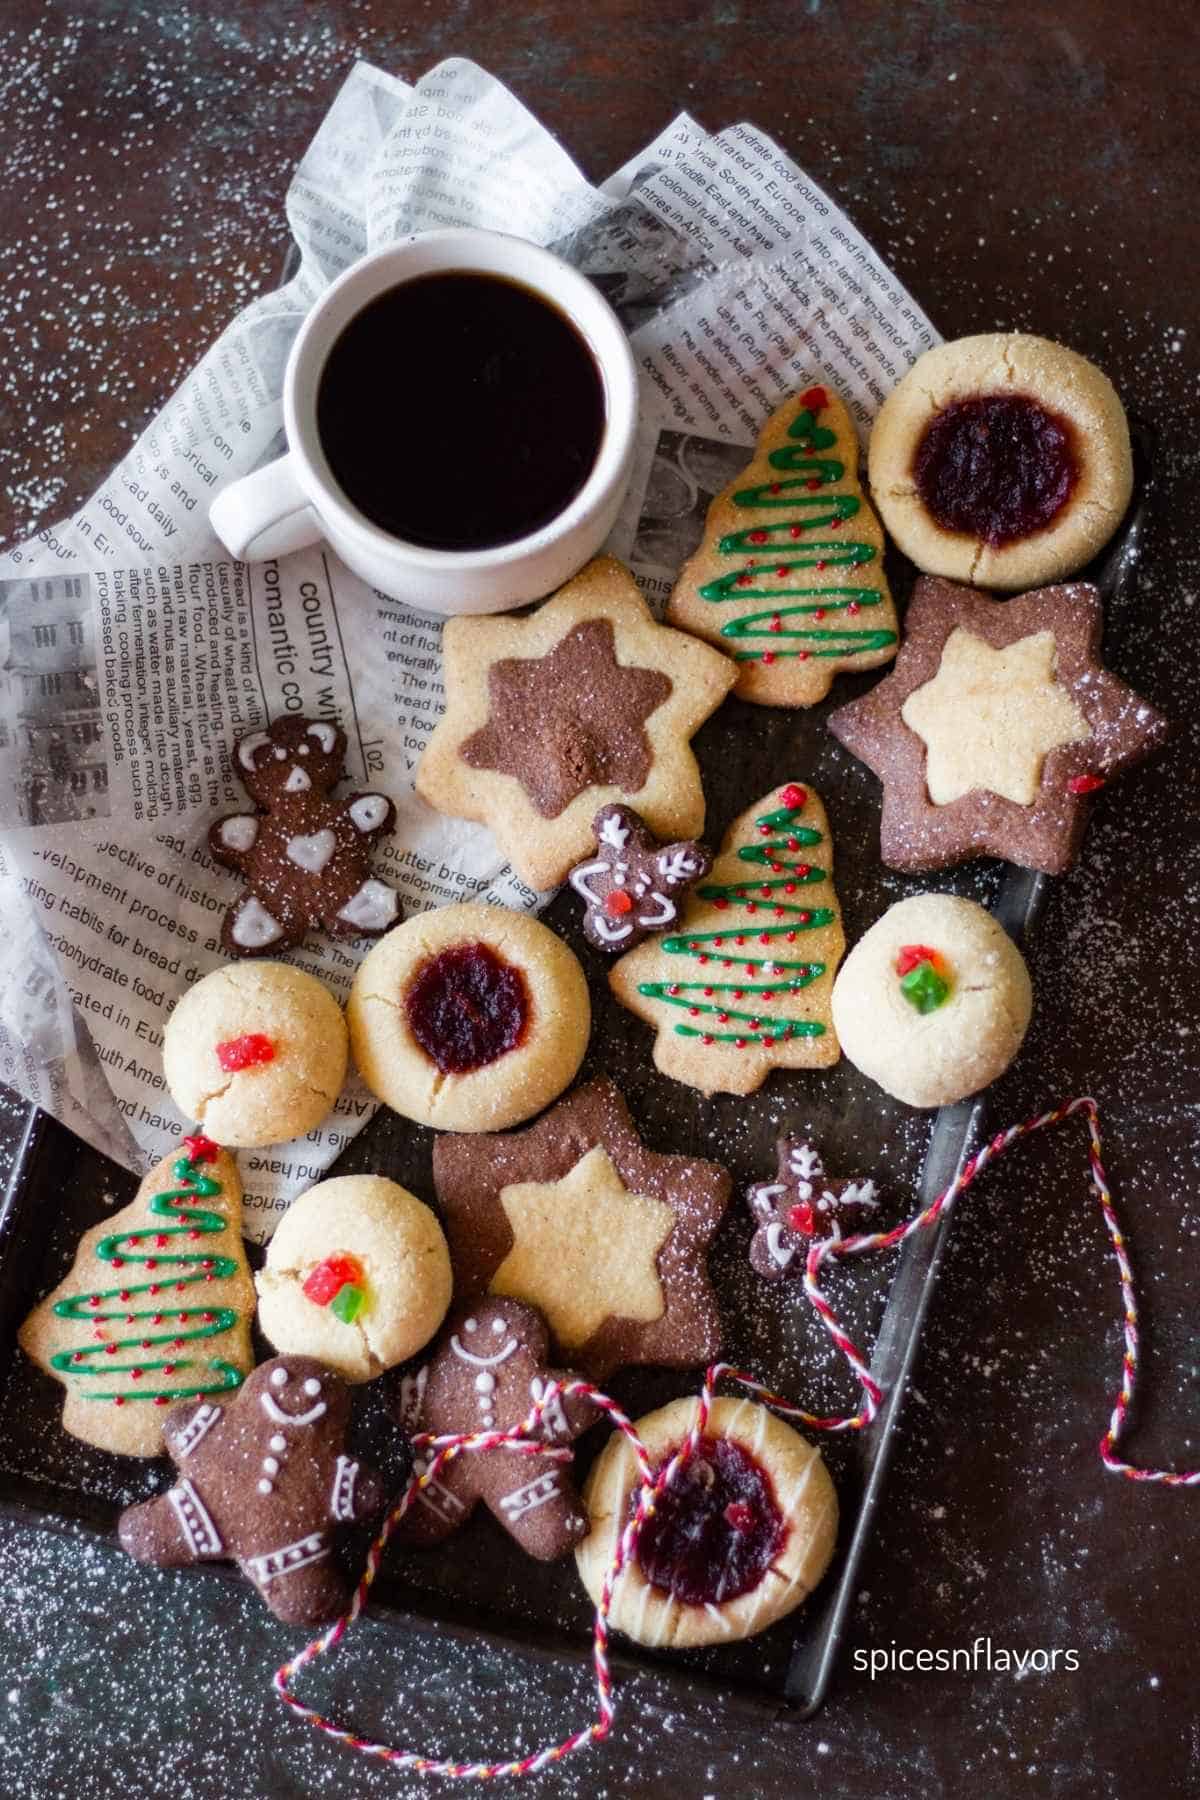
With this Nankhatai cookie box recipe, you can use the same dough to create a variety of cookies—thumbprints, festive cut-outs, and checkerboards—all baked together for a beautiful, flavorful treat perfect for any occasion.
What is Nankhatai?
Nankhatai is a traditional Indian shortbread cookie known for its buttery, khasta (crumbly) texture, and melt-in-the-mouth flavor, making it a festive favorite during Diwali.
Previously, I experimented with this classic recipe by adding nine different flavors—from cardamom to saffron and nutella—transforming the simple dough into a delightful assortment of flavored Nankhatais.
This year, I’m taking it further by using the same versatile dough to create endless shapes and styles, perfect for a festive cookie box.
From thumbprint cookies to chocolate, cut-out stars, and more, this recipe proves that with just one basic dough, you can craft a beautiful variety of cookies for any celebration.
What’s in My Nankhatai Cookie Box?
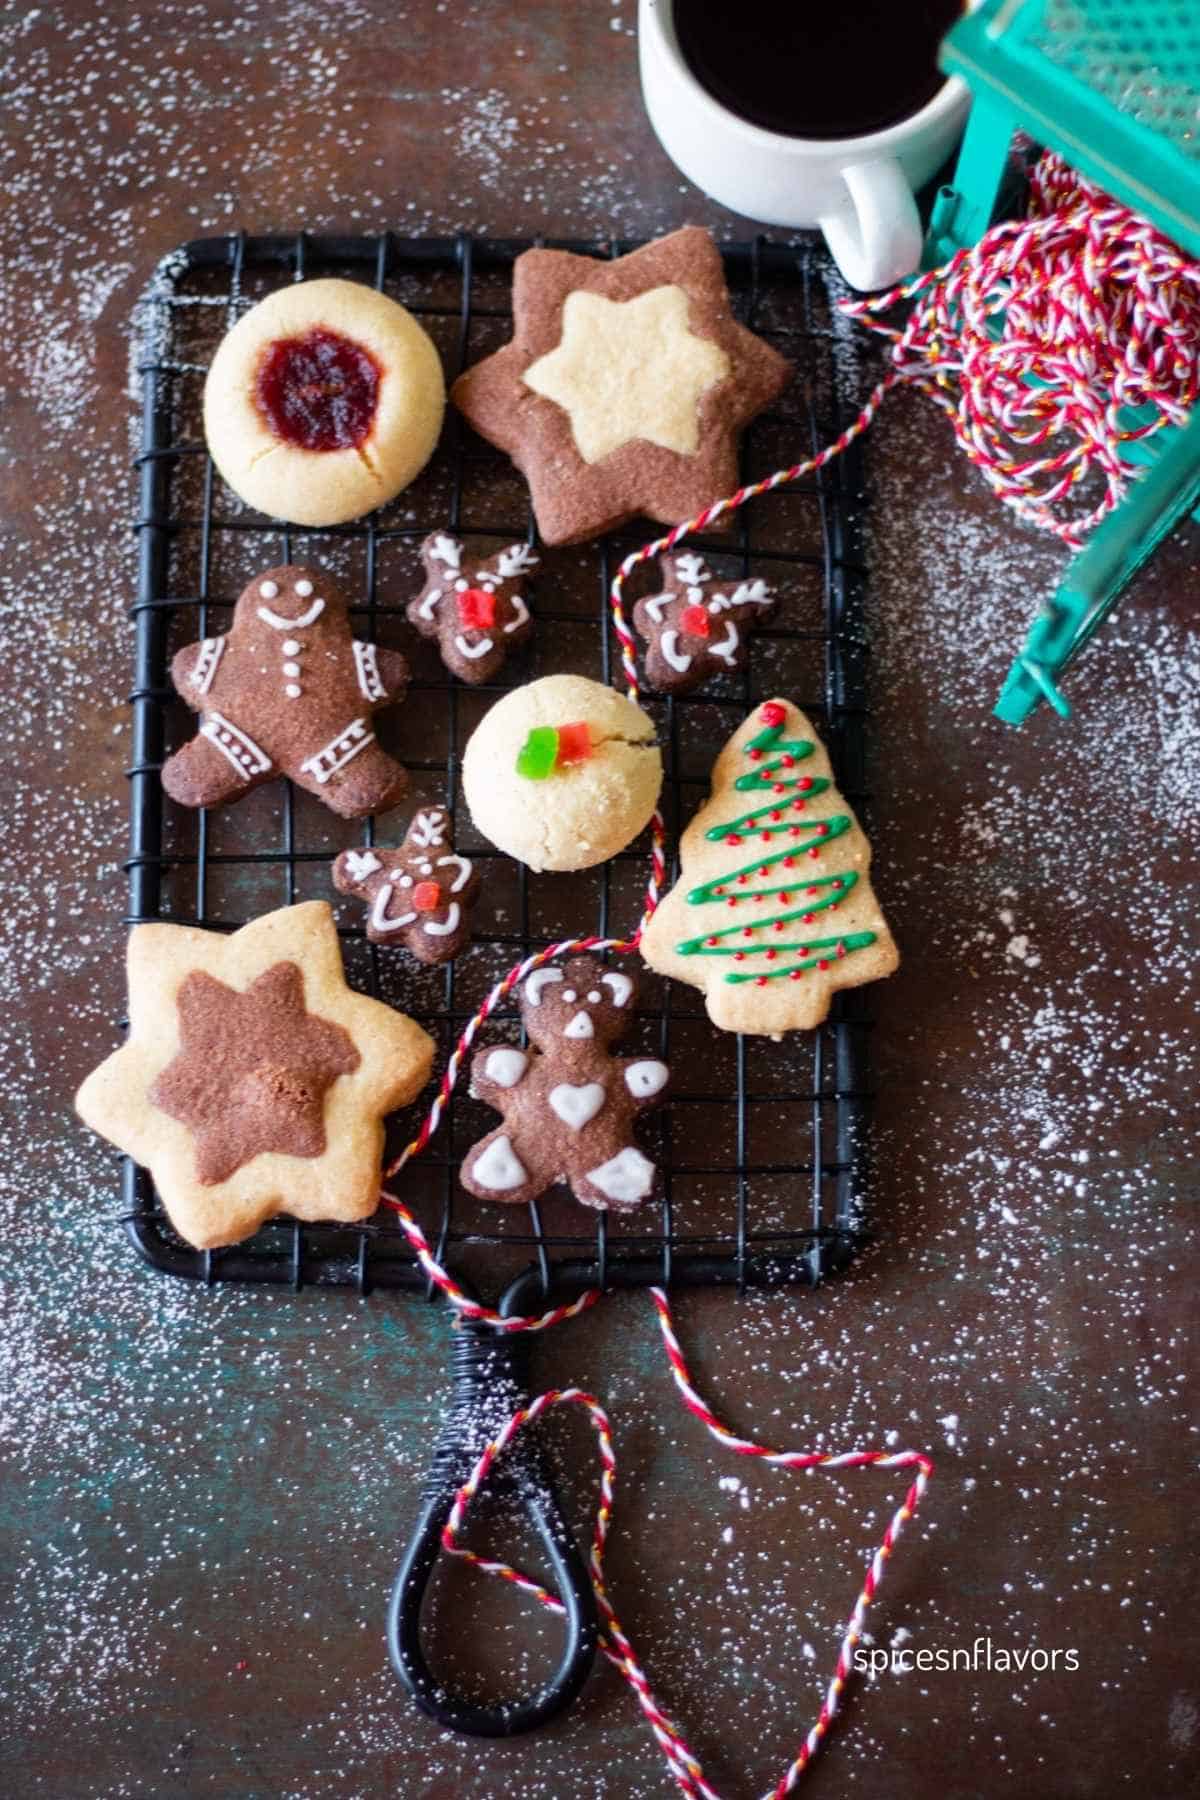
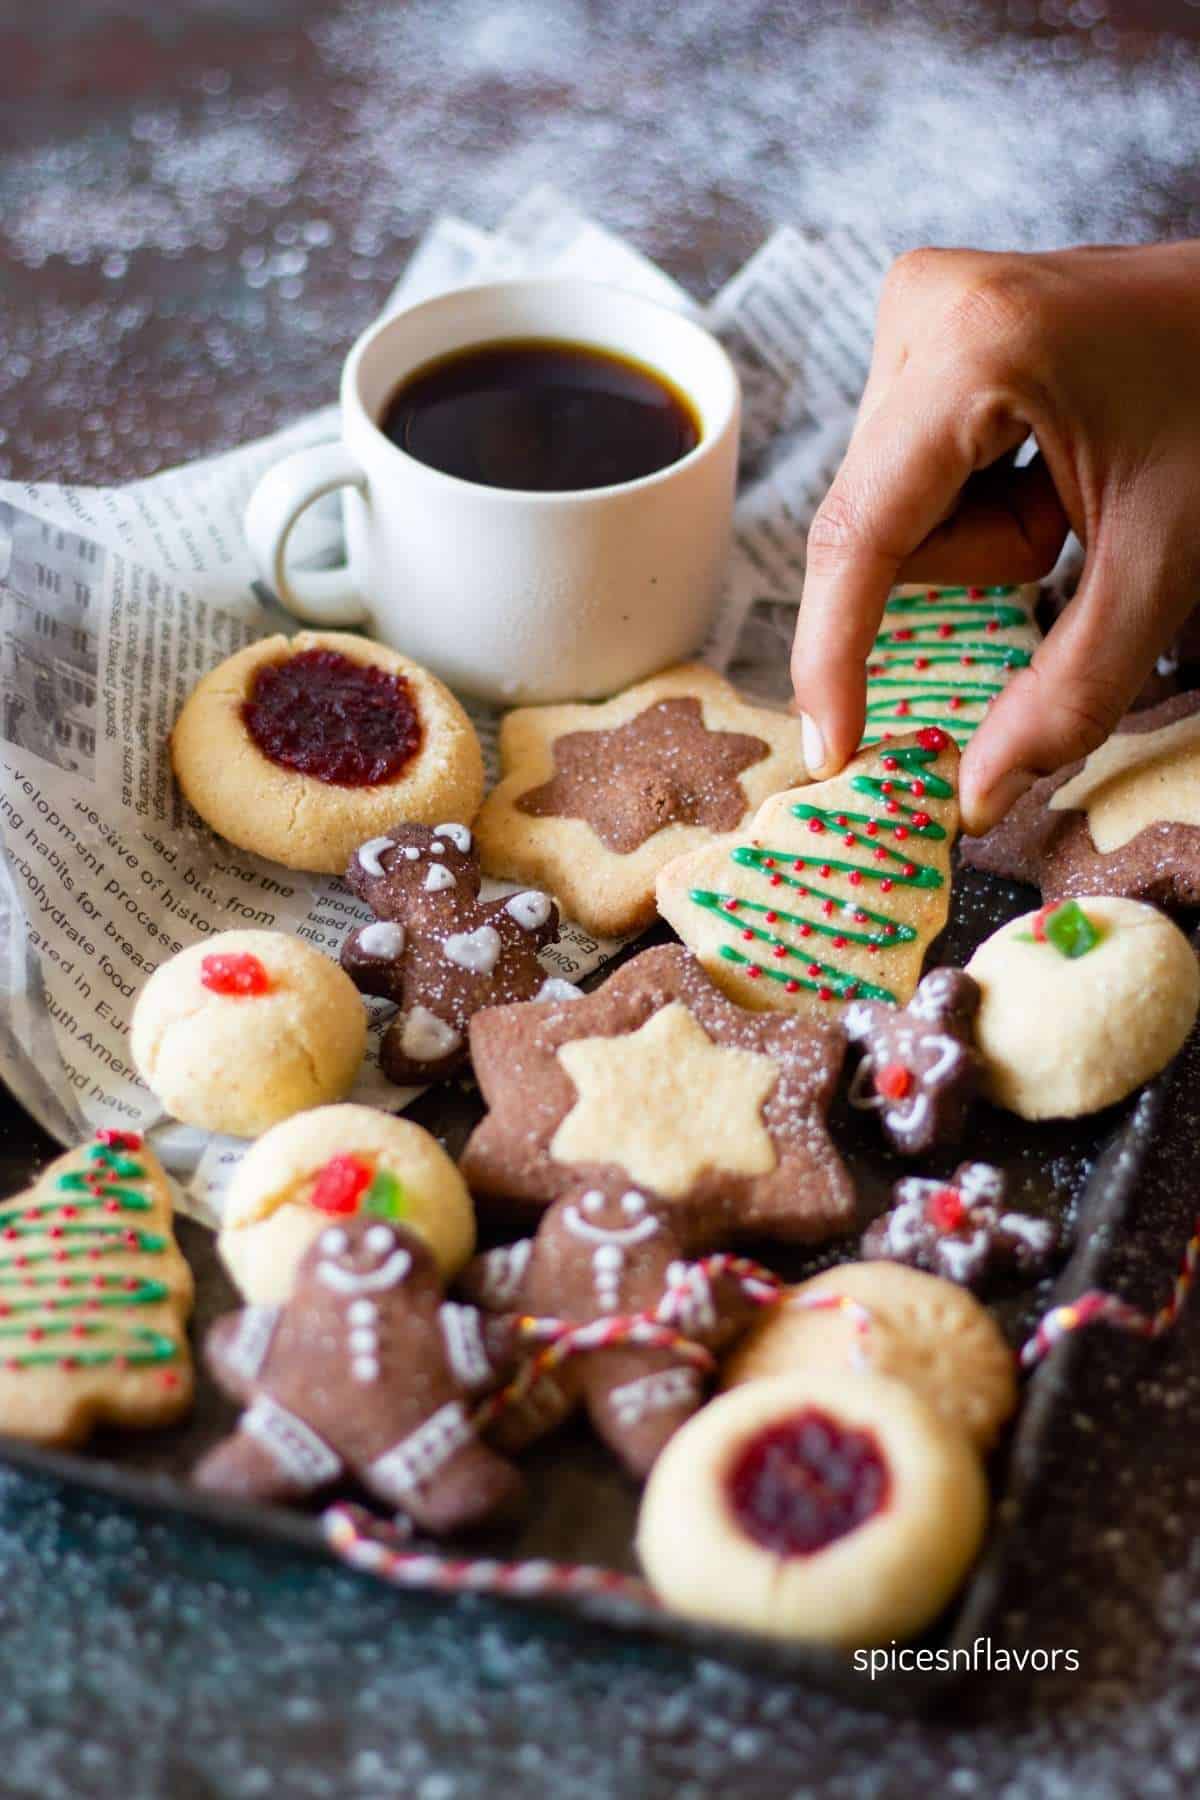
- 3 Round Plain Cookies – Simple and delicious, these classic Nankhatai cookies are perfect for anyone who enjoys the original flavor.
- 3 Thumbprint Cookies – A delightful twist, these cookies feature a small impression in the center filled with cranberry sauce for a sweet and tangy treat.
- 3 Checkerboard Star Cookies – A creative take on the star cookies, with a contrasting white dough center that gives them a playful checkerboard look.
- 3 Gingerbread Shaped Cookies – These cocoa-flavored cookies take the shape of traditional gingerbread men, bringing a cozy, holiday feel.
- 3 Rudolph Shaped Cookies – Adorable cocoa cookies in the shape of Rudolph, complete with all the festive charm.
- 1 Teddy Bear Cookie – A cute teddy bear-shaped cookie made with cocoa dough and decorated for an extra touch of sweetness.
- A Few Star and Round Shaped Cookies – These are made with the remaining dough, bringing a variety of shapes to the cookie box for a fun mix of textures and flavors.
Ingredients needed

- Flour and Chickpea Flour (Besan): A combination of all-purpose flour (maida) and chickpea flour gives the Nankhatai its signature crumbly texture and nutty flavor. The chickpea flour enhances the richness while keeping the cookies light.
- Ghee: Use semi-solid ghee for the dough—not melted. Semi-solid ghee ensures the dough comes together properly and helps retain the desired texture without spreading during baking.
- Sugar: Powdered sugar is ideal for this recipe as it mixes evenly into the dough, providing a smooth texture and balanced sweetness.
- Flavorings: Classic options include spices like cardamom powder or nutmeg for a warm, aromatic touch. For variations, you can add cocoa powder, coffee, rose essence, or zest for unique flavors.
- Decorative Additions (not shared in the picture): Use jam, cocoa-flavored dough, nuts, or edible colors to create beautiful designs like thumbprint cookies, checkerboards, or festive cut-outs.
Step by Step Instructions
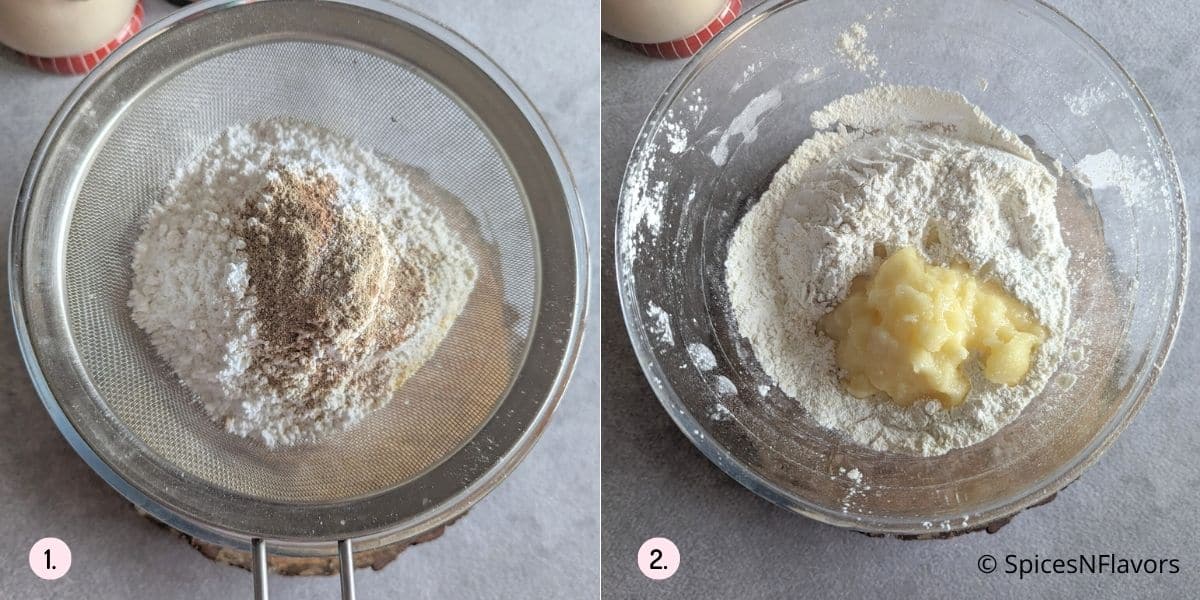
Sift together all-purpose flour, chickpea flour, powdered sugar, spices and salt in a mixing bowl
Add semi-solid ghee to the dry ingredients and mix it in using your fingers. Gradually bring the mixture together into a smooth dough.
Avoid adding any water, as the warmth from your hands will help bind everything together.
Shape the Cookies:
Round Shape: Roll a portion of dough into small balls and place them on a baking tray. Bake as is, and once the cookies are still warm, press tutti frutti pieces into the center for a colorful touch.
Thumbprint Cookies: Take a small ball of dough, flatten it slightly, and use your forefinger to make an impression in the center. After baking and cooling, fill the thumbprint with cranberry sauce or any jam or filling of your choice.

Divide the remaining dough into two portions.
Add cocoa powder to one portion and mix it into a smooth dough.

Roll out both doughs into 1/4-inch thick sheets (image 5).
Gingerbread Shapes: Cut out gingerbread shapes from the cocoa dough and place them on the tray. For a fun twist, shape some of the gingerbread into Rudolph faces using small details (image 6).
Teddy Bear Shape: Use the cocoa dough to cut out teddy bear shapes. Once baked and cooled, decorate the bears with icing or small edible decorations for extra fun!
Checkerboard Stars: Cut out star shapes from the dough, then use a smaller star cutter to cut out the center. Replace the center with white dough to create a checkerboard-style star cookie.
Swapped Centers: For another variation, cut out star shapes with the white dough, then cut out the center using a smaller cookie cutter. Swap the center with the cocoa dough to create a striking contrast.
Christmas Tree Shape: Roll out the dough and cut out Christmas tree shapes using a tree-shaped cutter. Once baked and cooled, decorate the trees with royal icing or any colorful icing of your choice.

Chill the Dough: Once all cookies are shaped, place the tray in the refrigerator and chill for about 30 minutes to help maintain their shape during baking.
Bake: Preheat the oven to 180°C (350°F). Bake the cookies for 8-10 minutes or until they are golden and slightly firm to the touch.
Icing: I used my simple eggless royal icing recipe to create the designs on gingerbread and rudolph shaped cookies. For Christmas tree I coloured them into green and red and made the designs on top.
Let the cookies cool on the tray for a few minutes before transferring them to a wire rack.
Storage Instructions
- Cooling: Allow the cookies to cool completely on a wire rack before storing. This prevents any moisture buildup inside the storage container that can make the cookies soggy.
- Airtight Container: Store the cookies in an airtight container to maintain their freshness and crisp texture. Layer the cookies with parchment paper to avoid them sticking together, especially if they have icing or jam.
- Room Temperature: The cookies can be stored at room temperature for up to 1-2 weeks. For longer storage, keep them in a cool, dry place away from direct sunlight.
- Freezing: If you want to store them for a longer period, freeze the cookies. Arrange the cooled cookies in a single layer on a baking sheet and freeze them for about 2 hours. Once frozen, transfer them to a freezer-safe airtight container or a ziplock bag. They can be stored in the freezer for up to 3 months. When ready to eat, allow them to thaw at room temperature.
By following these storage tips, your Nankhatai cookies will stay fresh and delicious for longer, perfect for sharing during the festive season! 😊
Best Tips
- Ensure the ghee is semi-solid, not melted, as it helps bind the dough without spreading too much during baking. This creates the perfect crumbly texture for your cookies.
- After shaping the cookies, chill the dough in the refrigerator for about 30 minutes before baking. This step helps the cookies maintain their shape and prevents them from spreading too much while baking.
- When rolling the dough, aim for an even 1/4-inch thickness. This ensures that the cookies bake uniformly and have the ideal texture, crispy on the edges and soft in the center.
- The baking time will vary depending on how thinly you roll the dough and the size of the cookies you're making. For example, the Rudolph cookies, being smaller in size, baked faster, while larger or thicker cookies may take a bit longer. Bake at 180°C (350°F) and keep an eye on them towards the end to avoid over-baking. They should be golden around the edges and slightly soft in the center.
- Don’t be afraid to get creative! Divide the dough into portions and experiment with different flavors like cocoa, cardamom, or rose essence. Use cookie cutters to shape them into festive designs like stars, trees, or teddy bears for added fun! Check out our Flavored Nankhatai recipe for more inspo.
- If you’re decorating with icing or toppings like cranberry sauce or raspberry filling, wait until the cookies have cooled completely to avoid melting or smudging the decorations.
Frequently Asked Questions
While ghee gives these cookies their signature texture and flavor, you can substitute it with unsalted butter if necessary. However, the cookies might not have the same richness or crumbly texture.
Roll the dough to about 1/4 inch thickness. This ensures that the cookies bake evenly and have the perfect texture—crispy on the edges and soft in the center.
Baking time will vary depending on the thickness of the dough and the size of the cookie shapes. As a general rule, bake at 180°C (350°F) for 8-10 minutes, but keep an eye on them. Smaller cookies like Rudolph (as seen in the pictures above) may bake faster, while thicker ones like gingerbread may take a little longer.
Related Recipes
Wish to Join US for the love of BAKING? Subscribe to our newsletter and Youtube channel. Follow along on Facebook, Instagram, and Pinterest for all the latest updates!

Nankhatai Cookie Box - 1 dough many variations
Ingredients
- 1 and 1/4 cups All Purpose Flour/Maida
- 1/4 cup Chickpea Flour/Besan
- 1/2 cup Powdered Sugar
- 1 tsp Cardamom Powder
- 1/4 tsp Nutmeg Powder
- 1/4 tsp Salt
- 1/2 cup (115 gms) Clarified Butter/Ghee
- 1/2 tbsp Cocoa Powder
- Few tutti fruti for decorations
Instructions
- Sift all the dry ingredients together in a bowl.
- Add semi-solid ghee to the dry ingredients and mix it well with your hands, binding everything into a smooth dough. The warmth from your hands should bring the dough together without adding any additional water.
- Once the dough is ready, divide it into portions depending on how many different cookie flavors or shapes you want to make.
- For example, to make cocoa-flavored dough, take half of the dough and knead in cocoa powder to create a smooth, colored dough.
- Plain Round Cookies: Roll the dough into small balls and place them on the baking tray. Gently flatten them to form a round shape. Bake as is for simple, traditional Nankhatai.
- Thumbprint Cookies: For thumbprint cookies, use your forefinger to create an impression in the center of each cookie. Once baked and cooled, fill the impression with cranberry sauce or any jam of your choice.
- Roll the dough to 1/4-inch thickness. You can either use a rolling pin or shape it directly with your hands for a rustic look.
- For checkerboard star cookies: Cut out star shapes from the dough and, using a smaller star-shaped cutter, remove the center. Replace the center with cocoa dough to create a contrasting color pattern.
- For Rudolph-shaped cookies, roll out the cocoa dough and use a gingerbread man or similar cutter. Bake these smaller-sized cookies for a shorter amount of time compared to larger cookies.
- Teddy bear-shaped cookies: Using the cocoa dough, decorating them with festive details once they’ve cooled.
- Use a Christmas tree cookie cutter to shape the dough, and once baked and cooled, decorate with icing.
- Once you’ve shaped the cookies, place them on a baking tray lined with parchment paper and chill them in the refrigerator for about 30 minutes. This will help the cookies maintain their shape during baking.
- Preheat the oven to 180°C (350°F).
- Bake the cookies for about 8-10 minutes or until they are golden around the edges. However, the baking time will depend on the thickness of the dough and the size of the cookie cutters. Smaller cookies like Rudolph will bake faster, so keep an eye on them to prevent over-baking.
- Allow the cookies to cool completely on a wire rack before decorating with icing or any toppings of your choice. I have used my eggless royal icing recipe to do the icing on top.
Leave a Reply