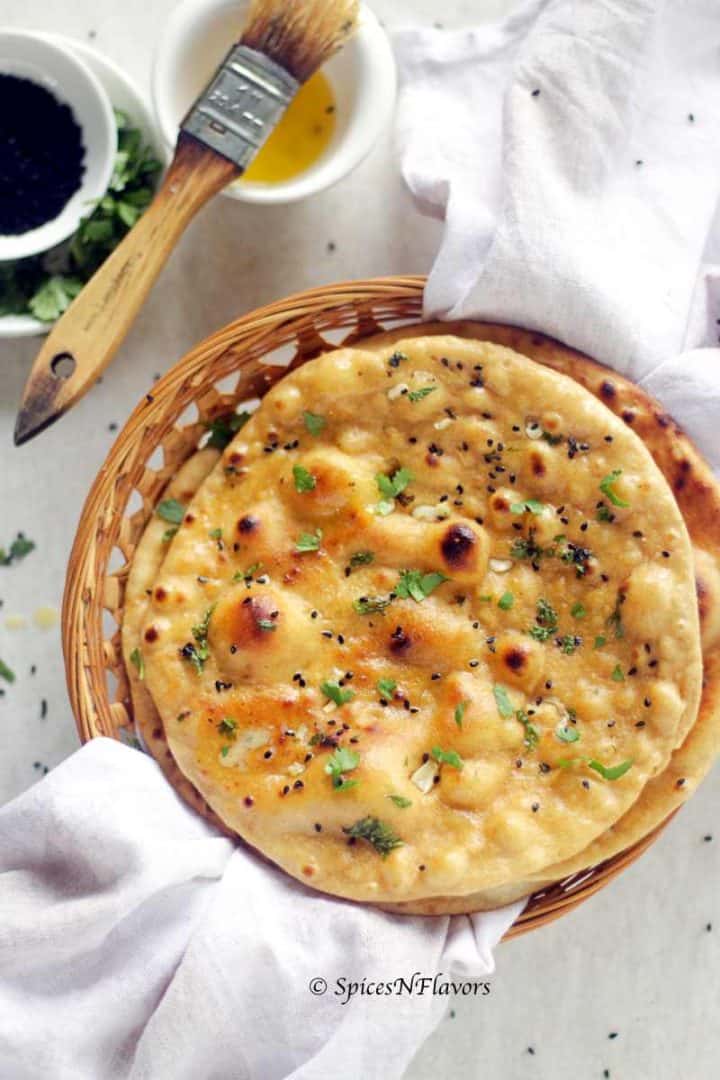
Perfectly crisp from outside, soft and chewy from inside this Tandoori Roti is your way to choosing healthier flatbread to go with your favourite Curry and Dal the next time you visit an Indian Restaurant.
Wait, why do you have to go to a restaurant when you can easily make homemade tandoori roti without tandoor (clay oven) right in the comfort of your kitchen in 3 simple steps?
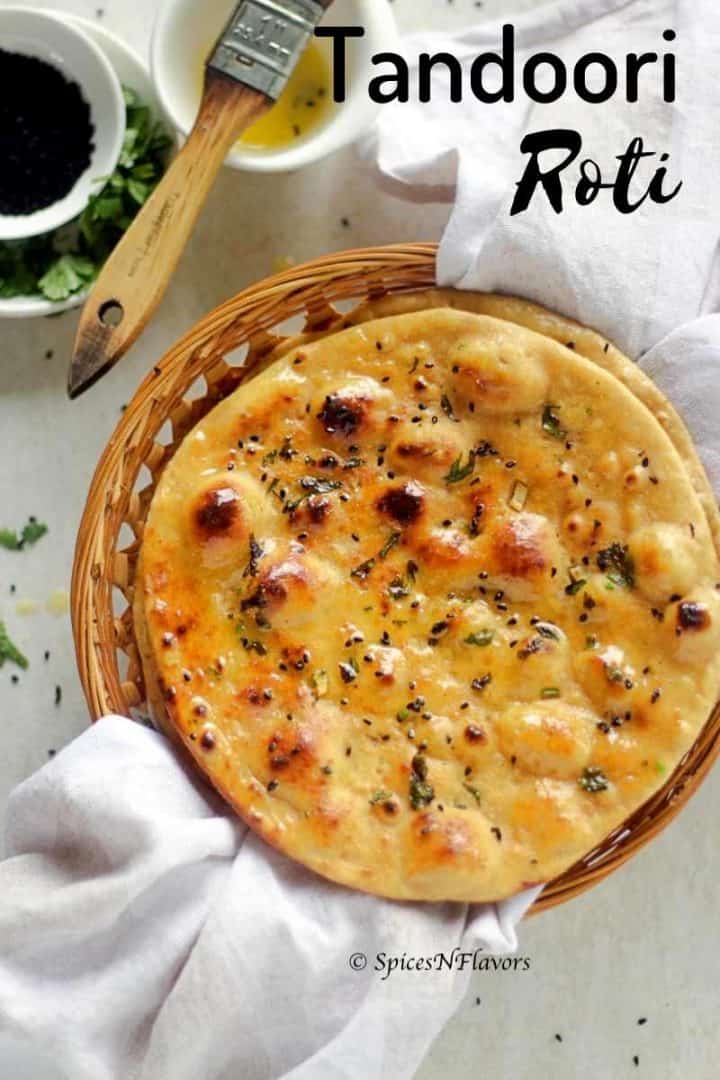
A popular Indian flatbread recipe that gets done in under 60 mins from start to end, this recipe also doesn't call for Yeast or Oven or any fancy ingredients or equipments.
Wait a second, but
What is Tandoori Roti?
Tandoor is a type of oven made out of clay predominantly used in Asian countries and Roti is one of the many Indian flatbreads out there.
So basically, it is a flatbread cooked in a tandoor.
Of course, a tandoor isn't available in modern houses these days, not even in India so to replicate that I am going to use a good old... Shhhh.. that's a secret.. will let you know in some time.. 😉
Oh common on!!
I know.. ok not a secret.. we are simply going to use an Iron Skillet or Tawa instead and replicate the hot tandoor cooking by directly cooking the rotis on the flame..
You just need Basic Pantry Ingredients to make the roti:
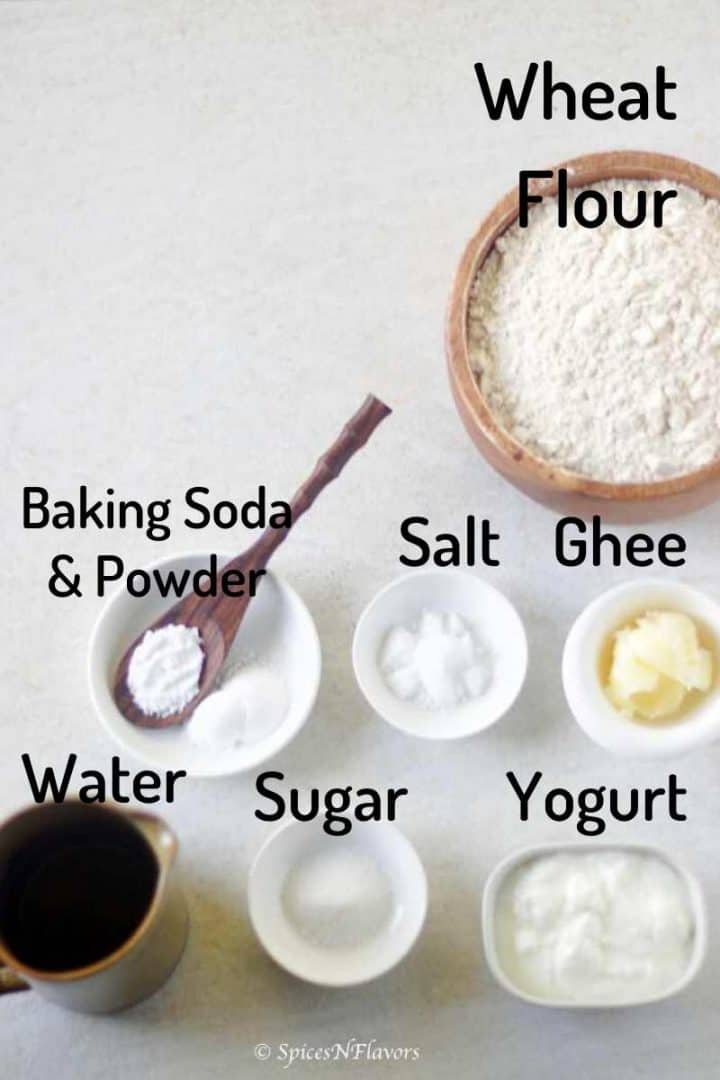
Whole Wheat flour :
Unlike a Naan Bread or Kulcha, we would be using whole wheat flour to make our rotis.
This is one of the reason which makes our flatbread healthier to its counter-parts as stated by this article.
Leavening Agents:
A everyday Indian Bread like Chapati or Phulka does not need any leavening agents.
But when you are making a restaurant-style roti recipe that needs to be cooked in hot ovens you need some leavening agent to keep it soft whilst being exposed to hot temperature.
So we are using baking soda and baking powder in this recipe which reacts with the yogurt creating gases and making the bread puff and remain soft.
You can also make tandoori roti using eno instead. Read more about it in the FAQ's
Salt/Sugar
The best part about this recipe is that the sugar content is less as compared to a naan recipe.
Salt adds to the flavour quotient.
Ghee: Makes the bread flaky. One can also use vegetable oil or butter instead.
Yogurt: Keeps the bread soft
Water: To bind everything into a dough.
Here is how to make Tandoori Roti in a step by step format:
Step 1 : Prepare the Dough
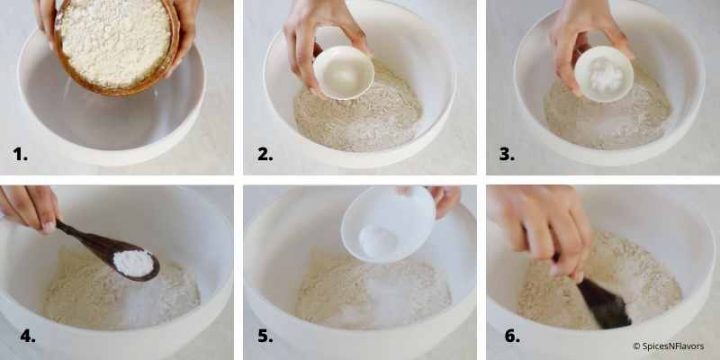
To a wide mouth bowl start by adding the whole wheat flour followed by sugar, salt, baking powder and baking soda. Mix it. (pics 1-6)
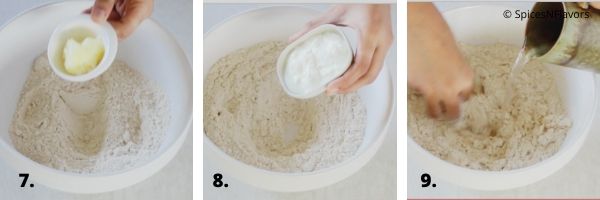
Add in ghee that is clarified butter (pic 7).
This makes the bread flaky in place of ghee you can also use oil or butter. Mix that as well.
Make a well and add yogurt (pic 8) which keeps the bread soft.
Finally add little water (pic 9) at a time and knead into a dough.
It would seem sticky to begin with..
Note the dough sticking to my fingers at this stage but keep kneading do not add additional flour at this stage.
I was finding it difficult to knead in the bowl so transferred it to my work top and finished off the kneading process for another 5 mins.
What you are looking for is a smooth and supple yet stiff dough and you would also note that your hands are also clean by this time.
And that is the reason there is no need to knead the dough for longer unlike a regular bread recipe.
Place it in the same bowl. Apply some ghee on top so that it doesn't dry out.
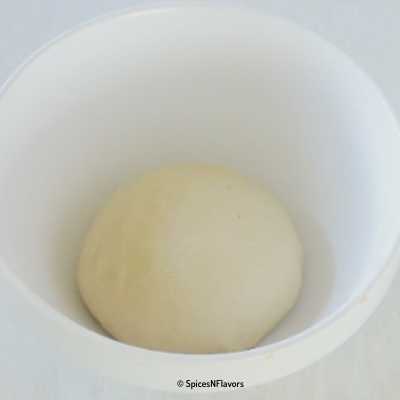
Cover with a tea towel.
And let it rest for 30 mins.
While that is resting let us prepare a cushion. I will tell you why you need this later.
So, for now, lay a tea towel and place 2 more folded towels on it and tie a knot and set aside.
Also this is the time to chop up some corinader leaves and garlic cloves.
We would also need nigella seeds and some melted butter.
Step 2: Shaping
After 30 mins roll it into a log and divide evenly into 12 roundels.
You can also weigh out each portion of around 60 gms if you prefer that way.
Then take out each roundel and start rolling into a disc of 6 inches in diameter. (pic 10 and 11)
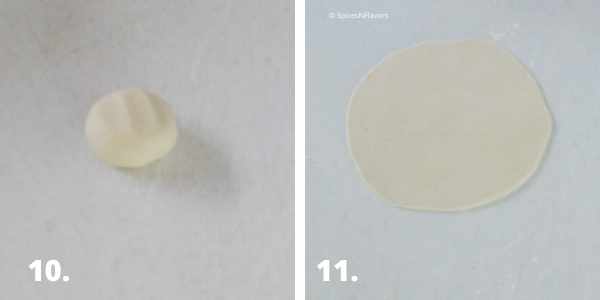
Of course you can eye ball and roll it too. But just keep your discs smaller around 5-6 inches only as smaller rotis tends to cook evenly.
But if you like to be precise then roll to even thickness of 6 inches.
If you are making the plain version just keep it as it is. Do not add any add ons..
For the butter rotis, we will brush some butter on top add in nigella seeds, and coriander leaves. Roll over with a rolling pin to press them into the dough.
And for the garlic rotis, everything remains the same except the addition of garlic along with nigella seeds and coriander leaves.
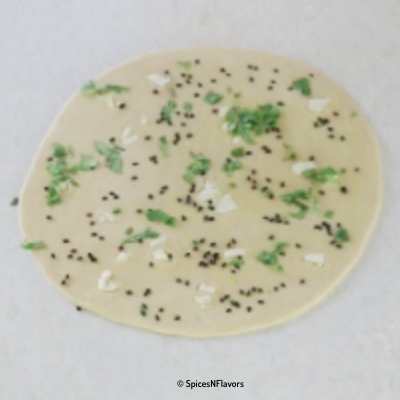
Step 3 - Cooking
Lift the roti up and place it on the cushion in a way that the plain side is facing you.
Apply some water on that side so that it would stick to your iron skillet.
Yes, make use of iron skillet or tawa for this recipe it won’t work well on a non-stick Tawa.
The skillet needs to be hot or else the rotis won’t puff.
Keep the temperature to med high.
So with the help of cushion (pic 12) drop the rotis on the tawa and press it down gently so that it sticks to the skillet.
Within few seconds you would observe small bubbles coming on top (image 13).
And after few bubbles just flip the skillet upside down (image 14) so that the roti now cooks on the direct flame giving the tandoori effect.
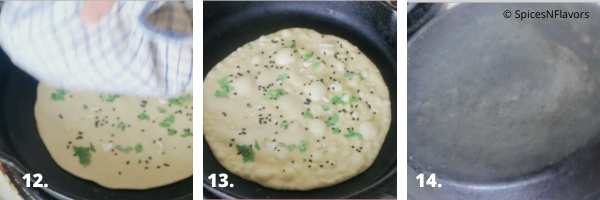
Since you have applied water and pressed it down on the skillet well, the roti won't fall off so rest assured.
Turn your skillet every now and then for even browning on top.
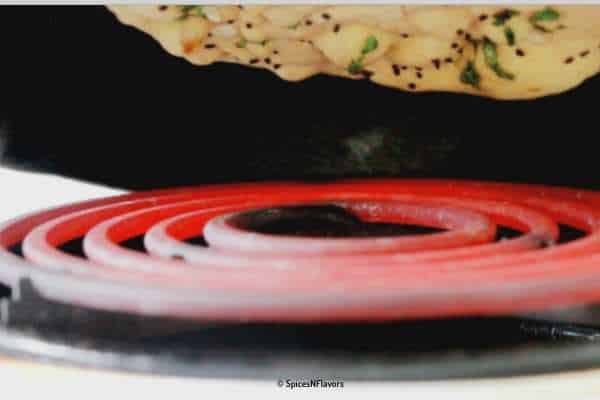
Don’t be afraid to leave it a little longer you need that blackening effect on top to resemble the tandoori cooking.
No that is not burnt. And this is another reason why we make smaller rotis so that it cooks evenly on the gas flame.
I would say once you do make 1-2 rotis you yourself will get an idea about how high the flame needs to be and how to rotate your skillet for even browning on top.
So once you are satisfied with the colour tilt it again.
Using a pair of tongs remove it and immediately apply some butter on top,
Wait actually smear a lot of butter because life is too short to think about calories right 🙂
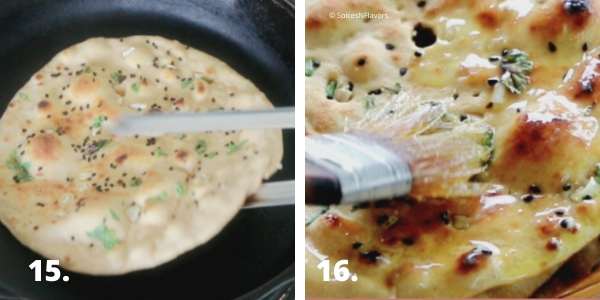
And serve them hot or warm. Cold rotis does not taste good.
If making plain rotis, then skip applying the butter once cooked too.
Now as mentioned the cushion makes it easier to transfer the dough to the skillet.
I tried to transfer using hands with no success (refer video in the recipe card)..
That being said there are people who find it comfortable to do it this way so I leave it up to you to decide as to what suits you.
After making 2 3 rotis sprinkle some water on top (image 17) and quickly wipe off (image 18) the debris that is sticking to the skillet.
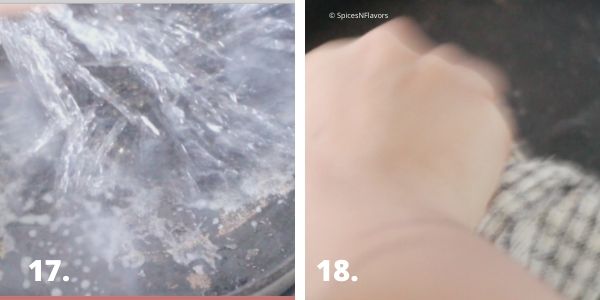
This serves dual purpose:
- It brings down the temperature of the skillet and
- The debris collected at the base tends to stick to the rotis and burns the base quickly. So to avoid that clean your tawa every now and then.
And that's it you have made yourself a breath-taking restaurant-worthy roti ready to be dipped into your favourite curry or dal.
Here are my top 9 tips to make Perfect Roti every single time.
- Make use of some kind of leavening agents (baking powder and soda in this case) to keep the rotis soft for a little longer.
- Unlike a regular bread recipe, do not need to a softer dough we want the dough to be little stiff here so knead for around 5-7 mins only.
- Resting the dough upon kneading is crucial to develop gluten.
- Roll the dough a little thick (around 6 inches to be precise) or else it won't puff up.
- At the same time make use of iron-skillet or tawa and not a non-stick one and also make sure that it hot when the roti hits the tawa.
- Roll the rotis smaller and rotate the skillet for even browning on top whilst cooking. As it is not possible to cook larger rotis on stove top and there are chances that it will remain undercooked.
- Do not use too much dry flour while rolling the rotis as the rotis won't stick to the cooking surface otherwise. Dust off any excess flour before placing it on the skillet.
- Sprinkle the iron skillet with some water after cooking 2-3 rotis.
- Store the rotis in an insulated hot box (Thermos) to keep it warm for longer if you have one or you can also store it wrapped in a cotton tea towel as we did with our Pita Bread.
How to serve Roti?
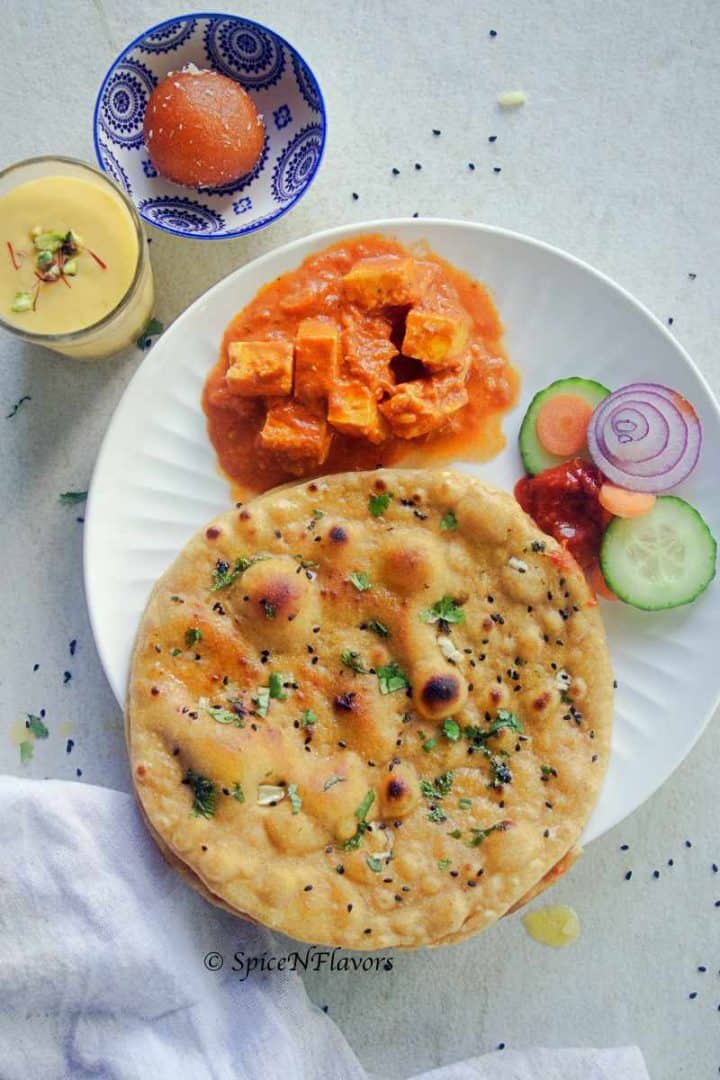
A Roti is usually served with hot or warm with some Dal and curry, with some salad and pickle on the side.
Today my mom made Paneer Butter Masala at home.
So on my plate you will find Tandoori Roti with Paneer Butter Masala, some salad and pickle.
As I only share baking and dessert related recipes on the blog, you won't find the recipe for curry.
But those of you who would want to try making the curry. Click here for the recipe. Have shared it from my friend Freda's blog.
And also do a favour to yourself by making mango lassi now that mangoes are in season or you can also have some buttermilk or soda instead.
Buttermilk or Soda water helps to digest the heavy meal easily.
And always end your Indian meal with an Indian sweet and what better than a gulab jamun 😀
All gulab jamun lovers in the house do raise your hands..
How to Eat Rotis?
The best way to enjoy Indian dishes is to eat using your hands. Ayurveda also recommends that.
I know many of you do not approve it but just give it a try once and you will feel the difference.
So tear apart a piece of roti get a handful of curry by dipping your fingers in it and yes do remember to lick the little bits sticking to your finger.. tastes heavenly.. have some pickle and some salad.. pure bliss..
How to store leftover Rotis:
You can store the leftover rotis in a thermos (insulated box) or wrapped in a cotton tea towel at room temperature itself for a day and not more that that.
And always reheat it before serving.
How to reheat the Rotis?
Often times as I end shooting, my rotis (food in general) become cold and obviously I am not going to eat it that way right..
So to reheat it simply dab some water on both sides of the roti.
Place it on a microwave-safe plate and microwave for 30 sec to get a warm and fresh roti.
What to do with leftover Rotis?
Now if your roti is a day old sometimes upon reheating turns hard. So here are a few ideas to re-use it.
- Make a cake - Yes you can make a cake from leftover rotis. Click here for the recipe.
- Use it as a Pizza Base - Apply some tomato ketchup, add some veggies of choice, sprinkle cheese generously. Place it on a tawa, covered with a lid and cook until cheese melts. Isn't it super easy?
- Make Ladoos - A healthier version of Indian sweet. Grind together rotis, jaggery powder, ghee, nuts of choice until it comes together and then shape it into balls.
- Cut it into thin strips and use it as a noodle in a recipe.
Before drafting a post on the blog, I often ask you guys about your queries or your problems while making the recipe on Instagram.
So here is answering to all those queries.
Do check out our Instagram page so that you can get all your baking queries answered then and there.
Some FAQ's
What is the difference between a Naan and a Roti?
The primary difference is that Naan is made from all-purpose flour whereas roti is made from whole wheat.
Usually yeast acts as the leavening agent in a Naan recipe whereas we do not need yeast to make tandoori roti.
The former is oval in shape and the latter is round.
I have the perfect recipe for making naan. You can click here for naan recipe.
Is Tandoori Roti healthy?
Tandoori Roti is healthier in terms that it is made using whole wheat flour which is nutritious and also takes a longer time to be digested by the body keeping you full for a longer time.
That being said it is healthier to its counter-parts.
It can be even more healthier if you skip the butter and eat it plain.
So next time you visit a restaurant try opting for a Tandoori Roti instead of a Naan.
Is this roti gluten-free?
No. It does have gluten in it as it is made of whole wheat flour.
Why is there no yeast in this recipe?
A role of yeast is to ferment the dough producing gases which causes it to rise and keeps it soft.
On the other hand the texture of the roti is supposed to be crisp whereas yeast would turn it soft.
But we do need some kind of leavening agents to keep the just soft enough to withstand the high heat and hence we are using baking powder and baking soda.
You can also make use of Eno here. Which would again keep the dough soft yet not bringing about a big rise.
Can I use Eno instead?
Yes you can use 1 packet of eno in place of baking soda and powder
Can I make rotis in OTG/Oven/Cooker?
Yes you can.
Find the details in the recipe card.
Wish to Join US for the love of BAKING? Subscribe to our newsletter and follow along on Facebook, Instagram, and Pinterest for all the latest updates!
Tag us on Instagram: @spicesandflavors to get featured on our stories.
Pin this for later:
Homemade Tandoori Roti in 3 simple steps
Ingredients
- 3 cups Whole Wheat Flour
- 1 tsp Sugar
- 1.5 tsp Salt
- 1.5 tsp Baking Powder
- 1/2 tsp Baking Soda
- 2 tbsp Ghee (Clarified Butter)
- 1/4 cup Yogurt/Curd
- 1 cup Water
- Some nigella seeds, coriander leaves, garlic cloves and melted butter as per needs
Instructions
Step 1 - Prepare the Dough
- To a wide mouth bowl start by adding the whole wheat flour followed by sugar, salt, baking powder and baking soda. Mix it.
- Add in ghee that is clarified butter. Mix that through.
- Make a well add in the yogurt and mix. Finally start adding little water at a time until everything comes together into a dough.
- Knead for another 5 mins until you get a smooth and supple yet stiff dough. (I ended up kneading the dough on my work-top as that was lot easier)
- Put it back in the bowl. Apply some ghee on the top so that the dough doesn't dry out. Cover with a tea towel and let it rest for 30 mins.
- Meanwhile prepare a cushion using tea towels, chop some garlic and coriander leaves and also melt some butter and set aside.
Step 2- Shaping
- Once rested roll the dough into a log and eye-ball and divide the dough into 12 equal portions. You can also weigh and divide it into 60 gms each to be presice.
- Now take out each ball and roll it into a disc of 6 inches in diameter. You can add little bit of flour if the dough sticks too much while rolling.
- Plain Roti: If making plain roti directly proceed to the cooking step
- Butter Roti: brush some butter on top add in nigella seeds, and coriander leaves. Roll over with a rolling pin to press them into the dough and then proceed to cook.
- Garlic Roti: everything remains the same except the addition of garlic along with nigella seeds and coriander leaves.
Step 3: Cooking
- Lift the roti up and place it on the cushion in a way that the plain side is facing you.
- Apply some water on that side so that it would stick to your iron skillet or Tawa.
- The skillet needs to be hot or else the rotis won’t puff. Keep the temperature to med high
- So with the help of cushion drop the rotis on the tawa and press it down gently so that it sticks to the skillet.
- Within few seconds you would observe small bubbles coming on top. And after few bubbles just flip the skillet upside down so that the roti now cooks on the direct flame giving the tandoori effect.
- Since you have applied water and pressed it down on the skillet well, the roti won’t fall off so rest assured. Turn your skillet every now and then for even browning on top.
- Literally bend over to see the colouration. So once you are satisfied with the colour tilt it again. Using a pair of tongs remove it and immediately apply some butter on top.
- And serve them hot or warm. Cold rotis does not taste good.
Video
Notes
- Always add liquid a little at a time to knead the dough. You might need all or you may need additional depending upon the type of flour you are using.
- Roti dough has to be smooth, supple and stiff. So kneading for about 5 mins would be just enough.
- Resting the dough upon kneading helps to develop the gluten structure and makes it easier to roll it into a disc.
- For even cooking on the stovetop it is advisable that you make rotis of smaller dimensions. I find that rotis with around 6 inches diameter cook evenly.
- Do not use too much dry flour while rolling the rotis as the rotis won't stick to the cooking surface otherwise. Dust off any excess flour before placing it on the skillet.
- It is recommended to use an iron skillet or tawa for this recipe. A non-stick pan will not work for this one.
- To ensure that your rotis puff note that the skillet needs to be hot and the rotis are rolled thick.
- Don't be afraid to leave the rotis to cook a little longer on the direct flame when tilted to get the tandoori effect.
- After making 2-3 rotis on the Tawa, sprinkle some water on it and quickly wipe off. This brings down the temperature of the Tawa if it gets too hot and also helps to clean any debris that is sticking on the Tawa which might cause the rotis to burn from the bottom.
Substitutions/Variations:
- Whole Wheat Four: You can substitute 1/2 cup of whole wheat flour with plain flour if you like.
- Baking Powder/Soda: It can be substituted with a packet of Eno.
- Ghee: Vegetable Oil or Butter can be used.
- As a variation, you can choose to stuff the rotis with paneer, dry fruits and coconut.
How to Store Rotis:
Store the rotis in an insulated hot box (Thermos) to keep it warm for longer if you have one or you can also store it wrapped in a cotton tea towel as we did with our Pita Bread. Any leftover rotis can be stored in an airtight container for up to 1 day at room temperature.How to Reheat Rotis:
Dab some water on both sides of the roti, place it on a microwave-safe plate and microwave for 30 sec.How to make Rotis using Cooker?
Heat the cooker till it is hot. Invert the cooker in a way that the flat side of the cooker is now facing you. Now to this side add the roti. Cook it until you see bubbles coming up and then invert and cook it on the flame directly until you see even browning on top. Remove with tongs and apply butter and serve.How to make it in an oven/OTG?
Roll around 4 5 rotis or how much ever you can fit it on your baking tray. Then bake in a preheated oven of 230°C for around 8 to 10 mins. Also please read through the post to have additional information on how to use up leftover rotis, how to serve rotis, how to eat rotis and many other useful tips.Nutrition
Conclusion:
Homemade Tandoori Roti is your way to choose a healthier flatbread the next time you visit an Indian restaurant.
Made using whole wheat flour and very less addition of sugar this roti recipe gets done in under 60 mins.
Learn how to make tandoori roti without tandoor in a step by step format and video tutorial.
I will see you soon with yet another recipe
Until then
Hugs
Sushma

Divya says
Can you put the roti directly on a gas flame stove?
Also which brand of atta did you use?
Thank you
sushma iyer says
Hi Divya..
Yes you can put it directly on the stove flame after the initial cooking on a pan. I am using Ashriwad Atta.
Regards
Sushma