Discover the secret to an effortless and utterly delicious Homemade Air Fryer Naan Bread recipe that's both a breeze to make and offers a taste far superior to store-bought options, enticing you to relish every mouthwatering bite.
Prepare to elevate your culinary journey with this irresistible delight that will leave you yearning for seconds.
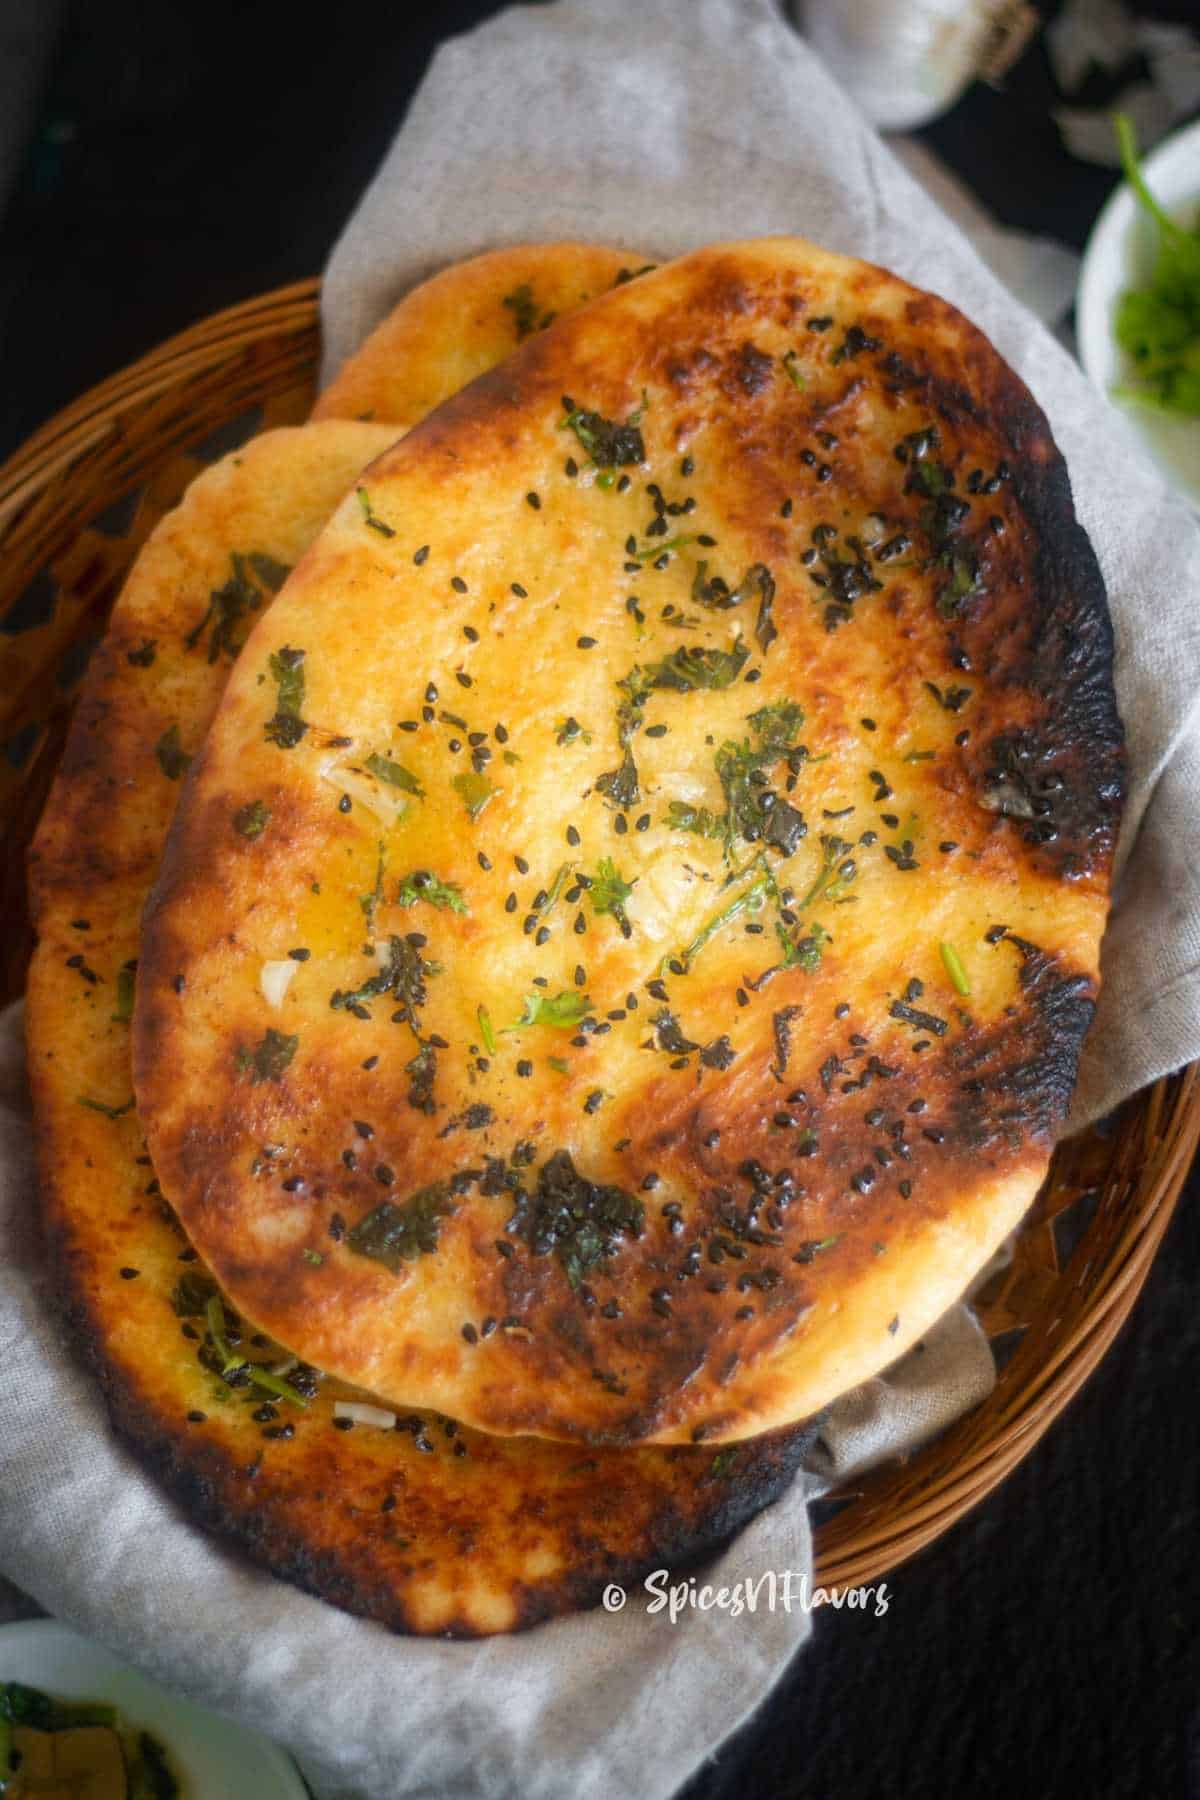
What is Naan Bread?
Naan bread is a soft, leavened flatbread originating from South Asia, particularly India. It's typically made from flour, water, yeast, and various seasonings. This Indian Bread is known for its fluffy texture, and slightly chewy or crispy crust, and often has a deliciously charred or blistered appearance due to being cooked in a tandoor.
It's a versatile bread that can be enjoyed on its own, used as a wrap, or served alongside various dishes like curries, kebabs, or grilled meats.
We have already talked about it in our Naan Bread recipe.
I have to admit when it comes to preparing Naan on a stovetop, it can be a bit challenging.
That's why today, I'm introducing you to the Air Fryer method, which simplifies the process and makes it much more convenient.
Why Choose the Air Fryer Method?
The Air Fryer method provides a quicker and more efficient cooking process compared to traditional methods like oven-baking or stovetop cooking.
The hot circulating air in the Air Fryer results in a perfectly crisp exterior while keeping the inside soft and fluffy.
Using an Air Fryer is energy-efficient, reducing electricity consumption.
This method is user-friendly, offering precise temperature control for consistent results.
Overall, the Air Fryer method provides a convenient and rewarding way to make homemade Naan Bread.
Ingredients
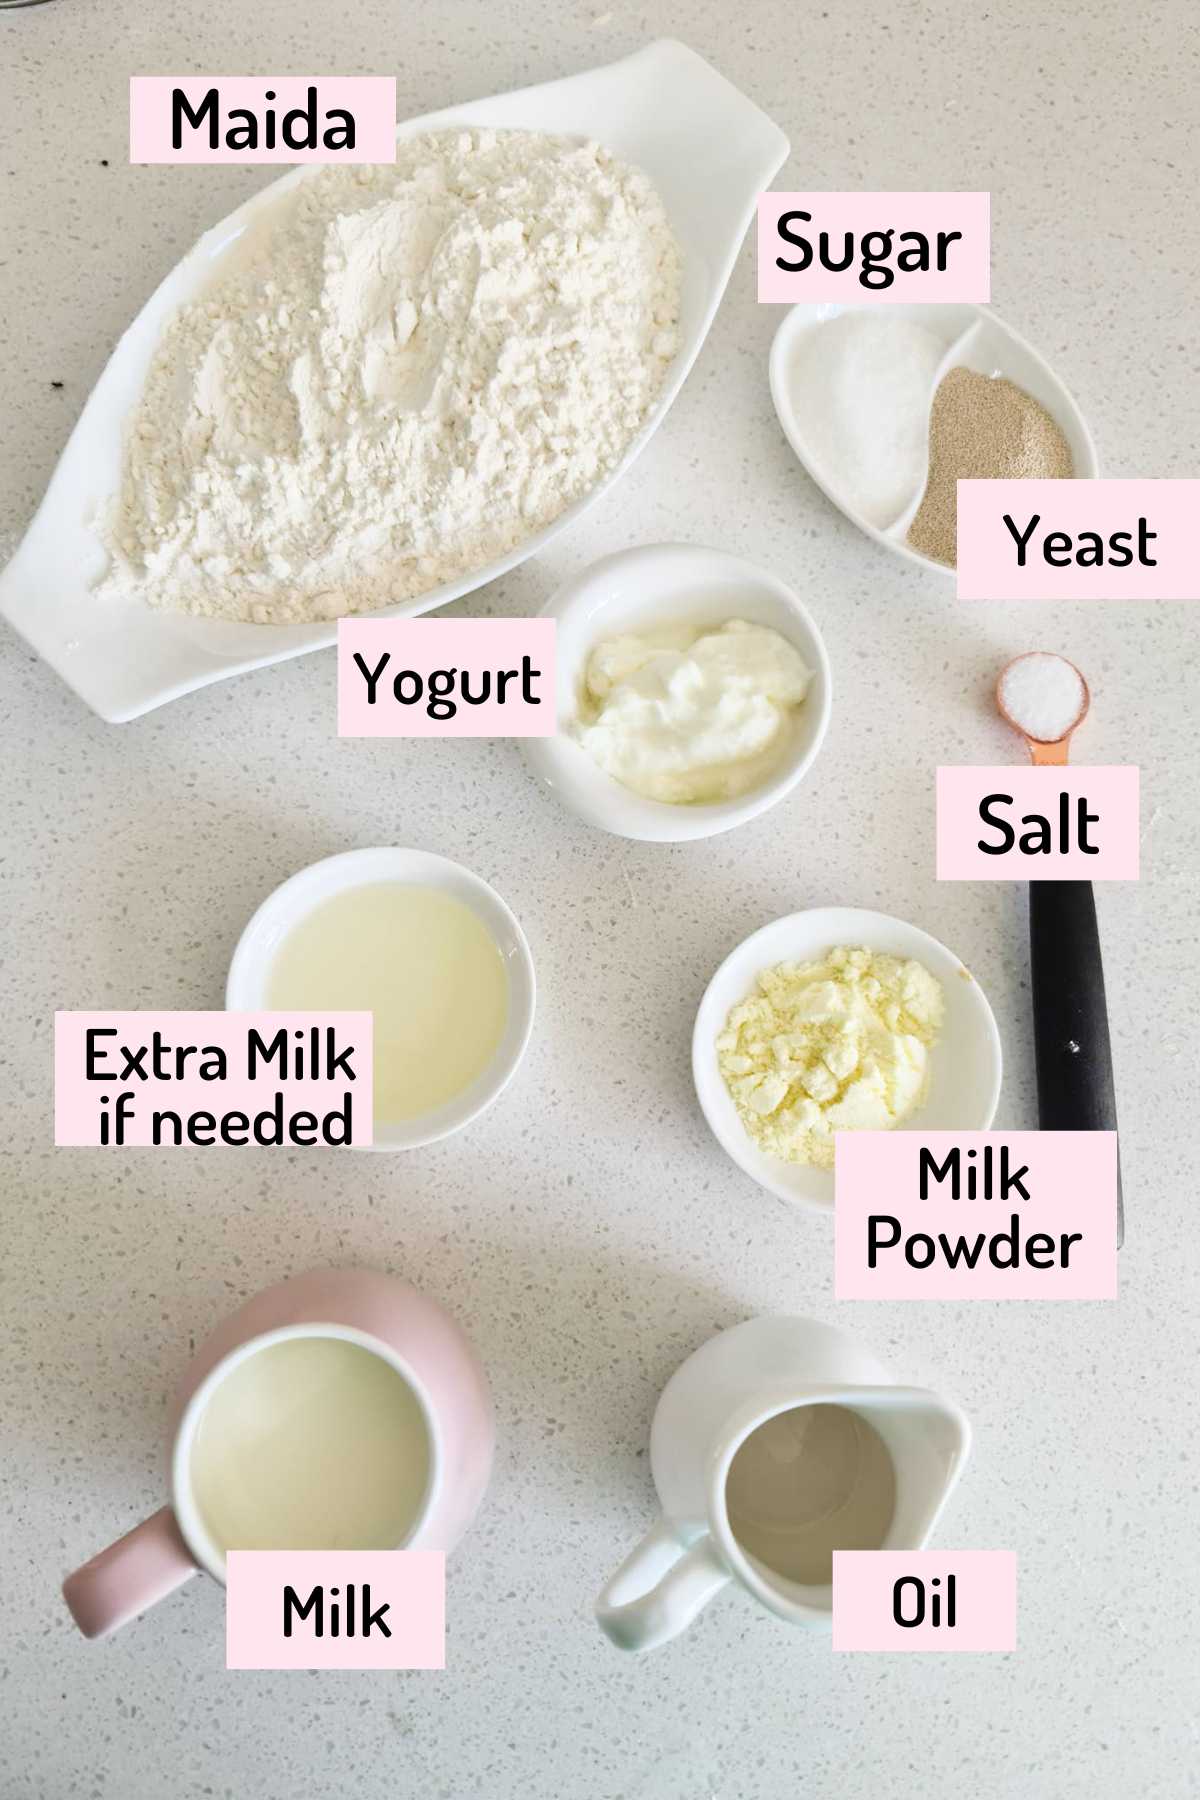
- Flour: Naan Bread is made using All purpose flour or Maida and a Tandoori Roti is made using Whole Wheat Flour. So for this recipe, we will be using APF. You do not need bread flour to make this. And no self-rising flour will also not work.
- Yeast: I prefer and suggest using Instant Yeast over active dry yeast; as this type of yeast can be directly added to the flour without having the need to activate it first before mixing unlike the latter. Very convenient to use.
- Milk: Keeps the bread soft and also helps to get that golden brown color once cooked but you can also use Water in place of Milk. Just make sure to use warm milk.
- Yogurt: Use any variety of unsweetened yogurt. I prefer using Natural Yogurt or Plain Greek Yogurt.
- Milk Powder: Helps to soften the dough but this can be skipped if you do not have it handy.
Detailed recipe with measurements and printable instructions can be found in the recipe card at the end of the post.
Step by Step Instructions:
Step 1 - Preparing the Dough
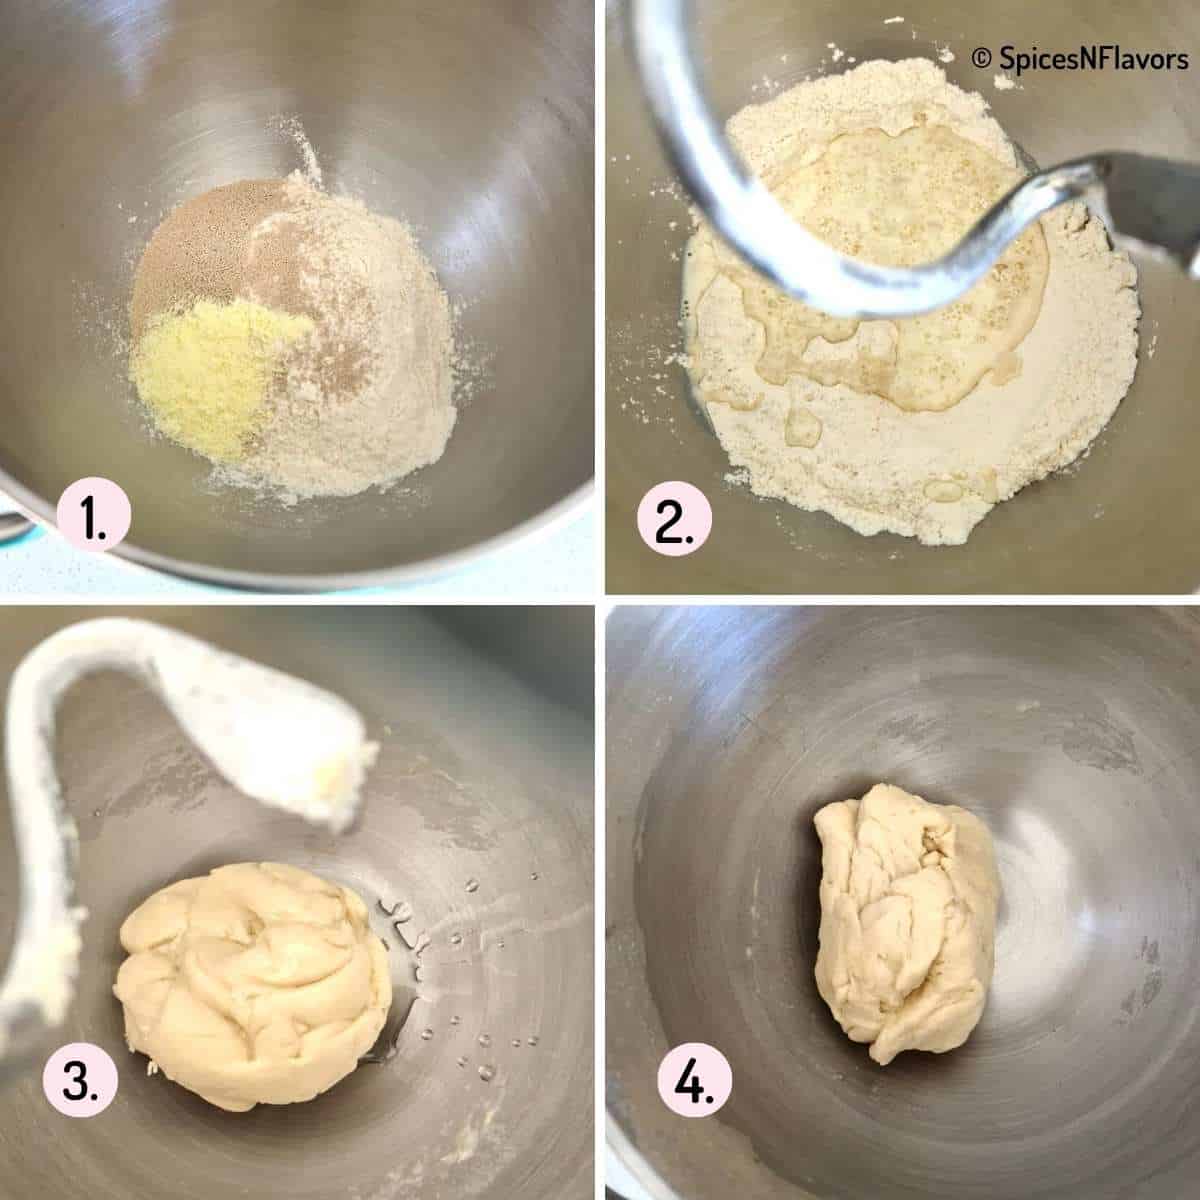
In the mixing bowl of your stand mixer, combine all the dry ingredients - salt, flour, yeast, milk powder and give a quick mix on low speed. (image 1)
Then add the yogurt and warm milk. Use the dough hook attachment to knead the mixture for approximately 6 minutes. (image 2)
Then, incorporate the olive oil and continue kneading for an additional 4 minutes until the dough achieves a soft consistency. (image 3 and 4)
If the dough appears dry, you can add an extra 2 tablespoons of milk and knead for another minute until it forms a pliable soft dough.
For more details on kneading by hand, please refer to our Naan Bread post.
Step 2 - First Proofing
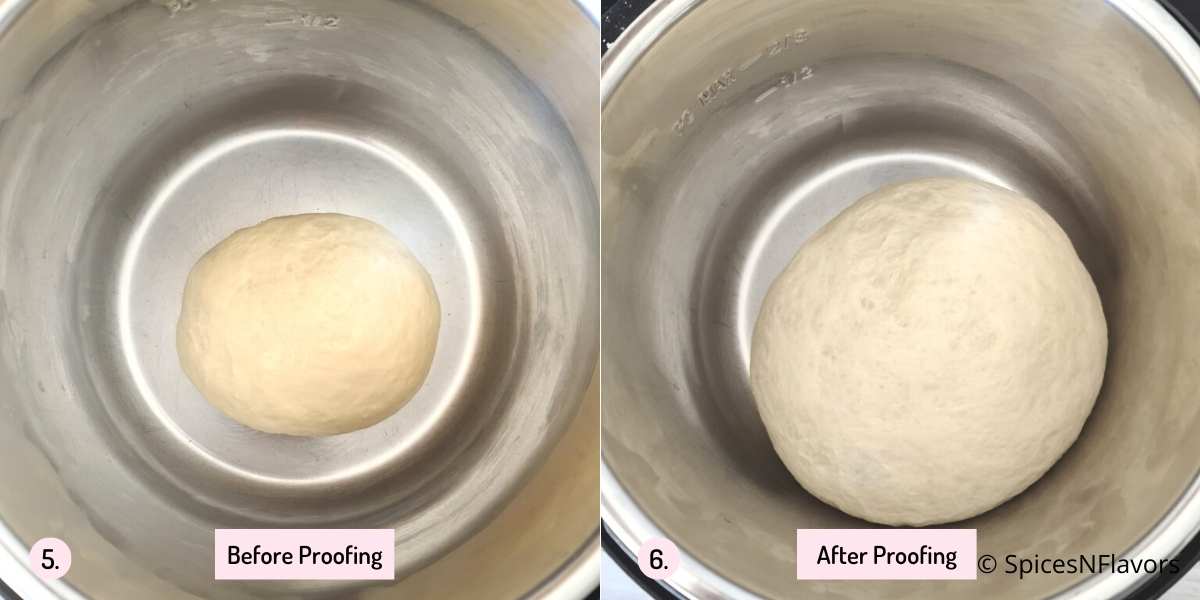
For an easy way to proof the dough, consider using an Instant Pot.
Grease the inside of the pot with a bit of oil and place the dough inside (image 5).
Close the lid, select the yogurt setting, ensure the vent is set to sealing, and set the timer for 1 hour.
This post on How to proof dough in Instant Pot would help you in different time settings to prove any type of bread dough.
Alternatively, you can allow the dough to prove on the countertop itself. Simply oil a bowl of your choice, place the dough inside, cover it with a tea towel, and keep it in a warm place to proof for 2 hours.
Step 3 - Preparing Garlic Butter
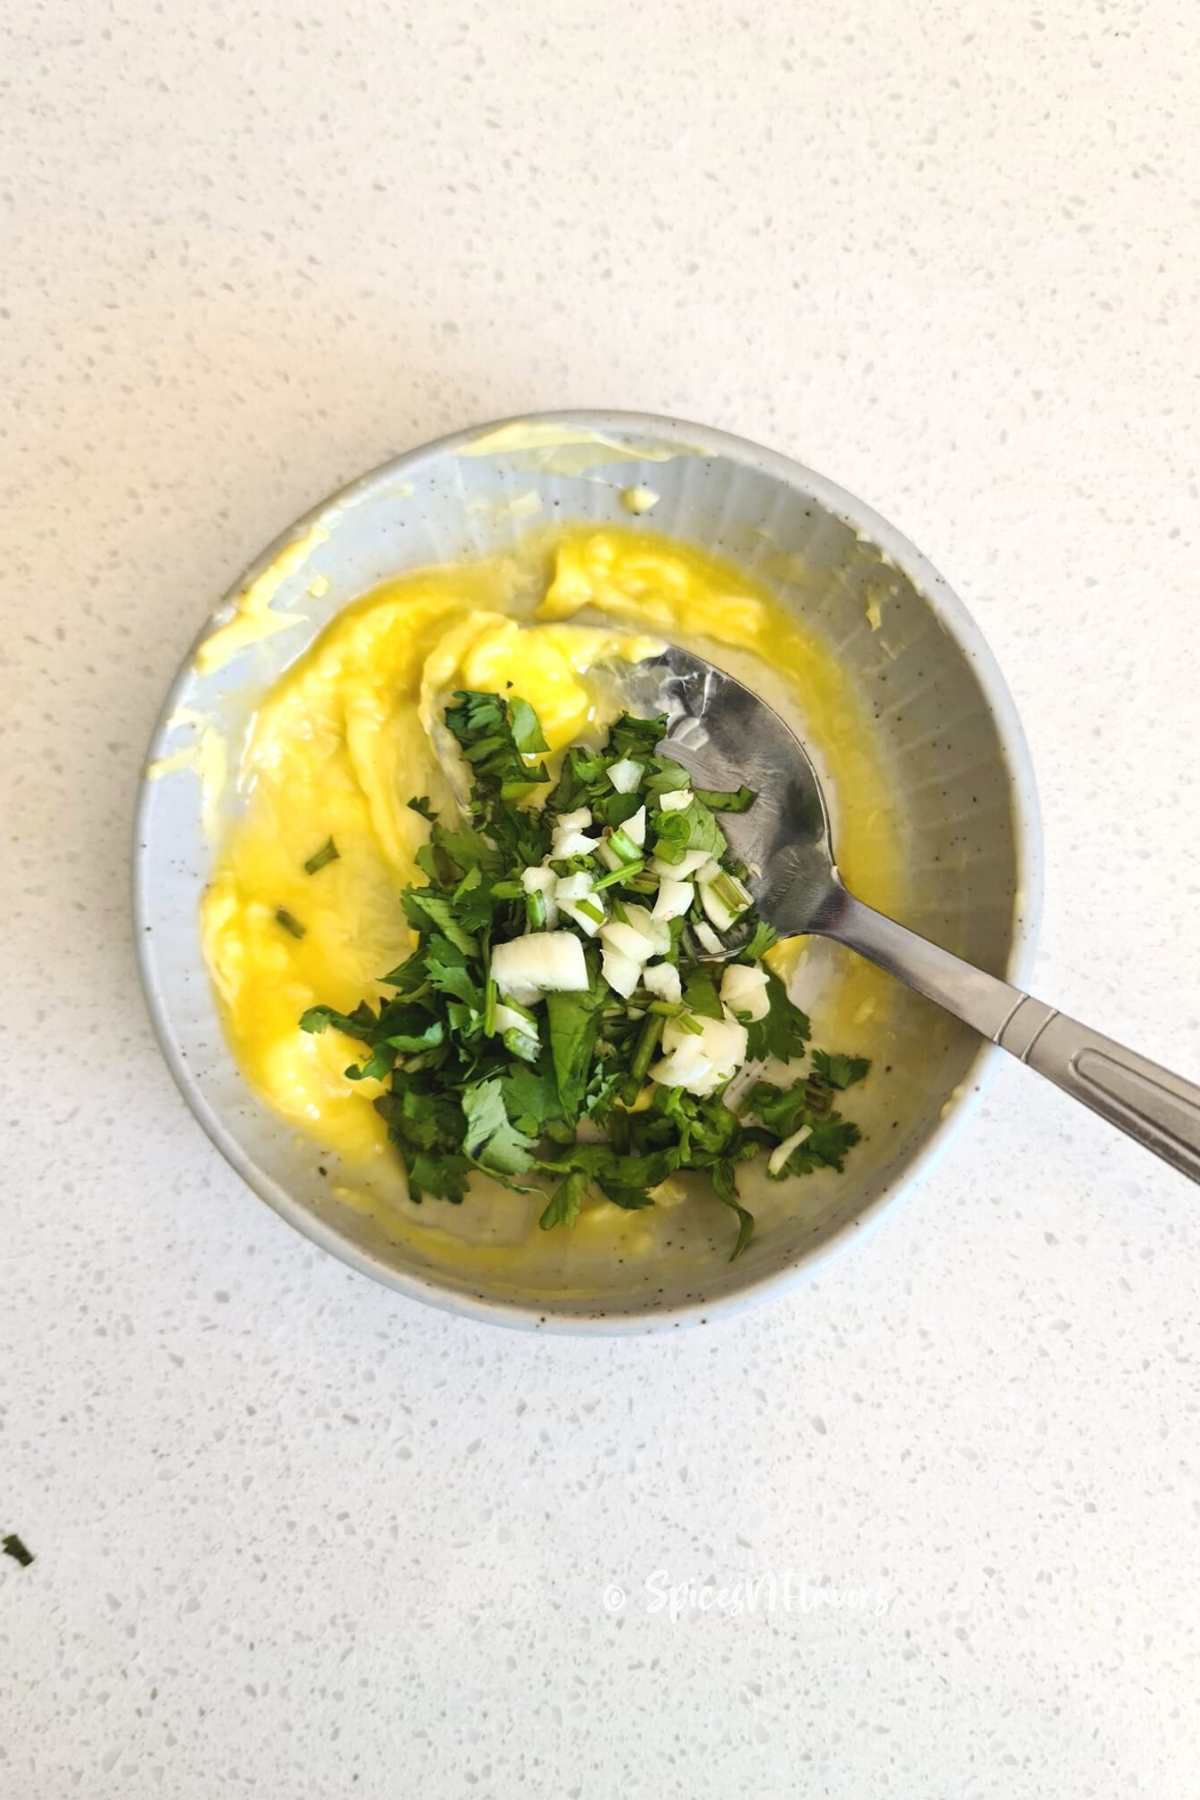
Prepare the garlic butter if you'd like to enjoy garlic naan bread.
To the softened butter, add crushed garlic and coriander leaves, mixing well before setting it aside.
If you prefer plain naan, skip the garlic and use plain melted butter instead.
Step 4 - Shaping

Divide the dough into 4 equal portions (image 7). Lightly brush a small amount of oil onto the rolling pin and use it to roll each piece of dough into an oval shape, ensuring it fits comfortably in the air fryer basket.
For Plain Naan: Simply sprinkle nigella seeds on top of the rolled-out dough and gently press them in using the rolling pin (image 8).
For Butter Naan: Brush the top of the rolled-out dough with melted butter. You can also incorporate some coriander leaves into the melted butter if desired.

For Garlic Naan: Generously brush the prepared garlic butter on top of the dough.
Step 5 - Cooking
Preheat the air fryer to 170°C for 5 minutes.

Place each rolled-out dough piece into the air fryer basket one at a time and bake for 5-7 minutes or until they turn evenly golden brown on top (image 9).
To achieve the iconic blisters on top of the naan, you have the option to place the naan bread, top side down directly on top of an open flame (image 10).
After cooking, consider brushing the top of the naan with additional butter for a softer crust and a glossy finish. Enjoy your delicious homemade naan!
Storage Instructions:
This is a very small batch recipe so you would not have any leftovers but if you still do then here is how you can store it
- Cool Completely: Allow the air fryer naan bread to cool completely at room temperature before storing. This prevents condensation and helps maintain its texture.
- Wrap or Container: You can store air fryer naan bread in an airtight container or resealable plastic bag. Alternatively, you can wrap individual pieces in plastic wrap or aluminum foil.
- Refrigeration: If you plan to consume the naan bread within a day, storing it at room temperature is fine. However, for longer storage, it's best to refrigerate it. Place the wrapped or containerized naan bread in the refrigerator.
- Freezing (Optional): For extended storage, you can freeze air fryer naan bread. Place the cooled and wrapped naan bread in an airtight freezer bag. Make sure to remove as much air as possible to prevent freezer burn. You can freeze naan bread for up to 2-3 months.
- Reheating: When you're ready to enjoy the stored naan bread, you can reheat it in the air fryer for 2-3 minutes until it's warmed through and regains its original texture. Alternatively, you can use a toaster, oven, or stovetop skillet to reheat it.
Remember that while refrigeration and freezing can extend the shelf life of air fryer naan bread, it may not be as soft and fresh as when it was first made.
However, proper storage and reheating can still provide a tasty and convenient option for enjoying leftover naan bread.
Baker's Tips:
- Ensure the consistency of your dough is soft, smooth, and slightly sticky. If it's too dry, add a bit more warm milk. If you are using water to knead the dough then add warm water.
- Lightly grease or oil the dough before proofing. This prevents it from drying out and forming a crust on the surface.
- Customize your naan with toppings like nigella seeds, melted butter, or garlic butter for added flavor. Adjust the toppings according to your preference.
- For the characteristic blistering on top of the naan, you can briefly place the cooked side directly over an open flame. This step is optional but adds a traditional touch.
- Brushing the cooked naan with melted butter after removing it from the air fryer not only enhances the flavor but also gives it a glossy finish.
- Store leftovers in an airtight container or freeze for later.
- Don't be afraid to experiment with different seasonings, fresh herbs, and spices to create variations of naan bread to suit your taste.
- The recipe can be easily doubled.
Serving Suggestions

- Pair with Indian Curries: Air Fryer Naan Bread is the perfect accompaniment for a wide range of Indian curries such as butter chicken, tikka masala, or mughlai curry. Its soft and slightly crispy texture makes it ideal for scooping up rich and flavorful sauces.
- Use for Wraps and Sandwiches: You can it to create delicious wraps or sandwiches. Fill it with your favorite ingredients like grilled chicken, veggies, and sauces for a quick and satisfying meal.
- As a Pizza Base: A great way to enjoy your naan is to transform it into quick and easy personal pizzas. Spread marinara sauce, tomato or pizza sauce, cheese, and your favorite pizza toppings, then air fry until the cheese is melted and bubbly for an air fryer naan pizza. For a crispy pizza just bake it for a minute longer. I am soon going to share the recipe of air fryer naan bread pizza so stay tuned to learn the 3 ingredients pesto naan pizza recipe.
- Enjoy with Dips: For a simple yet delightful snack, cut Naan into smaller pieces and serve with various dips like hummus, tzatziki, or Baba Ganoush.
- Make Naan Chips: Cut naan into triangular or rectangular pieces, brush with a little olive oil and seasonings, then air fry until crispy. These naan chips are great for dipping in salsa, guacamole, or cheese dip.
- Grilled Cheese: Make a unique grilled cheese sandwich using naan bread. Fill it with your favorite cheese and grill until it's gooey and golden brown.
Air Fryer Naan Bread is incredibly versatile, so feel free to get creative with your serving ideas to suit your taste and the occasion.
Frequently Asked Questions
You make Tandoori Roti with whole wheat flour. It is not naan if you make it with whole wheat flour so to answer no you do not make whole wheat naan
You can proof the dough on your countertop in a warm place if you don't have an Instant Pot. It just takes a bit longer.
Yes, you can mix and knead the dough by hand. It might take a bit more effort, but it's definitely doable.
Yes, you can prepare the dough ahead of time and store it in the refrigerator until you're ready to cook. You can also freeze cooked naan for later use.
If you don't have an air fryer, you can make naan on a stovetop skillet or in the oven. Adjust the cooking method accordingly or refer to our Naan Bread recipe for step by step easy recipe instructions
Yes, you can divide the dough into smaller portions to make mini naan for appetizers or snacks.
Related Recipes
Wish to Join US for the love of BAKING? Subscribe to our newsletter and Youtube channel. Follow along on Facebook, Instagram, and Pinterest for all the latest updates!
The Best Homemade Air Fryer Naan Bread
Ingredients
- 1/2 tsp Salt
- 1.5 cups (180 gms) Maida/APF
- 1 tbsp (8 gms) Milk Powder
- 1/2 tbsp Sugar
- 2 tsp (8 gms or 1 sachet) Instant Yeast
- 2 tbsp Yogurt
- 1/4 cup + 2tbsp Warm Milk
- 1 tbsp Oil
Garlic Butter (optional)
- 2 tbsp softened butter
- 1 garlic clove chopped or grated
- 1 tbsp chopped Coriander (cilantro) leaves
Instructions
Step 1 - Preparing the Dough
- In your stand mixer's mixing bowl, combine salt, flour, yeast, milk powder. Mix using a dough hook at a slow speed for a minute. Combine yogurt, and milk.
- Use the dough hook attachment to knead for 6 minutes on medium high speed.
- Incorporate olive oil and knead for an extra 4 minutes until the dough is soft.
- If the dough is dry, add 2 tablespoons of milk and knead for another minute.
Step 2 - First Proofing
- Use an Instant Pot for easy proofing. Grease the pot, place the dough inside, select the yogurt setting, seal the vent, and set a 1-hour timer.
- Alternatively, proof on the countertop by oiling a bowl, covering the dough with a tea towel, and allowing it to rise for 2 hours.
Step 3: Preparing Garlic Butter
- Make garlic butter by mixing crushed garlic and coriander leaves into softened butter. Prepare this only if you want to make Garlic Naan
- For butter naan, use plain melted butter instead.
- For plain naan - no need for any pre-prep.
Step 4 - Shaping
- Divide the dough into 4 portions.
- Lightly oil the rolling pin and roll each piece into an oval shape to fit the air fryer basket.
- For plain naan, add nigella seeds and press gently. For butter naan, brush with melted butter (add coriander leaves if desired). For garlic naan, generously brush with prepared garlic butter.
Step 5 - Cooking
- Preheat the air fryer to 170°C for 5 minutes. Place each dough piece in the air fryer basket, baking for 5-7 minutes until golden.
- For iconic blisters, briefly expose the top to an open flame (optional).
- After cooking, brush with more butter for a soft, glossy finish. Enjoy your homemade naan!
Video
Notes
- Ensure the consistency of your dough is soft, smooth, and slightly sticky. If it's too dry, add a bit more warm milk. If you are using water to knead the dough then add warm water.
- Lightly grease or oil the dough before proofing. This prevents it from drying out and forming a crust on the surface.
- Customize your naan with toppings like nigella seeds, melted butter, or garlic butter for added flavor. Adjust the toppings according to your preference.
- For the characteristic blistering on top of the naan, you can briefly place the cooked side directly over an open flame. This step is optional but adds a traditional touch.
- Brushing the cooked naan with melted butter after removing it from the air fryer not only enhances the flavor but also gives it a glossy finish.
- Store leftovers in an airtight container or freeze for later.
- Don't be afraid to experiment with different seasonings, fresh herbs, and spices to create variations of naan bread to suit your taste.
- The recipe can be easily doubled.



Leave a Reply