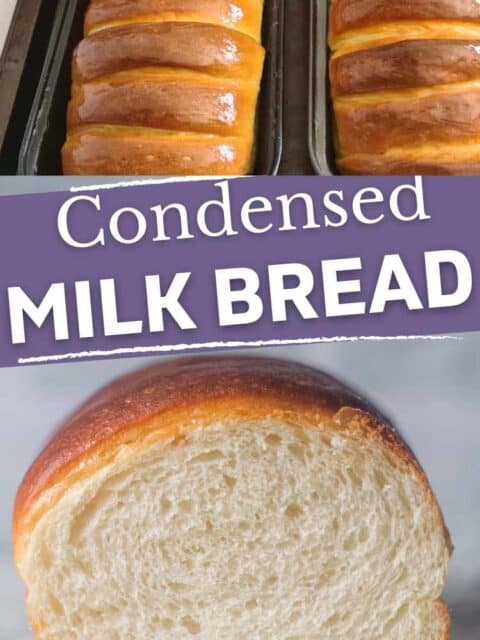
Deliciously soft and fluffy bread with a hint of sweetness this condensed milk bread is a unique sandwich bread that stands out for its premium flavor and texture. It's perfect for making mouth-watering grilled cheese and it's so tender that you can use it to make the fluffiest french toast.
👩🏼🍳 What does condensed milk bread taste like?
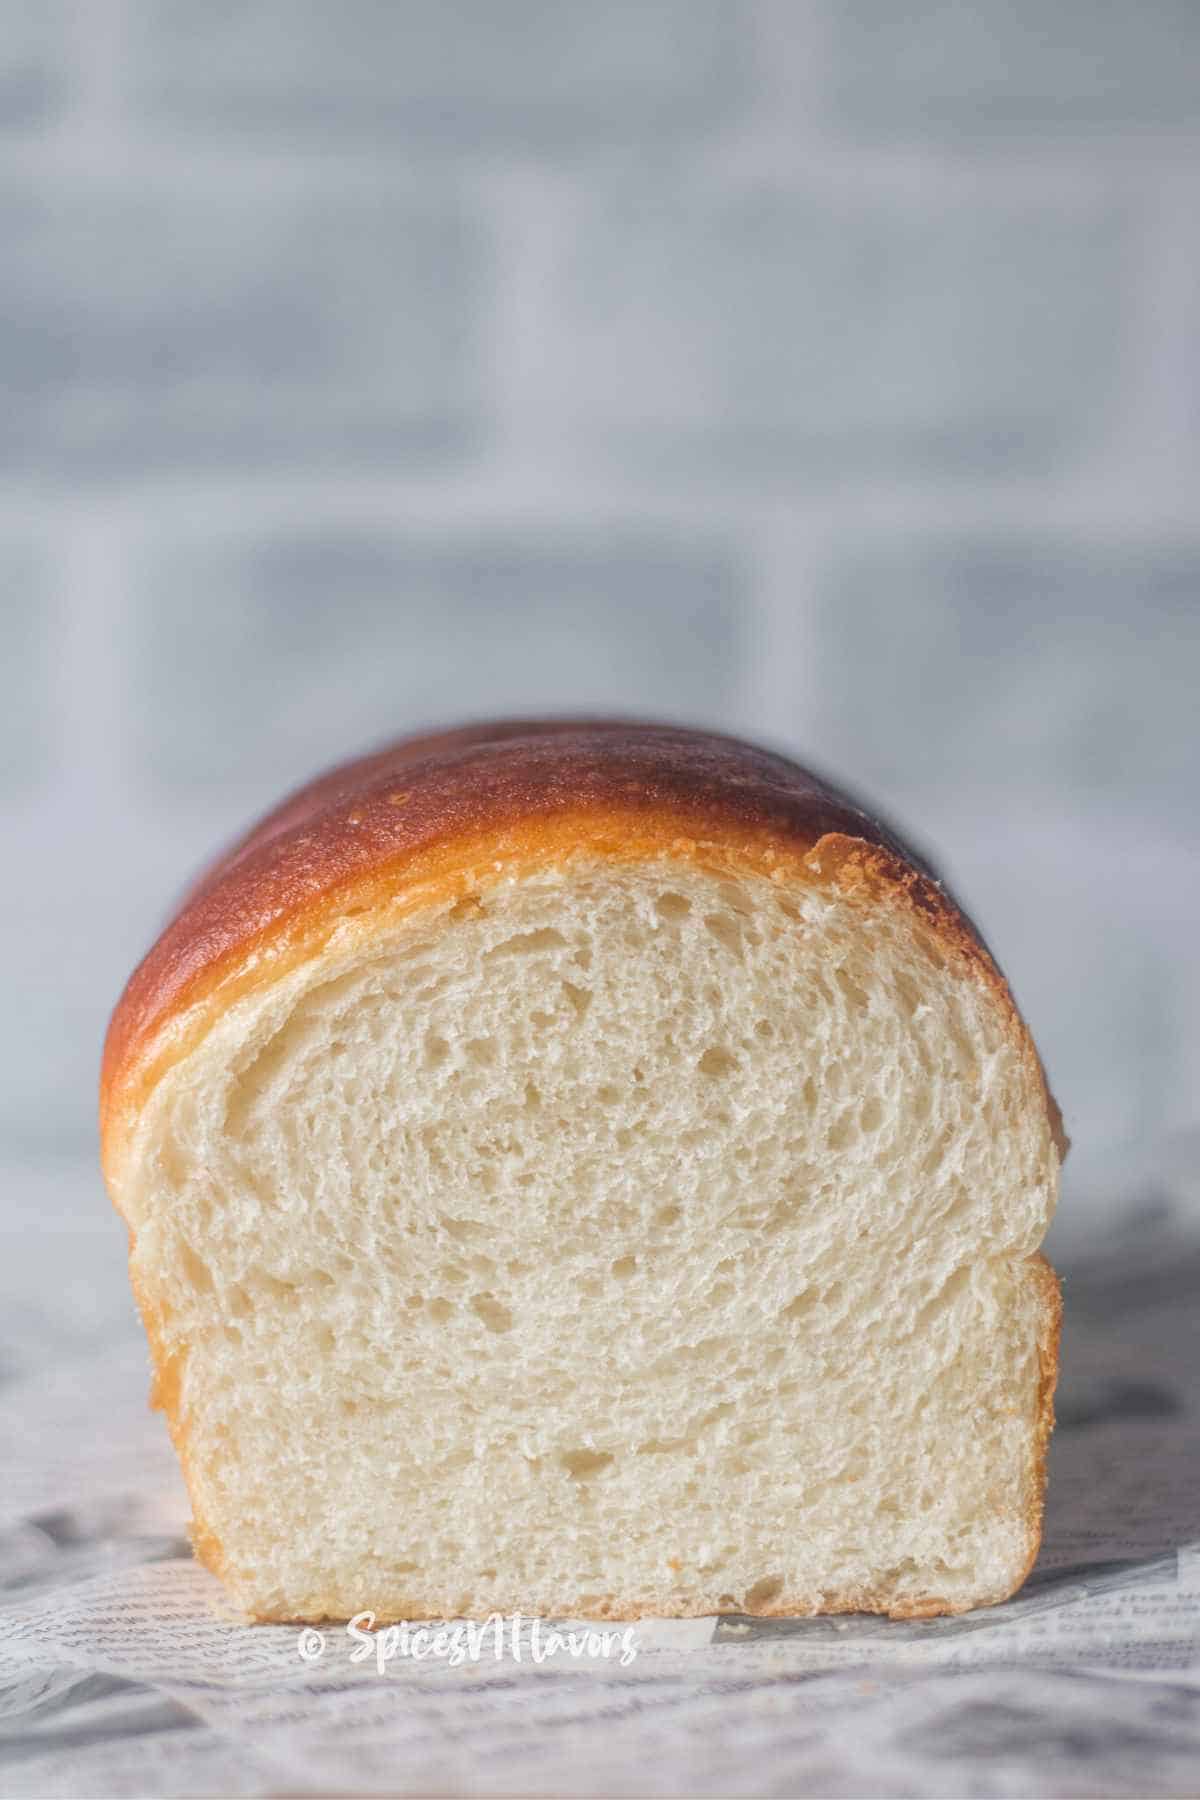
Just 3 words - lightly sweet, fluffy, and soft. If you've ever had any enriched dough bread like brioche or Hokkaido milk bread before, this bread will remind you of that but made in a less complicated way!
The condensed milk is more subtle than it appears at first glance. Does not lend a sweet flavor but adds to the texture of the bread. And hence there is an added condensed milk glaze on top to amplify the flavor.
It is a mildly sweet bread perfect for French toast or even bread pudding, simply eat it plain or use it as a sandwich bread.
This bread is soft to the touch and Condensed Milk Bread is the perfect excuse to use up leftover condensed milk.
It is so good, you'll want to make it every day!
📌 What does Condensed Milk do in a bread?
The answer is simple: It makes it super soft and moist.
Condensed milk is made by combining whole milk and sugar, then heating it until the great majority of the water has evaporated out of the mixture leaving behind a thick, rich substance that's basically rich in fat.
This extra fat in condensed milk helps to soften the bread and adds tenderness, moisture, and flavor to the recipe.
In short, it kind of mimics the role of eggs in the enriched dough and hence is often used as a replacement for eggs in baking be it in this recipe that we are learning today or be it in cakes.
📝 Ingredients - Substitutions and Notes
Scroll to the recipe card to print this out.
- 250 gms (1 cup) Warm milk - Too cold milk won't activate the yeast and too hot will kill it. The ideal temperature would be around 90-110°F
- 105 gms (1/3 cup) sweetened condensed milk
- 1/4 (60 gms) cup yogurt or use 1 egg
- 31/4 cups (390 gms) all purpose flour
- 15 gms Milk Powder - optional but highly recommended
- 8 gms (2 tsp/1 sachet) Instant Yeast
- 1 tsp salt
- 57 gms (1/4 cup) Butter melted - Even softened butter would work. Either way, I recommend using unsalted butter.
For the Glaze:
- 3 tbsp condensed milk
- 1 tbsp unsalted butter softened, at room temperature
👩🏼🍳 Step-by-Step Instructions
Step 1 - Prepare the Bread Dough
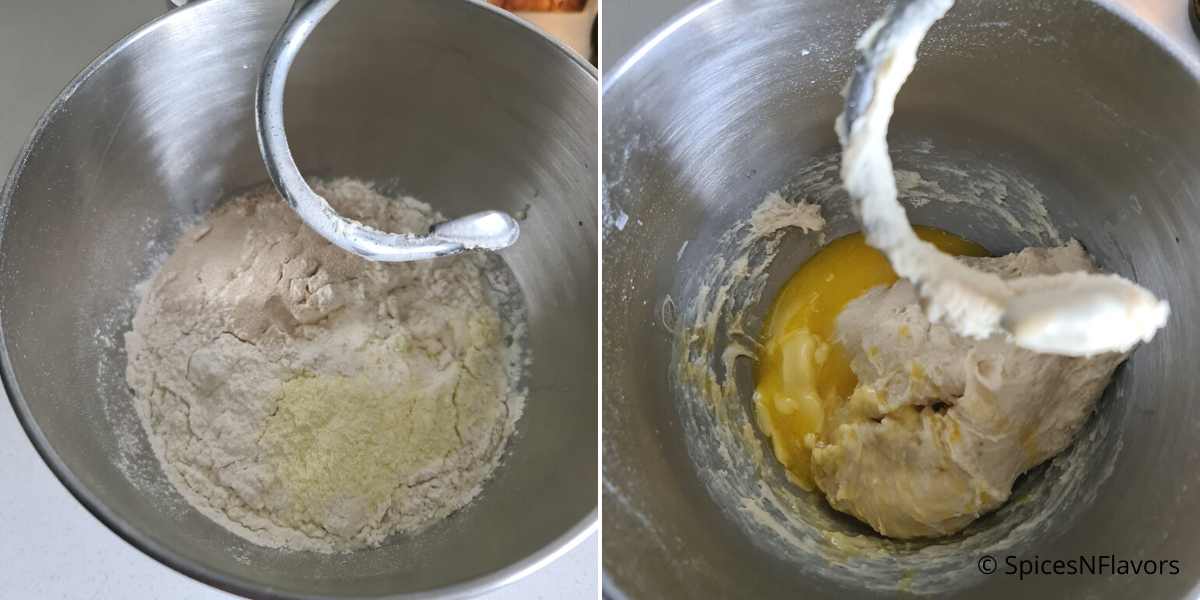
Into the bowl of a stand mixer add lukewarm milk, yogurt, and condensed milk.
In a separate medium bowl, take the flour, add salt to it and mix well.
Now add this flour and salt mix to the bowl of stand mixer followed by milk powder, sugar, and yeast.
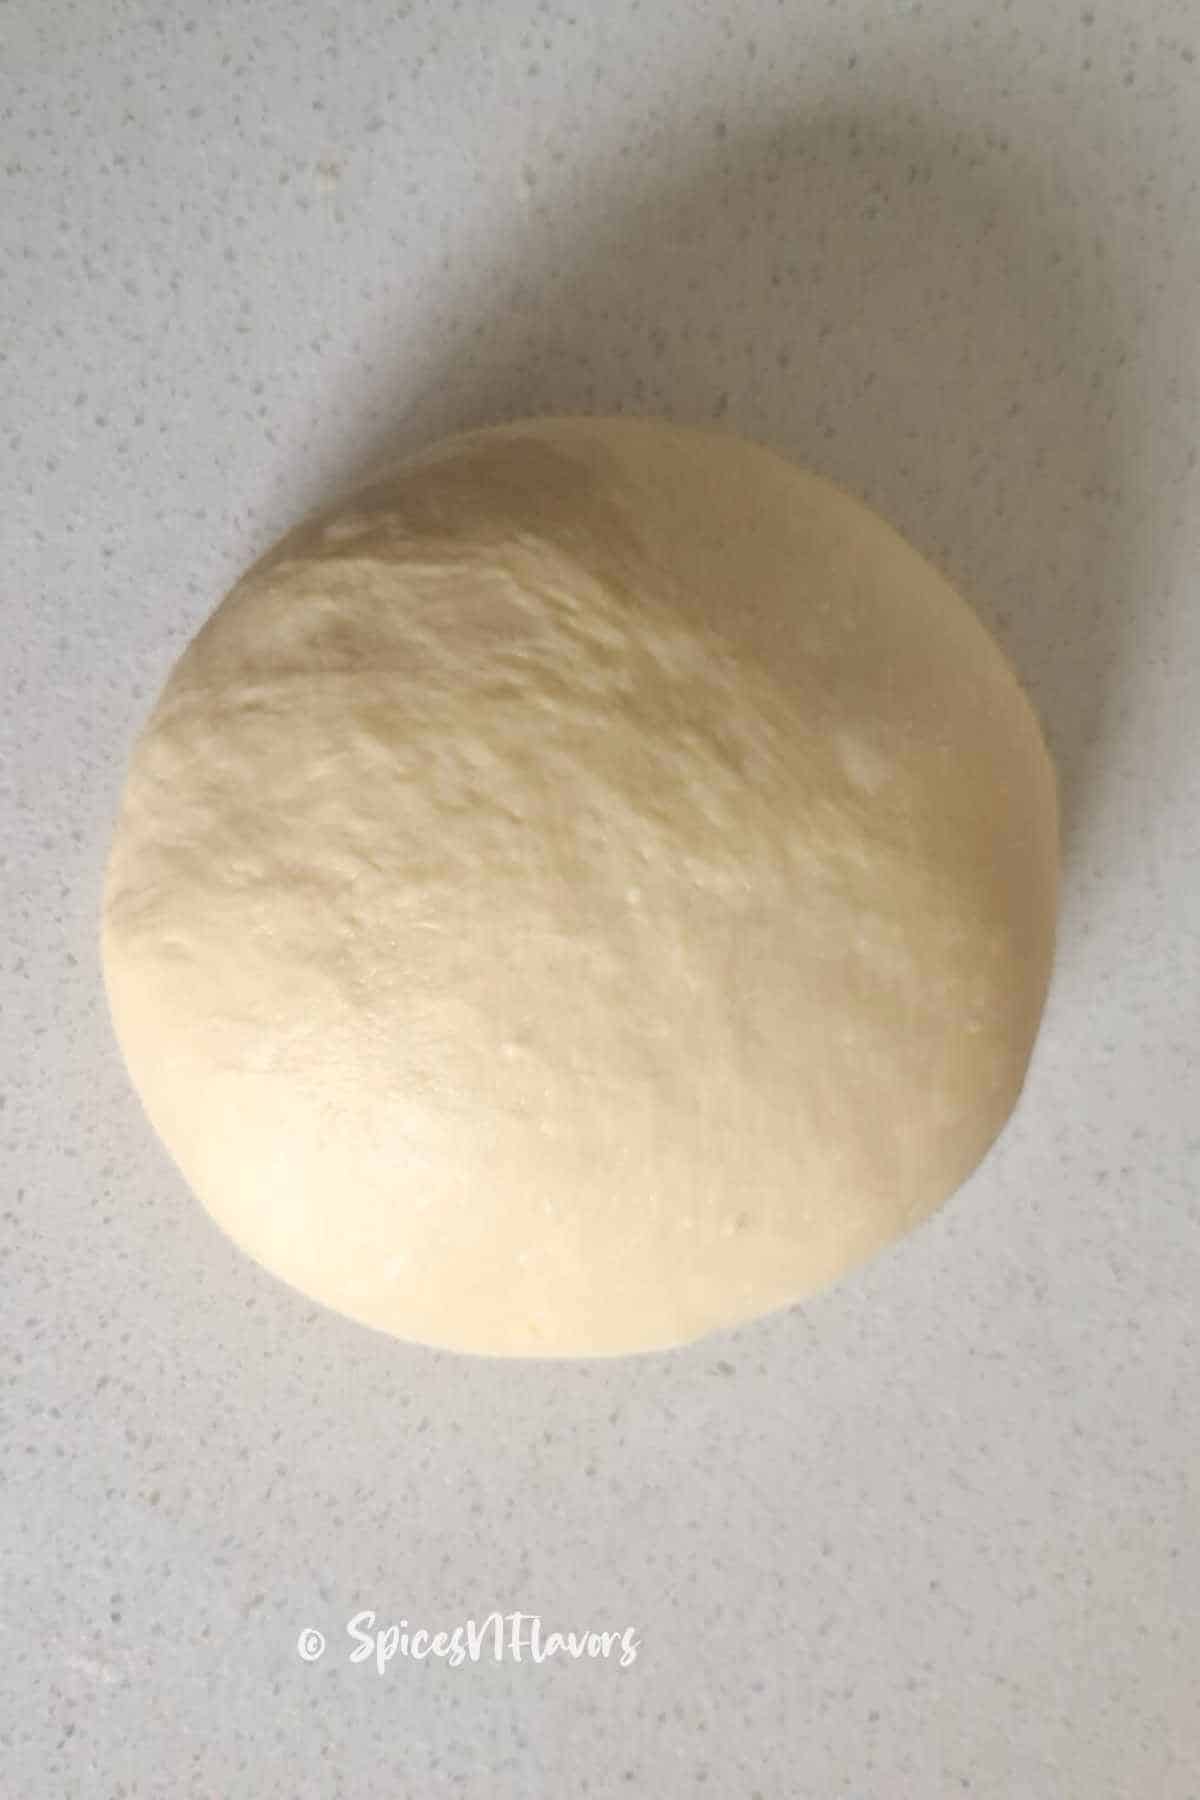
On low speed, using a dough hook combine everything till it is mixed together, then increase the speed to high and knead on medium-high for 8 mins.
After 8 mins, add the butter to it (image on the right) and knead again for another 4 mins until the dough feels soft and bouncy.
Step 2 - First Proofing.
Grease the bottom and sides of the bowl with some oil or butter.
Place the well-kneaded dough into it.
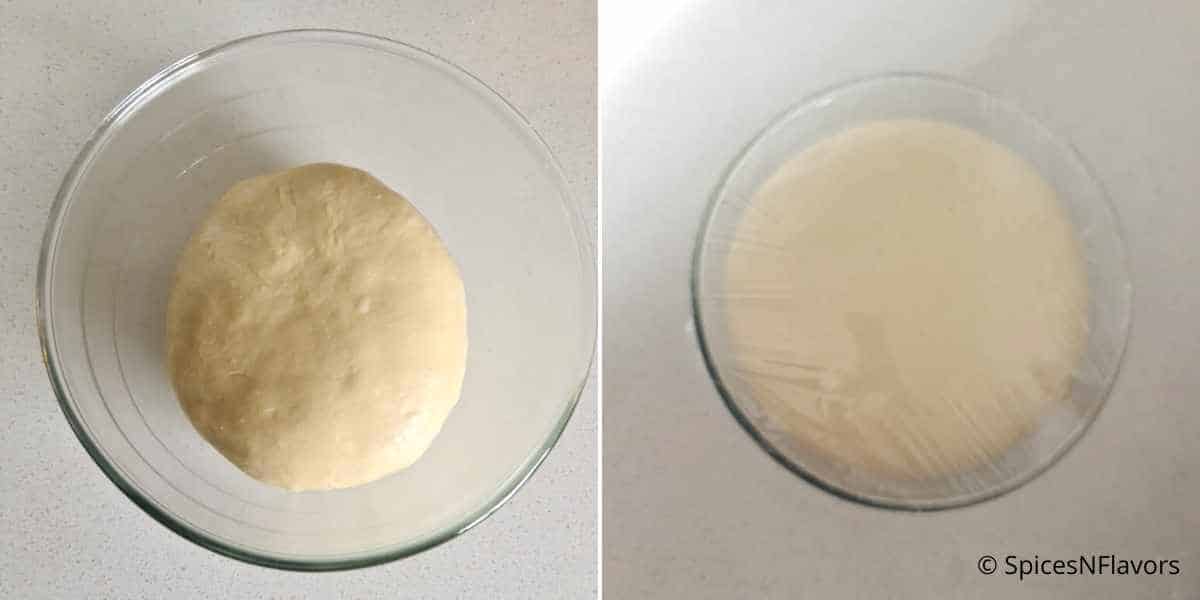
Cling wrap or plastic wrap the bowl. Then cover it with a clean kitchen towel and allow for first proofing for around 1 hour or until the dough is doubled in volume in a warm place.
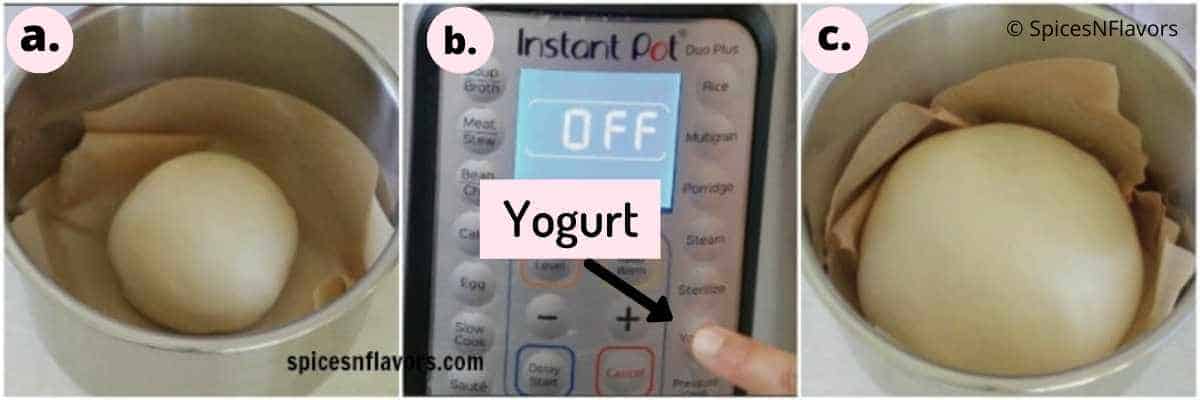
To save time you can do this process in an Instant Pot too. Check out our blog post on Instant Pot Bread Proofing for more details.
Or simply grease the inside pot with some oil, and place the dough into it. Cover the lid. Choose the Yogurt setting and set the time to 30 mins.
Prepare the Loaf Pan
While the dough is proofing prepare the loaf pan.
Grease the base and sides of the pan with oil and line the base with parchment paper.
Step 3 - Shaping
Once proofed punch the dough down to release the gases and take it onto your worktop.
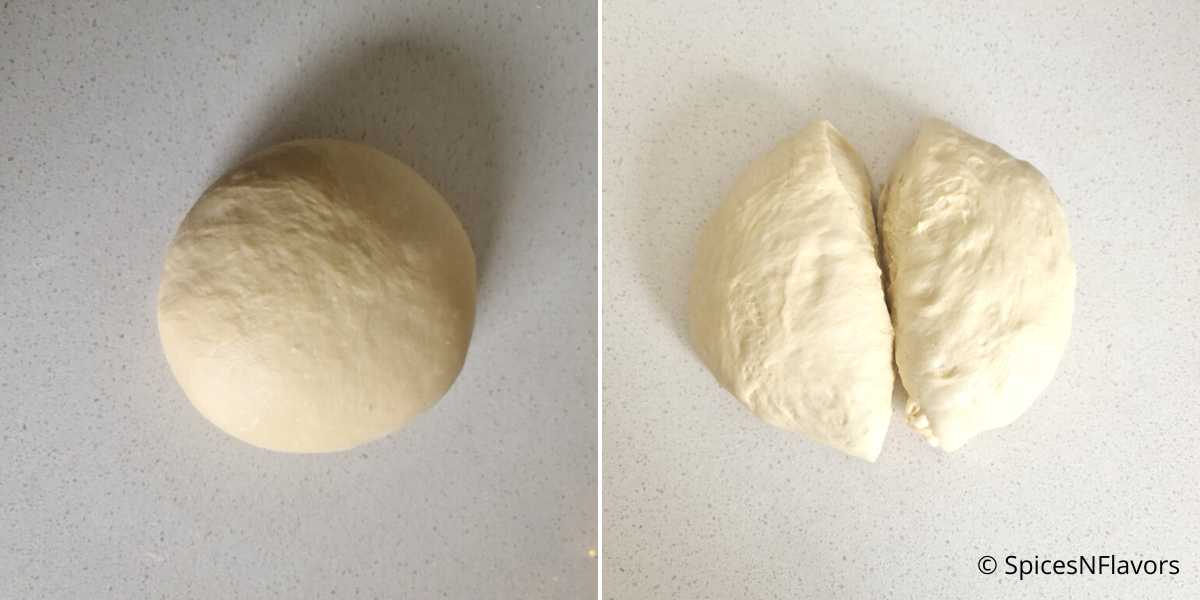
Divide the dough into two equal halves.
Keep one half covered until you are working with the other.
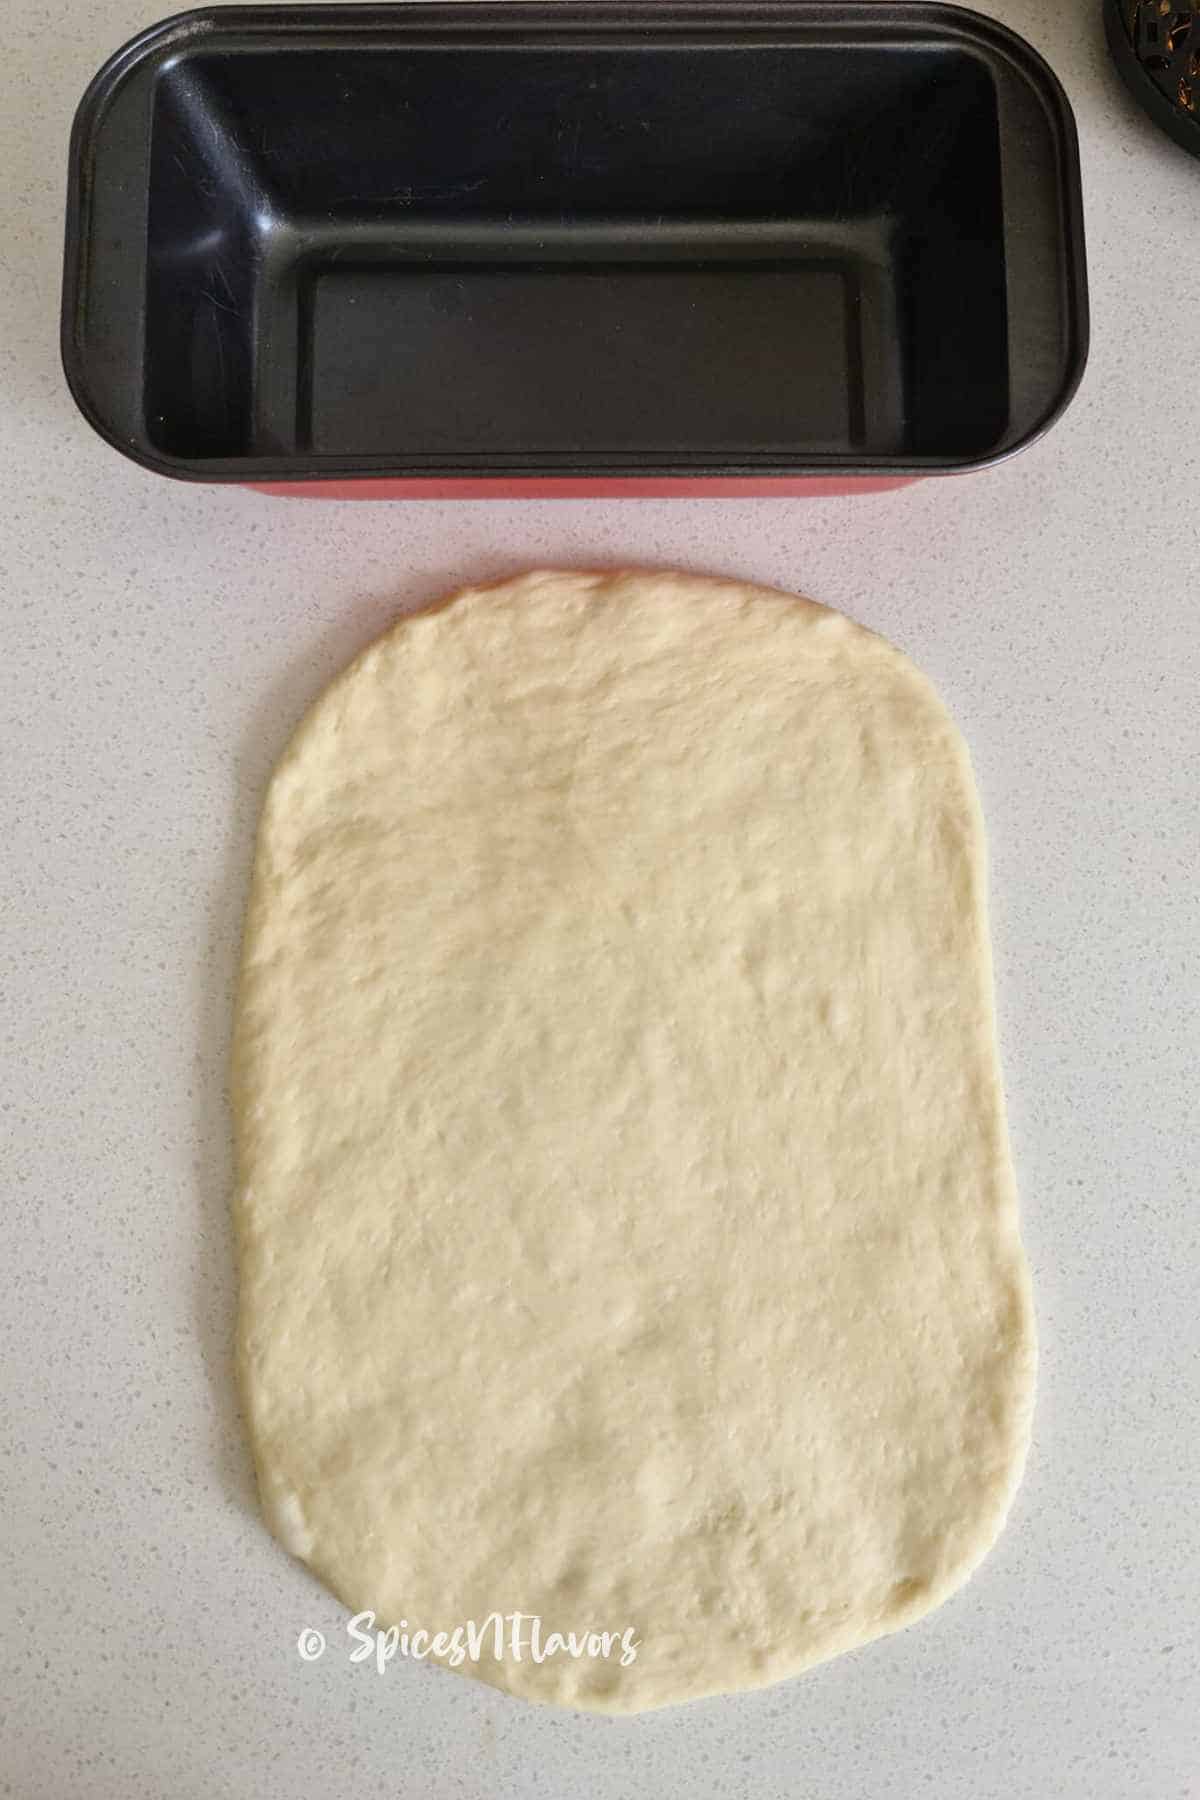
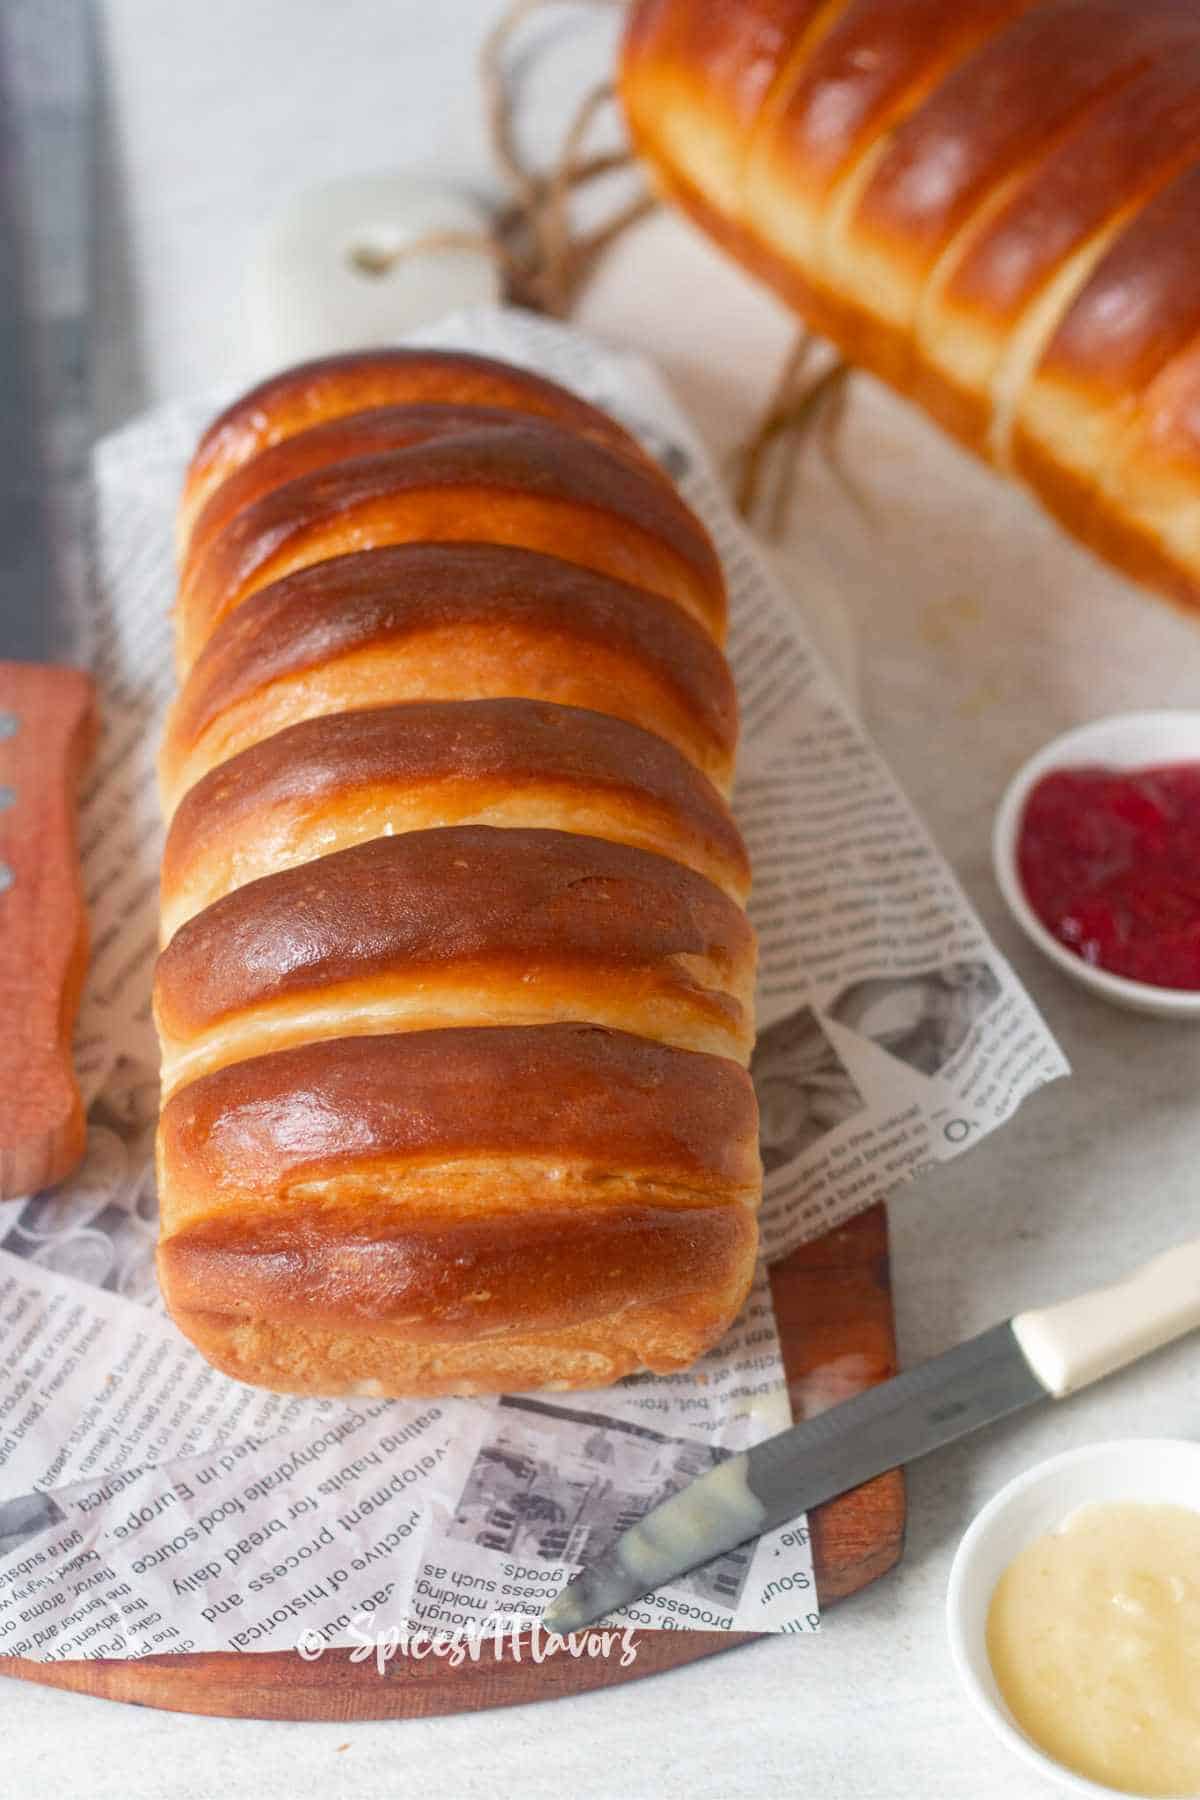
Take one half of the dough and roll it into a long rectangle shape to a width that would fit your loaf pan.
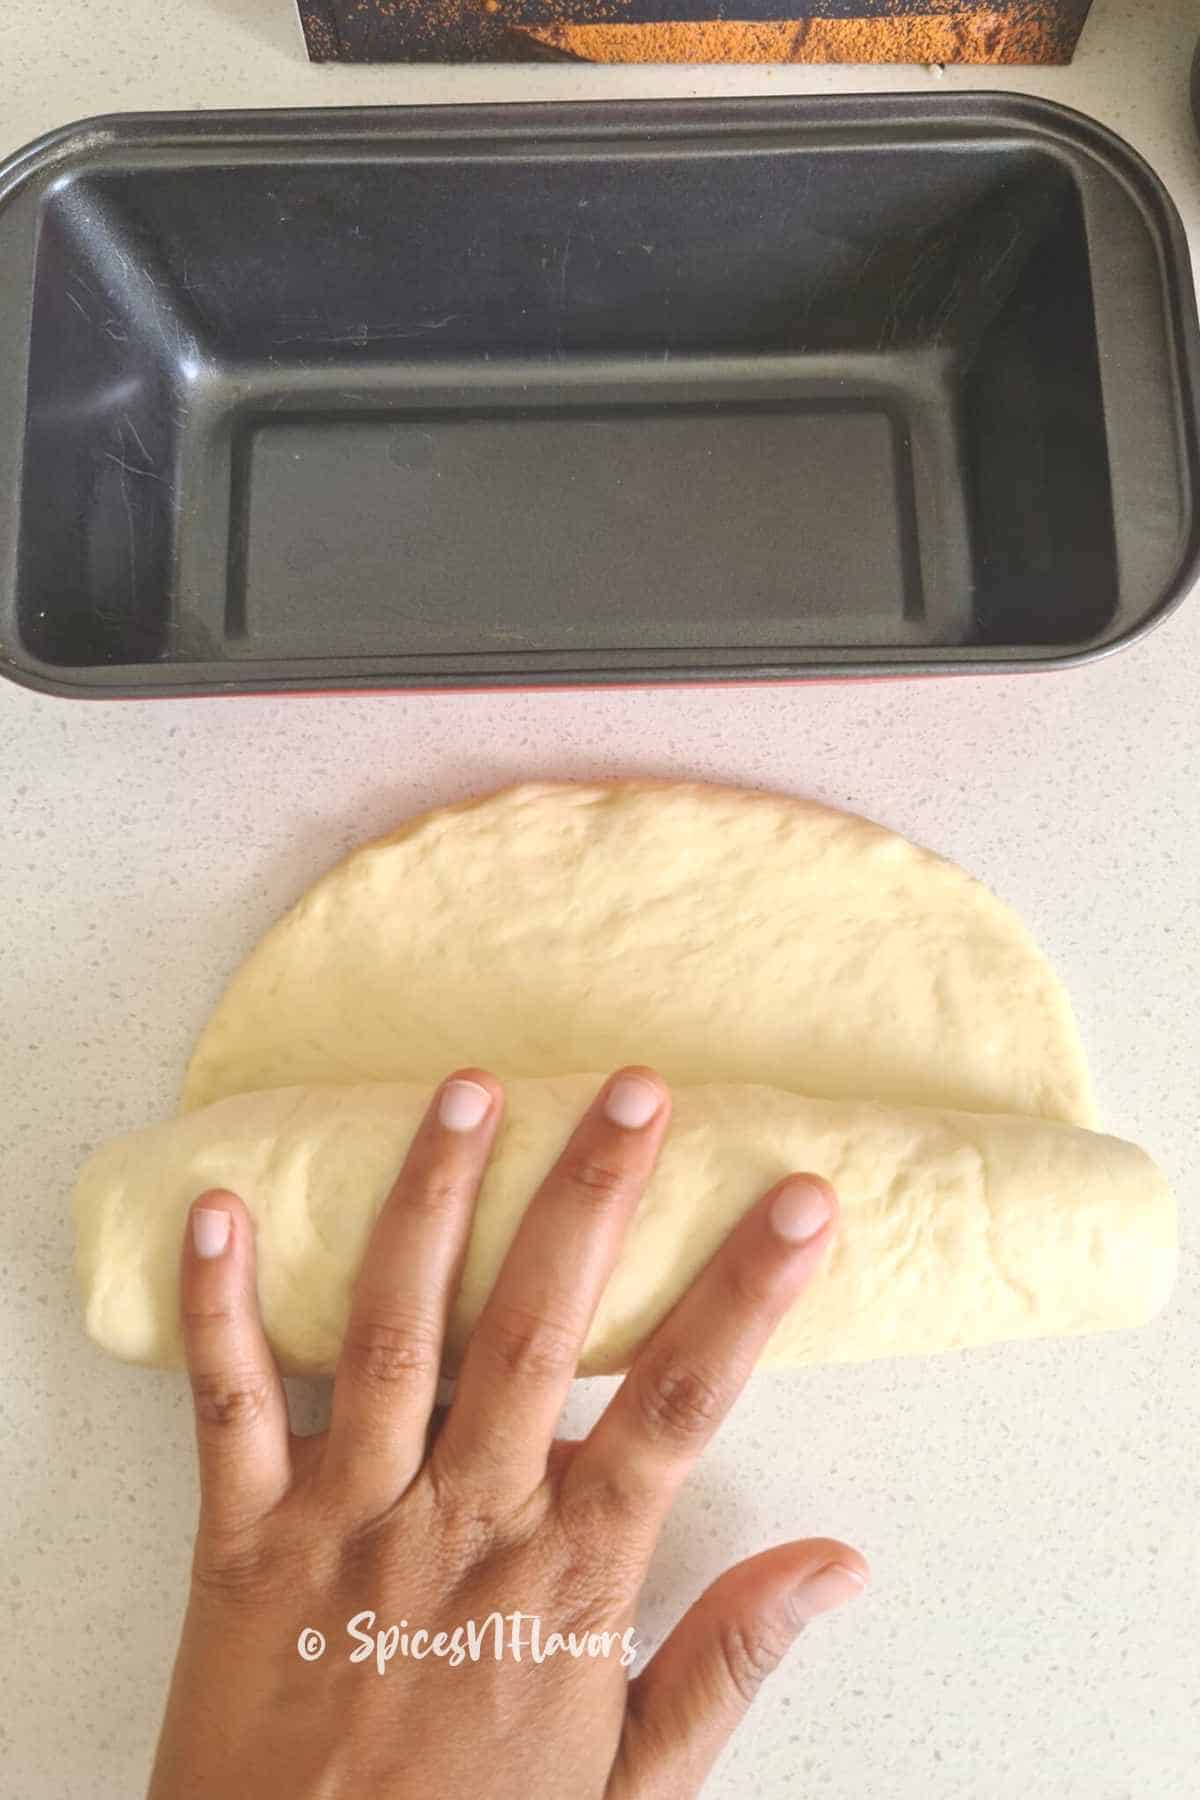
Shape it into a log by rolling from the edge closest to you. Crimp the dough using your fingers to seal the edges.
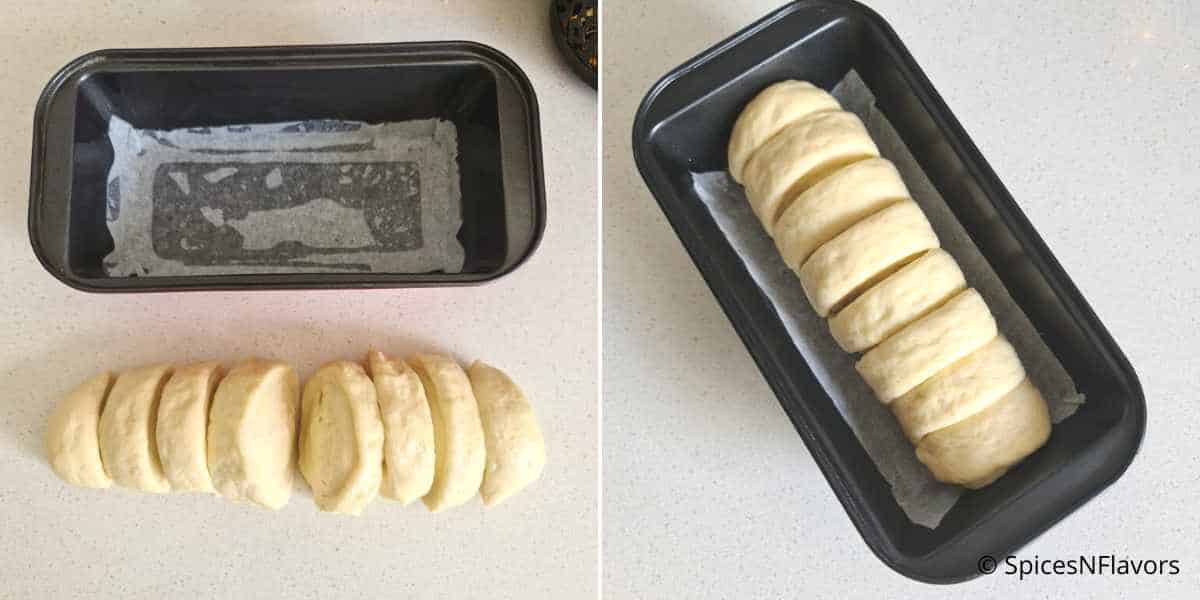
Divide it into 8 equal portions using a sharp knife or bench scraper.
Then place the dough into the prepared bread tin. Cover with a tea cloth while you work on the next half.
Repeat the exact same steps with the other half too.
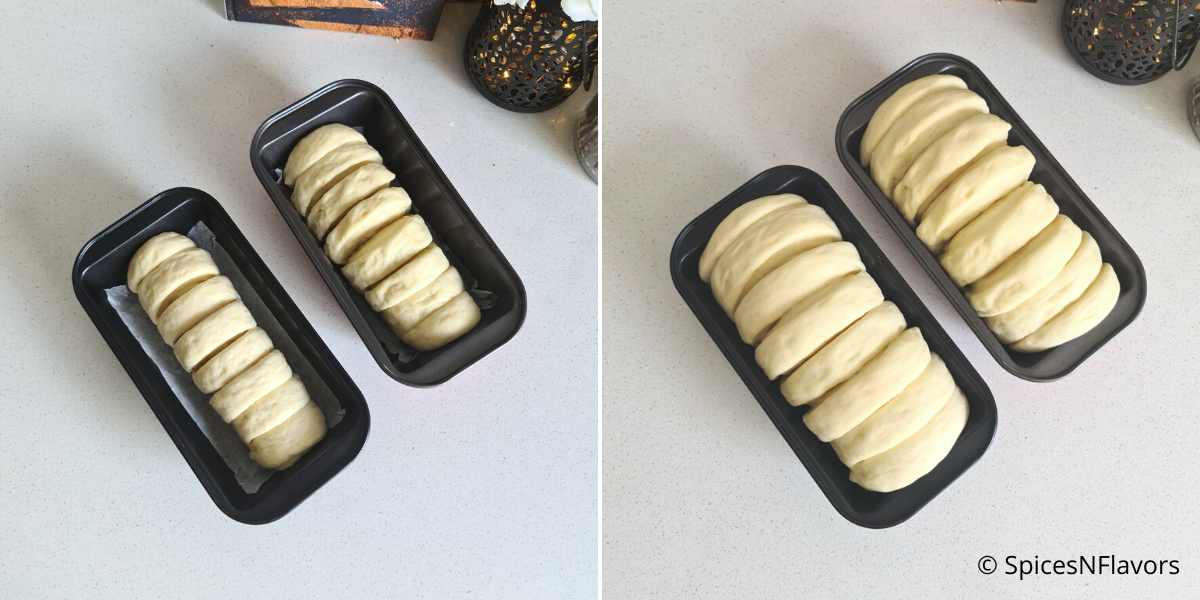
Now cover both the pans with a tea towel and allow for a second rise - 25 mins or until the dough reaches the brim of the pan.
Since this is a variation of milk bread recipes, you do not need to egg wash the top before baking.
Step 4 - Baking
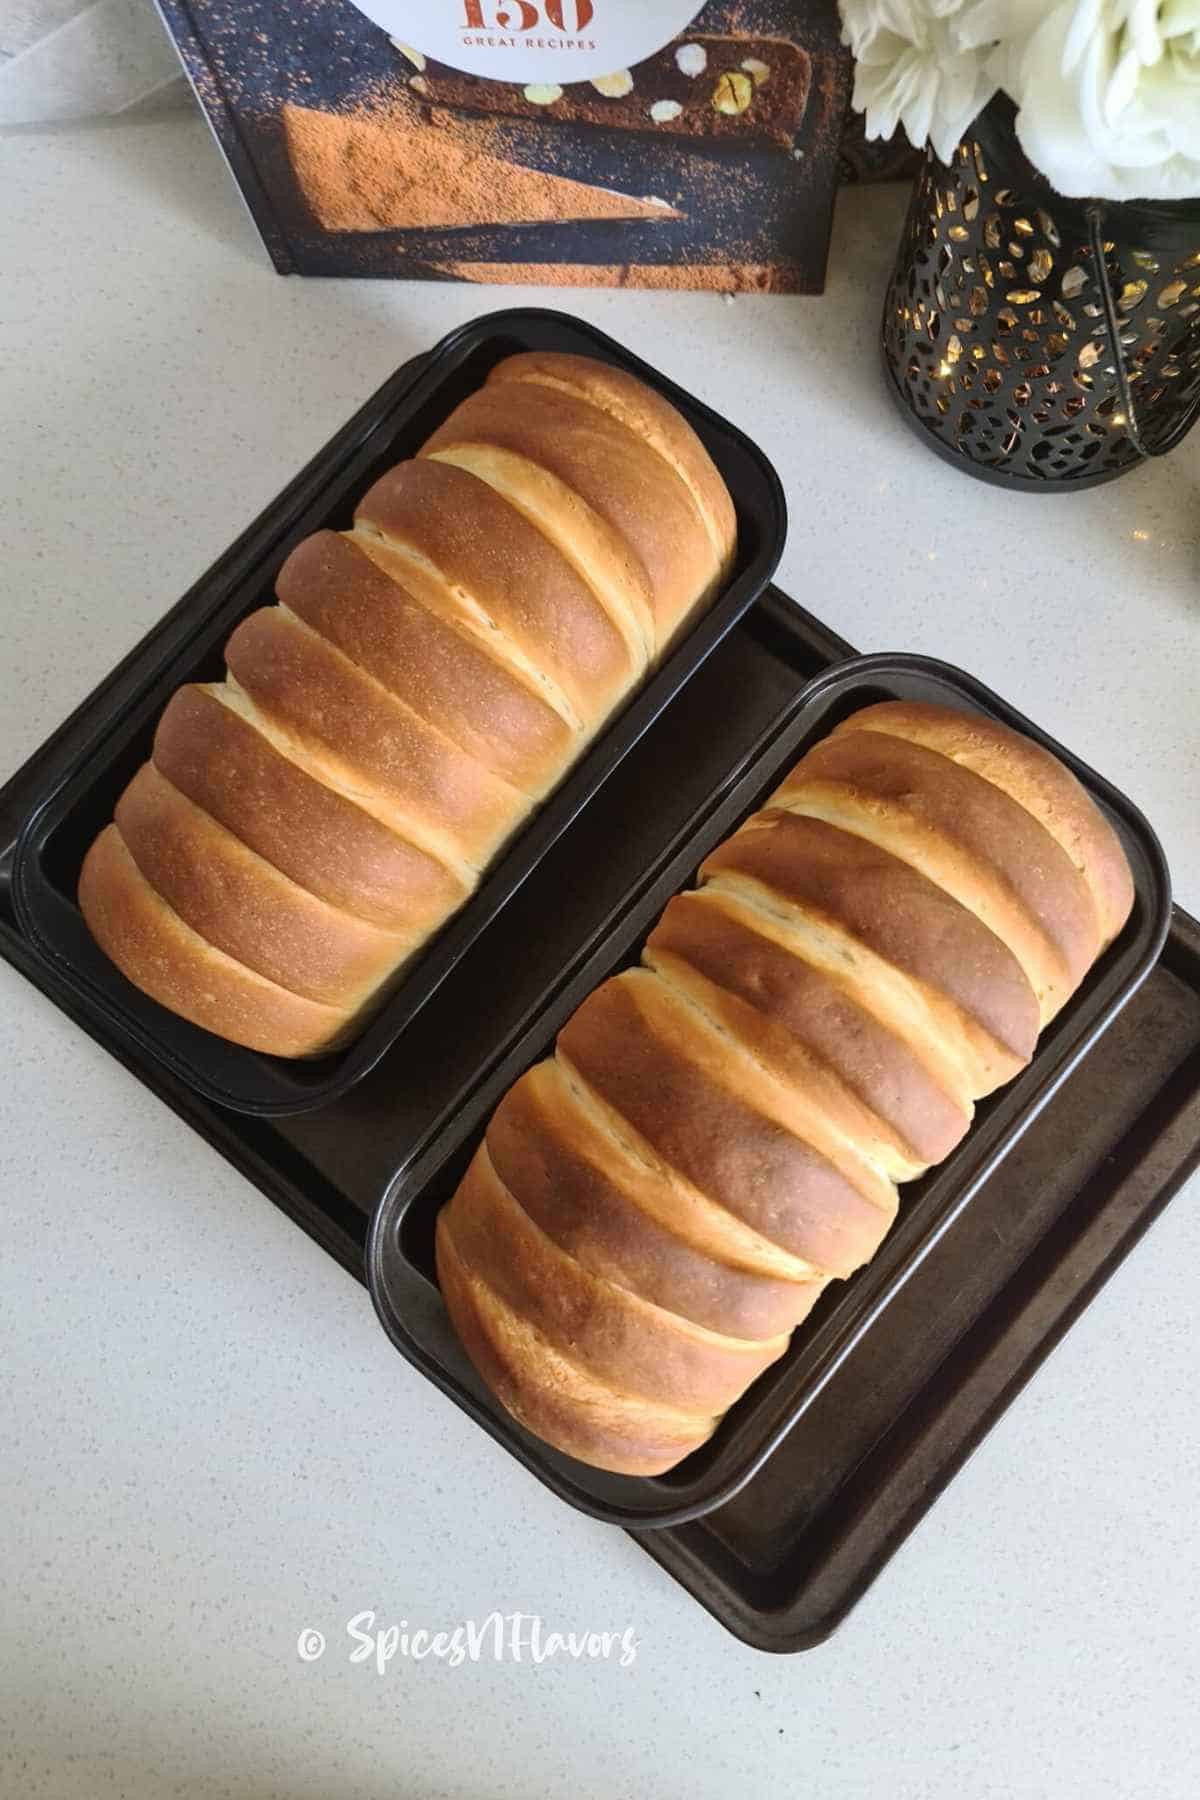
Bake the proofed dough in the preheated oven of 180°C for 25 to 30 mins or until the top looks crisp golden brown and the bottom sounds hollow.
While the bread is in the oven baking prepare your condensed milk glaze to go on top.
Step 5 - Condensed Milk Glaze
In a small bowl combine the soft butter and condensed milk until it is a homogenous mixture that is of spreading consistency.
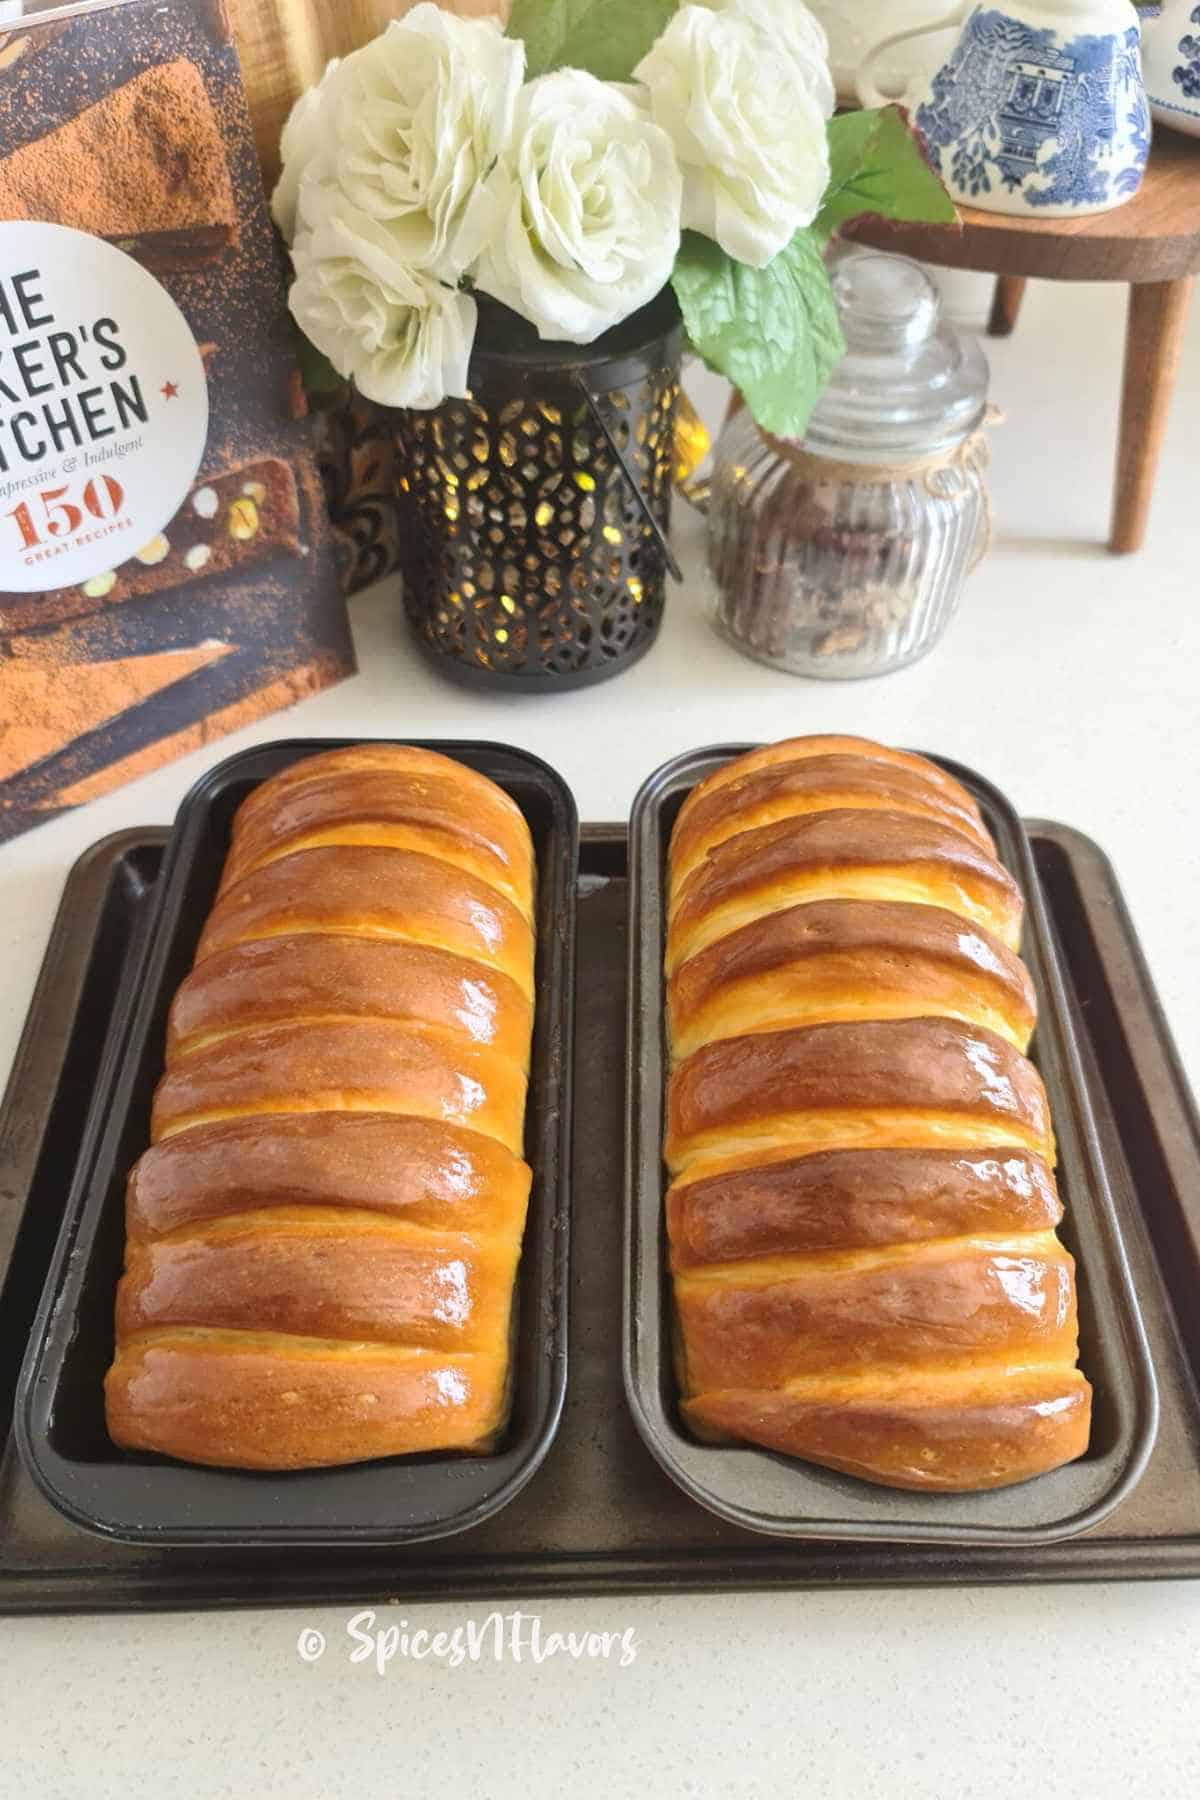
Once the breads are baked and still warm brush this glaze on top with a pastry brush all over the bread.
This glaze will give a nice sheen effect and also will soften the crust.
Allow the bread to sit in the pan for another 5 mins and then invert onto a wire rack to cool completely.
When done the right way, this condensed milk bread recipe is way easier and equally, flavor-packed than its counterparts.
🍞 Storage Instructions
Homemade bread is best eaten fresh that is on the same day of baking.
Of course, the leftovers can be stored for another few days.
Store in an airtight container. This bread is best eaten within 2 days of making it. If you can't eat it all, freeze what's left and eat it within 3 months.
To freeze the bread simply cling wrap it twice and then freeze.
Or else use it to make bread pudding or french toast, serve with ice-cream as a dessert.
💡 Baker's Tips
- Except for the milk, all other ingredients should be at room temperature. Milk should be warm or else the yeast won't be activated and if it is too hot the yeast would be killed. A temperature of around 90-100°F is just right or else your bread rise would be hampered.
- I prefer and recommend using Instant Yeast as it does not need to be activated and can be directly added to the flour mixture. However, if you are using active dry yeast make sure to activate it before proceeding with the recipe.
- While rolling the bread to shape it into a log make sure that you are pressing and sealing the edges well so that the bread does not open up while baking and lose its shape. Also, ensure to place it seam side down.
- Always keep the bread dough covered to ensure it doesn't get dried out especially in this case when you are working with one dough and the other one is resting.
- You can knead the dough using your hands too. Check our Pita Bread recipe for detailed steps on how to knead the dough using your hands.
- The usual tips for baking remain the same for this recipe too - preheat the oven, brush the baking pan with oil and line the base with parchment paper, do not leave the bread for too long in the pan once baked.
- Instead of storing the leftovers, I would recommend you to make bread pudding or french toast out of it. This bread works so well for such recipes.
- You can use the same dough to prepare any enriched bread recipe like cinnamon rolls, Japanese milk bread, or even finger doughnuts.
- Use the same recipe to make delicious condensed milk bread rolls. Instead of rolling into a rectangular shape divide the dough into equal balls and shape it like dinner rolls.
Frequently Asked Questions
No, you cannot swap the condensed milk in the recipe with evaporated milk or half and half. It has to be only sweetened condensed milk to get the caramel flavor as well as to keep the bread soft.
Honestly, I love condensed milk and make so many recipes out of it. Our 3 ingredient condensed milk cookies are so much popular. If not check out our 17+ recipes that you can make using Condensed Milk.
I prefer using two small loaf pans for this recipe. The one that I am using measures 7.5x3.5x2.5 inches. I did try baking this in a 9x5 inch Pullman loaf pan but it didn't turn out well.
📝 Related Recipes:
- 17+ recipes to use leftover condensed milk
- 3 ingredient Condensed Milk Cookies
- Hokkaido Milk Bread
- Turkish Simit Recipe
Wish to Join US for the love of BAKING? Subscribe to our Youtube channel. Follow along on Facebook, Instagram, and Pinterest for all the latest updates!

Soft and Fluffy Condensed Milk Bread recipe
Ingredients
- 250 gms (1 cup) Warm Milk
- 105 gms (1/3 cup) Condensed Milk
- 60 gms (1/4 cup) Yogurt
- 390 gms (3 + 1/4 cup) APF/Maida
- 15 gms (1.5 tbsp) Milk Powder
- 8 gms (2 tsp) Instant Yeast
- 1 tsp Salt
- 57 gms (1/4 cup) Butter softened
Instructions
Step 1 - Prepare the Bread Dough
- Into the bowl of a stand mixer add lukewarm milk, yogurt, and condensed milk.
- In a separate medium bowl, take the flour, add salt to it and mix well.
- Now add this flour and salt mix to the bowl of stand mixer followed by milk powder, and yeast.
- On low speed, using a dough hook combine everything till it is mixed together, then increase the speed to high and knead on medium-high for 8 mins.
- After 8 mins, add the butter to it and knead again for another 4 mins until the dough feels soft and bouncy.
Step 2 - First Proofing
- Grease the bottom and sides of the bowl with some oil or butter. Place the well-kneaded dough into it. Cling wrap or plastic wrap the bowl. Then cover it with a clean kitchen towel and allow for first proofing for around 1 hour or until the dough is doubled in volume in a warm place.
- Alternatively you can also prove the dough in the Instant Pot to save time. Spray some oil in the inside pot. Place the kneaded dough into it. Close with a glass lid and choose Yogurt mode and set the time for 30 mins.
Prepare the Loaf Pan
- While the dough is proofing prepare the loaf pan. Grease the base and sides of the pan with oil and line the base with parchment paper.
Step 3 - Shaping
- Once proofed punch the dough down to release the gases and take it onto your worktop. Divide the dough into two equal halves. Keep one half covered until you are working with the other.
- Take one half of the dough and roll it into a long rectangle shape to a width that would fit your loaf pan
- Shape it into a log by rolling from the edge closest to you. Crimp the dough using your fingers to seal the edges.
- Divide it into 8 equal portions using a sharp knife or bench scraper.
- Then place the dough into the prepared bread tin. Cover with a tea cloth while you work on the next half. Repeat the exact same steps with the other half too.
Step 4 - Second Proofing
- Now cover both the pans with a tea towel and allow for a second rise - 25 mins or until the dough reaches the brim of the pan.
Step 5 - Baking
- Bake the proofed dough in the preheated oven of 180°C for 25 to 30 mins or until the top looks crisp golden brown and the bottom sounds hollow.
Step 6 - Condensed Milk Glaze
- While the bread is in the oven baking prepare your condensed milk glaze to go on top.
- In a small bowl combine the soft butter and condensed milk until it is a homogenous mixture that is of spreading consistency.
- Once the breads are baked and still warm brush this glaze on top with a pastry brush all over the bread.
- Allow the bread to sit in the pan for another 5 mins and then invert onto a wire rack to cool completely.
- Enjoy warm or use it to make sandwiches, bread pudding or french toast.
Video
Notes
- Except for the milk, all other ingredients should be at room temperature. Milk should be warm or else the yeast won't be activated and if it is too hot the yeast would be killed. A temperature of around 90-100°F is just right or else your bread rise would be hampered.
- I prefer and recommend using Instant Yeast as it does not need to be activated and can be directly added to the flour mixture. However, if you are using active dry yeast make sure to activate it before proceeding with the recipe.
- While rolling the bread to shape it into a log make sure that you are pressing and sealing the edges well so that the bread does not open up while baking and lose its shape. Also, ensure to place it seam side down.
- Always keep the bread dough covered to ensure it doesn't get dried out especially in this case when you are working with one dough and the other one is resting.
- You can knead the dough using your hands too. Check our Pita Bread recipe for detailed steps on how to knead the dough using your hands.
- The usual tips for baking remain the same for this recipe too - preheat the oven, brush the baking pan with oil and line the base with parchment paper, do not leave the bread for too long in the pan once baked.
- Instead of storing the leftovers, I would recommend you to make bread pudding or french toast out of it. This bread works so well for such recipes.
- You can use the same dough to prepare any enriched bread recipe like cinnamon rolls, Japanese milk bread, or even finger doughnuts.
- Use the same recipe to make delicious condensed milk bread rolls. Instead of rolling into a rectangular shape divide the dough into equal balls and shape it like dinner rolls.
Ishika says
Made this today and I loved the taste! The bread is so soft!
sushma iyer says
Hi Ishika.. that sounds wonderful I am glad that the recipe worked so well for you. thank you for sharing your feedback with us appreciate it 🙂
Lisa says
I found it. Thank you anyway
Lisa says
How much condensed milk for the bread and how much for the glaze?
Lois Greene says
Is that sweetened condensed milk or just plain condensed milk? Sorry if this is a dumb question!!
sushma iyer says
Please don't be sorry. Yes it is sweetened condensed milk.. I should have been specific it is not your fault 🙂
Barbara says
Can this recipe be made in a bread machine on the “dough” cycle and then rolled out?
sushma iyer says
Hi Barabara.. I have never owned a bread machine and hence have no idea about it. sorry..
Anu says
Very late but for anyone wondering; I did use the dough cycle in my bread machine to make this. I multiplied the recipe by 1.5 (for my 2lb Pullman loaf tin). My 2lb bread machine struggled a bit with the size/consistency of the mixture so I helped it along with a spoon. I had to stop the machine and switch to an additional knead cycle after the first knead cycle finished, as the dough did not look perfectly smooth - then ALSO kneaded it a little by hand (just a min or two) before the first proof. There was a little too much for my Pullman and it overflowed, so will remove abt 100g dough and make a little dinner roll next time, but the bread is stunning! The only recipe I will EVER use from now on, but will just try with a stand mixture next time I make it (tomorrow!). My daughter loves it - says it tastes store-brought, but better! The texture is to die for!
Ayesha says
Can the butter be substituted with oil …if yes will the quantities differ.??
sushma iyer says
Hi Ayesha.. yes the quantity won't differ but the flavour might change.. butter makes the bread rich
Maria says
Hi! I'm just making this lovely sounding bread. There are two different amounts of flour mentioned. (?) The recipe card states 1 1\4 cups of flour. The earlier recipe summary states 3 1/4. I believe the second sounds correct. Thanks for sharing all your lovely recipes.
sushma iyer says
Hi Maria.. Thank you for pointing it out.. yes you are correct.. I have now edited the recipe card. Sorry for the incovenience caused 🙂
Poornima says
Would love to make this bread. No mention of sugar in the ingredients. How much to be added? Love your recipes btw👌
sushma iyer says
Hi Poornima.. There is no sugar in the recipe.. But I see that I had accidentally mentioned it in the instructions.. I have now edited it.. thank you for pointing it out 🙂