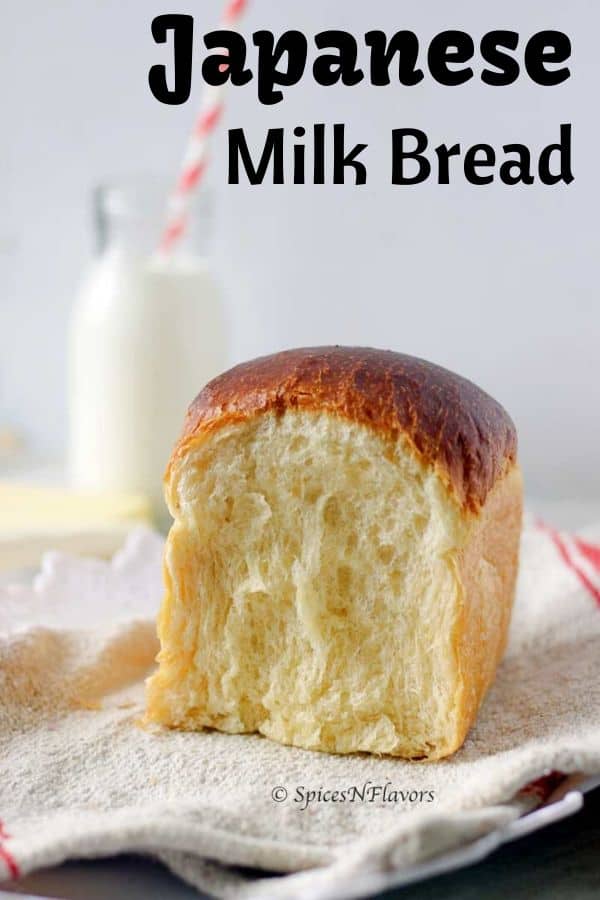
Hokkaido Milk Bread - This Japanese style milk bread with a light, fluffy, tender crumb is so delightful to eat that you will get obsessed with it. It is the perfect everyday bread loaf recipe, use it from sandwiches to french toast, and is the one you need to try NOW!!!
This recipe walks you through every little step with tips, tricks and things to avoid so you can enjoy this light white bread at home.
The aroma of freshly baked bread..
That comforting, mouth-watering, snow white, pillowy little loaves and rolls..
Soft, squeezable slices that pull apart in feather-like layers.
Imagine that melt in your mouth feel like a cotton candy...
This Hokkaido Milk Bread recipe is what you need..
Have you ever wondered what makes certain Bread so fluffy and light?
It is a Tangzhong technique. Also known by Yudane method.
A technique wherein the starch in the flour is gelatinised which keeps the moisture inside the bread, making it softer and also helps it to last longer.
This post covers all the techniques and steps you need to make the Tangzhong Milk Bread at home.
Here is,
How to make Japanese Milk Bread from scratch in a step by step format:
Step 1: Preparing the Tangzhong starter (Roux)
You might have made this roux several times before especially to thicken soups, gravies the most common being pasta sauces.
The same technique is used in this bread too.
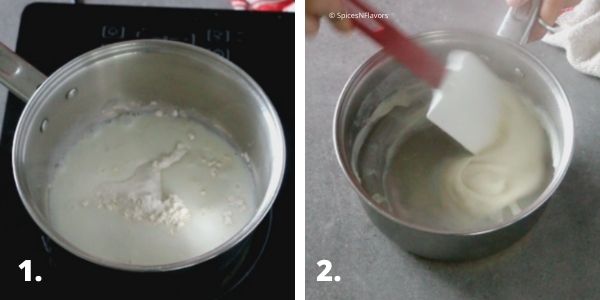
So we start by adding flour, 3tbsp water and 3 tbsp milk to the saucepan (image 1).
Combine until the flour is dissolved.
Put the saucepan on heat and whisking continuously cook until the starch is gelatinised.
In lay man words simply until the flour thickens a bit (image 2).
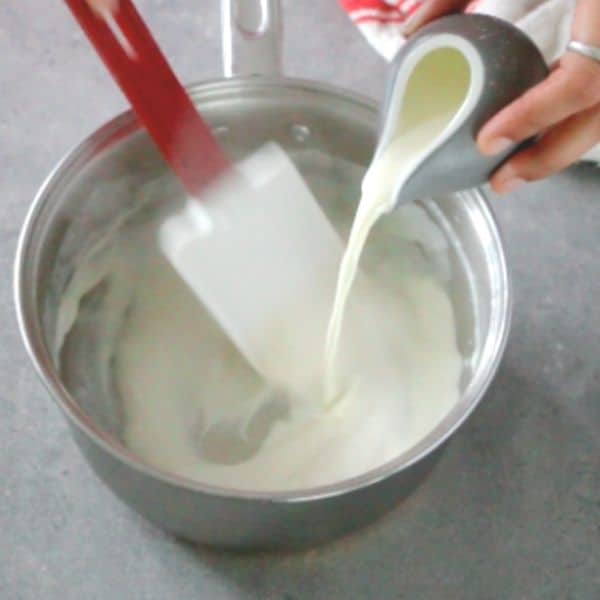
Take it off the flame and immediately add the rest of the milk+cream and mix, to cool the Tangzhong starter quickly
Set it to aside and start with rest of the steps.
Step 2: Prepare the Dough.

In a bowl of your stand mixer combine the rest of the ingredients - salt, flour, yeast, sugar and milk powder. Finally crack open an egg (image 3).
And in goes the prepared roux but before adding the roux make sure that it is cooled down a bit and is not super hot.
Using the dough hook of your stand mixer (image 4) combine everything on med speed until it comes together as a dough (say around 2 mins).
After that start feeding the dough with butter a little at a time (step 5) and finally knead for 8 mins on high speed until the dough is ready.
When you lift the hook of your stand mixer, you would see a blob of dough sticking to the base of the pot (image 6).
Step 3 : First Proofing
Once the dough is ready, tip it off onto your counter-top.
Knead for few seconds and try to give it a round shape.
Transfer to a greased bowl and proof it for 1 hour.
How to Proof Dough in Instant Pot?
Rather than proofing in a bowl, you can also choose to proof in your Instant Pot if you have one.
To proof in an Instant Pot too, the steps remain the same that is to grease the inner pot with some oil.
Only catch is that you need an Instant Pot with Yogurt setting
My Instant Pot is over a year old now and it has all the features that you need.
I like to use a Cooking Spray these days as it is much easier if you had seen me use it in our No-Knead Bread Loaf post.

Then place it in the Instant Pot (image 7), choose the Yogurt setting (image 8) and set the timer to 30 mins (image 9).
For this recipe, the dough would not necessarily double in size but there will be considerable yeast activity (image 10).
Since I absolutely love proofing in my Instant Pot I have a separate post on
How to proof dough in Instant Pot which might be a good read for you.
Step 3 : Shaping
Once proofed tip it onto your work-top lightly dusted with some flour.
Eyeball and divide it into three equal portions or you can also weigh them and divide which is the way I prefer to be precise.
So weigh it into 3 equal portions of 205 gms using a kitchen scale.
Take each portion, roll it into a ball by tucking the sides to the base, cover with a tea towel and then intermediate proof for 10 mins.
Intermediate Proof : 10 mins

Meanwhile, grease the baking pan with some butter and keep ready.
I prefer to use 9x5 inches cake pan for this recipe.
You want to have a deep and large pan to get that tall effect.

After 1o mins, take each portion flatten it out and roll lengthwise (image 11).
Fold it into thirds (image 12 and 13).

Turn it around (image 14), and again roll lengthwise (image 15).
Start folding from one end (image 16) (in a way like swiss roll cake).
OR watch the video for a clear understanding
Place it in the baking pan (image 17).
Step 4 - Second Proofing
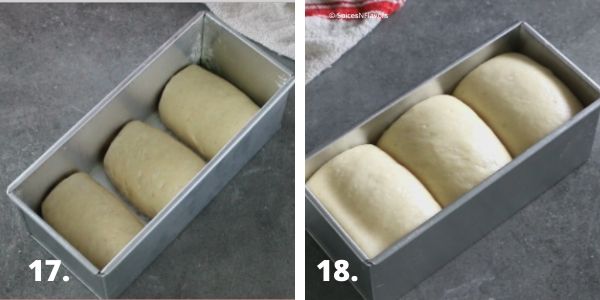
Cover the cake pan with a tea towel or cling wrap and allow for second proofing.
This would take anywhere between 1 hour to 1.5 hours (image 18).
Second Proofing : 1 to 1.5 hours
Do not go by the time here, what you are looking for is that the bread dough should have risen to the very brim as seen in the pictures or video.
Step 5 - Baking
Even though you can see me brushing the top of the proofed dough with milk in the video, I would not recommend it.
That is because, I felt the dough darkened a lot while baking which I did not prefer.
Had it been a regular day I would have repeated the process to show you the difference.
But even I am running short of yeast at the moment so decided to go with this video footage itself.
So if you prefer you can milk or egg wash the dough or just go ahead and bake it.
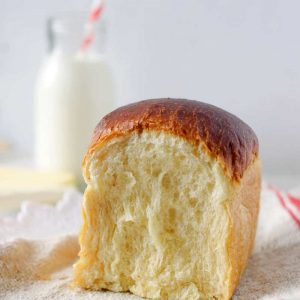
Bake in a preheated oven of 180°C (352°F ) for 30-35 mins.
Let it cool in the pan itself for 5-8 mins and then invert it on a wire rack to cool completely before slicing and enjoying this with some jam or butter.
This bread is a bit sweet and has a soft, chewy and melt in your mouth feel.
Here are certain tips that would help you nail it in the very first attempt.

My Top 7 Tips to bake this Fluffy Milk Bread
- Do whisk the roux (step 1) continuously to avoid the formation of lumps and also from it getting burned.
- Make sure that the Tangzhong culture or Tangzhong starter is cooled down before you add it to the rest of the ingredients or else the yeast would die due to the heat from the starter.
- To cool the starter quickly add the rest of the milk immediately and mix.
- Start feeding the butter after 2 mins, that is, when it forms into a dough (step 2) as the fat might retard the yeast activity and we do not want that so adding at a later stage is advisable.
- I would recommend a 9x5 inches bread pan for this recipe.
- Do remember to keep the dough covered at all times to avoid drying of the dough.
- Once baked, leave the bread in the baking pan itself for 5-8 mins as the bread bakes in the cooling process too. So don't rush to take it off from the pan immediately.
But wondering,
Why do I have to make Roux in the first place?? What is this Tangzhong Technique?
This Tangzhong starter is also referred to as Yudane Method and in some parts, it is also known as Hokkaido.
That's how it gets its name Hokkaido Milk Bread it seems.
So whatever may be its name.. the idea is that we are gelatinizing the starch in the flour by cooking it.
This method traps the moisture content in the dough.
So while baking the steam tries to escape which causes the bread to rise but in turn, gets trapped by the gluten strands or the crust and creates air pockets.
That's how the bread gets the characteristic texture and remains fluffy.
As the starter also aids in hydrating the dough, the end result is a moist bread loaf giving us the characteristic melt in the mouth, feel, unlike a regular white bread recipe.
These Japanese Milk Bread are a class apart making it the lightest, fluffiest, most tender bread you'll ever come across.
However if you are intimidated by all these then our Condensed Milk Bread would yield the exact same results but with no added work.

Addressing few of the questions that I often get asked..
Can I make Japanese Milk Bread Rolls using this recipe?
Yes absolutely. Instead of dividing the dough into 3 after first proofing, divide it into 16 equal parts.
Shape them into rolls and place it in the baking pan and allow it to proof until doubled.
You can refer my eggless dinner roll post for a detailed video on how to shape dinner rolls.
If you do not wish to make the roux and get into additional steps, then this recipe of making an enriched dough for the softest dinner rolls is all you need.
Can the Bread Flour in this recipe be replaced with All Purpose Flour.
Yes but it won't be as tall as the ones made with Bread Flour.
As explained in the tangzhong starter the steam escapes while baking which gets trapped by gluten strands.
So more the protein in the flour, more the stronger strands and more it would be able to fluff up.
In simple terms, yes you can substitute but it won't be as tall as the one made using Bread Flour.
I am not able to find Milk Powder at this time. Can I replace it?
Most of my bread recipes call for Milk Powder as it makes the bread softer and I always mention that you can skip it and use flour instead and replace water with milk.
But this Japanese Milk Bread recipe as the name suggests needs both the milk and milk powder to get the cloud-like bread texture.
So you cannot leave out the milk powder in this recipe.
How to Store Homemade Bread?
As mentioned in our No-Knead Bread Loaf post, the best way to store bread is in the bread containers or bread bags wrapped in an aluminium foil.
But I always store my bread in a simple airtight container.
Due to the hydration process, this recipe stays good for up to a week.
But trust me, it won't last that long.
Never store your homemade bread in the refrigerator as it dries up faster.
And yes this also freezes well.

Many Asian multinational companies hold patent for this recipe and technique so I just want to share that I am not the one who came up with the recipe.
I got to know about this recipe from a Youtube video and then I researched a lot and learnt the science behind by reading hundreds of blogs and also by personal experience 🙂
Also, I just want to make another thing clear that this is not like an effortless No Knead Bread recipe.
There are few additional steps but everything will be worth it when you first bite into it.
This Hokkaido milk bread, a lightly-sweetened Japanese white bread that’s so incredibly soft, fluffy and light that you would get obsessed with it.
Imagine a classic supermarket white bread slice but a more lighter, superior, buttery, rich and more flavourful version of it.
In short, this bread recipe would put any other bread to shame!!
Enjoy it plain with some butter, as a toast or with some homemade Jam.. either way you are going to love it..
Related Recipes:
- Soft Spanish Bread - Eggless Version
- Dinner Rolls.
- Challah Rolls
- Hokkaido Cheese Tart
If you like this recipe or happen to try it then share your experience below in the comments by giving it a star rating or let me know by TAGGING ME, TWEETING ME OR INSTAGRAM ME. I would love to connect with you and your posts.
Consider joining the Community of 100K+ subscribers on our YOUTUBE CHANNEL for regular updates.
Pin this to your Bread Board on Pinterest

Hokkaido Milk Bread
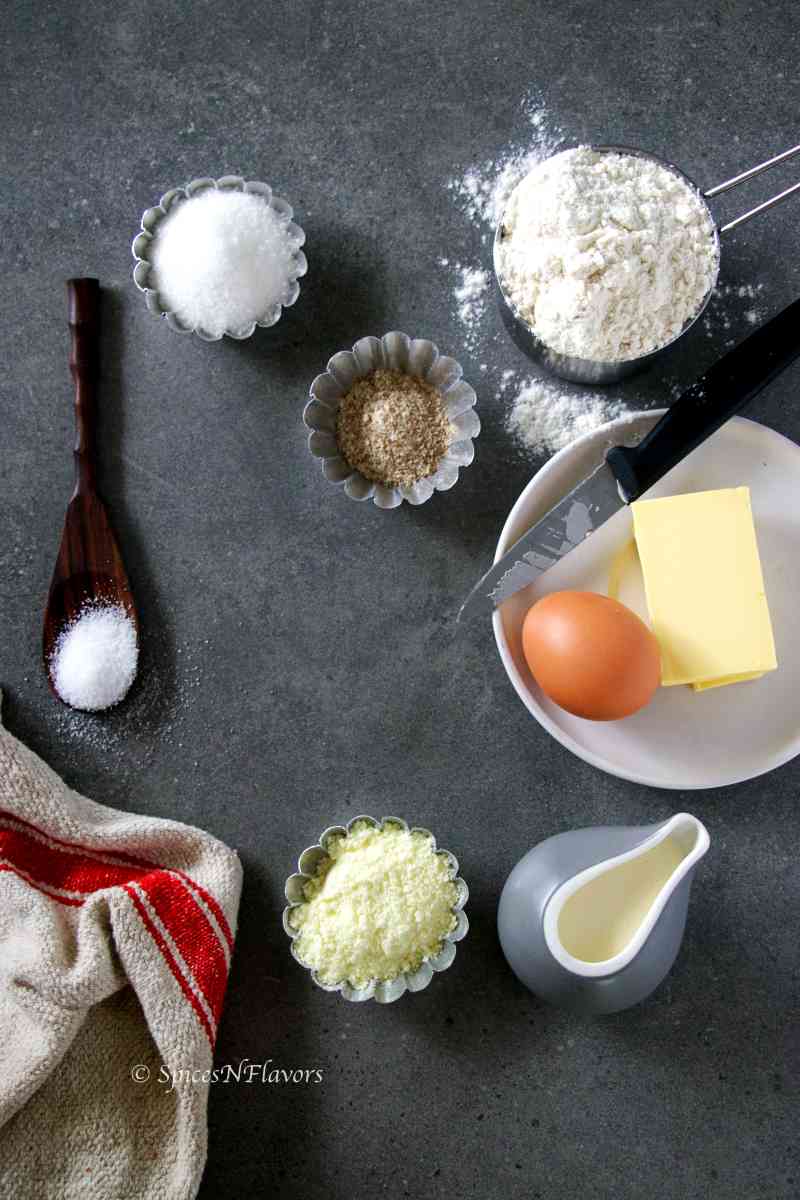
Ingredients
Tangzhong Starter
- 2 tbsp (14 g) Bread Flour
- 3 tbsp (43 g) Milk
- 3 tbsp (43 g) Water
Ingredients to make the Bread Dough
- 30 ml Milk (cold)
- 45 ml Cream (cold)
- 1/2 tsp Salt
- 275 gms Bread Flour
- 6 gms Instant Yeast
- 40 gms (2 tbsp) Sugar
- 18 gms (1.5 tbsp) Milk Powder
- 43 gm (1) Egg
- 56 gms (1/4 cup) Butter
Instructions
Step 1 - Prepare the Roux
- In a saucepan, dissolve the flour in milk and water (mentioned under the roux ingredients). Place it on the gas stove and cook till until the flour thickens whilst stirring continuously.
- Once thickened, take it off the flame and immediately add the remaining milk and cream. This is done to reduce the temperature of the roux quicker.
Step 2 - Prepare the Dough
- In the bowl of your stand mixer, add rest of the ingredients (except for butter) - salt, flour, yeast, sugar, milk powder and egg.
- Add the roux.. before adding the roux make sure that it is slightly cooled and not hot as if it is too hot it would kill the yeast.
- Attach the dough hook and combine everything on med. speed for 2 mins until it comes together as a dough.
- Then start feeding the dough with butter a little at a time. Once incorporated knead the dough for 8 mins.
- After which take the dough onto a lightly floured surface.
Step 3 - First Proofing
- Give the dough a round shape making the top smoother.
How to Proof on Counter-top.
- Grease a bowl with some oil. You can use the same bowl in which you kneaded the dough
- Place the dough in the bowl and dab the remaining oil from your hands on top of the dough so that it doesn't dry out while proofing.
- Cover it with a tea towel and allow it to proof in a warm place for 1 hour.
How to Proof in an Instant Pot?
- Grease the inner pot of your instant pot with some oil.
- Place the dough into it and dab the top of the dough with the leftover oil so that it doesn't dry out.
- Place the iiner pot into your Instant Pot and choose the Yogurt Setting.
- Set the time to 30 mins.
Step 4 - Shaping
- Once proofed, punch and tip the dough onto your work top and divide into 3 equal portions. Either eyeball or use a kitchen scale and divide it into 3 portions of 205 gms each
- Roll it into a round shape by tucking the sides to the base.
- Cover the 3 balls with a tea towel and allow for an intermediate proofing of 10 mins.
- Meanwhile grease the baking pan with some butter and set aside.
- After 10 mins, take each portion and roll it lengthwise. Fold it into thirds.
- Roll again lenthwise and then starting from the corner near you roll it like we roll for a swiss roll cake. (Refer the step by step pictures in the post from above paragraph or refer the video in the recipe card).
- Place it in the greased baking pan, cling wrap and allow it for second proofing.
Step 5 - Second Proofing
- Allow the dough to rise in the baking pan for around 1 to 1.5 hours.
- What you are looking for is that the bread dough should have doubled in size and reaches the brim of the baking pan.
Step 6 - Baking
- Bake this in a preheated oven of 180°C (355°F) for 30-35 mins until the top is golden brown in colour and the bottom sounds hollow.
- Allow the bread to cool in the pan itself for 5-8 mins then transfer to a wire rack to cool completely.
Video
Notes
- Do whisk the roux (step 1) continuously to avoid the formation of lumps and also from it getting burned.
- Make sure that the Tangzhong culture or Tangzhong starter is cooled down before you add it to the rest of the ingredients or else the yeast would die due to the heat from the starter.
- To cool the starter quickly add the rest of the milk+cream immediately and mix.
- You can use active dry yeast in place of instant yeast. Just make sure to activate it first before proceeding with the recipe.
- It is always advisable to check for the expiry of the yeast before beginning to make the bread.
- For baking cakes and breads, it is always advisable to weigh out the flour and other ingredients. However, if you do not have a scale yet (though I highly recommend investing in one if you plan to bake regularly; doesn’t cost much and lasts a lifetime) just watch this video on Focaccia Bread recipe where I show you how to measure the ingredients the right way.
- Start feeding the butter after 2 mins, that is, when it forms into a dough (step 2) as the fat might retard the yeast activity and we do not want that so adding at a later stage is advisable.
- Greasing the baking pan with some oil helps in easy unmoulding of the bread once baked. Though I would recommend a 9×5 inches bread pan for this recipe.
- Do remember to keep the dough covered at all times to avoid drying of the dough.
- Please note the first proofing time is Either 30 mins in the Instant Pot or 1 hour on the Counter-top and not 1.5 hours.
- Once baked, leave the bread in the baking pan itself for 5-8 mins as the bread bakes in the cooling process too. So don’t rush to take it off from the pan immediately.
- Check out the post for additional details on how to store the bread, the right tools and equiments that can help you master bread baking, tips on how to perfect your bread baking skills, the right Instant Pot settings and much more.
Can I substitute All Purpose Flour for Bread Flour?
Yes you can but the bread won't be as tall as the one made with bread flour. Read the post for additional details on this concept.Can I skip Milk Powder?
In this recipe both milk and milk powder is a vital ingredient so unfortunately you cannot skip.Is it possible to make this Hokkaido Milk Bread recipe without yeast?
No you would need yeast for this recipeCan I use this recipe to make Milk Bread Dinner Rolls?
Yes absolutely. Instead of dividing the dough into 3 like we did for this recipe, divide the dough into 16 equal portions. Please feel free to refer to our dinner rolls recipe for a detailed instructions.Nutrition
Conclusion:
Hokkaido Milk Bread - This Japanese style milk bread with a light, fluffy, tender crumb is so delightful to eat that you will get obsessed with it.
It is the perfect everyday bread loaf recipe, from sandwiches to french toast, or simply with homemade JAM..
A recipe that you need to try NOW!!!
Learn the Tangzhong roux method which helps create the tender crumb in a step by step picture and video format.
I hope you enjoyed this recipe.
Will see you soon with yet another one
Until then
Hugs
Sushma
Yuki says
I lived in remote location and have difficulty finding cream, can i sub it with more milk?
sushma iyer says
yes you can Yuki 🙂
Enya Mesina says
Greetings from the Philippines! Thank you so much for this recipe. I will definitely give it a go.
sushma iyer says
I am glad you found it worthy enough to try.. thank you.. will be waiting for your feedback on the same 🙂
Supriya Tripathi says
Hello,
I tried your recipe... (1) after kneading the dough is not shiny and smooth as yours,
(2) its looks like of very teary texture... please advice what am I doing wrong?
(3) it didnt rise in oven... but had a beautiful rise during prooving.
sushma iyer says
Hi Supriya..
It seems you are applying to much pressure while kneading. You do not want to do that.. all you have to do is push using your heels, fold over back to centre, turn the dough and repeat. And if the bread didnt rise in the oven then the only reason is that you have overproved the dough so the yeast lost its power while baking.. you can watch my bread baking queries video for more knowledge on baking bread: https://www.youtube.com/watch?v=ljyXvC-HUJ4
Katia says
I made it and it was wonderful!!! Thanks so much! Do you think it would work with whole weat flour also? Thanks Katia
sushma iyer says
Hi Katia.. That is excellent so pleased to know that you liked it.. Well I have not tried it but I believe the bread would be little denser than the APF one. 🙂
Tamy says
Hello,
If I double the recipe, do i also double the mixing time and proofing time?
Thanks
sushma iyer says
Hi Tamy.. No you don't.. You just prove until the dough doubles..
Sam says
Can I make it without eggs ? What should I substitute?
sushma iyer says
Hi Sam..
I think it should work. You might have to increase the quantity of milk in that case. Not tried yet but soon am going to try the eggless version as many of my readers are interested. I will update it to you then.
Regards
Sushma
Lucille Yip says
I wish there was a way to post pictures. I made the bread this morning and it was outstanding! The texture was light and feathery. The taste was delicious. I've tried several recipes for Japanese Milk Bread but they had a tight crumb despite my efforts. This is the FIRST recipe that worked beautifully! I cannot thank you enough for the time and directions you provided.
I bake the loaf in a 8x4 loaf pan. I previously made other recipes in a 9x5 pan, which is my preference. Any suggestions?
Thanks again for a superb recipe!!!
sushma iyer says
Hi Lucille..
That is excellent. So good to know that the recipe worked for you.. You can consider sharing your images on any of the social media platforms like Facebook or Instagram. You can make this recipe in a 9x5 pan too. 🙂
Erin says
Hello,
In the article you say that yudane method is the same as tangzhong method, but they are different. The ratios of water to flour are different, and the technique to produce is different.
sushma iyer says
Hi Erin..
Thank you for bringing it to my notice. When I researched this, I found this information on Google. May be it is my mistake and I should have read more articles. I would certainly look into it and do the needful changes if the information that I have shared is incorrect. Thank you for pointing it out. Appreciate your help.
Regards
Sushma
Janet Blake says
Hi. I made this recipe and got rave reviews from family and friends! Thanks so much. I am going to make another batch today and am going to make into buns instead of bread! Fingers crossed🤞🏻
sushma iyer says
Hi Janet..
That is amazing.. so pleased to learn this.. And yes this would make excellent buns too.. Thank you for sharing your feedback with us.. appreciate it.
Regards
Sushma
Donna says
I was wondering if after making the roux if you could add it and the other ingredients to a bread machine to mix, knead, and go thru first rise before placing it in a breadpan. Has anyone tried this??
sushma iyer says
Hi Donna..
Never used a bread machine before so sorry won't be able to guide you on the same.
Regards
sushma
Lubna says
Can you make this in bread maker? Any idea on what setting to use or how to do it with bread maker?
sushma iyer says
Sorry Lubna..
I have never used bread machine before..
Regards
Sushma
Karen Walter says
This bread is amazing! It's no harder than any other yeast bread and the results are awesome. I doubt if I will have even one slice left to see how long it stays fresh.
sushma iyer says
Hi Karen..
Yes this is our absolute favourite bread too.. So pleased to learn that you loved them too.. thank you for sharing..
Regards
Sushma
Mishi says
Hi there! This might be a silly question, but I was wondering if you could help me convert 275 grams of bread flour and 6 grams of yeast to American conversions, like cups or teaspoons? When I google the conversion, one site says 275 grams is 2 1/2 cups, another says it’s1.9 cups, etc. I’m guessing because of the density of flour, it makes a difference when converting? The bread flour and yeast are the only 2 measurements that you don’t put a conversion in the parentheses. Thank you so much!
sushma iyer says
Hi Mishi..
Ok so 1 cup of flour is 120 gms so 275 gms means you could use 2 and quarter cups of flour.. and 1 tsp of yeast is 4 gms so you can use 1.5 tsp of Yeast.. Hope this helps..
Regards
Sushma
lee says
Finally a bread recipe that worked for me! My bread was alway dense and this one was as light as advertised. My only suggestion is that for the non bakers like me, mention the difference in instant yeast and active yeast in the main part. I knew it seemed weird that you didnt activate the yeast like others I had tried, but went for it anyways. Then read a question after the fact about instant or active and you answered that you used instant and be sure to activate a dry yeast. It took a second batch but i know now.
sushma iyer says
Hi Lee.. That is so good to know thank you for sharing your feedback with us.. appreciate it..
However I have mentioned about the Activation of Yeast in the notes section.. Seems like you missed it.
Regards
Sushma
Pat says
What maked bread flour different from normal flour?
sushma iyer says
Hi Pat
Bread Flour has a higher protein content than normal flour which makes it form stronger gluten strands and a sturdier bread structure.
Also the extra protein helps in a higher rise as compared to the normal flour. But if APF is the only flour you have handy please go ahead and use it.
Regards
Sushma
Abby L says
This recipe looks terrific and I can’t wait to try it. I’m going to have to try and order some milk powder from Amazon or somewhere, I’m just in the process of teaching myself how to bake bread and had never even heard of milk powder before this. How many servings is this? I see that it is three separate “rolls” so is that one per person? Or is each roll large enough to be shared? Although it looks so good I’m not sure anybody’s going to want to share. LOL. If I double the recipe, Should I do it in two separate batches or can it all fit together in my mixer? If it’s better to do it in two separate batches that’s perfectly fine and I can do that but can I wait and bake both of them together in the oven at the same time? While I making the second batch should the first batch just sit at room temperature or should it be in the refrigerator? Sorry I have so many questions. Final questions however can you tell me the conversion from ML to cups etc. for example the milk is 30 ML, Is how many cups? And the 45 ML for cream, is how many cups? Thank you so much I’ll let you know how it comes out weird to try it as soon as I can get the milk powder.
sushma iyer says
Wow Abby.. I am so glad that you have stumbled upon my blog.. I feel so good when readers ask genuine questions while trying out the recipe. Thank you so much.. Pleased to learn that you are keen to try the recipe..
Now let us answer your questions one at a time:
1. The three rolls are definitely not for one person. It is definitely large enough to be shared. You can slice it as a bread slice and make sandwiches, toast or enjoy with some jam. Consider this as a packet of bread that you would buy from the super-market. How many persons do you usually serve in your home with 1 packet?? I buy 1 packet of bread and it serves 4 of us for 2 days.. So slice and serve.
2. If you double the recipe, I think it should fit in a standard kitchen aid mixer. I have always doubled the white bread recipe (not necessarily this one but the other basic recipe on the blog) and it worked fine. So I think you can double the recipe.
3. If you make one batch at a time, no need to put the other in the fridge. You can prove both on the counter-top itself. Should take nearly the same time if you are doing one after the other.
4. So my 1 cup = 250 ml of liquid. So 30 ml milk and 45 ml cream makes 75ml which is 1/3 cup. You can add half of each won't make a difference and measure and get it up to 1/3 cup if you prefer that way.
Hope this answers all your queries.. Would be more than happy to address something else or if any of these is not clear would be happy to elaborate the same. Do let me know.
Would also love to hear your feedback once you try it. Waiting for the same.
Regards
Sushma
Mary says
Hi,
I baked this bread and it turned out well. Except the top is dark brown. I did brush anything on top. How can I make the color on top lighter?
Thanks in advance.
sushma iyer says
Hi Mary..
So pleased to learn that you liked the bread <3 To reduce the colouring on top you can place an aluminium foil on top for the last 10-15 mins of bake time.
Regards
Sushma
Mary says
Noted on this. Thank you Sushma. 😉
sushma iyer says
My pleasure Mary 🙂
Regards
Sushma
Jayne says
This is the most amazing bread recipe that I have ever made. The directions are spot on & so easy to follow, along with the video.
Sushma Balasubramanian, you are an amazing baker with great skills. I'm so glad that I discovered your website & that you are a part of the Instant Pot group as well. Me & my family thank you.
❤❤❤❤❤
sushma iyer says
HI jayne..
I am so pleased to read your comment.. That is indeed kind of you to try the recipes and share your wonderful feedback with us.. Truly appreciate it..
And yes happy to have connected to you.. always love finding people with similar interests 🙂
Regards
Sushma
Timmy says
Hi! In the dough recipe, it was mentioned that the milk and cream should be cold. Will that still.activate the yeast? Just curious because i always see in bread recipes that the liquids be warm or room temp. May I know the reason for using cold milk and cream? Finally, should the butter be also cold or soft and room temperature? Thanks!
sushma iyer says
Hi Timmy
Yes for bread recipes, you always need liquids to be at a warm temperature. In this case, we are making the roux which is super hot and it would kill the yeast if added directly, so to reduce the temperature quickly we are adding cold milk and cream which would reduce the temperature a bit. If you were to use room temperature or warm cream and milk, you will have to wait for the roux to cool down for a longer time before adding it to the dough and proceeding.
The butter has to be soft and at room temperature.
Hope this helps
Regards
Sushma
Emilia says
It turned out marvelous.
This bread is a masterpiece. I followed the recipe and it worked without a glitch.
I even used all-purpose flour since currently it is a popular commodity and I could not find bread flour.
I wish I could post pictures.
Thank you for the recipe, Sushma:)
sushma iyer says
Yay!!! Emilia.. thank you for taking the time out to leave your wonderful feedback here.. Also, so good to know that APF worked for you.. This would help many who were looking out for the alternative to bread flour given the current situation..
So pleased to read through your comment.. <3
Regards
Sushma
Lakshmi says
You did an awesome job in explaining each and every step in detail ..I will definitely try this bread .And will let you know how it came .
sushma iyer says
Hi Lakshmi.. I am pleased to learn that the steps were helpful.. thank you for dropping by.. would love to know how it turned out for you..
Regards
Sushma
Lakshmi says
Sushma , I have one question , the cream mentioned in your recipe is heavy whipping cream ? What’s the alternate if we don’t have ?
sushma iyer says
Hi Lakshmi..
You can use any type of cream here need not be whipping cream. Here in New Zealand, only one type of cream is available which acts as heavy cream and whipping cream, in short, I use the same cream to add to curries as well as to frost the cake as well as here. So use any that is available. And if you do not get it then even milk would do the job as of now 🙂
Regards
Sushma
Hema says
Hi Sushma have you tried this recipe without egg?
sushma iyer says
Hi Hema.. sorry not yet.. will try once yeast is available in the market and would definitely share. 🙂
Sushma
Robin says
There is an overload of info. Of course it’s good to have details, but due to the amount of language I felt overwhelmed.
Basic bullet points are so much easier to follow.
Thanks very much,
Robin
sushma iyer says
Hi Robin
I appreciate your feedback.. will work and try to concise it next time.. Sorry about it..
Regards
Sushma
Catherina says
Hi , thanks for sharing!
In the Tangzhong, 14 gr of flour ? 2 tbsp ? Do you mean 40 gr !?
Thanks
sushma iyer says
Hi Catherina..
No 1 tbsp of flour is around 7-10 gms here and there.. so 14 gms is the correct value 🙂
Randy Carter says
Love...love...love this recipe about to make my third loaf.....thanks
sushma iyer says
Wow Randy.. that is fantastic.. so pleased to read your commment.. thank you for trying and sharing it with us.. appreciate it 🙂
Regards
Sushma
Emily says
Is this active dry or instant yeast?
sushma iyer says
Hi Emily.. I always use instant yeast in my recipes.. you cam use active dry too just make sure to activate it first 🙂
GC says
What kind of cream? Heavy cream? Light cream? Half and half?
Can I make this without a stand mixer?
sushma iyer says
Yes you can make this without stand mixer GC.. follow any of my previous posts for tips.. and any type of cream would work or simply substitute the cream with milk 🙂 Cream would make it richer though 😉