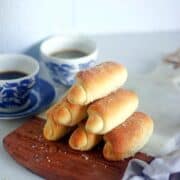
Soft, buttery and light - what does one need more in a bread?? This Spanish bread recipe is exactly that. And filled with a delicious, moist sweet filling makes this bread stand apart!!
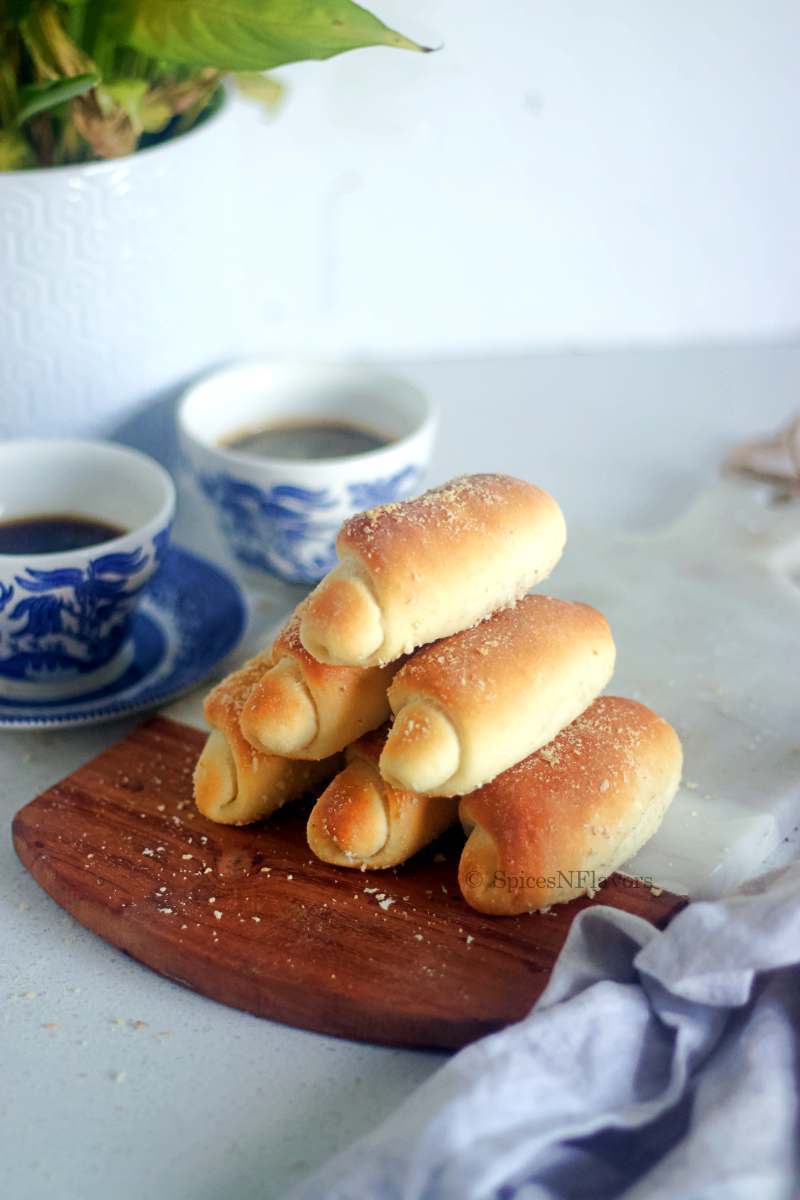
What is Spanish Bread?
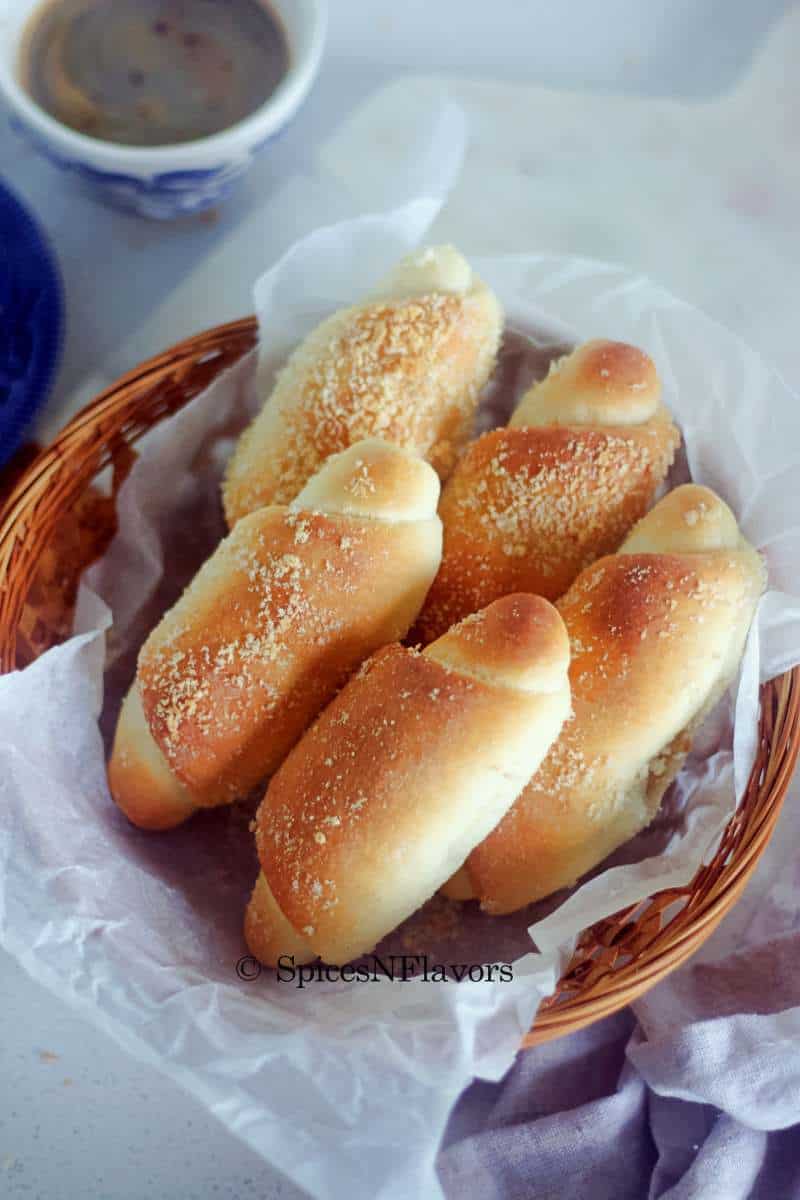
Originated in Philippines, and commonly knows as Senorita Bread, Spanish Bread are nothing but oblong buttery enriched bread roll that is often filled with a sweet filling made of breadcrumbs, butter and brown sugar and coated with more breadcrumbs on the outer layer.
Why you must try this recipe?
With an incredible flavour, a striking filling recipe and the added softness from the moist dough, makes this bread recipe a must try for every bread lover.
- Enriched Breads are a class apart. The dough itself is so soft and bouncy that the end result has to be perfectly soft bread that tastes divine.
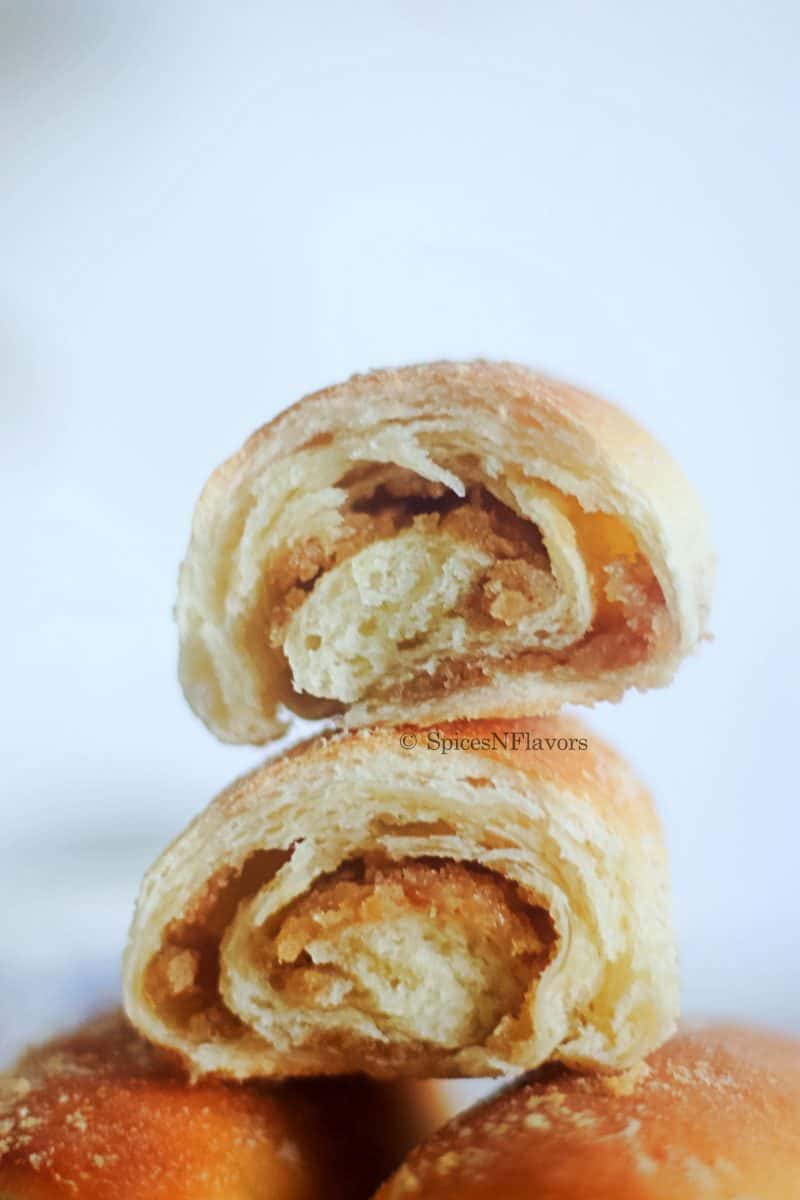
- The moist and sweet filling gives an additional texture and flavour that would leave you wanting for more.
- Usually Spanish Bread is made using eggs. I am sharing an eggless version perfect for those who do not consume eggs.
- A great make ahead recipe so you can definitely make the dough ahead of time and bake it fresh for breakfast, brunch or lunch or whenever your heart desires in a matter of time.
Ingredients:
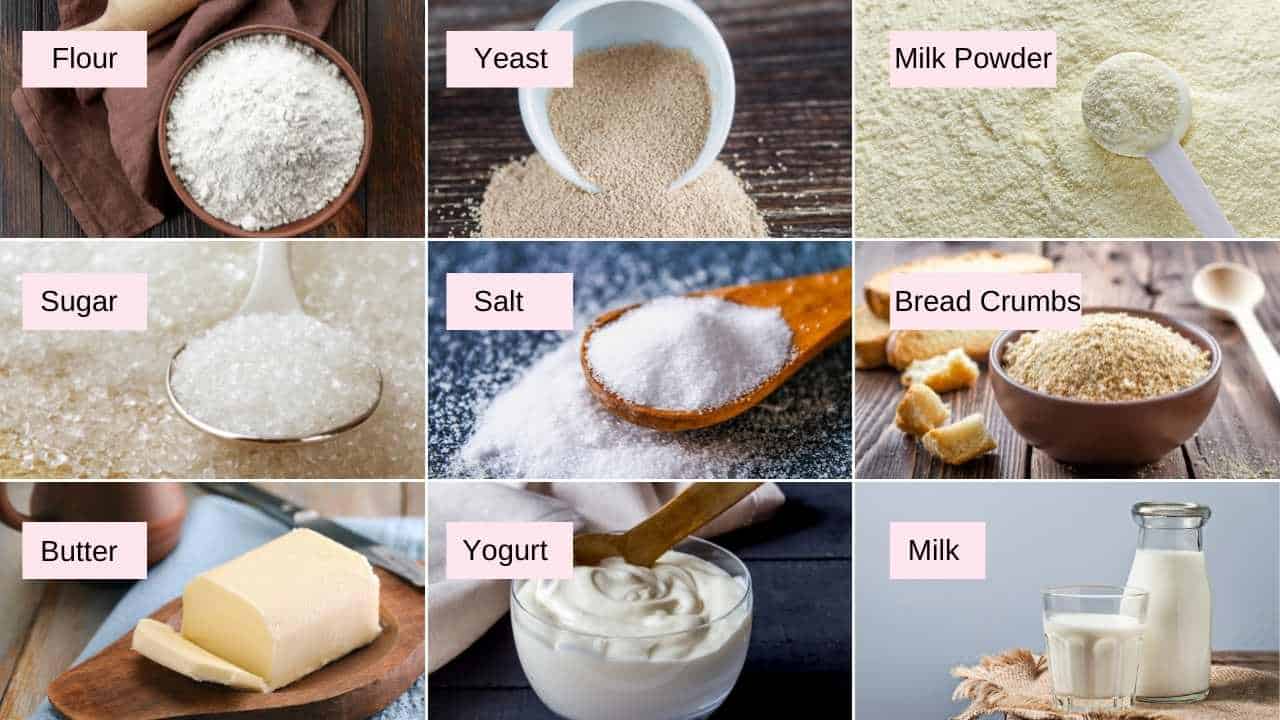
- Bread Flour: Use Bread Flour for this recipe. If it is not available only then use APF. The results might vary a bit.
- Yeast: Preferably use Instant Yeast. If using any other variety make sure to activate it first before proceeding with the recipe.
- Milk Powder: Adding little milk powder to any bread dough would make it soft and tender.
- Yogurt: This acts as a substitute for eggs giving the dough that much needed moisture and flavour.
- Sugar: You would need two types of sugar for this recipe: Plain for the bread dough and Brown sugar for the filling. However you can use only brown sugar if you prefer for both bread dough and filling.
Setp by Step Instructions:
Step 1 - Prepare the Dough
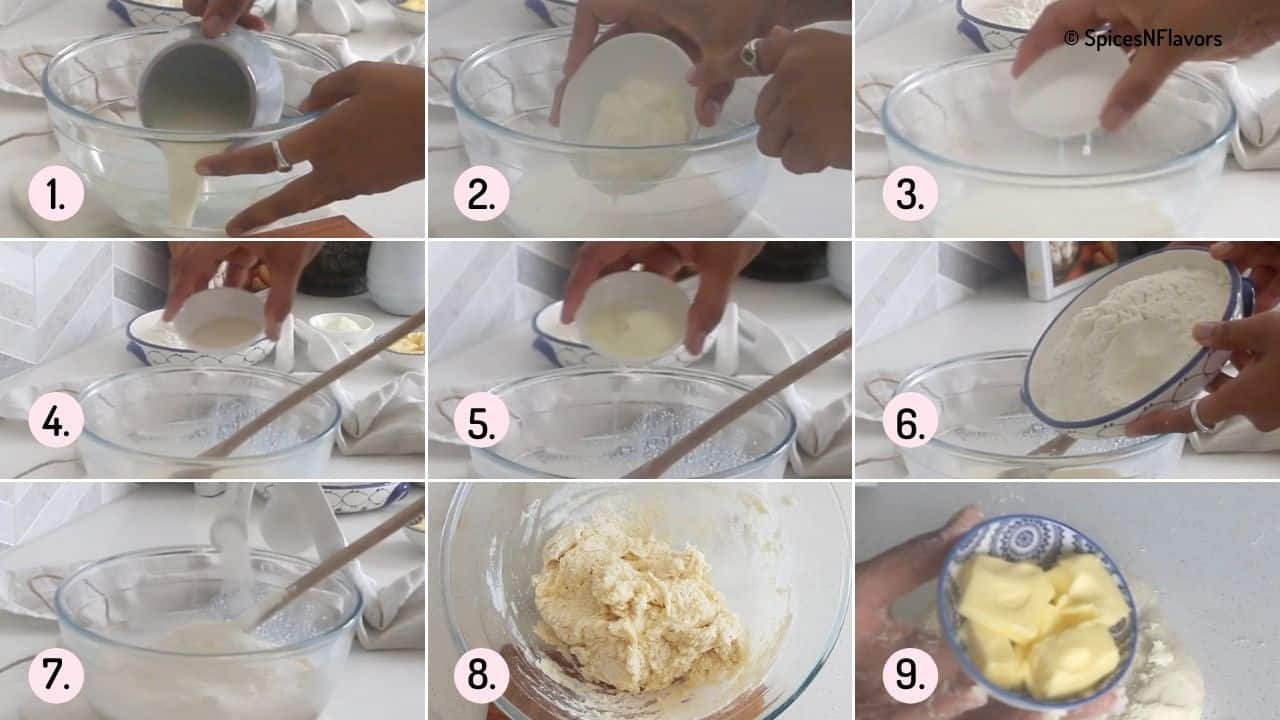
To make this recipe, start by adding warm milk to the base of your mixing bowl followed by yogurt (image 1-2).
Add in the sugar and give everything a quick mix.Then in goes the yeast, milk powder, bread flour and salt (images 3-7).
Mix everything well but eventually you will have to use your clean hands to bring the dough together. Once it forms a lumpy dough (image 8) transfer it to a lightly dusted flour and then start kneading.
After about 10 mins of kneading, incorporate the butter a little at a time (image 9).
It is going to be a messy job as the softened butter tends to stick and spread. But just keep kneading, make use of your bench scraper if needed and eventually the dough will come together.
Step 2: First Proofing
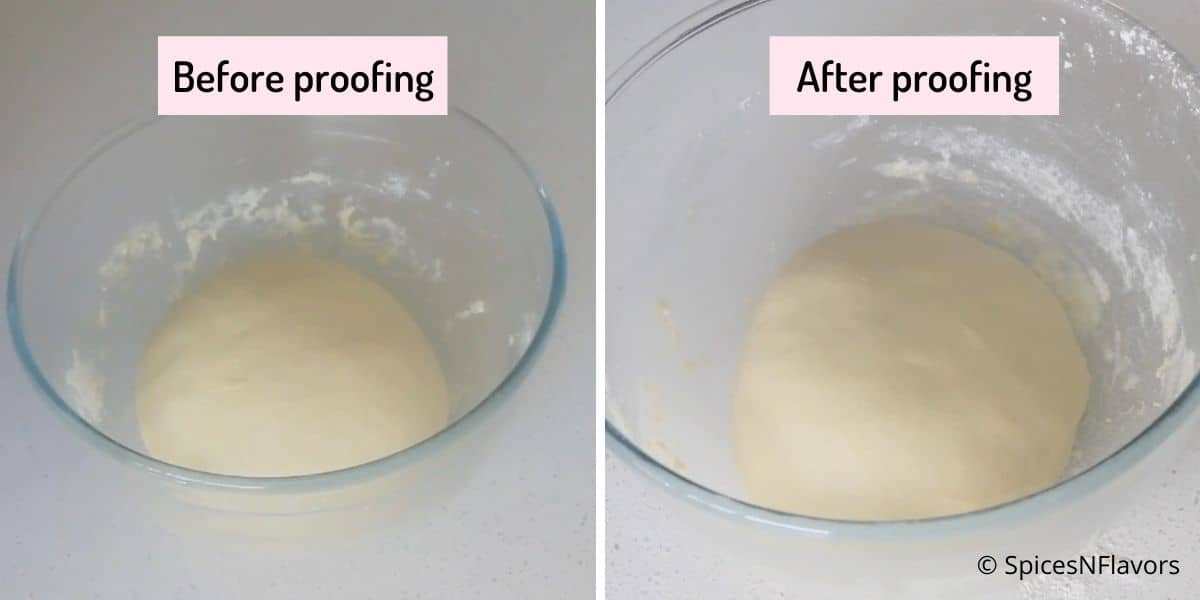
So use the same bowl in which you kneaded the dough. Grease it with oil and then place the dough. Swirl it around to coat it with oil on all sides.
Cling wrap and allow to proof for 1 hour.
Alternative you can proof the dough in the instant pot too. In that case the time duration would be reduced to 30 mins.
This post on Instant Pot Bread Proofing explains all the details about proofing any bread dough in the pot.
Step 3 - Prepare the Filling
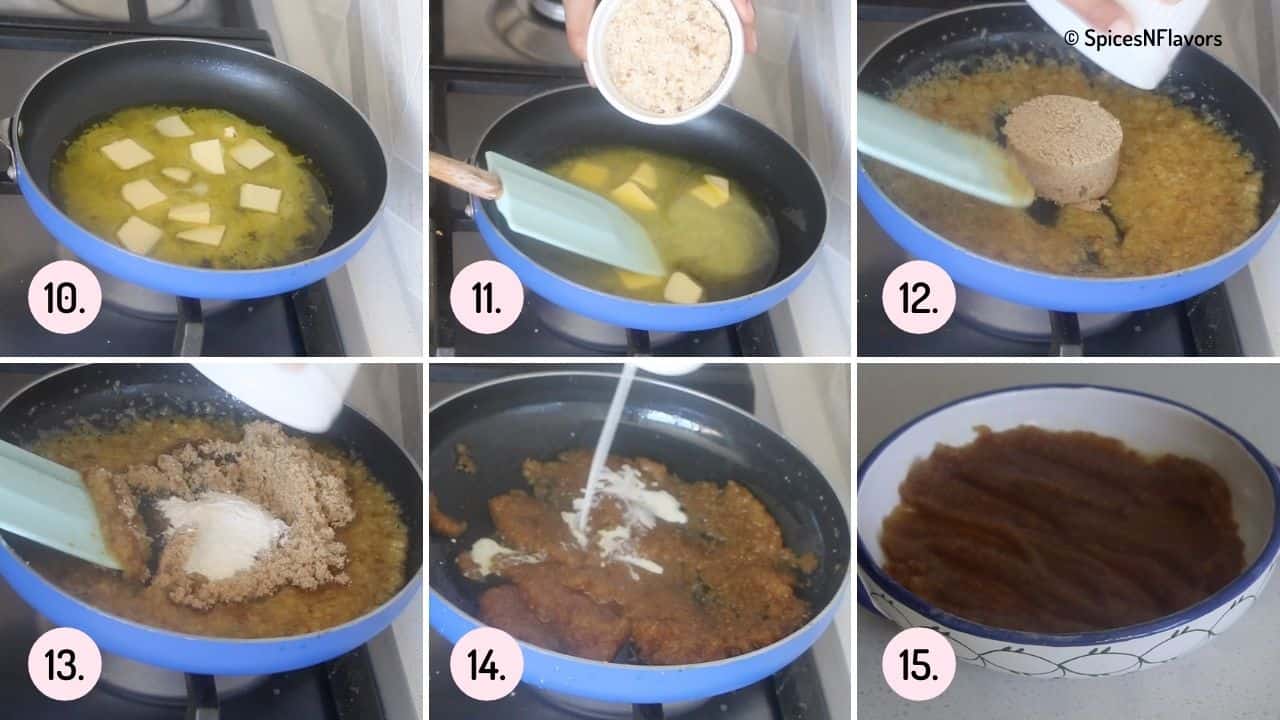
Melt the butter in a saucepan. Add in the breadcrumbs. Mix it really well and then add the brown sugar and flour. Cook everything until the mixture starts to thicken.
Finally add a tsp of milk, this would keep the moisture content intact.
Cook until it comes to a halva like consistency. Then take on to a bowl, spread it out and allow it to cool completely (images 10-15).
The tip to cook the filling so that it does not ooze out is adapted from this recipe.
Step 4 - Shaping the Bread Dough
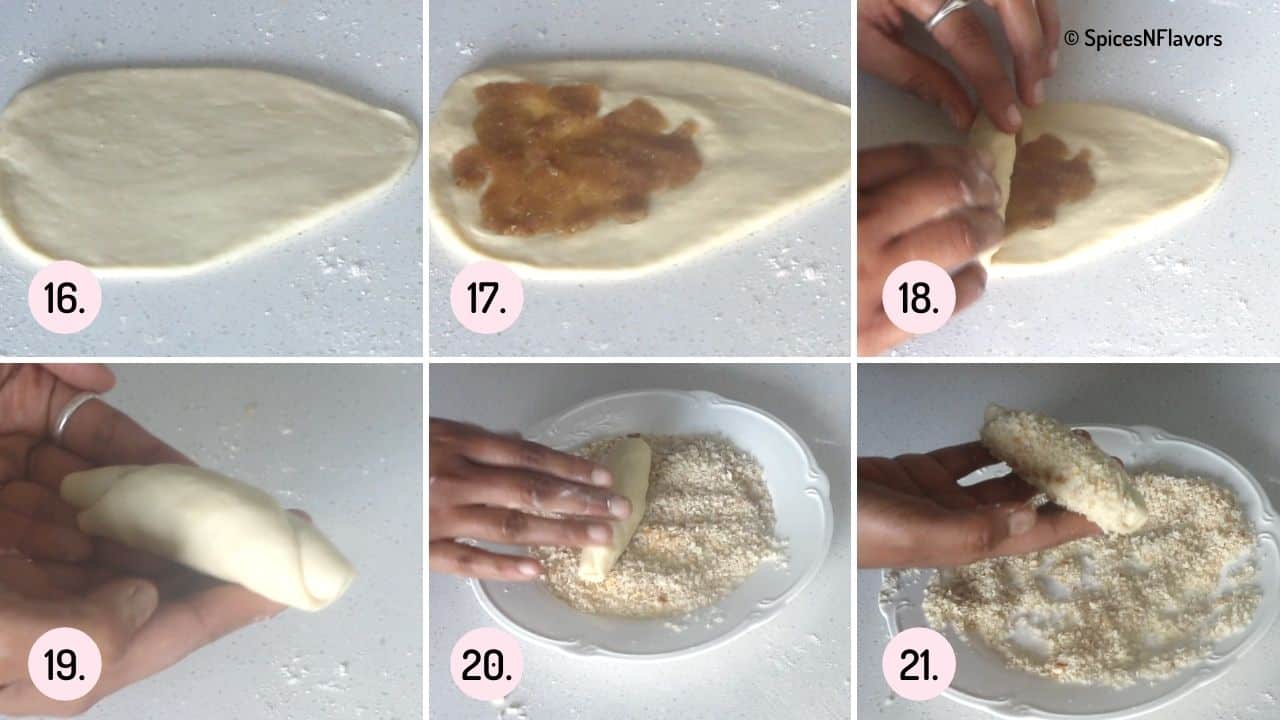
Once your dough is proved take it onto your counter top and divide it equally into 10 portions. You can eyeball it or use a weighing scale for accurate measurements. Each dough weighs 50 gms.
Slightly round it up in your palms, then press to flatten and roll it into a triangular shape to resemble a pizza slice.
Spread a small portion of filling on the inside as seen. Then roll from the wider end to the narrower end to form a croissant shape.
You can choose to slightly butter the inside of the dough before placing the filling for additional moistness. I missed this step. Also while filling make note to leave a gap around the edges on both sides so that the filling does not ooze out while baking.
Then roll it on a plate of breadcrumbs and place on baking sheet lined with parchment paper. Make sure that the end part sits at the bottom so it won't open up while baking.
Step 5 - Second Proofing
Cover with cloth or kitchen towel or cling wrap and let them rise for another 20-30 minutes or until they doubled in size.
Step 6 - Baking
After second proofing time to bake them. Place the baking sheet on the middle rack and bake at 180°C for 15-20 minutes until the top turns golden brown.
The bread tastes best when still warm.
Storage Instructions:
Store the bread in an air tight container at room temperature for up to 2 days.
Before serving it is always a better idea to warm the bread for few seconds in the microwave for optimum flavour.
Make ahead Instructions:
- You can make the dough ahead of time and place it in the fridge. The dough will slowly rise and double in size overnight. On the day of baking, remove from the refrigerator 30-40 mins before you’re going to shape them into rolls.
- The other way to do is to make the dough, allow first proofing and shape them into rolls. Place into fridge and allow for second proofing. Bake them the next day and you're done! Please Note: Once the shaped dough rolls have proved, you can’t remove or touch it in the pan. Otherwise, it will lose its shape.
Baker's Tips:
- Greasing the dough and the bowl in which you are going to proof it beforehand will help prevent your dough from drying out.
- Adding a tsp of milk while cooking the breadcrumbs and brown sugar filling will ensure that the filling stays moist.
- While filling the dough with the sweet filling leave a gap around the edges so that the filling does not ooze out while baking.
- While shaping, tighten the ends really well and make sure that the end part sits at the bottom on the parchment paper or else there are chances for the dough to lose its shape while baking.
- If while coating the bread dough after shaping, you feel that the bread crumbs are not sticking to it then brush it with some milk first and then add to the bread crumbs.
Recipe FAQ's
No. Without Breadcrumbs this bread would just be a regular bread dough. The breadcrumbs give a very slightly crunchy texture, then you get the soft insides with more of a buttery sweet crunch again from the breadcrumbs.
You can use any variety. Panko breadcrumbs also works or you can make use of homemade bread crumbs too.
No. Spanish Bread and Senorita Bread are the same but they are totally different to Pandesal. Pandesal are bread rolls more like what we Indians call as Ladi Pav or Dinner Rolls in other parts of the world.
There are so many filling choices to go for. You can make this recipe with pineapple filling or add a little coconut or even nuts like walnuts. You can also make the savory version by adding in tomato and cheese.
Related Recipes:
- Dinner Rolls (Ladi Pav recipe) - 9 mistakes you probably are making.
- Homemade Finger Doughnuts.
Wish to Join US for the love of BAKING? Subscribe to our newsletter and Youtube channel. Follow along on Facebook, Instagram, and Pinterest for all the latest updates!
Soft Spanish Bread - Eggless version
Ingredients
- 1/2 cup + 2 tbsp Lukewarm Milk
- 1/4 cup (60 gms) Yogurt (at room temperature)
- 2 tsp Instant Yeast
- 2 tbsp Sugar
- 2 cups (240 gms) Bread Flour
- 1 tbsp Milk Powder
- 1 tsp Salt
- 3 tbsp (42 gms) Butter softened
For the Filling
- 2 tbsp Butter
- 3/4 cup Breadcrumbs
- 1/2 cup Brown Sugar
- 2 tsp Flour
- 1 tsp Milk
Instructions
Step 1 - Prepare the Dough
- In a mixing bowl, add the milk, yogurt and sugar. Mix well. Add in the yeast, milk powder, flour and salt. Combine together to form a lumpy mass of dough.
- Then transfer it to a slightly floured worktop and start kneading. Knead for 6 mins. Push the dough away from you. Then fold over back to the centre. Turn the dough and repeat the process.
- After 6 mins, start incorporating the butter a little at a time. This would be little messy as the butter spreads all over the work surface but keep kneading and the dough will come together. You can make use of your bench scraper to help you with the kneading.
- Once kneaded it is time to prove the dough.
Step 2 - First Proofing
- Use the same bowl in which you kneaded the dough. Grease it with oil and then place the dough. Swirl it around to coat it with oil on all sides.
- Cling wrap and let it proof for 1 hour on your counter top.
- Alternatively you can also proof the dough in your instant pot by selecting the Yogurt Mode and setting the time for 30 mins.
Step 3 - Prepare the Filling
- While the dough is proving let us prepare the filling.
- Melt the butter in a saucepan. Add in the breadcrumbs. Mix it really well and then add the brown sugar and flour. Cook everything until the mixture starts to thicken.
- Finally add a tsp of milk. Cook until it comes to a halva like consistency. Then take on to a bowl, spread it out and allow it to cool completely.
Step 4 - Shaping and Filling
- Once the dough is proved, punch it down to remove the gas bubbles and then divide the dough evenly in to 10 roundels. If using a weighing scale for this purpose then divide the dough into 50 gms each.
- Take each portion and slightly round it up in your palms, then press to flatten and roll it into a triangular shape to resemble a pizza slice. Spread a small portion of the prepared filling on the inside. Then roll from the wider end to the narrower end to form a croissant shape.
- Roll each bread dough on a plate of breadcrumbs and place on baking sheet lined with parchment paper. Make sure that the end part sits at the bottom so it won't open up while baking. Cover with cloth or kitchen towel or cling wrap and let them rise for another 20-30 minutes or until they doubled in size
Step 5 - Baking
- After second proofing time to bake them. Place the baking sheet on the middle rack and bake at 180°C for 15-20 minutes until the top turns golden brown.
Video
Notes
- If you are using Yeast other than the Instant one then please do activate it by mixing along with the milk and sugar first. Let rise for 15 mins and then proceed with the recipe.
- Yogurt in this recipe is the replacement for eggs. So you can use 1 egg and skip yogurt if you prefer making breads with eggs.
- Milk Powder enriches the bread dough.
- Any variety of breadcrumbs can be used. Homemade or Store bought.
- Adding a tsp of milk while cooking the breadcrumbs and brown sugar filling will ensure that the filling stays moist.
- Greasing the bowl and bread dough with oil before proofing will prevent the dough from getting dried while proofing.
- While shaping, tighten the ends really well and make sure that the end part sits at the bottom on the parchment paper or else there are chances for the dough to lose its shape while baking.
- While filling the dough with the sweet filling leave a gap around the edges so that the filling does not ooze out while baking.
- If while coating the bread dough after shaping, you feel that the bread crumbs are not sticking to it then brush it with some milk first and then add to the bread crumbs.

Leave a Reply