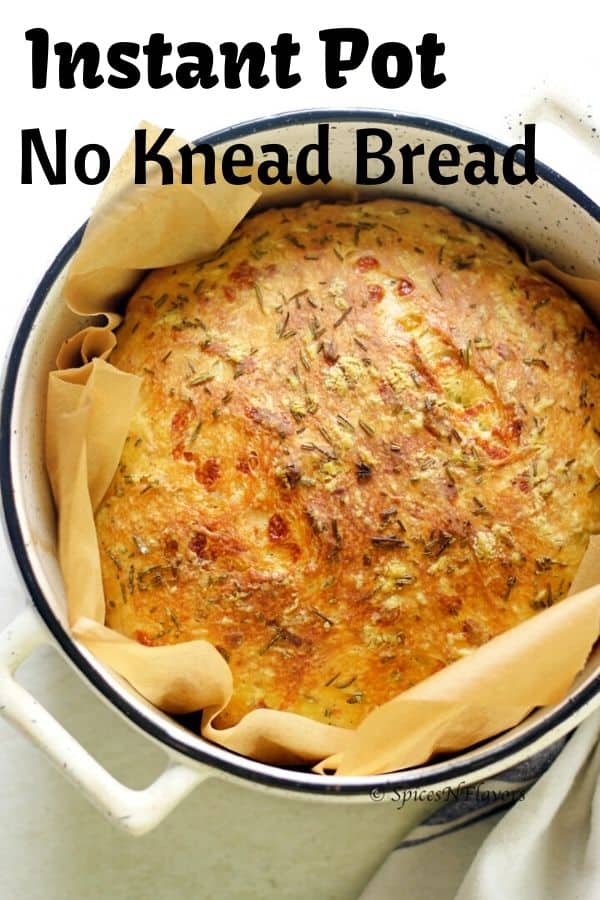
Statutory Warning - This Instant Pot No Knead Bread flavoured with cheese and herbs is gonna make you so addicted that you would end up coming back to it again and again.
Grab a coffee and follow along this dutch oven bread proofed in Instant Pot is the only ultimate guide to bread making you will ever need.
Popularised by New York Baker Jim Lahey this method of no-knead bread went viral when people had no clue what viral was 😉 and it revolutionalized the way home bakers or even professional bakers for that matter baked bread.
This No-Knead Bread is:
1.Easy no-knead bread recipe one could ever try their hands-on
2. Simple and Fuss Free
3. No stand mixers, no complicated ingredients, no special equipment needed.
4. You hardly need 10 mins of active time to make this bread. Rest, the dough is either prooving or baking.
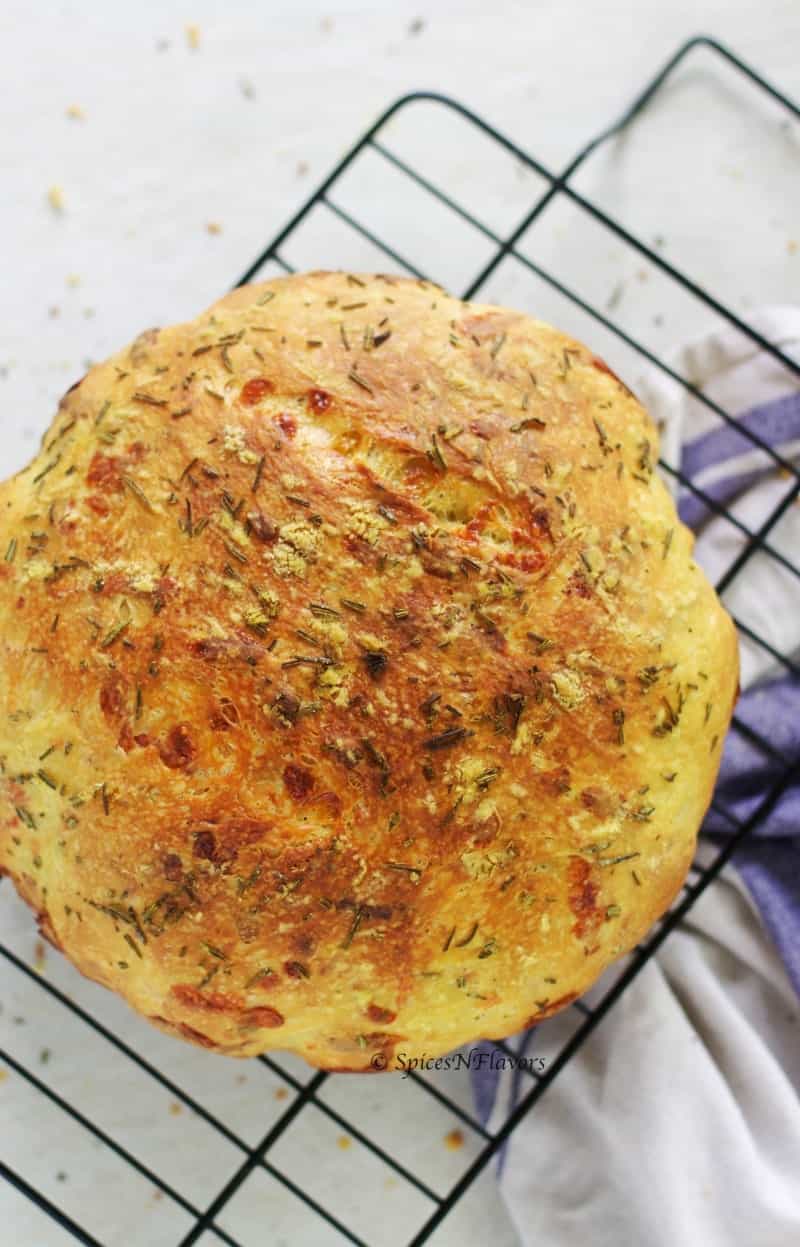
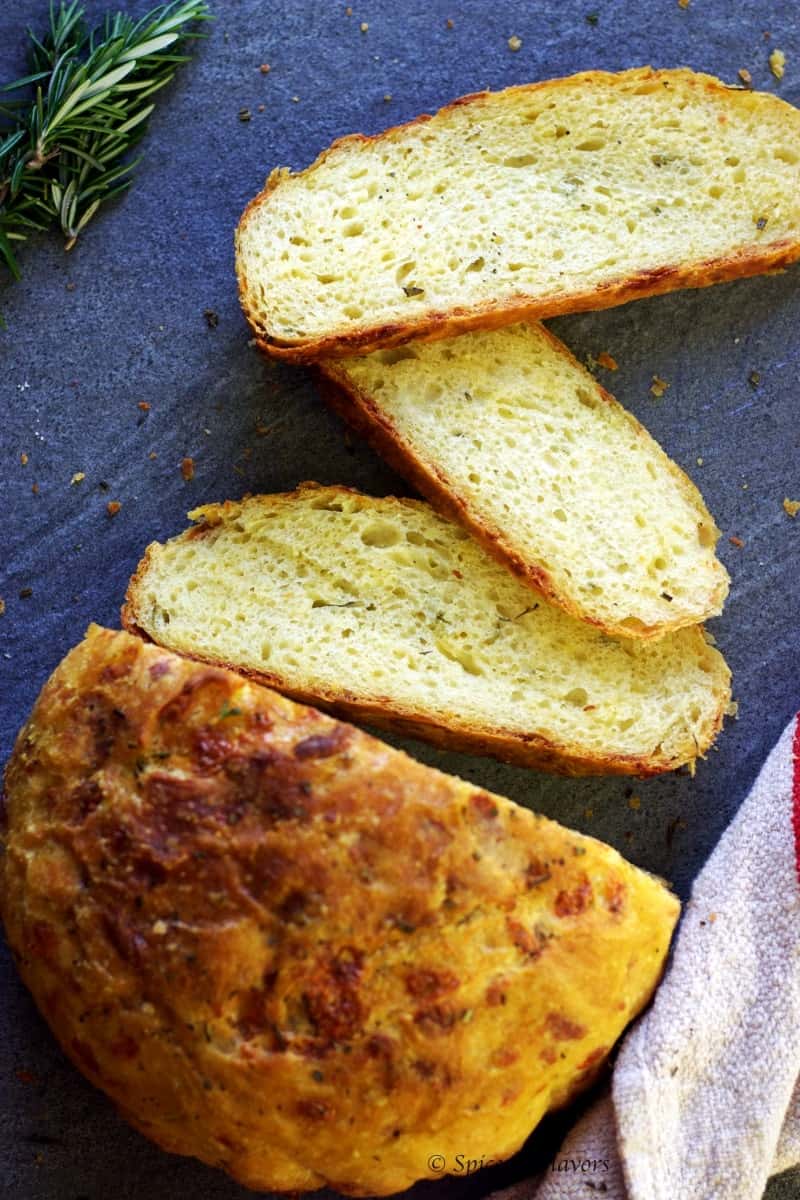
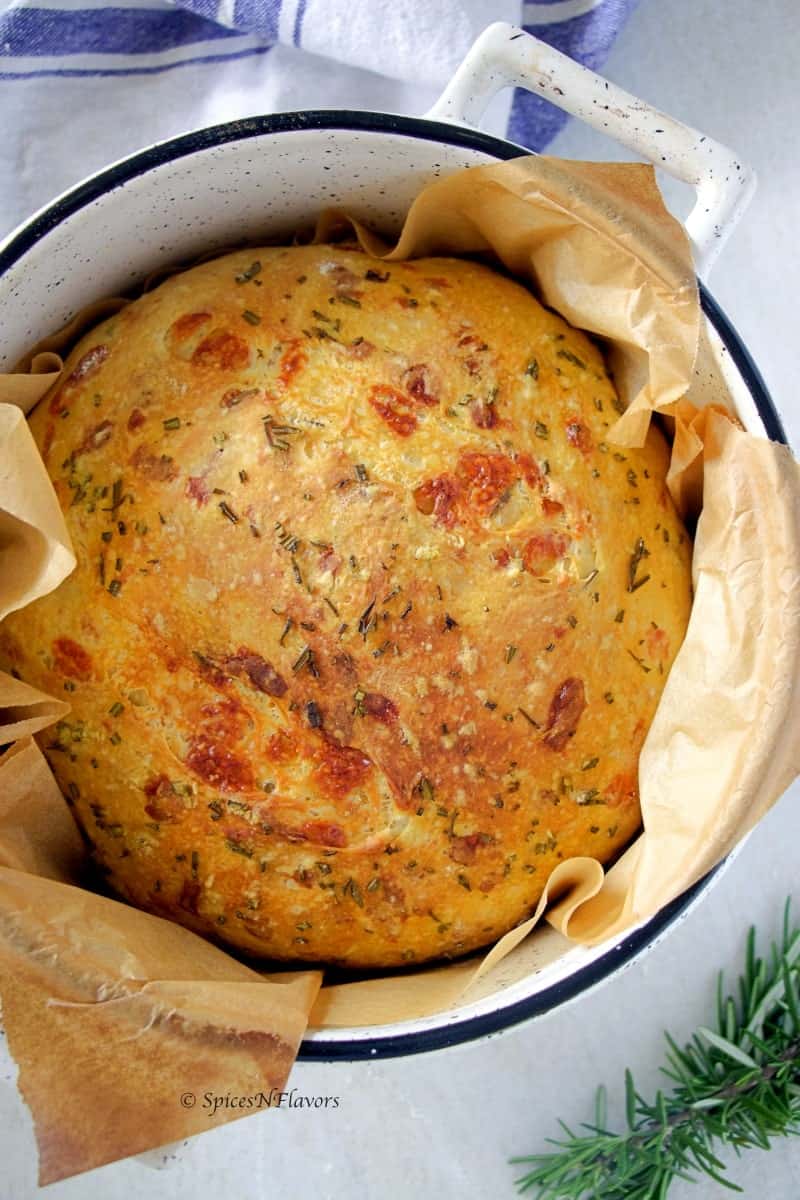
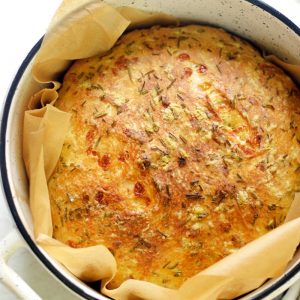
A bread that has a golden brown, thin, crusty top with a soft, chewy and flavourful interior.
Characterised by the long duration of the fermentation process which forms the gluten strands that gives the bread its characteristic texture.
And this is where our Mighty INSTANT POT bread baking skills come handy.
Role of Instant Pot in making No-Knead Bread:
Proofing dough in Instant Pot is one the best hacks you could ever try.
Especially when it comes to making a No-Knead Bread which calls for overnight fermentation you can totally cut down on the time by half and literally to hours.
In this case, we will use Instant Pot to proof our bread dough and you will just need 4 HOURS to proof the dough.
In fact the other day I was running short of time so I proofed the dough for just 3.5 HOURS and it worked just fine.
So just before having lunch, mix the dough and put it in your Instant Pot and you will have your bread ready to be served hot and fresh for dinner.
I will tell you exactly how in this step by step recipe on Instant Pot No-Knead Bread.
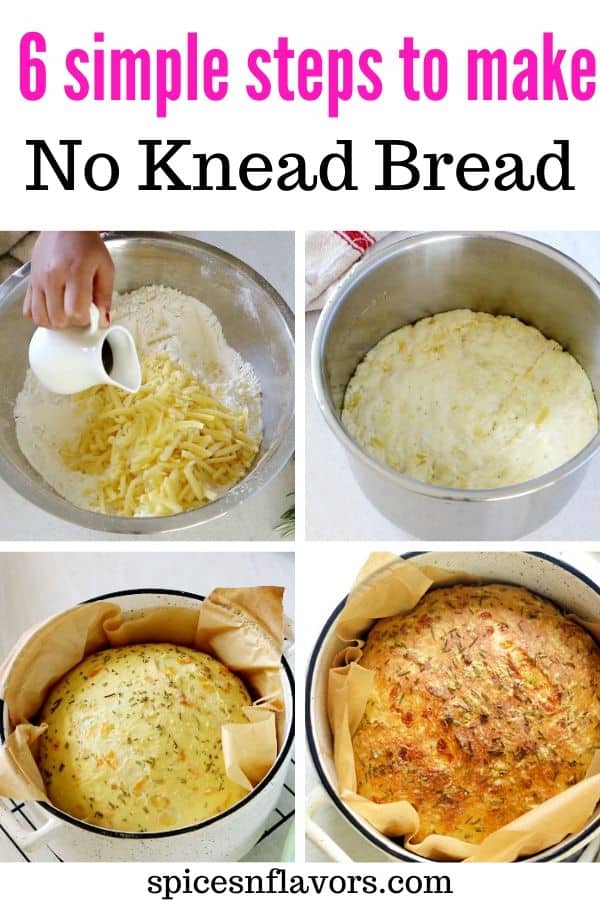
Step-by-Step Recipe to make Instant Pot No-Knead Bread:
Step 1: Making a Wet Shaggy Dough
That's a crucial part of making no-knead bread dough. The dough has to be really sticky and wet.
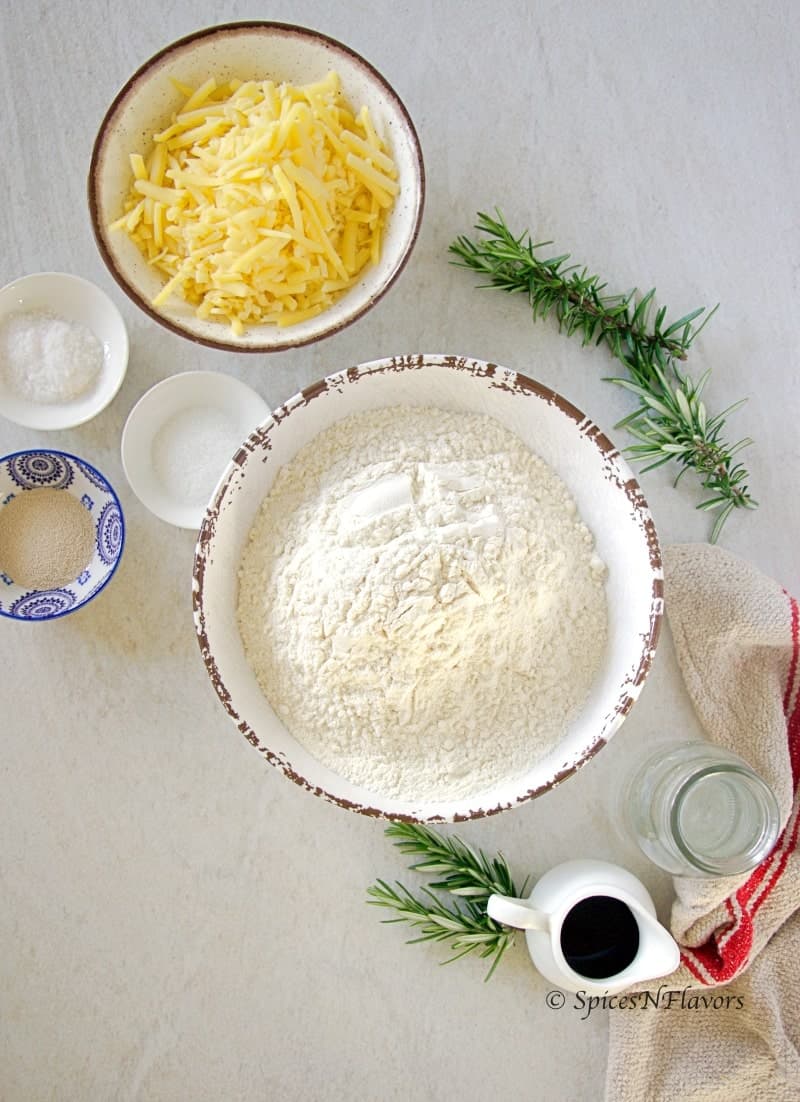
All you need is just basic ingredients - Flour, Yeast, Salt, Sugar and Water.
But trust me the bread made using this is so bland, I mean it is not flavourful at all. It does have great texture though but no flavour profile at all.
I highly recommend adding some flavours to your bread.
Today I have used a combination of Cheese and Herbs to flavour this bread. Check out 9 other variations to flavour this bread in the post itself.
Add the dry ingredients -salt, flour, yeast, sugar followed by cheddar cheese, rosemary and olive oil.
Simply combine everything into a sticky wet mass by adding water a little at a time.
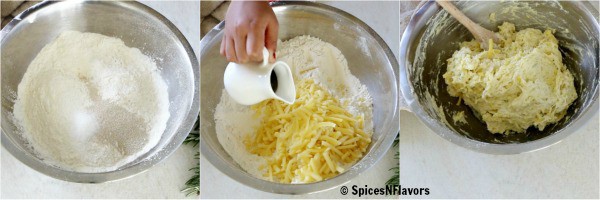
Even though the recipe says 1.5 cups of water add little water at a time. I was left out with about 2 to 3 tbsp of water.
Step 2: First Proofing
If you do not have an Instant Pot then transfer the sticky wet mass of dough into a greased bowl, wrap it with cling wrap and let it on your countertop overnight to prove.
Next day follow Step 3.
How to proof bread dough in Instant Pot?
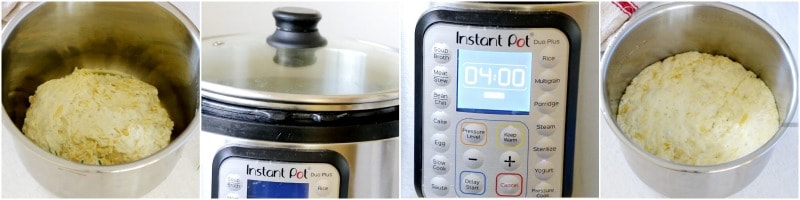
If you have an instant pot then grease the inner pot with some oil.
Transfer the dough into the greased inner pot. Cover with a glass lid and not the sealing lid.
Choose the yoghurt button - Normal mode and set the time to 4 hours.
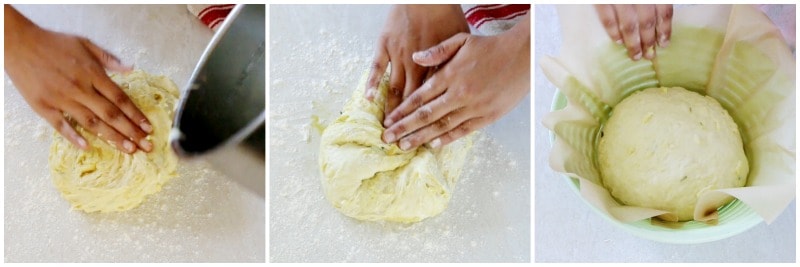
Step 3: Shaping the dough into a boule
That sounds so professional right!!
Haha.. well it is actually a French word meaning Ball. 😉
So basically all you have to do take your proofed dough onto a well-floured surface, add some flour on top as well and then shape them into a nice ball.
Such that the top of the bread should have a smooth surface as much as possible.
You can watch the quick video for how to shape bread boule or watch the detailed video on Youtube from the recipe card or by clicking here.
Step 4: Second Proofing
So once you get a smooth top and nice ball or oval-shaped dough.
Simply transfer it to a banneton - breadbasket that has been pre-lined with a parchment paper.
If you do not have one then you can use any wok shaped bowl (narrow bottomed and wider sides similar to the basket) to do the job.
And if not that simply let it proof on the countertop. It is perfectly alright.
In fact, this method of proofing is termed as "Bench Time"
No matter which medium you choose, try to shape it on a parchment paper as that way it becomes easier to transfer the dough into the preheated dutch oven.
And the proofing time would be 30 mins.
Step 5: Pre-heating the oven along with the Dutch Oven
Once you have shaped and allowed the dough to rest for 30 mins, time to pre-heat the oven.
Put your dutch oven inside the oven (lol.. that sounds funny to me 😉 ) so anyways and then preheat your oven to 450 Fahrenheit or 230°Celsius for 30 mins.
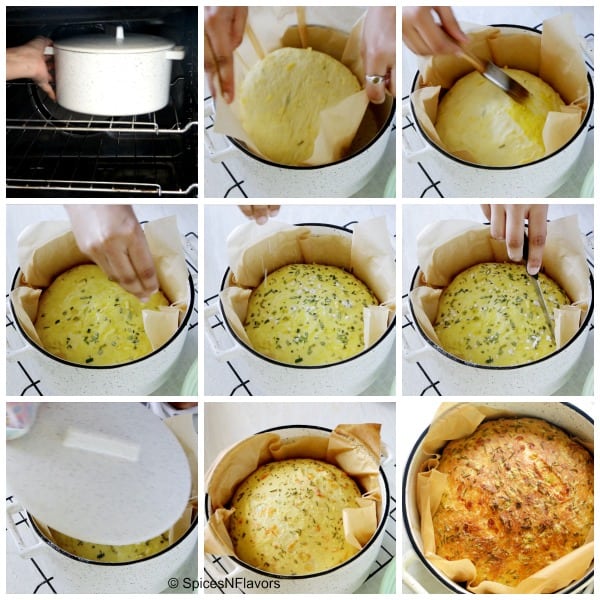
Step 6: Baking the No-Knead Bread
CAUTION ALERT:
The Dutch oven would be super hot at this stage so patiently and carefully take it out of the oven.
Lift the parchment paper (with the dough in it.. of course 😉 ) from the banneton and carefully transfer to the hot dutch oven.
Brush the top with olive oil and sprinkle some chopped rosemary and plain flour on top.
Using a sharp knife make 2, half-inch cuts on the bread.
Close it with the lid and transfer it back to the oven and bake with the lid on for first 30 mins. Then remove the lid and bake for another 15 mins.
I know you are already patting your back and you need to for baking such professional looking bread right in the comfort of your home without any efforts.
Just don't let anyone else know the secret 😉
Dutch Oven No-Knead Bread - Do you really need it?
The characteristic of no-knead bread is a wet shaggy dough and long fermentation process.
So when we put it in the oven, the moisture in the bread converts to steam and this where the dutch oven comes into play as it traps the steam and doesn't allow it to evaporate in the initial 5-10 mins of baking.
What does steam do for bread?
- It helps to keep the crust soft so that it gets the expansion enabled by the "oven spring" activity.
- Also helps to dissolve the sugar that caramelizes the sugar on top that ultimately gives the glossy, golden and crusty top to the bread.
Also, the heat retained by the dutch oven is much more than our home-based ovens.
So it is highly recommended to use a dutch oven for baking artisan bread.
Can I bake no-knead bread without Dutch Oven?
Oh yes, of course!!!
You can use two skillets instead; one which holds the bread and the other placed upside down which acts as the cover or the lid.
If you do not have skillets then you can bake it in a cookie tray as well or any baking pan for that matter just mimic the steam by placing boiling hot water along with the bread while baking.
I would love to do a separate post on the same.
Will you guys be interested?? Let me know by commenting - YES.. 😀
My 6 major tips for making Instant Pot No Knead Bread:
- The no-knead bread dough has to be wet, shaggy and sticky mass. Just feel the dough, add water little at a time and mix. If you feel that it is too wet add some flour and adjust.
- I would recommend you to add flavouring of your choice while making the bread as find the plainer version to be a little bit bland.
- Shaping the Dough: Do not add too much flour while shaping the dough - you need just 2 to 3 tbsp at the max because you do not want to end up with the dry dough. The moisture content of the dough is the key when it comes to making this easy no-knead bread recipe.
- Try to make use of a banneton or a bowl similar to it to get that bakery-style shape, well honestly the messier this bread gets the more artistic it looks once baked.
- Using a sharp knife to score (cut) the bread is the key. You do not want to drag it too much. Be gentle but quick at the same time while making cuts on the dough for that artistic look. Oh please do not miss this step as it is not just for looks but instead, this also helps the bread to increase in volume and expand under the heat. 😀
- High heat to bake this Dutch Oven No-Knead Bread is another key factor. So make sure that your oven is hot when you place the bread for baking. It takes nearly 30 mins to reach to that high heat so do keep that in mind. 🙂
- The final 15 mins are what makes the bread crusty. So the longer you bake the more the crustier your top will be ultimately yielding a golden brown, thin, crusty top with a soft, chewy and flavourful interior.
- Always use a glass lid or a plate to cover your Instant Pot and not the regular lid as if accidentally you allow it to prove for longer there are possibilities that the dough would rise and get stuck to the sealing pin from within and it would become too tough to open the lid.
- You can use a 3qt, 6qt or even a 10qt Instant Pot to prove the bread.
How to Score Bread - Is it essential?
If you read through my tips, you might have observed in Tip No 5 where I mention about using a sharp knife to score your bread.
This is not just for decorative purpose, scoring has its own role in bread baking.
By scoring a bread you actually allow the bread a chance to increase in volume and expand during baking in the initial oven spring.
If you do not score there are chances that the bread would tear apart or crack at undesirable places and won't yield a rustic looking bread.
Some tips to get the perfect scoring on bread:
- Use a sharp knife. For beginners, I would advise using fresh new blade. Due to its sharpness, you will find it easier to work with.
- Do not drag too much. Be gentle and quick. Apply gentle pressure and make cut at an angle. Dragging too much would expose the interiors of the bread and would make it look unpleasant.
No-Knead Bread Variations:
Here are few flavour variations that you can try while making this Instant Pot No-Knead Bread.
- Instant Pot Rosemary Bread - This seems to be the most common flavour choice. Just add 2 tbsp of chopped rosemary to the dough.
- Instant Pot Olive Oil Rosemary No-Knead Bread - Ad 1/4 cup Olive Oil and 2 tbsp Rosemary.
- Cheese and Herbs - Just like the recipe that I have shared today - Cheddar Cheese and Rosemary. Any different type of cheese and herbs can be used.
- Herbed bread - A blend of herbs - rosemary, basil, chives etc or any other herbs of choice can be used.
- Triple Cheese - Blend of cheese - Cheddar, Parmesan, Mozzarella etc.
- Sun-dried Tomatoes and Basil - 1/3 cup of sun-dried tomatoes and 3 tbsp of basil would be an amazing flavour variation.
- You can also opt for a sweeter version by adding cinnamon and raisins or even some chocolate to the dough.
- Few other variations like pesto, pizza seasoning, garlic butter etc can all be used. I have also shared a list of flavour combination that one can use in my Christmas Star Bread Recipe which you can check out by clicking the link.
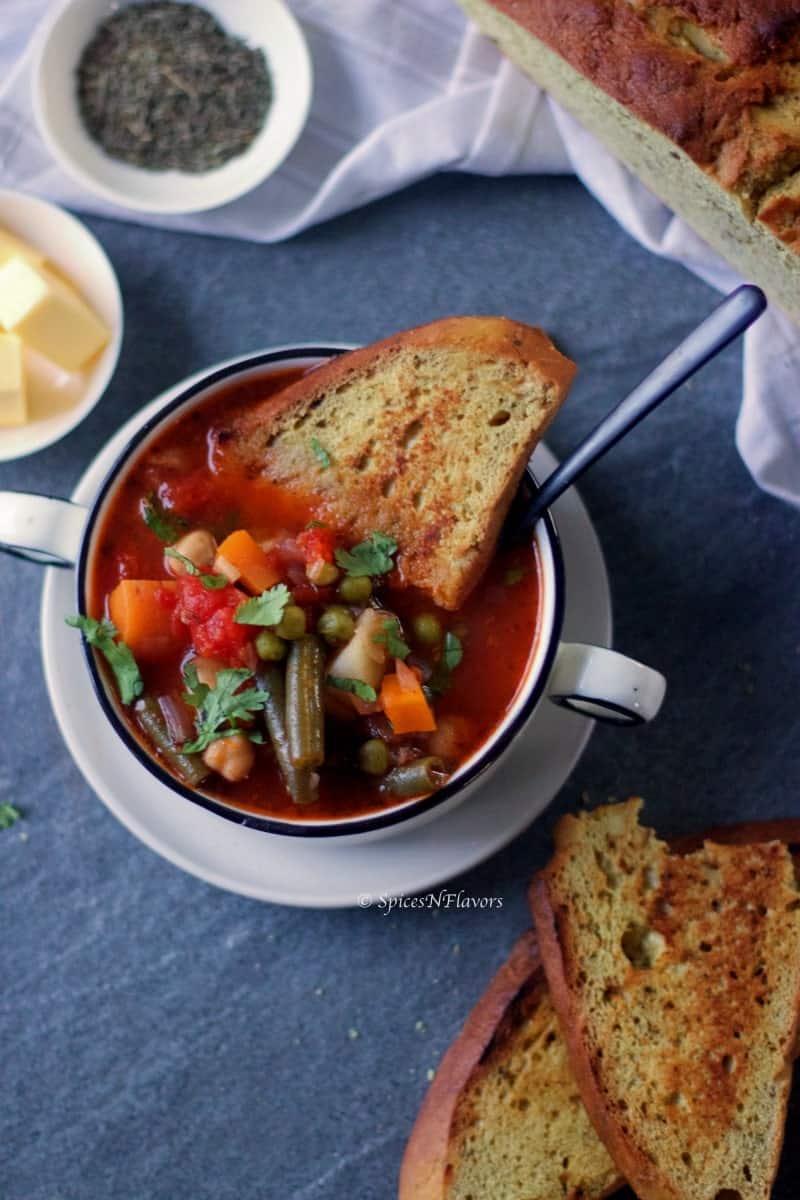
Try it for breakfast with some coffee or with a salad on the side or make some sandwiches for school lunches or simply dip into your favourite soup this season, this would surely become your favourite go-to bread here on.
Here is a detailed step by step recipe on how to make Instant Pot No-Knead Bread
If you like this recipe or happen to try it then share your experience below in the comments by giving it a STAR RATING or let me know by tagging me, tweeting me or Instagram me. I would love to connect with you and your posts.
Oh by the way if you love baking bread and too in an Instant Pot then definitely check out my two of the most popular bread recipes by clicking here and here.
Instant Pot No Knead Bread
Ingredients
- 3 Cups (approx 375 gms) All purpose Flour
- 1.5 tsp Salt
- 1 tsp Sugar
- 1.5 tsp Yeast
- 1.5 cups Warm Water (refer notes)
Flavour Options
- 1.5 cups Cheese
- 2 tbsp Olive Oil
- 2 tbsp Chopped Rosemary
Instructions
Step 1 : Preparing The Dough
- Combine salt, flour, yeast, sugar in a bowl and give a quick stir
- Add in the cheese, olive oil and rosemary. Mix.
- Finally, add the water little at a time to combine it into a wet shaggy mass of dough.
Step 2: First Proofing
- Grease a bowl with little oil, transfer the wet dough to it, cling wrap, allow it to proof for 8 hours on countertop. Alternatively, grease the inner pot of your Instant Pot. Transfer the dough to it. Set the yogurt mode and time to 4 hours, normal pressure. Proof for the set time.
Step 3 : Shaping the Dough
- Dust the worktop with some flour and tip the proofed dough onto it. Dust the top of the dough as well with some bread.
- Shape it into a boule. Won't take you more than 30 to 40 seconds. Refer the quick video on how to do it the right way or the detailed video included in this recipe card.
- Transfer it to a banneton that has been pre-lined with parchment paper.
Step 4: Second Proofing and Preheating the Oven
- Cover the top with a tea towel and allow it to prove for 30 mins.
- Meanwhile, place the dutch oven in the oven. Preheat the oven to 230°C which is 450F degree for the same time which is 30 mins.
Step 5: Baking the Bread
- After 30 mins take the dutch oven out of the oven. Caution: It would be super hot so make sure to use oven mittens.
- Carefully lift the parchment paper with the dough from the banneton and place it in the dutch oven.
- Brush the top with some olive oil, sprinkle some chopped rosemary on top and make 2 cuts on top of the bread. (Do not spend much time at this stage).
- Put the lid back on the dutch oven and off it goes into the hot oven for 30 mins.
- After 30 mins, take the lid off the dutch oven and cook it uncovered for additional 15 mins to get the golden crispy crust on top.
- So a total time of 45 mins is what you need to bake the bread, 30 mins with lid on and final 15 mins without the lid.
- After the baking time take the bread immediately out of the dutch oven and place on a cooling rack to cool for 10 to 15 mins. Then slice and enjoy.
Video
Notes
- The no-knead bread dough has to be wet, shaggy and sticky mass. Just feel the dough, add water little at a time and mix. If you feel that it is too wet add some flour and adjust.
- Even though the recipe calls for 1.5 cups of water, I was left out with nearly 3 tbsp of water so add little water at a time to bind the dough, as the water content also depends on climatic conditions, how old the flour is etc.
- I would recommend you to add flavouring of your choice while making the bread as I find the plainer version to be a little bit bland. For the flavouring variation option check the post above the recipe card. You can keep it as simple as you like.
- Shaping the Dough: Do not add too much flour while shaping the dough - you need just 2 to 3 tbsp at the max because you do not want to end up with the dry dough. The moisture content of the dough is the key when it comes to making this easy no-knead bread recipe.
- Try to make use of a banneton or a bowl similar to it to get that bakery-style shape, well honestly the messier this bread gets the more artistic it looks once baked.
- Skip brushing the top with olive oil before baking if you like really crusty bread.
- Using a sharp knife to cut the bread is the key. You do not want to drag it too much. Be gentle but quick at the same time while making cuts on the dough for that artistic look. Oh please do not miss this step as it is not just for looks but instead, this also helps the bread to increase in volume and expand under the heat. 😀
- High heat to bake this Dutch Oven No-Knead Bread is another key factor. So make sure that your oven is hot when you place the bread for baking. It takes nearly 30 mins to reach to that high heat so do keep that in mind. 🙂
- The final 15 mins are what makes the bread crusty. So the longer you bake the more the crustier your top will be ultimately yielding a golden brown, thin, crusty top with a soft, chewy and flavourful interior.
- Always use a glass lid or a plate to cover your Instant Pot and not the regular lid as if accidentally you allow it to prove for longer there are possibilities that the dough would rise and get stuck to the sealing pin from within and it would become too tough to open the lid.
- You can use a 3qt, 6qt or even a 10qt Instant Pot to prove the bread.
- One can bake this bread without a dutch oven too. Have mentioned it in the above paragraph or if you would like to see a separate post on it then do let me know in the comments below.
- For Breakfast: Toast a slice of bread, spread some hummus, salad leaves and sunflower or pumpkin seeds on top.
For Lunch: I like to serve it with a simple onion tomato gravy
Dinnerr: Practically goes well with any kind of soup.
Conclusion:
Name it Dutch Oven No-Knead Bread or an Instant Pot No Knead Bread this no-knead bread recipe comes together so easily that even a 4 yr old can totally rock it.
Perfect bread recipe for home bakers.. just mix, prove and bake and enjoy the feel of making artisan bread right at the comfort of your kitchen.
This instant bread recipe has the perfect crusty golden top with a soft and chewy texture from within that would surely be a great addition to your home baking recipes.
Try it for breakfast with some coffee or with a salad on the side or make some sandwiches for school lunches or simply dip into your favourite soup this season, this would surely become your favourite go-to bread here on.
Pin this to your Bread board
I will see you soon with yet another recipe
Until then
Hugs
Sushma
Brittany says
This is the most beautiful bread I've made before! The house smells amazing!! Thank you for the recipe!!
sushma iyer says
I am so pleased to learn this Brittany.. thank you for sharing your feedback with us.. appreciate it
Megan Hood says
Absolutely amazing instructions,so easy to follow!
sushma iyer says
Hi Megan.. thank you.. 🙂 appreciate your feedback
Helga izzard says
Sounds amazing I am going to try this definitely as I havnt got an oven at the moment 👍
Jennifer Daley says
Can I make this with almond or coconut flor? I can't have gluten
sushma iyer says
Sorry Jennifer.. I have not tested this recipe for a gluten free version..
Michelle says
I'm currently proofing this recipe with gluten free Flour (king Arthur measure for measure). I'll let you know how it comes out!
sushma iyer says
Wow I am excited to know Michelle.. If this works out it would solve so many queries from other readers.. can't wait to see how it turned out for you 🙂 thank you
Juliee says
Cannot wait to make this!! Also can’t wait to explore your site. Happy day!! (Discovered via FaceBook)
sushma iyer says
Hey Juliee
high five.. so glad to connect with you.. hope you find many more interesting recipes in the future.. 🙂 thank you
Jana says
Turned out fabulous! I added about 1 tsp of everything but the bagel seasoning
sushma iyer says
Hey Jana.. that is so good to know.. and everything bagel seasoning sounds amazing.. I will try that too.. thank you 🙂
Judy Sommer says
Yes, enjoyed video. Looking forward to next bread-sourdough!
sushma iyer says
Wo hoo!! thank you 🙂
LE says
What size Dutch oven?
sushma iyer says
Hi LE
My casserole is 15cm (H) x 27cm (W) x 22cm (D) in dimensions and I think it is 3.5qt
M Cobin says
I’m wondering if anyone has substituted gluten free flour for the all purpose flour? Any suggestions would be appreciated! TYIA
sushma iyer says
Unfortunately I have not tried with gluten free flour.. sorry
Kelly says
can this be made without sugar? diabetic here... it's not a lot of sugar, but i've tried to completely eliminate sugar from my diet and finding bread that doesn't have sugar in it in a store or bakery is almost impossible.
sushma iyer says
Well technically this should work without sugar.. but in that case one cannot use Instant Pot.. the science here is that; since we are proving it for a long time the yeast can feed on the flour (the starch) and should rise well.. but since I have not tried it personally I am not confident..
Regards
Sushma
Janis says
I am love loving your website, recipes, and cookbooks!! have a question, you still have to bloom the yeast right? I am a newbie for making bread.
sushma iyer says
Hi Janis.. so we are using Instant Yeast which can be directly mixed with the flour..I also recommend using Instant Yeast because it is easier to work with.. but if you are using the other active dry variety that needs to be bloomed before adding it to the flour..
Glad to see you are loving the website.. thank you.. 🙂
Amy Eimer says
I’m definitely going to try this soon! But I would love a dark rye or pumpernickel version. Do you have a recipe? Or share a link?
Thank you so much!
sushma iyer says
Hi Amy.. Unfortunately I do not have the recipe.. sorry
Mary Ann Schiro says
Why transfer to a Dutch oven? The Foodi & Insta pot each have a bake setting, so why transfer it to a Dutch oven & use the range oven?
sushma iyer says
Hi Mary.. Breads baked in IP does not get that brown colouration as per my experience. So I prefer baking it in the oven.. 🙂
Donna says
Another way (whey) to make it more flavorful, might be to use whey (leftover from yogurt making) in place of some or all of the water.
sushma iyer says
Hi Donna.. Yes totally that's a great way plus whey has lot more nutritive value so always a win win.. 🙂 Thank you for sharing the tip
Rosemary says
Where did you get that dutch oven? I tried making it and the handle on the lid cracked.
sushma iyer says
Hi Rosemary.. I live in New Zealand and got it from a local store - Kmart. However the recommended brand for such high temperature baking is Le Crueset you can try that
Karon webb says
Can I use dried herbs and how much
sushma iyer says
Hi Karon.. yes around 1 to 2 tsp should be fine
Barbara from Illunois says
Am in the midst of making your recipe having added 1C. Sharp Cheddar, 1/2 C. Monterey Jack, 2Tbsps Olive Oil, 1 Tbsp dried Rosemary and a healthy dash of granulated Garlic Powder and Onion Powder....Lamb stew it on tonight's menu. Will try to get a pic before the hoards get to it! My only question is what size (in quarts if you can) is your lovely dutch oven? I often make a similar recipe using a 1 1/2 Qt. casserole dish.
sushma iyer says
Hi Barbara.. what a lovely flavour profile you have got there.. I am drooling imagining all those lovely flavours.. Coming to your query my casserole is 15cm (H) x 27cm (W) x 22cm (D) in dimensions and I think it is 3.5qt
Marissa says
This bread looks delicious; I can’t wait to try! Could you tell me where your Dutch oven is from? It is the most stylish Dutch oven I’ve ever seen!
sushma iyer says
Hi Marissa..
Thank you so much.. I live in New Zealand and got it from a local store. It is not a branded one to be honest.. 😀
Sowjanya says
Hey Sushma! I tried this today and it turned out awesome. Thanks for the recipe 😊
sushma iyer says
Hi Sowjanya.. that is amazing.. so good to know.. thank you for sharing
Betty says
Hi Sushma,
Love you recipes & details.
Can you tell me what can I use as yeast substitute?
Thanks
sushma iyer says
Hello Betty.
This recipe won't work without yeast.. If you do not want to use commercial yeast then you can try using sourdough starter but yeast would be required.
Regards
Sushma
Abhishek Saxena says
Hello ma'am I've been trying for a good bread for around 2 weeks now with my mom but failed everytime,seeking your help,watching any video did not help.
sushma iyer says
Hi Abhishek..
The best recipe for you to try would be this one: https://spicesnflavors.com/super-soft-no-knead-white-bread-5-steps/ Try this and see how it goes all you have to do is mix, proof and bake.
Regards
Sushma
Gerri says
I know the difference in instant and active yeast...doe it matter which one to use?
sushma iyer says
No it does not. You can use any yeast for that matter. Instant Yeast does not need activation whereas the other one does need so just take a note of that other than that you can use any Yeast Gerri 🙂
Regards
Sushma
Sehresh says
Can u plz let me know that can I make this bread without oven on a stove top in a large pot with a stand?
sushma iyer says
HI Sehresh..
NEver tried.. sorry about that..
Regards
Sushma
Ajitha says
Hi Sushma,
I love your site and youtube channel. Your videos are amazing. I'm sure even a baby will bake amazing by watching your videos and following your tips. I always wanted bake and it used to be a miss or a hit. Your recipes are motivating me to bake more often. I want to definitely try baking a cake for my LOs bdays .
I have few questions. I was wondering if if I can use lodge cast iron kadai and cover it with a glass lid for this recipe. Also, can you please let me know the difference between instant yeast, rapid raise yeast and active yeast?
sushma iyer says
Hi Ajitha..
I am so pleased to learn that you are liking all the recipes, the videos and the post too.. Thank you for sharing your honest feedback with us.. appreciate it. I guess we even had a chat on Email too right??
So coming to your query.. you can use an iron kadai yes but not glass lid instead go for your stand mixer bowl or another cast iron. For the yeast I have created an infographic explaining all the details on instagram. Do you use that platform? If yes check that our if not I would cover it in the future videos.
Regards
Sushma
Ajitha says
This is a wonderful recipe. I will definitely give it a try. I don’t have a Dutch oven. Can I place it on my lodge iron skillet and cover it with my cake mixer ? Also , I’ve a question about yeast. I have rapid raise and active instant raise yeast. Can you please tell me the difference?
sushma iyer says
Hi Ajitha..
Yes you can put it in the iron skillet without an issue. Do you use Instagram Ajitha.. If yes then check my handle I recently shared an infographic regarding Yeast 101.. If not let me know and I will try to answer here.. https://www.instagram.com/spicesandflavors/
Ajitha says
Thank you very much. I will definitely check out. You are amazing. Thank you to Youtube for suggesting you on my recommendations. Your videos are amazing. I’m sure even a baby will bake amazing by watching your videos and following your tips. I always wanted bake and it used to be a miss or a hit. Your recipes are motivating me to bake more often. I want to definitely try baking a cake for my LOs bdays .
Marion says
Dont have Dutch oven..but have a pot with lid that can go in oven .can I use this and cover the steam hole with foil.
sushma iyer says
Hi Marion..
You can try that or you can also place it on a pizza stone if you have or on an iron skillet and cover it with the bowl of your stand mixer.. Or you can also keep them on a baking tray if you don't have anything and simply place a bowl of hot boiling water in the lowest rack and add some ice cubes to create steam or if you have a spray bottle spray the top of the bread with water.
You can find the steps in my other recipe: Ciabatta Bread if you would like to see. Here is the link: https://spicesnflavors.com/ciabatta-bread-recipe/
Hope this helps
Regards
Sushma
Nancy Berry says
This was TERRIFIC! Thank you so much. Do you have the Nutritional break down on it? Mainly looking for carbohydrates
sushma iyer says
Hi Nancy..
I am so pleased to learn that the recipe worked.. thank you for sharing.. And yes will work on adding the nutritional breakdown. Thank you for suggesting
Regards
Sushma
Gaya says
Any chance i can substitute self raising flour for all purpose flour? Just realised that’sall i have in the pantry! Thanks!
sushma iyer says
Hi Gaya..
There might be some confusion here. This recipe calls for All Purpose Flour only 🙂 Please have a look
Regards
Sushma
Sonali Rajgarhia says
I tried this bread yesterday it was really good and super easy.
The bread was a little dense can you suggest why that may have happened.
sushma iyer says
Hi Sonali.. Thank you for trying it out.. Next time try adding little more water to the batter. Did you use wheat flour by any chance?
Jasmine says
Hi
Can I use bread flour instead of APF in the recipe
sushma iyer says
Hi Jasmine.. Yes you can
Sarah says
Hi! What's the longest time we can proof for the 1st time? You mentioned 8 hours but can it be up to 12 hours?
sushma iyer says
Hi Sarah
Yes sure you can.. You can even prove it for 18 hours to the max on counter-top
Regards
Sushma
Cheryl says
Hi...my Instant Pot does not have the yogurt button. Do you have any idea how to proof the bread otherwise?
sushma iyer says
Hi Cheryl.
In that case you can do it the regular way, either proof it on the counter-top or in your oven with lights on 🙂
Regards
Sushma
Mimi C says
What type of yeast is used? I think I have regular active but I see some recipes call for instant.
I made a no-knead instant pot bread yesterday and it was a flop. I like your recipe better, as you add the water AFTER you’ve mixed the dry ingredients. Mine was a soupy mess!
Thank you.
sushma iyer says
Hi Mimi..
You can use either instant or active dry or even fresh. IF using instant add directly like I did.. If using any other variety make sure to activate it first before proceeding with the recipe 🙂
Shakeeta says
Hi can I use Almond Flour ?
sushma iyer says
Sorry shakeeta.. but never tried with any other flour except for whole wheat and all purpose flour
Stephanie Julian says
Do I have to use parchment paper ? I don’t have parchment paper, and was wondering if could transfer it directly into the Dutch oven?
sushma iyer says
Hi Stephanie..
One the dutch oven would be super hot so handling the dough with parchment paper makes it easier.
Secondly, there are also chances that the bread gets stuck to the base of the pot so using parchment paper helps. Now I think you can still go ahead and transfer it directly to the Dutch oven just be careful.
Katie says
Hey, I found your recipe on Facebook and I’m actually about to put it in the oven to bake. I’m so excited to see how it turns out! I keep looking at the Dutch oven you use and love it! I was wondering if you could tell me where you got it or what brand it is?
Thanks!
sushma iyer says
Hi Katie..
I live in New Zealand and got it from a local store KMArt and it is a local brand too :D.. And I see that you have baked the bread.. I am excited to learn how it turned out for you.. would be waiting for your feedback 🙂
Tracey Tingley says
What size Dutch oven did you use?
sushma iyer says
Hi Tracey.. it is 15cm (H) x 27cm (W) x 22cm (D) in dimensions and I think it is 3.5qt
Katie says
The bread is amazing! I’m going to make it again but with cheddar and jalapeños!
sushma iyer says
That is awesome Katie.. thank you so much for sharing your amazing feedback with us.. appreciate it <3
Pat says
I made this bread yesterday, it looked awesome and smelled awesome. It rose beautifully but it seemed a little moist on the inside. Is this. Normal? Tasted great toasted but don’t think it would be good as sandwich bread. Any suggestions? Perhaps cook it longer? Thanks.
sushma iyer says
Hi Pat..
Try adding little less water the next time and also cook it bit longer.. <3
Jo says
This bread was so easy and yummy! My teenagers made it for us and it turned out awesome. Will for sure be adding this to our list of musts to make very often.
sushma iyer says
That is awesome Jo.. So glad to learn that you guys loved it.. Thank you for taking the time out to try this recipe and share your wonderful feedback with us.. totally appreciate it.. And your teenagers just amazing.. so much talent at such a young age..
Brenda says
Joycelyn, of course, there is always copy and past; however, you can visit https://www.printfriendly.com/ website and read/follow the instructions. It really is rather simple if you are using a computer or laptop. I'm unsure how it would work with and iPad or a cellphone, but it's worth a try.
Pam Andrews says
Hello. Just saw the recipe for the No Knead bread. Sounds delicious! Couple questions though.
If you don't use the cheese, does it still have the right consistency or do you alter that? Also, you say to put in hot oven but yet it says first to put in oven then turn oven on. So just questioning that?
Thanks for sharing.
sushma iyer says
Hi Pam
Apologies for not replying to you here on time. I do not get comment notification on phone and check the comments here only twice a day. So sorry about that.
But like I mentioned on FB.. cheese does not affect the consistency of bread it is added to enhance the flavour.
And put your dutch oven in the oven.. Switch it on to preheat. It would take around 30-40 mins. Meanwhile your breading is also undergoing second proofing.
After 30 mins take the dutch oven out. Put the proofed bread into it and then bake with lid on for 30 mins and without lid for 15 mins. Hope this is clear.
Or just watch the Youtube detailed tutorial and it might help you. Here is the link: https://www.youtube.com/watch?v=CdsSo2Yy9Dw&t=52s
Thanks and Regards
Sushma
Molly says
Could you use whole wheat four with is recipe?
sushma iyer says
Hi Molly..
Yes you can just take care of the quantity of water being added. 🙂 Sometimes whole wheat flour needs more than regular APF 🙂
Joycelyn says
Hello Sushma
Came across your site via pinterest link for your Instant pot no knead bread, which looks awesome by the way.
I tried to print your recipe but instead of just having the bread recipe instructions minus the colour photo of your bread, I get both. Is there anyway you can offer an option of no photo, or perhaps have another print option that only has the instructions only? I ask because where I live, coloured printer ink is very expensive so do my best to not waste it.
Thank you
sushma iyer says
Hi Joycelyn..
So glad to learn that you liked the recipe and would like to print it out.
I understand your concern but it is a part of the recipe plugin that we use and has nothing to do with me manually writing it out. I can check the settings of the plugin and also will raise a ticket with the support team of the plugin and see if there is anything that can be done. Will keep you updated.
Sorry about the trouble.
Regards
Sushma
RG says
Definitely going to try this... Thanks for sharing!
sushma iyer says
sounds great RG.. I am sure you won't be disappointed.. Thank you
Cristiane says
Which cheese do you recommend?, please? Thanks
sushma iyer says
Hi Cristiane..
I have used Cheddar Cheese in here.. So a combination of cheddar cheese, jalapeno and rosemary would work wonders..
There are many other flavour combinations you can try that I have mentioned in the post.. I recently even tried Sun dried Tomatoes and Basil.. loved it.. <3
Priya says
I don't have Dutch oven
sushma iyer says
HI Priya..
You can still make it in a casserole or in an iron skillet 🙂 Just the shape in the iron skillet would be little distorted but nevertheless would taste the same 🙂