
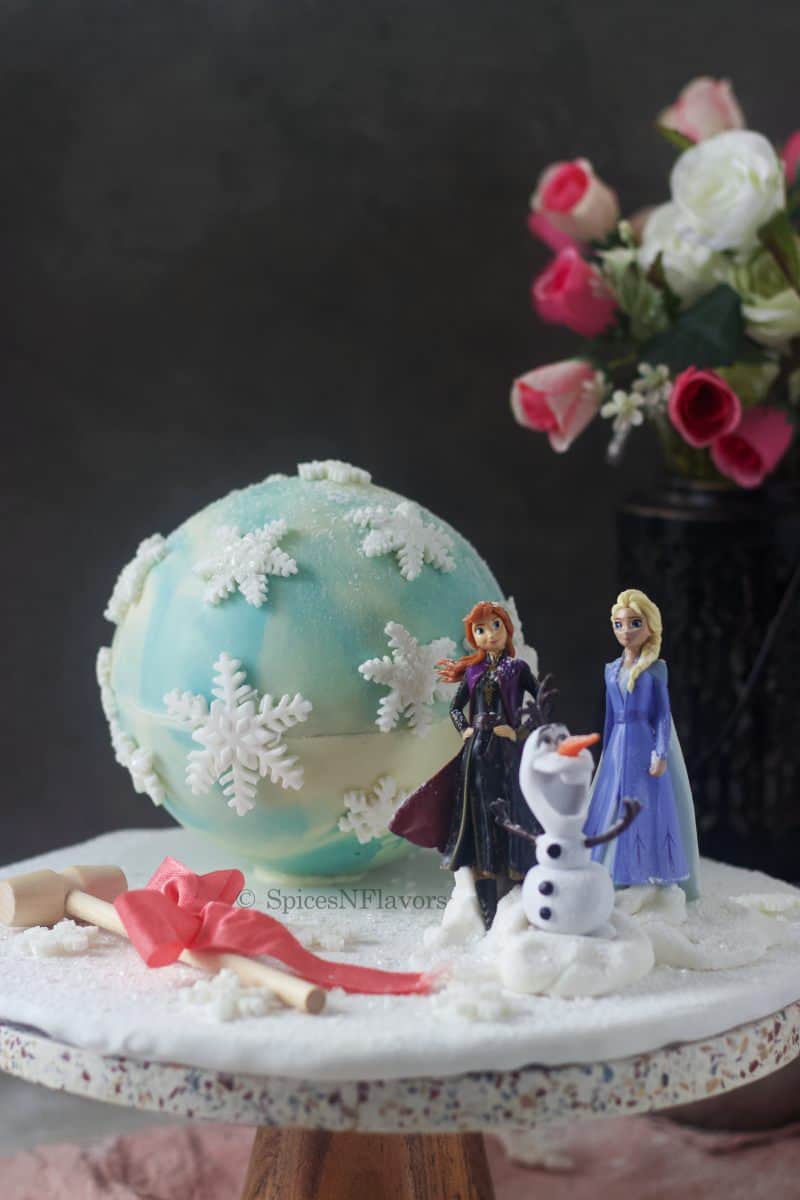
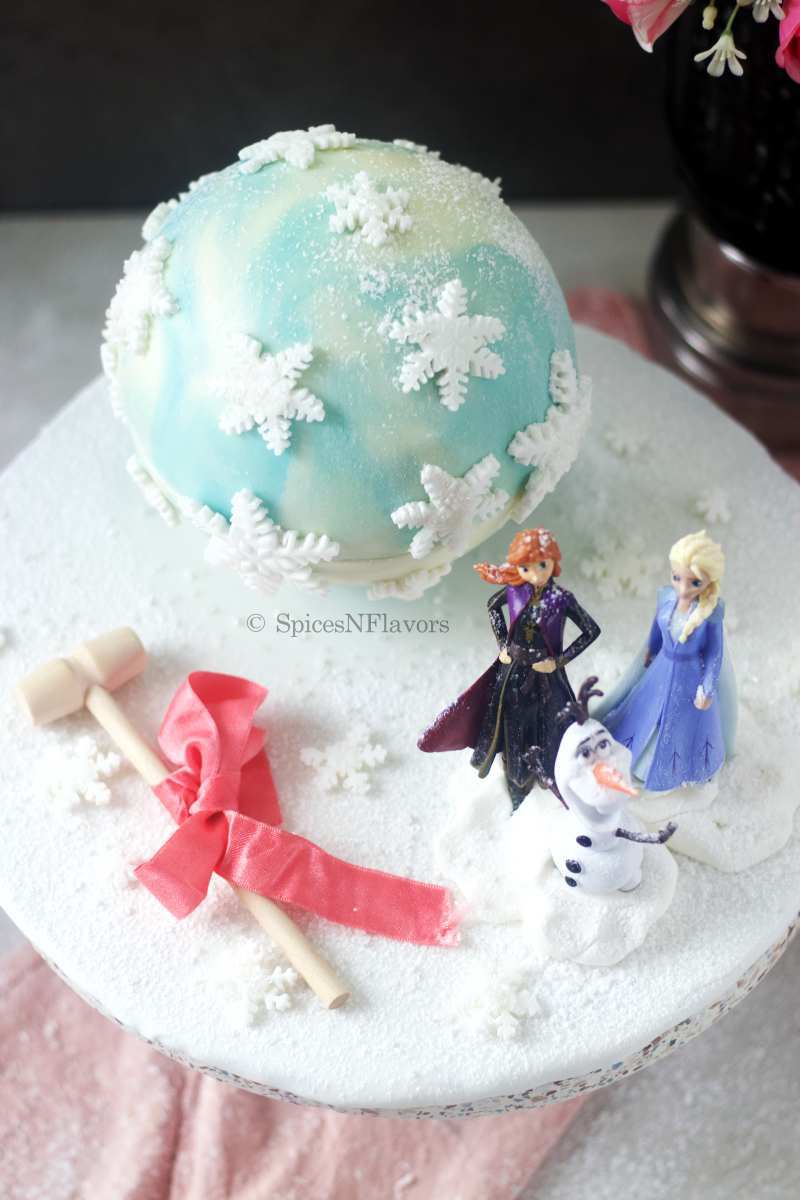
Learn how to make theme Pinata Cakes using just 1 ingredient. This Frozen Pinata Cake with hammer is so customisable that you can literally use this step by step guide to create any theme of your choice; it truly is so much fun for kids and adults alike to break through the pinata to find the surprise goodies.
Is Pinata Cake still in the trend??
Well, not sure about that; but this Frozen Pinata Cake surely made my kids birthday party special. Just don't let them know that it is super easy to put together.
What is Chocolate Pinata Cake?
Like all the food trends we have seen in the past year, Chocolate Pinata Cakes are basically a chocolate case made using the help of a silicon mould, that when unmoulded forms a cavity to be filled in with any surprises of choice - chocolates, cakes, gifts etc. Just crack open the chocolate mould with the hammer to get into the surprises.
But trust me on this, the smashing part is seriously fun. And it is always good to receive little surprises right and hence this trend is getting so much popularity.
Things you would need:
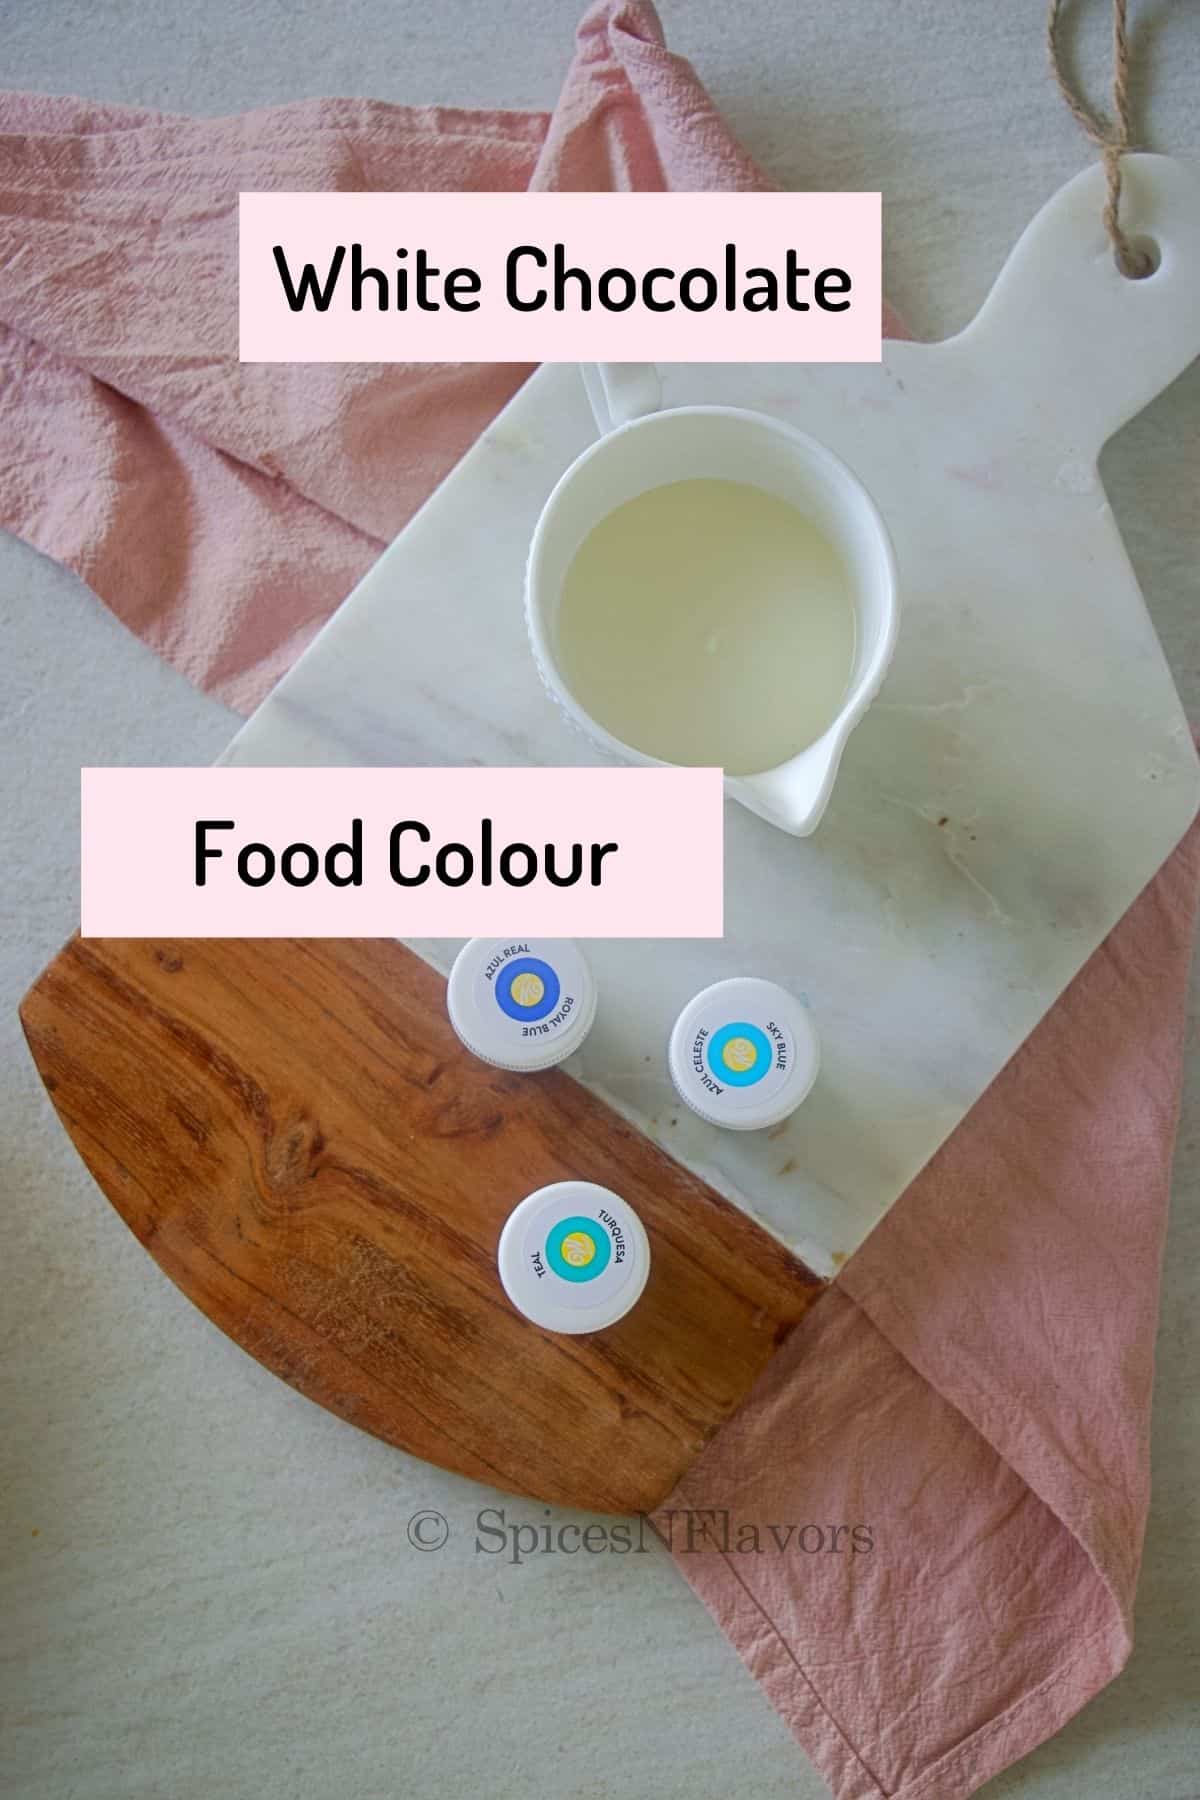
In terms of ingredients you just need 1 ingredient to make this smashable chocolate cake which is obviously white chocolate right!!
But since this is a theme based pinata cake that I am sharing today we will need few additional items like:
- Food colouring of choice
- The Mould ofcourse
- Fondant for decorations.
- Edible Glue
- Sugar sprinkles
But if you are aiming to make the simple ones, then this smashable chocolate heart post has got you covered with basic tutorial on making this trending cake.
How to make Theme Pinatas?
STEP 1: Melting the Chocolate
Start by melting the chocolate. Now this is the most crucial part of this entire cake.
Make sure that the chocolate is completely melted and the consistency of the chocolate is flowly for the chocolate to spread across the mould and also to set properly.
I have detailed video on, How to melt chocolate the right way which you can watch to understand better.
Click here to know how to melt chocolate in the Instant Pot.
Apart from that I have two other videos on chocolate decorations which further explains on how to tame chocolate.
Step 2: Making the Pinata Chocolate Shell
Divide the melted chocolate into 2-3 bowls depending on the theme of choice.
For this Frozen Pinata theme I am dividing them into 3 bowls and colouring two of them, one in sky blue and the other in teal.
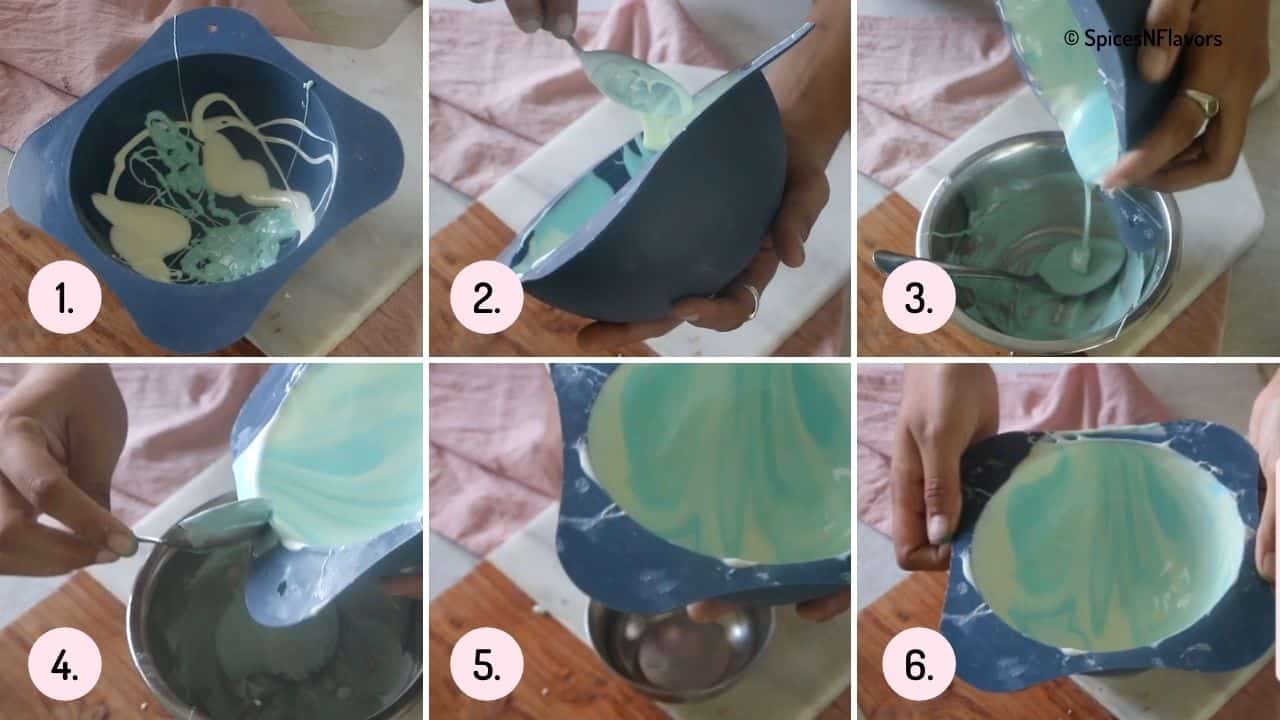
Now take the silicon mould, and pour in the different coloured melted chocolate in random twirls and swirls to coat the mould (image 1).
If need be add additional chocolate around the edges (image 2).
But do not be tempted to swirl too much or else you might lose the marbling effect that we are aiming for with different colours.
Once fully coated, twist the mould upside down to allow excess chocolate to drip off (image 3).
Clean the edges, rest the silicon mould on top of another bowl, do not let it sit on flat surface and allow it to set completely at room temperature itself that is a mandatory step to retain its shape (image 4-6).
Leave it at room temperature to set completely.
If it is super hot and you cannot leave it to set outside then in that case let it sit in the refrigerator for just until it is set around 5 to 8 mins, you can watch this chocolate pop it video to understand the exact process.
Step 3: Demoulding
It is not difficult to demould but it is important to use gentle hands.
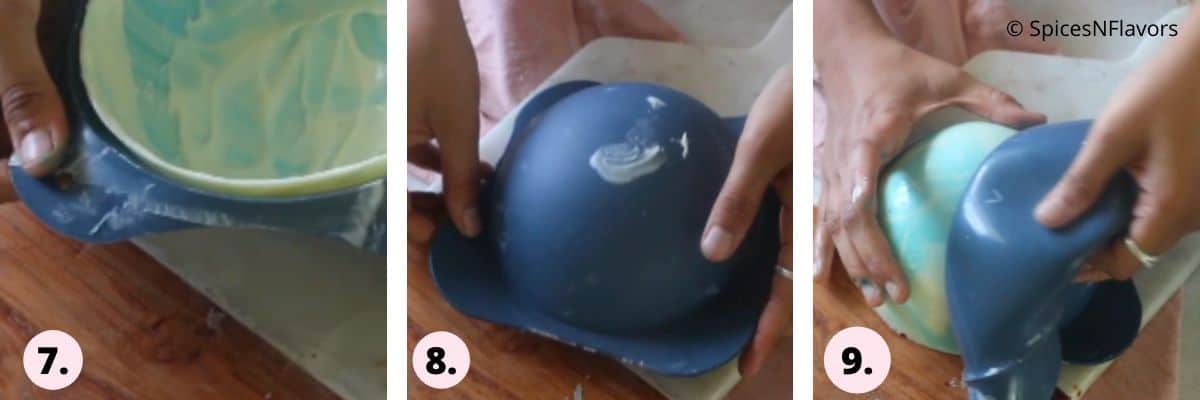
Slightly release the chocolate from the edges in all directions (image 7).
Then place it on a flat surface and pull the silicon mould towards you gently releasing the chocolate (image 8-9).
Now your base is ready but we will have to repeat this entire process one more time to get two such chocolate shells.
Step 4: Assembling Together
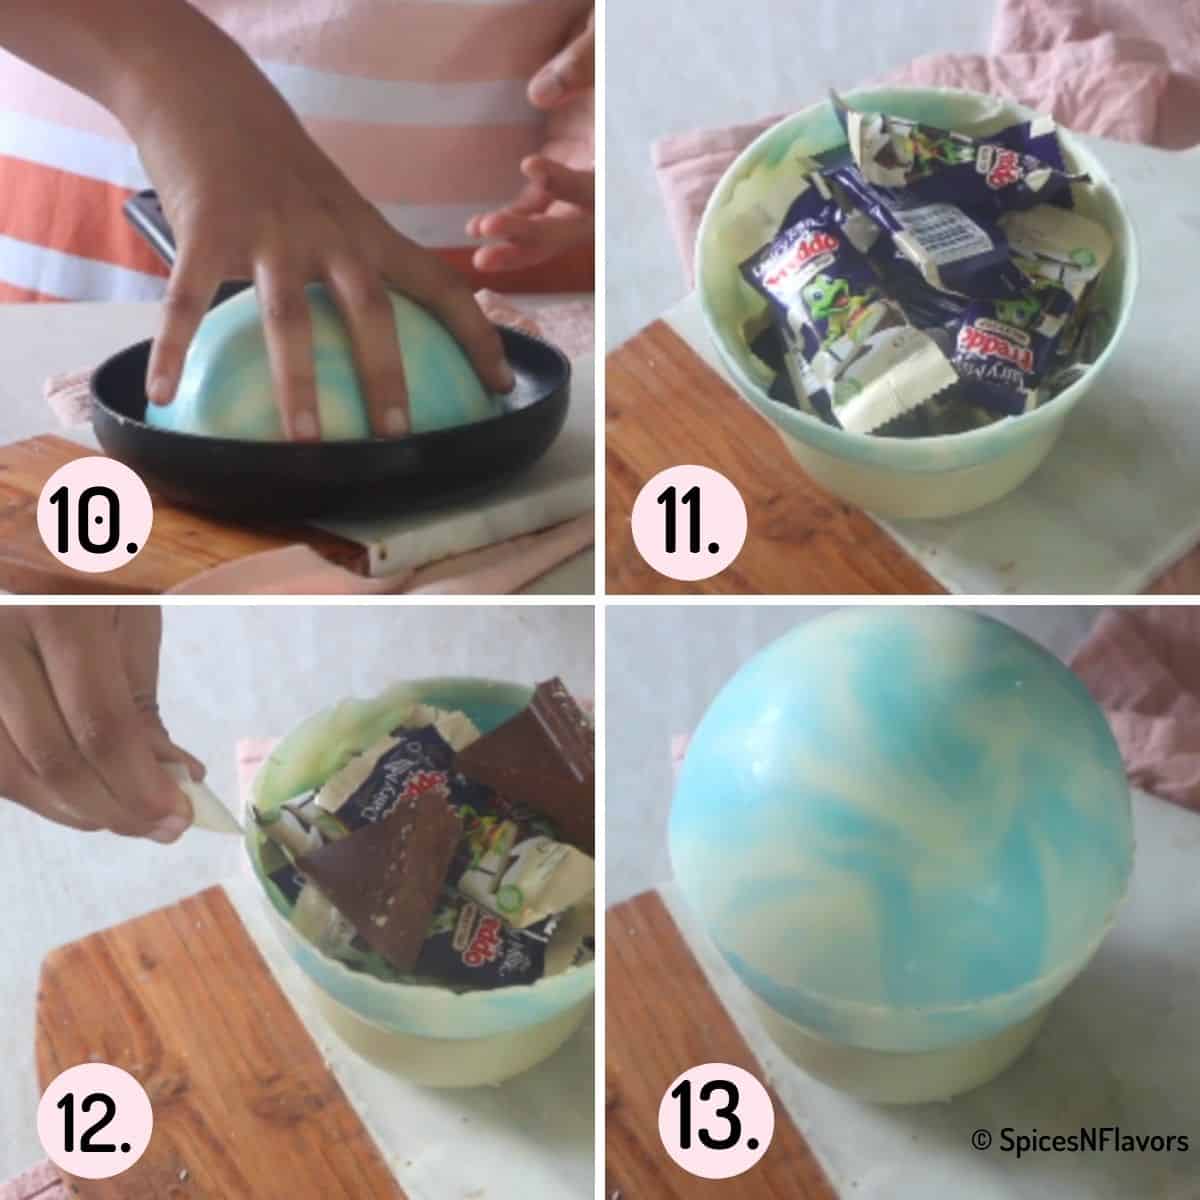
Once the chocolate is set and demoulded in order to even out the surface, place it on top of a hot tawa and quickly remove it (image 10).
This would make the top smooth and even, remember we do not want to remelt the chocolate so be quick while placing it on top of hot tawa.
Then place the base and add any fillings of your choice. I am simply adding some chocolates here (image 11).
Close with the other half and seal both the parts with some more melted white chocolate. Allow it to set too (image 12-13).
Now that your base is ready lets prepare the decorations as per theme of choice.
Step 5: Theme Decorations
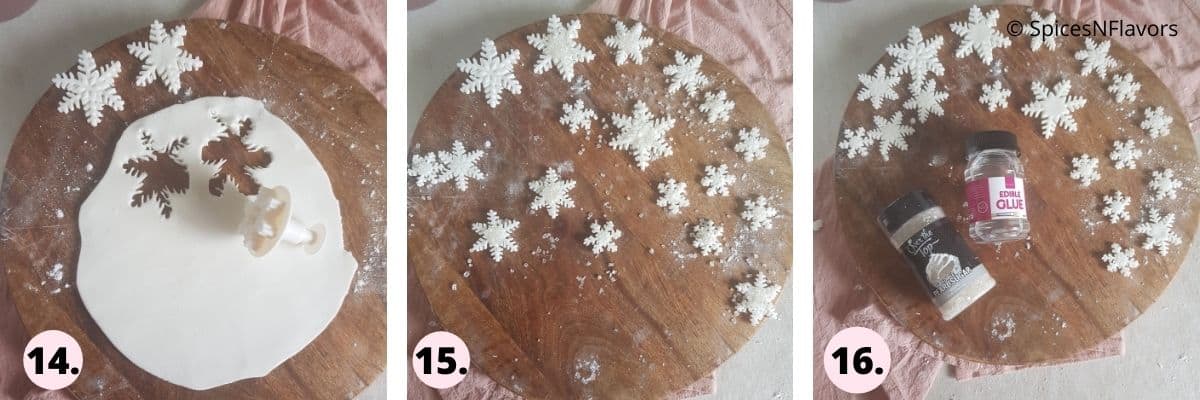
For this Elsa Pinata Cake decorations, I am rolling in some fondant and using the snowflake cookie cutter, I am going to cut out three different sized snowflakes here (image 14).
Adding a layer of edible glue on top and sprinkling some sugar sprinkles on top. Allow it to set too (image 16).
Step 6 - Final Assembly
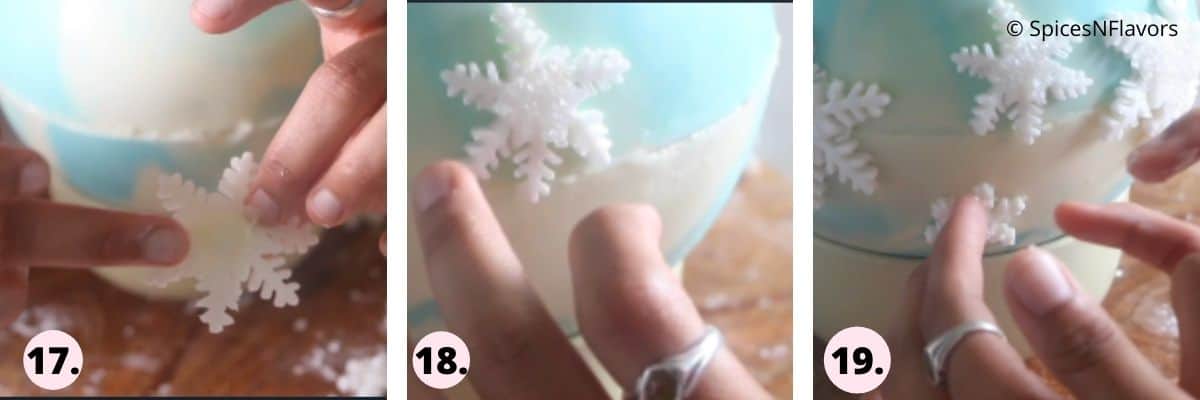
Time to assemble everything, using your fingers just add a thin layer of melted white chocolate onto the back of your fondant and stick it on top of the pinata cake (image 17-19).
Now this is your chance to cover up any flaws. Take a good look and stick the decorations to not only make it look aesthetically pleasing but also to cover up any flaws.
Repeat the process until you are satisfied and then place it on top of the cake board.
Baker's Tip: Cover the cake board also with some fondant, this would also enhance your theme and overall look of the cake.
To stick the frozen theme pinata cake to the cake board, make use of melted white chocolate. So add a little on the cake board and then place the cake on top of the chocolate.
This would ensure that the cake remains in place.
And that is how simple it is to make the cake.
While serving, sift some icing sugar all around to give the snowy effect.
Since I am not good at fondant figurines. I am placing some toy elsa, anna and olaf on the cake board for added decorations using fondant to stick them in place.
How to Store the Chocolate shells?
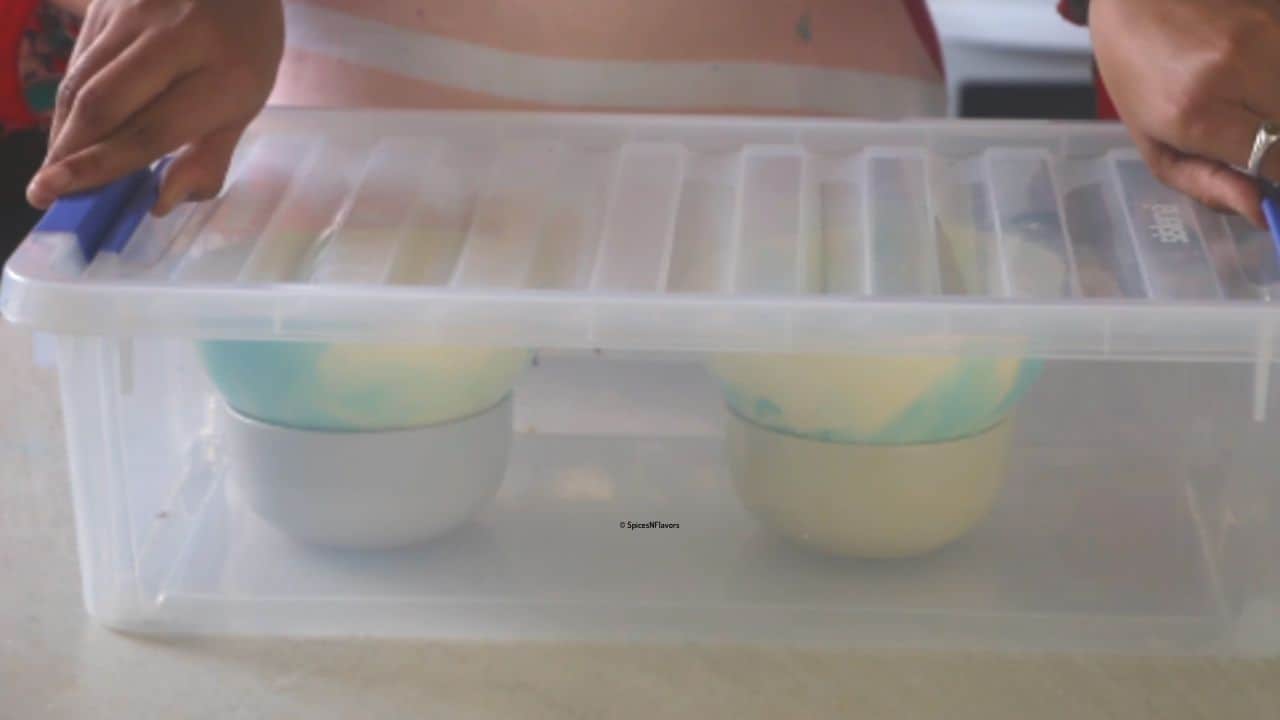
Be it the chocolate shells before assembling or after assembling, make sure to place it on top of a bowl first.
Then place in an air tight container and store in a darker place like your wardrobe or where the air conditioner usually runs. This is if you are living in a hot and humid place.
But if in cold countries then simply place it on your counter top.
Filling Ideas:
You can absolutely customise the fillings in the cake as per choice. Here are few examples for you:
- Korean Bento Cake Box - Being small in size this would be an ideal fit inside the chocolate shell.
- Cheesecake - This no bake mini heart chocolate shells would be just perfect
- Brownies, Cookies etc.
- Non edible gifts like cards, personal messages, watch. earrings or even a ring to propose to your loved one. Isn't it a fun idea?
BAKER'S TIPS:
- Do not place your chocolates on boiling hot water to melt (if following the stove top version of melting chocolates), that might seize your chocolates. Watch this video to understand it better.
- Make sure the chocolate is not too hot while mixing the colours, or else the chocolate would turn lumpy. And if too cold, the colouration would thicken the chocolate fast. So use just warm to touch chocolate.
- Add in a few drops of oil along with the colour to avoid seizing or use oil based food colours.
- Once the coloured melted chocolates are added do not swirl the mould too much or else you wont get the marbled effect on your finished chocolate shell.
- Do a second coating of chocolates especially around the edges or any areas where you feel the chocolate is thin and might break while de-moulding. But take care not to coat the entire mould or else the shell would be too hard to break open.
- Always release the edges first while de-moulding to ensure that you are not applying too much pressure later which can break the chocolate.
- Make use of melted chocolate to fix any flaws while assembling the two portions together.
- Covering the cake board with fondant or vinyl paper would improve the overall look of the cake.
I am using compound chocolate here which are easier to use as compared to couverture as the former doesn't need any tempering. Feel free to use couverture too if you prefer just make sure to follow the tempering process or else the chocolate won't set.
What do you put in a Breakable Chocolate Heart?
RELATED RECIPES:
- Smashable Chocolate Heart
- How to Melt Chocolate the right way
- 7 Basic Chocolate Decorations every Baker must know.
- No Bake Cheesecake in Chocolate Shells
- Flavoured Chocolate Bars.
- Trending Chocolate Pop it recipe.
Wish to Join US for the love of BAKING? Subscribe to our newsletter and Youtube channel. Follow along on Facebook, Instagram, and Pinterest for all the latest updates!
Want to learn how much and how to Price this Pinata Cake?
Pinata Cake with Hammer - Frozen Theme
Ingredients
- 200 gms Melted chocolate
- Food Colour of choice I have used sky blue, teal and white chocolate
- Fondant as per the decoration
- Edible Glue and sugar sprinkles if needed
- Oval Silicon Mould
- Snowflakes cookie cutter
Instructions
- Divide the melted chocolate into 2-3 bowls depending on the theme of choice.
- For this Frozen Pinata theme I am dividing them into 3 bowls and colouring two of them, one in sky blue and the other in teal.
- Now take the silicon mould, and pour in the melted chocolate in random twirls and swirls to coat the mould.
- If need be add additional chocolate around the edges. But do not be tempted to swirl too much or else you might lose the marbling effect that we are aiming for with different colours.
- Once fully coated, twist the mould upside down to allow excess chocolate to drip off. Clean the edges, rest the silicon mould on top of another bowl, do not let it sit on flat surface and allow it to set completely at room temperature itself that is a mandatory step to retain its shape.
- Leave it at room temperature to set completely. If it is super hot and you cannot leave it to set outside then in that case let it sit in the refrigerator for just until it is set around 5 to 8 mins, you can watch this chocolate pop it video to understand the exact process.
- Slightly release the chocolate from the edges in all directions. Then place it upside down on a flat surface and pull the silicon mould towards you gently releasing the chocolate.
- Repeat the process one more time to make 2 chocolate shells in total.
- Once the chocolate is set and demoulded in order to even out the surface, place it on top of a hot tawa and quickly remove it.
- Then place the base and add any fillings of your choice. I am simply adding some chocolates here. Close with the other half and seal both the parts with some more melted white chocolate. Allow it to set too.
- For this Elsa Pinata Cake decorations, I am rolling in some fondant and using the snowflake cookie cutter, I am going to cut out three different sized snowflakes here. Adding a layer of edible glue on top and sprinkling some sugar sprinkles on top. Allow it to set too.
- Now this is your chance to cover up any flaws. Take a good look and stick the decorations to not only make it look aesthetically pleasing but also to cover up any flaws.
- To stick the frozen theme pinata cake to the cake board, make use of melted white chocolate. This would ensure that the cake remains in place.
- I am not great when it comes to fondant figurines so I am simply placing some toy elsa, anna and olaf with the help of fondant on the cake board.
- That is it. Your Frozen Theme Pinata Cake is ready.
Video
Notes
- Do not place your chocolates on boiling hot water to melt (if following the stove top version of melting chocolates), that might seize your chocolates. Watch this video to understand it better.
- Make sure the chocolate is not too hot while mixing the colours, or else the chocolate would turn lumpy. And if too cold, the colouration would thicken the chocolate fast. So use just warm to touch chocolate.
- Add in a few drops of oil along with the colour to avoid siezing or use oil based food colours.
- Once the coloured melted chocolates are added do not swirl the mould too much or else you wont get the marbled effect on your finished chocolate shell.
- Do a second coating of chocolates especially around the edges or any areas where you feel the chocolate is thin and might break while demoulding. But take care not to coat the entire mould or else the shell would be too hard to break open.
- Always release the edges first while demoulding to ensure that you are not applying too much pressure later which can break the chocolate.
- Make use of melted chocolate to fix any flaws while assembling the two portions together.
- Covering the cake board with fondant or vinyl paper would improve the overall look of the cake.
- You can use the same technique to create so many themes like - Spiderman, Football etc.
Leave a Reply