
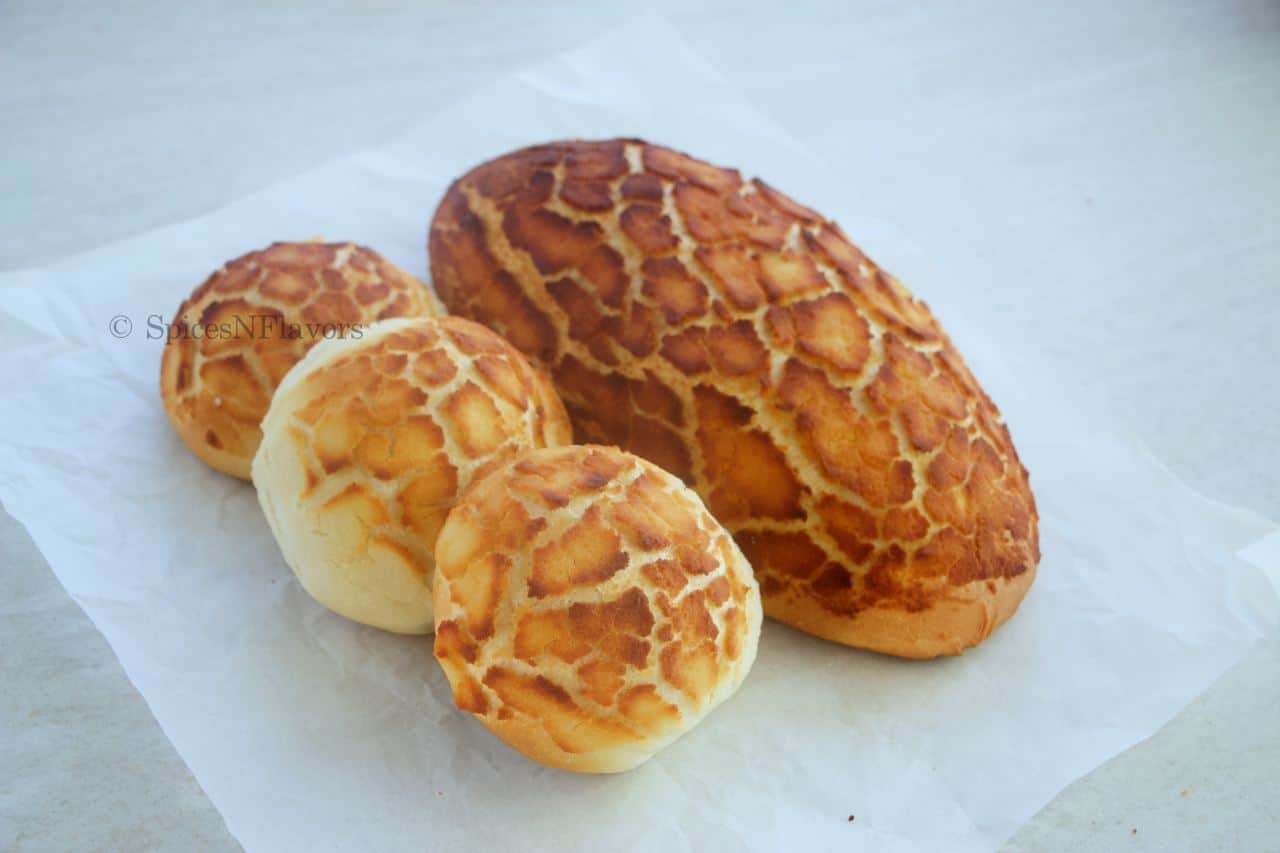
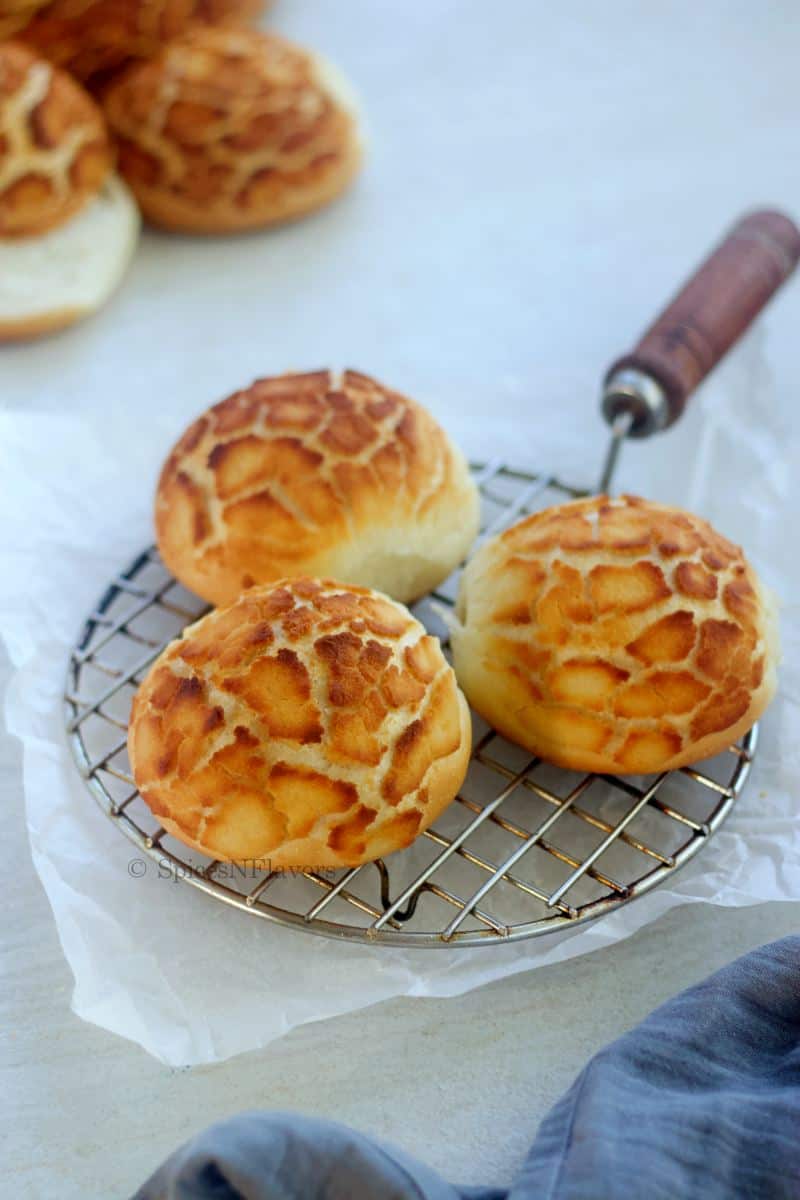
Characterized with the classic mottled crunchy crust, soft and fluffy interiors with a slightly sweet note this Tiger Bread is simply impossible to resist.
The post covers detailed step by step instruction on making the dutch crunch bread as well as the bread rolls, perfect for a beginner and expert baker alike!!
What is Tiger Bread?
Originated in Netherlands, also known as tijgerbrood or tijgerbol (tiger roll), Tiger Bread is basically a soft and fluffy white bloomer bread loaf which has a distinct pattern baked on top owing to the rice flour paste which also gives the bread its flavour and crunch.
Why is it so good?
Being a bloomer bread loaf recipe, you really do not need any kind of baking pan and this recipe can also be adjusted to make tiger bread rolls if that is what you prefer (have included the instructions for those as well).
What makes it special is the rice flour paste applied on top of the dough before baking which dries and cracks while baking giving the bread its characteristic bold look and flavour.
Why use Rice Flour paste?
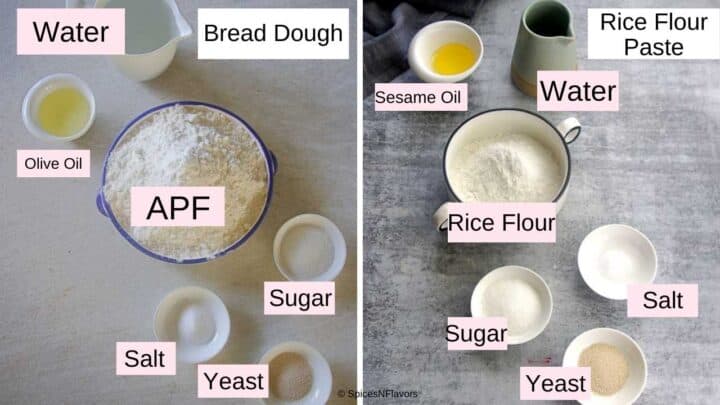
The rice flour paste is made up of sesame oil, yeast, rice flour, sugar and salt.
Rice Flour being gluten free; does not spread or expand while baking.
Whereas, the white bread beneath is expanding in the heat of the oven. So while the bread expands, the rice flour paste on top dries, brakes at certain point and eventually crisps up giving the patterned look.
Ingredients:
Ingredient notes:
- Yeast: I prefer using Instant Dry Yeast for all my bread recipes, simply because it does not need any kind of activation before proceeding with the recipe. If you are using Active Dry Yeast make sure to activate it first by dissolving in some warm water and sugar before proceeding with the bread dough.
- Rice Flour: You would need Rice flour for the recipe and not Ground Rice because the later is coarse in texture and you want the final paste to be fine and smooth.
- Sesame Oil: Imparts a bold flavour to the paste. If you do not find it you can use vegetable oil in its place.
Step by Step Instructions:
Step 1: Prepare the Bread Dough

In a mixing bowl, combine together salt, flour, sugar, yeast. Give a quick mix. Add the oil and water. (image 1-6)
Combine to a dough.
Transfer it to a lightly dusted surface.
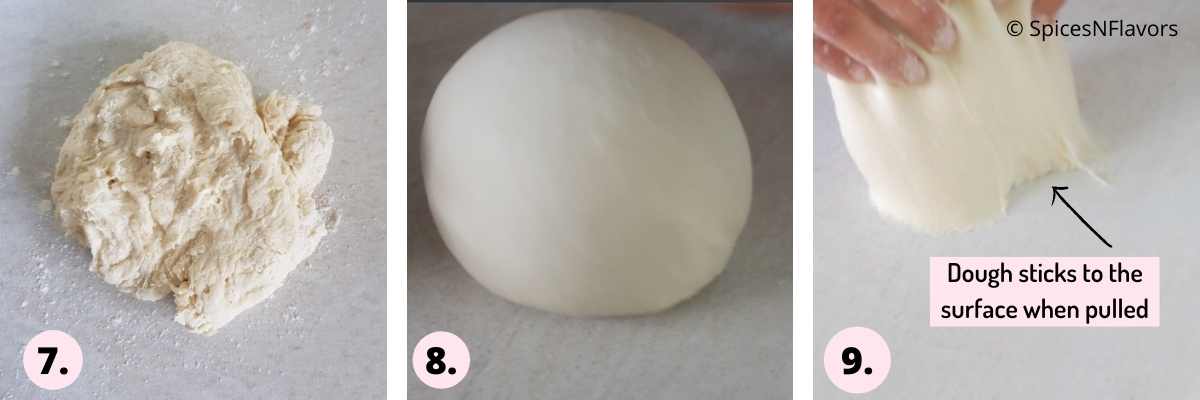
Start kneading the dough until it is soft, pliable and elastic (image 7-9).
Pro Tip: Knead your dough for 15 to 18 mins. It is ready when you press your finger against it and it pulls back with some resistance. That indicates that the dough is moist and ready to be proofed.
Step 2: First Proofing
Slightly grease the bowl in which you mixed the dough with some oil.
Place the dough in to it. Turn the dough all around to coat it with oil too.
This would prevent it from drying while proofing.
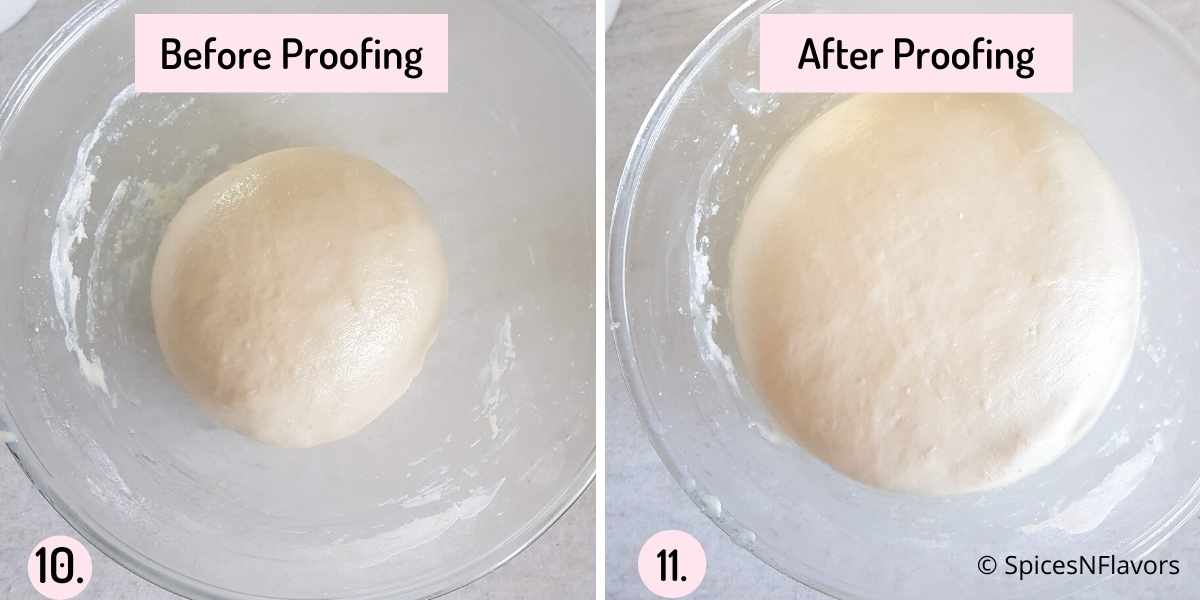
Cover with a cling wrap and allow it to proof for 1 hour.
How to proof dough in the Instant Pot?
Instant Pot proofing is the best hack ever. I highly recommend you to check this post on Instant Pot Bread proofing for additional details.
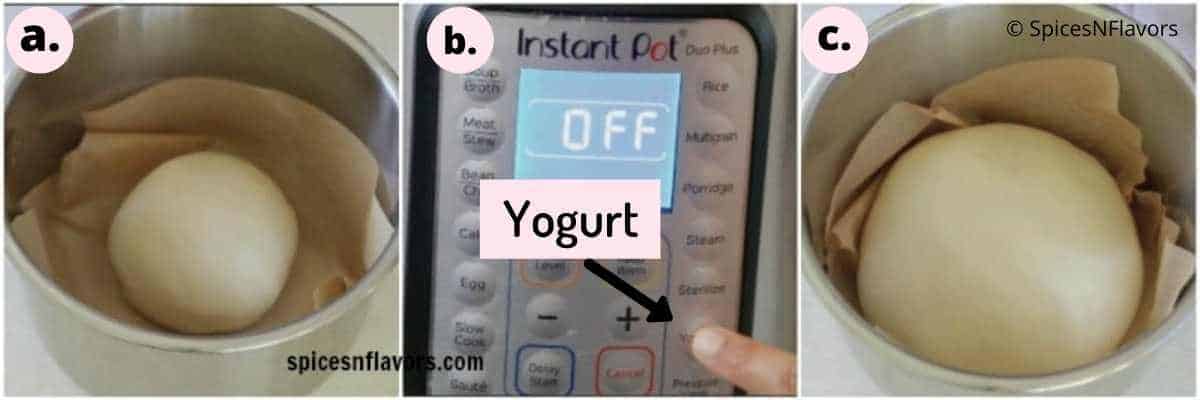
As for this recipe, grease the pot with some oil. Put the dough in it, turn it all around to coat with oil. Or you can also choose to line the base with parchment paper as shown in the image above.
Then place a glass lid. Choose Yogurt setting. And set the time to 30 mins.
Step 3: Shaping
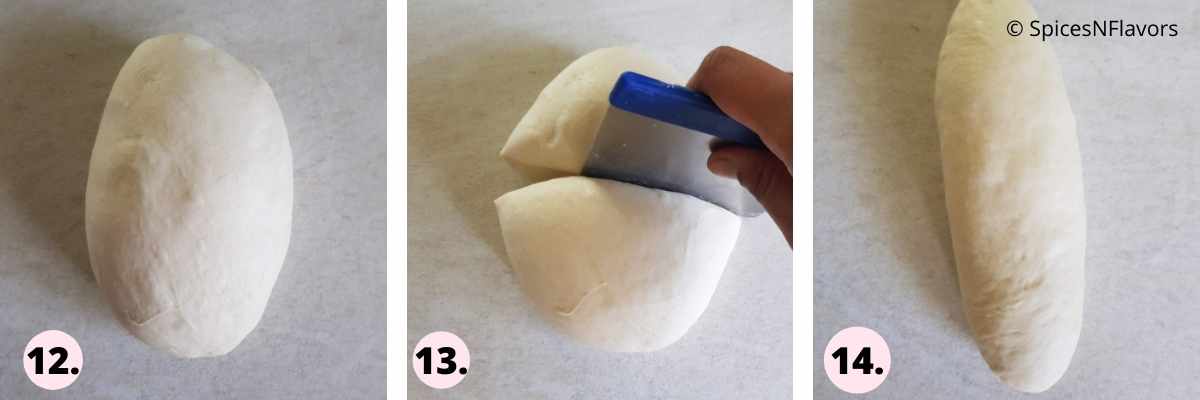
Once proofed, punch it slightly and tip it onto your work surface.
Divide the dough into two equal halves.
Press each half to form a rectangle.
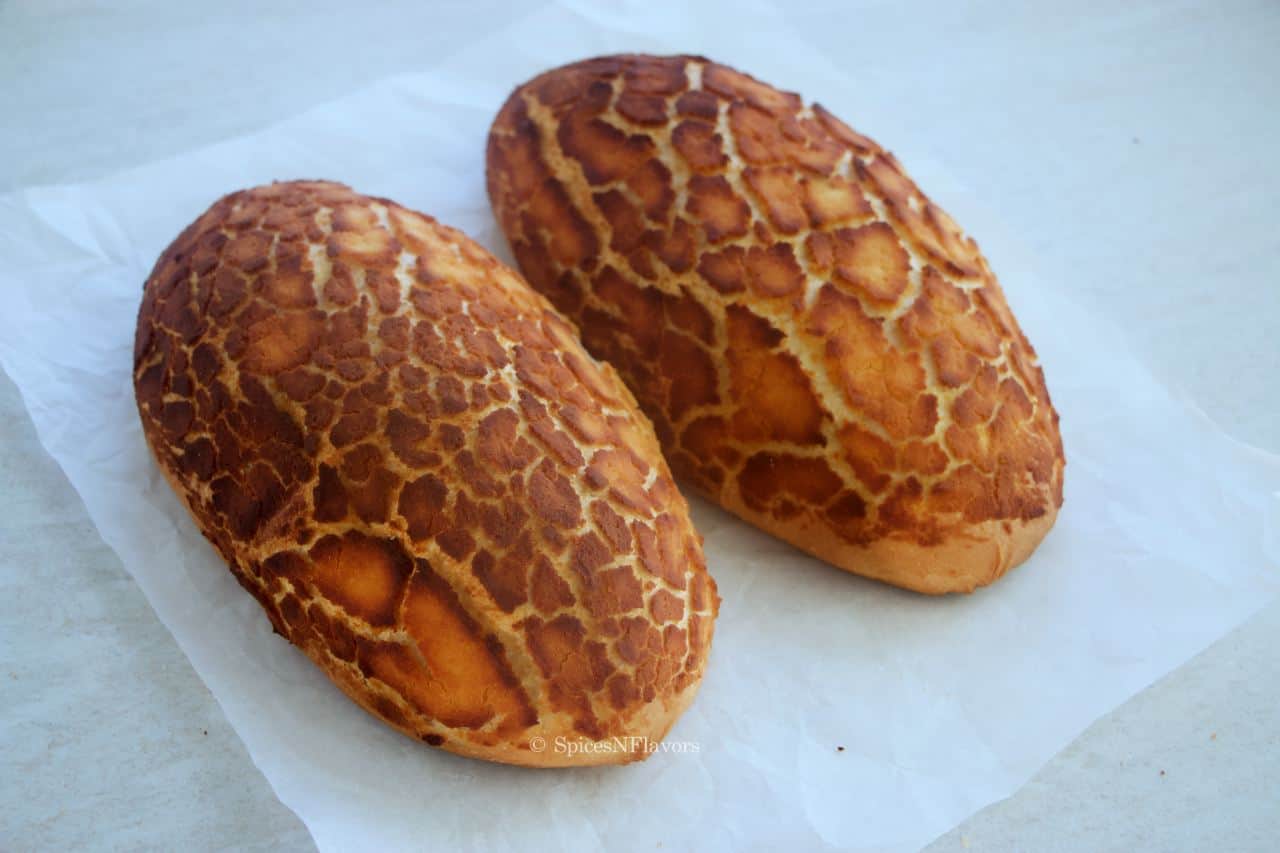
Then start rolling the dough from one end to form a torpedo shape aka long loaf shape. (Roll like a swiss roll cake). (image 12-14)
Place the loaves to proof for second proofing on slightly greased baking tray.
Cover with a tea towel and allow it for Second and Final proofing.
Step 4: Second Proofing
You need to proof the dough for 40 mins.
At mid interval that is after 20 mins, we need to apply the rice flour paste on top to get the perfect crust.
How to prepare the perfect crust topping?
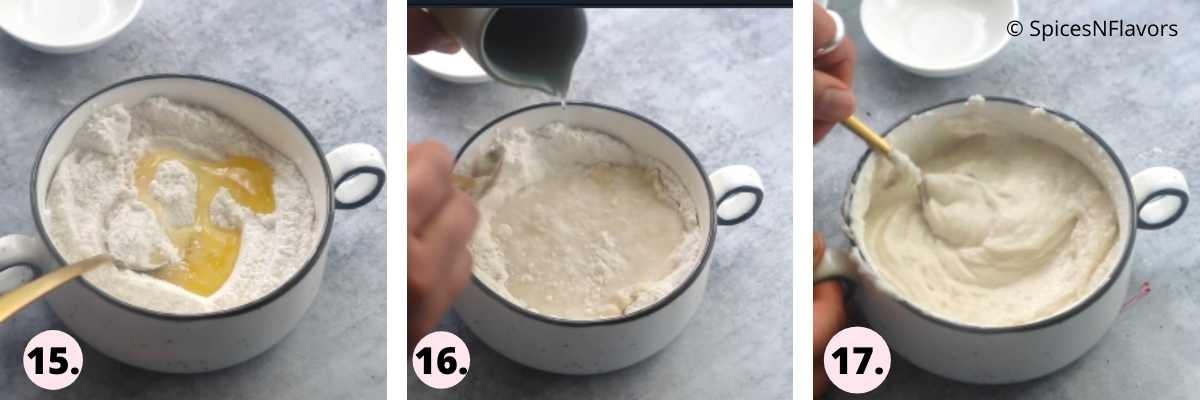
In a mixing bowl, combine together the rice flour, yeast, sugar, sesame oil, salt and water to form a smooth paste. (images 15-17)
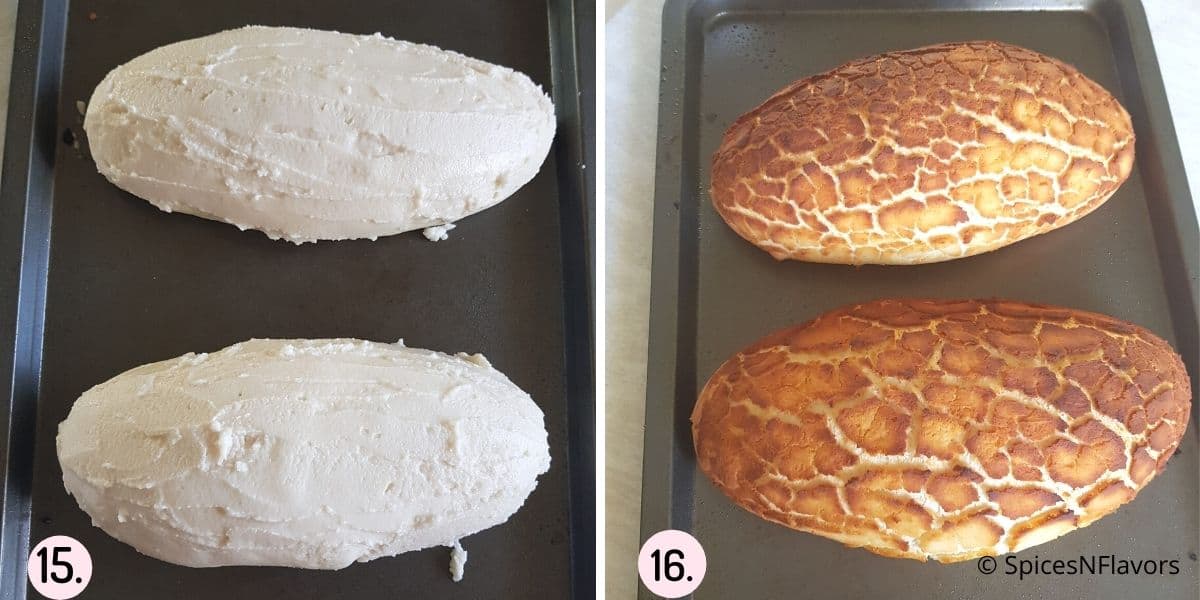
Apply this paste generously on top of the bread taking care not to deflate the bread dough (image 15).
Grease a cling wrap with some oil and cover the bread dough with this and then a tea towel and allow it to proof for the remaining 20 mins.
Remember to grease the cling wrap or else the rice flour paste may stick to the tea towel and your crust won't have the beautiful texture.
Step 5: Baking
After the final proofing, bake the loaves in a preheated oven of 200°C for 30 to 35 mins until the top is crackled and nice golden brown in colour and the bottom of the bread sounds hollow (image 16).
Let it cool in the baking tray for 5 mins then transfer it to a wire rack to cool completely before slicing and enjoying.
How to make Tiger Bread Rolls?
Follow the above steps till Step 2.

In the shaping step, instead of dividing the dough into 2 equal halves, divide it into 8 equal halves.
Take one part, tuck the sides to the bottom and then using your fingers and thumb tighten the dough to form a tight bread roll (images 17-18).
You can check our post on Ladi Pav aka Dinner Rolls to understand the shaping technique in much details.
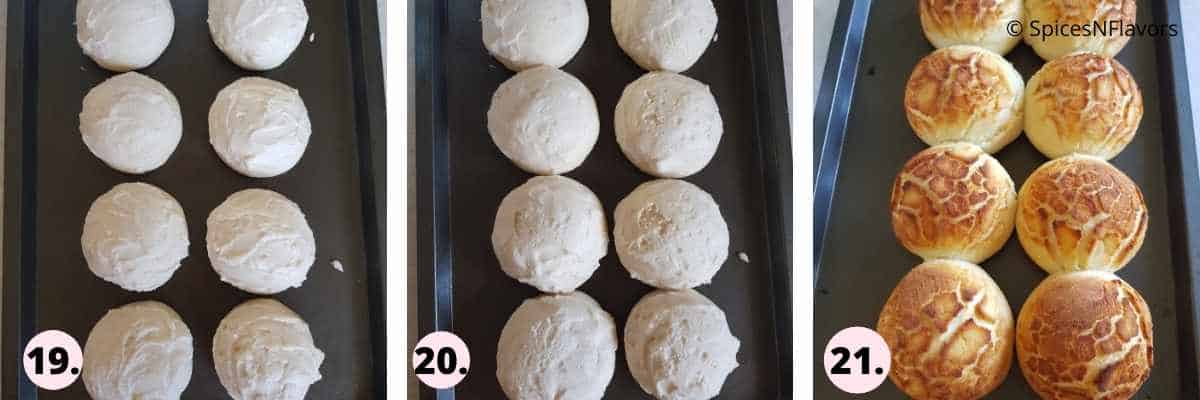
Once shaped, allow it to prove for 20 mins on a greased tray, then apply the rice flour paste as mentioned and prove for the remaining time duration.
Bake at 200°C for 20 to 25 mins (images 19-21).
Storage Instructions:
The bread tastes best when served fresh.
Store it in an air tight container at room temperature for 2 days.
You can also choose to freeze the bread to avoid any wastage
How to Freeze Bread?
Pre-slice and place your ideal portion in a zip lock bag and freeze for up to 3 months.
Thaw the bread till it comes to room temperature and slightly warm it in the microwave or oven to eat.
Baker's Tips:
- Temperature: Use Warm Water to knead the dough. Too hot will kill the yeast and too cold will deactivate the yeast.
- Shaping: Make tight rolls while shaping the bread dough to avoid air pockets in them once baked.
- Coating: Coat the bread dough with the magic rice flour paste very gently as you do not want to deflate the gas in the risen bread dough.
- Baking: Don't be afraid to bake the bread for a little additional of 3-4 mins to achieve the dark rusty golden brown colour.
- Cooling: Always make it a point to cool the bread completely before slicing.
The Science behind Dutch Crunch Bread
The secret to getting the perfect crunchy top is the rice flour paste that is smeared on top of the slightly risen dough.
Rice Flour being gluten free does not expand while baking.
Whereas the proved white bread dough beneath is rising in the heat of the oven and is constantly expanding thereby tearing the rice flour paste giving the distinctive mottled appearance on the crust.
So now you know there is nothing special about the bread dough, but it is always a little trick under your belt to jazz up things once in a while 😉
Recipe FAQ's
You may use other gluten-free flour like Oat Flour, Almond Flour or any Millet Flour to experiment. But my recommendation would be rice flour as it gives the crunchiest crust.
Yeast makes the paste soft and palatable and hence I would not recommend skipping it. Moreover, it is also a leavening agent so it makes the end product to be light and airy.
There is actually no difference. After a letter from a little girl went viral, the
Sainsbury’s supermarket in the UK changed its name to giraffe bread as it looks more spotted in appearance like that of a giraffe rather than being stripes like a Tiger.
You can have the bread on its own or spread some butter, jam, marmalite or nutella. Alternatively you can also slice the bread rolls or loaves and fill any filling of choice to have your own homemade Subway Bread. This bread can also be toasted.
It does have Yeast on it. So if you like you can add about 1/2 tsp of Marmite, Vegemite or any other brand of Yeast Extract to further enhance the flavour of tijgerbrood but ideally it is not needed.
Related Recipes:
- How to Proof Bread Dough in Instant Pot.
- Dinner Rolls - 9 mistakes that you might be making.
- White Sandwich Bread recipe
- Challah Rolls.
Wish to Join US for the love of BAKING? Subscribe to our newsletter and Youtube channel. Follow along on Facebook, Instagram, and Pinterest for all the latest updates!

Tiger Bread
Ingredients
Bread Dough
- 1 tsp Salt
- 3 cups (360 gms) Flour/Maida/APF
- 1 tbsp Sugar
- 1 tsp Instant Yeast
- 3 tbsp Olive Oil
- 1 cup (230 ml) Water
Rice Flour Paste
- 1/2 cup (75 gms) Rice Flour
- 1 tsp Yeast
- 1 tbsp Sugar
- 1 tbsp (9 gms) Sesame Oil
- 1/4 tsp Salt
- 1/3 cup + 1/2 tbsp (90 ml) Water
Instructions
Step 1 - Prepare the Bread Dough
- In a mixing bowl, add the salt, flour, sugar and yeast. Mix it gently and add oil. Finally add water and combine until everything comes together to a dough
- Transfer to a lightly dusted work top and knead for about 15 to 18 mins until you get a smooth pliable dough.
- To make it in a stand mixer: Add all the ingredients to the bowl and knead for 8 mins on med high speed.
- Then transfer it to a lightly greased bowl, turn the dough once so that the dough is also coated with oil.
Step 2 - First Proofing
- Cover with a tea towel and let it proof in a warm place for 1 hour.
- If proofing in an Instant Pot: Grease the inner pot with some oil. Transfer the dough to it and turn the dough once to coat it with oil too. Choose the Yogurt Mode and set the time to 30 mins.
Step 3 - Shaping
- Once proved, transfer the dough to your worktop. Lightly degas and divide the dough into 2 equal halves.
- Working with one half at a time, roughly shape it into a rectangle.
- Start forming a tight roll from one end and pressing firmly each time to seal the edges until you reach the very end.
- Repeat the same with the other half and transfer both the loaves to a greased baking tray. Cover with a tea towel and allow second proofing of 20 mins.
- Instead of shaping it into loaves you can also make 8 individual bread rolls instead. For that simply divide the dough into 8 equal halves, tuck the sides underneath and then using your thumb and fingers roll it tightly like we do for dinner rolls. And then follow the steps mentioned below.
Step 4 - Rice Flour Paste
- In a separate mixing bowl, combine together the rice flour, yeast, sugar, salt, sesame oil and water to form a smooth paste.
- After 20 mins of second proofing, generously apply a coat of the paste on top of the bread dough taking care not to deflate the gas.
- Slightly oil a cling wrap and cover the bread dough now coated with the rice flour paste. Then top it with a tea towel and allow for further proofing of 20 mins.
- The final proofing is 40 mins in total. After 20 mins apply the rice flour paste and allow to proof for the remaining time.
Step 5 - Baking
- After a total time of 40 mins, bake the bread in a preheated oven of 400°F or 200°C for 30 to 35 mins.
- If making into bread rolls, then bake at the same temperature for 25 mins.
- Once baked, allow it to cool on the baking tray for 5 mins then cool on a wire rack completely before slicing and enjoying.
Video
Notes
- Yield: This recipe would yield 2 plain bloomer type loaf of 19 cms each or 8 bread rolls.
- Temperature: Use Warm Water to knead the dough. Too hot will kill the yeast and too cold will deactivate the yeast.
- Shaping: Make tight rolls while shaping the bread dough to avoid air pockets in them once baked.
- Coating: Coat the bread dough with the magic rice flour paste very gently as you do not want to deflate the gas in the risen bread dough.
- Baking: Don't be afraid to bake the bread for a little additional of 3-4 mins to achieve the dark rusty golden brown colour.
- Cooling: Always make it a point to cool the bread completely before slicing.
- Rice Flour: Any Gluten free flour like oat flour, almond flour or millet flour can be used.
- Sesame Oil: Use Vegetable Oil instead.
Mors says
My toppings comes out deferent sometimes it didn't come out dark it's still white what's wrong with it?
sushma iyer says
Hi Mors.. IF you oven has settings for turning just the upper rod on.. may be you can try with that.. sometimes it is the oven that is the problem
Cloe says
Made my first loaf ever using your recipe today. I got 5☆ across the board from my family and my biggest critic (my father) said it was 'Delicious!'. Thank you for this moment ♡
sushma iyer says
Hi Cloe..
That is so good to know.. I am glad to see that the recipe worked wonders.. and I can truly understand your feeling when your father appreciated your baking skills.. Being a daddy's girl I always look forward to please him 🙂 thank you for sharing this.. appreciate it 🙂
Kim says
Hi, thank you for your recipe! My bread loaf came out nicely but the rice paste crackling were chalky looking, like not cooked on the top .
Thanks again!
sushma iyer says
Hi Kim.. Like I mentioned in the post don't be afraid it to over bake a little to get the colouration on top.
Camy T says
Hi!
I made this today but my crust didn’t crack and the crust became soft… any suggestions? The bread however was delicious.
sushma iyer says
Hi Camy.. so sorry about it.. Just wondering did you preheat your oven and was it at the right temperature? As rice flour would become toasty and form a crunchy layer on top so the chances of not getting the crust is minimal. However if left unattended on the counter top for long the crust tends to become soft due to the moisture around.
Regards
Sushma
Jane says
Tried making the tiger bread today, but they didn’t rise very well in the oven, any ideas why?
sushma iyer says
Hi Jane.. I am so sorry to learn this.. There could be a couple of reasons: 1. Your yeast was not fresh. Did you use active or instant variety? If active then did you activate it first?
2. The bread was over-proofed meaning all the yeast activity went in proofing the dough so nothing was left for oven-spring in the oven.
3. The ingredients were not measured right - too much sugar or too much salt can retard yeast activity. Hot water/milk can kill the yeast.
4. Salt and yeast were mixed together.
5. Oven was not hot.
Did you commit any of these mistakes by any chance??
Jane says
I had active yeast, I mixed that with the cup of warm water and sugar before adding to the flour and salt,
I noticed from your video that your dough was much more sticky than mine, which was more dryer. Guess I’ll have to start afresh
sushma iyer says
Ahhh I see makes sense then.. also if you are using active yeast the quantity should be increased so 1 teaspoon instant yeast = 1 1/4 teaspoons active dry yeast. 🙂
Hanna says
Hi! I’ve tried making it but the top crust did not turn out well although the bread came out how i wanted it to be. Can i know how to fix this? Please and thank you.
sushma iyer says
Hi Hanna.. Are you sure you used rice flour?? Because rice flour should crisp up no matter what..
Mamta Varma says
Made whole wheat burger buns this evening. They were absolutely delicious. As they came out of the oven, buttered one and had it hot - tasted out of the world. Thank you for sharing the recipe. Have also tried the sooji bread - it’s the best thing I have learnt.
sushma iyer says
Yay Mamta.. I am so happy to learn about your successes.. I am glad that all the recipes are just working perfectly fine for you. thank you for taking the time to share your feedback. 🙂
Shabna Anwar says
It looks awesome and yum. Must try recipe. Can you tell me the rice flour which is used is of par boiled rice or white rice? Is it fine rice flour or coarse rice flour?
sushma iyer says
Hi Shabna.. You get this rice flour from Indian brand I have never check which kind it is. It is a common ingredient in households mostly used while making Rava Dosa and tikkis. I think you can use any variety. The key point is not to use Ground Rice which will be much coarser. You need to use Rice Flour of any variety.
Chitra says
I loved making and eating it.
Thank you for this simple yet delicious recipe.
sushma iyer says
Wow.. that is pretty quick Chitra.. thank you for giving it a try and leaving a wonderful feedback.. Truly appreciate it <3