Doraemon Cake is a super simple DIY tutorial post on cartoon character cake that you can make for your kids birthday.
Learn how to make Doraemon Cake step by step with all the minute details covered that would make your cake decorating a breeze.
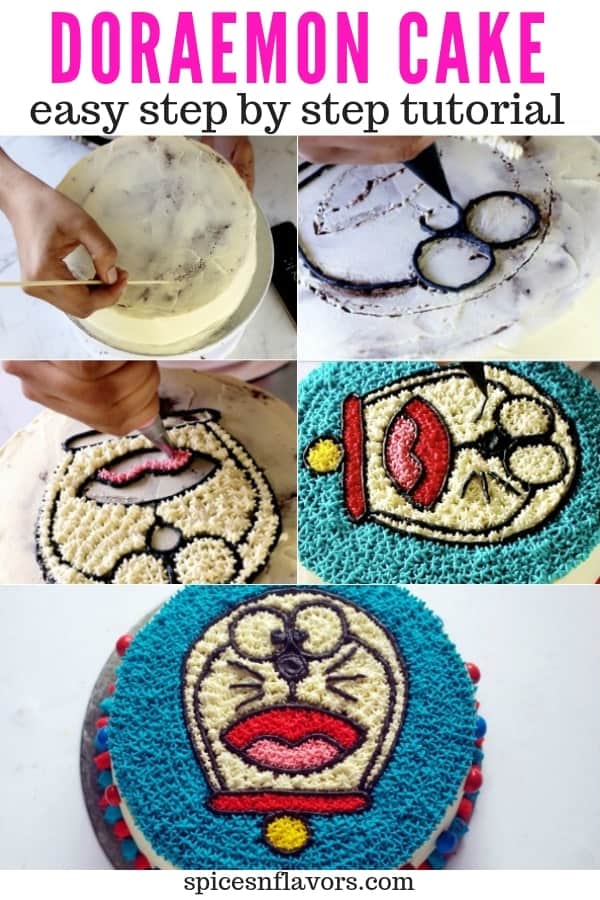
Doraemon Cake Decoration is so easy that you won't believe that you have actually pulled it off so well.
Up until now, I had never seen any episodes of Doraemon and friends. So when I set out to make the Doraemon character the first thing I had to do was look up some of his cartoons.
And after watching that I realised I have grown up so much that cartoons are not my thing.. hehe.. of course, I could watch Tom and Jerry countless times even now maybe because I grew up watching them but any other cartoon is really not my thing.
Secondly, you can look up on Google Baba for Doraemon cake designs where you will find so many pictures of Doraemon Cake for inspiration.
Just like Pikachu Cake, in my case, the design was sent by the client. So I was saved the time to actually look up for the same on the net. 😀
If you are planning to make this Doraemon birthday cake then there are a few things that you would need to start with.
1. Doraemon chocolate cake - I mean just any cake base layer. You can use either Vanilla Cake or Chocolate Cake. Anything would work. I am calling it Doraemon chocolate cake as I have used my go-to favourite Moist Eggless Chocolate Cake recipe as the base.
2. Filling - For making this Doraemon cake recipe today I have used a simple Chocolate Whipped Cream Filling. Again you can flavour it up as per you need.
3. Frosting - We cannot use Stabilized Chocolate Cream to frost because the colours won't show up. So we will be using my favourite Stabilized Whipped Cream Frosting. Such a beautiful frosting I must say. You can also choose to use Buttercream or Italian Meringue Buttercream here as per your needs.
4. Small tip star nozzle and a Wilton round tip
5. Piping bags
6. Gel Colours - blue, red, pink, yellow and black.
7. M and M's or Gems in the colour red and blue.
8. Chocolate Block to write Happy Birthday in case you are making it for a client.
Before starting with the step by step tutorial on how to make Doraemon Cake there is a little thing that I wish to discuss here and that is determining your Doraemon Cake price.
I am not going to give the exact price of Doraemon shape cake as that would vary from place to place but there are 2 important things that you need to consider which is what I am highlighting.
Once you do the crumb coating on the cake put it in the fridge to chill. After which just frost the sides but not the top. That is because
A. As in this Doraemon Cake recipe, you would be piping on top so if you frost the entire cake that would mean you would need extra cream for frosting the design on top. Which in turn means you would end up charging your client more.
B. And the extra cream would eventually lead to an increase in the cake weight again would not be a justice to the work you put.
So being a home baker you will have to consider this even more.
Now let us see how to make Doraemon step by step I mean Doraemon shaped cake. 😀
Step 1:
Prepare the Chocolate Cake base layer:
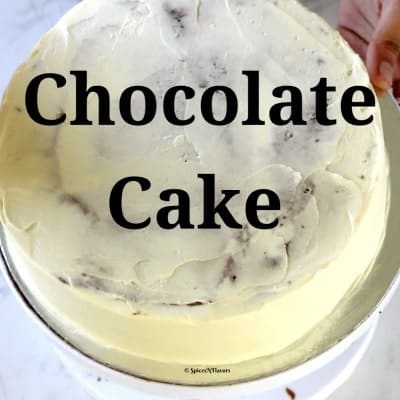
So you would need a base layer to make the Doraemon face cake piping on top.
Today I have used Easy Eggless Chocolate Cake as the base and filled with chocolate cream and frosted the sides with stabilized whipped cream.
Btw it is an 8-inch cake with 3 layers of cake and 2 layers of filling.
Step 2:
Make the outline of the Doraemon character that you wish to make on top of your cake. For this, we would use a toothpick or wooden skewer with a pointed edge.
Then using a reference Doraemon images, and free-hand decoration, sketch the image on top of your cake. For making this I have used a wooden skewer with the pointed edge.
And then instead of dragging and drawing a line, we would make simple dots all over as you can see in the image below or refer my video tutorial for easy understanding.
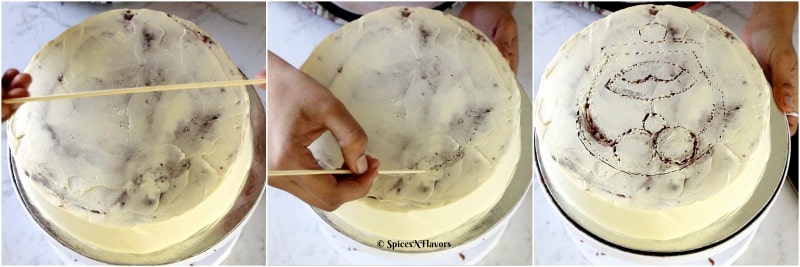
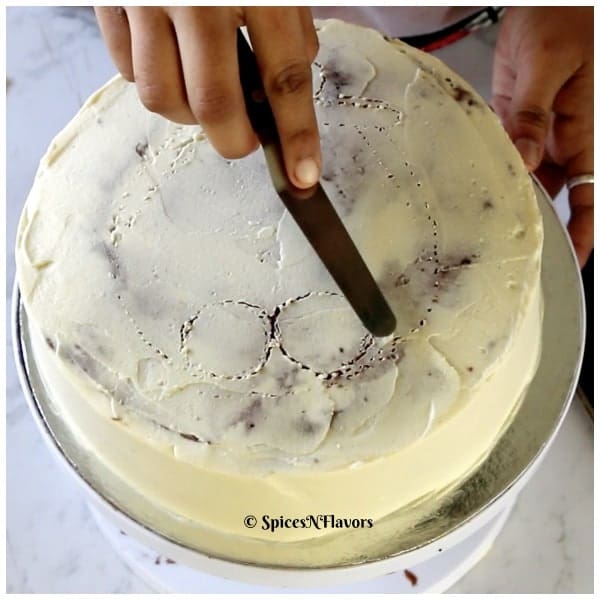
Pro Tip:
In case you do a mistake while dotting, do not worry use a spatula to smooth it off and start again 🙂
Step 3:
Piping
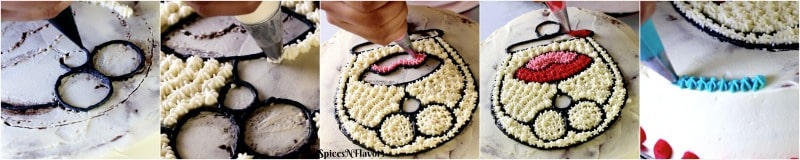
The first thing you need to do is colour your Stabilized Whipped Cream into desired colours such as - Black, Pink, Red, Yellow and Blue.
Fill your piping bag with black icing and make an outline on top of the dotted points.
And then refer your image and start piping the desired colour as per your Doraemon theme cake.
The only thing you need to remember while piping especially blue colour is that everything should go in one particular direction so that the piping looks even.
Step 4:
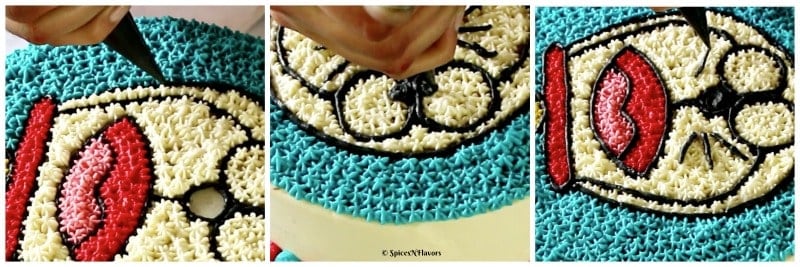
Final touches:
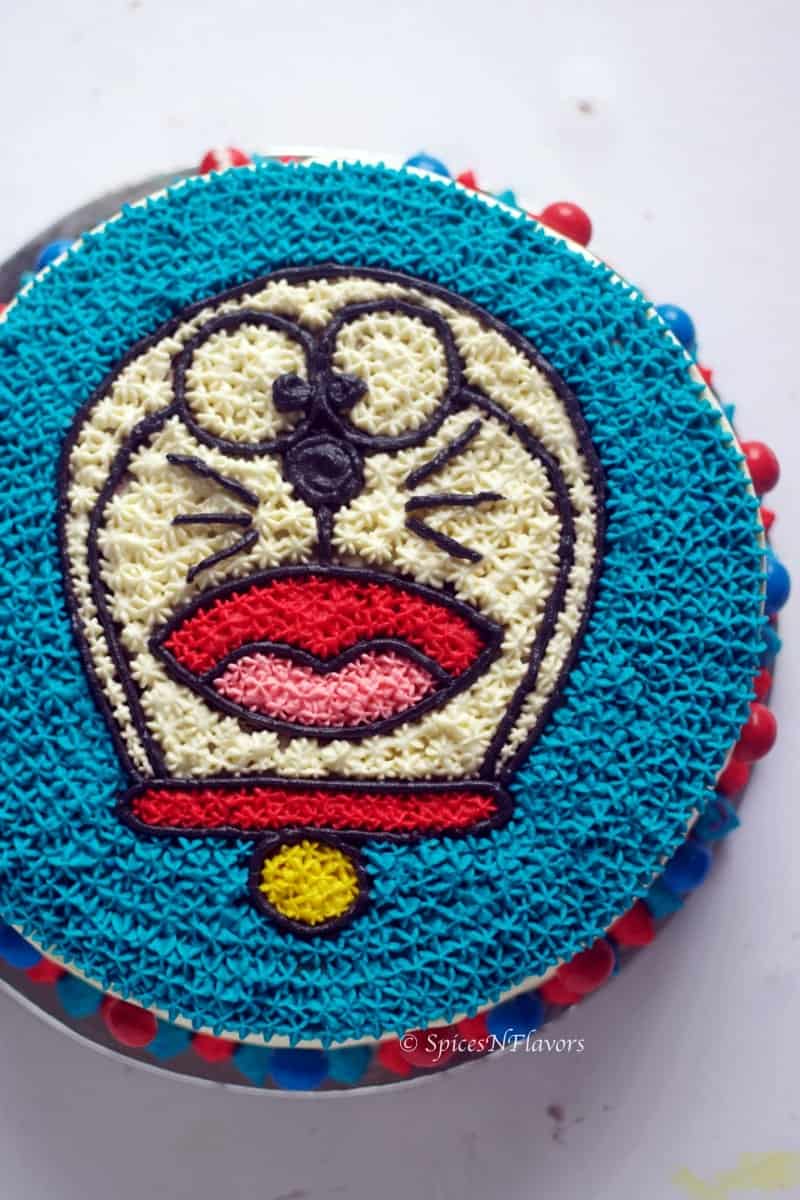
Once you have done piping on top, take your black icing once again and a double coating on top to make it even and more prominent.
Also make sure to add the eyes, nose and whiskers.
Step 5:
Final decorations:
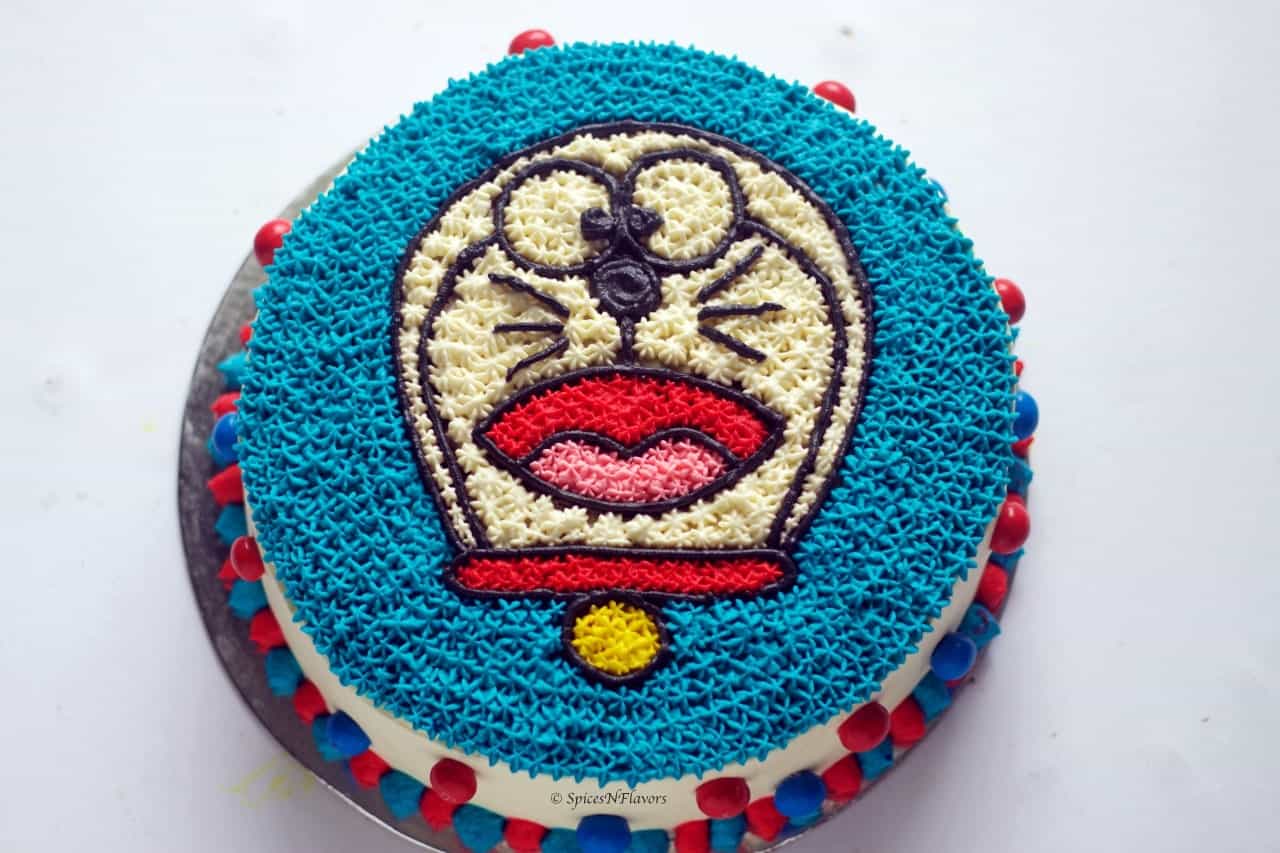
Using your round tip nozzle and red and blue colour make dots all around the base of the cake. (please refer video)
Also place red and blue M and M's to decorate and complete the final look of our Doraemon Cake.
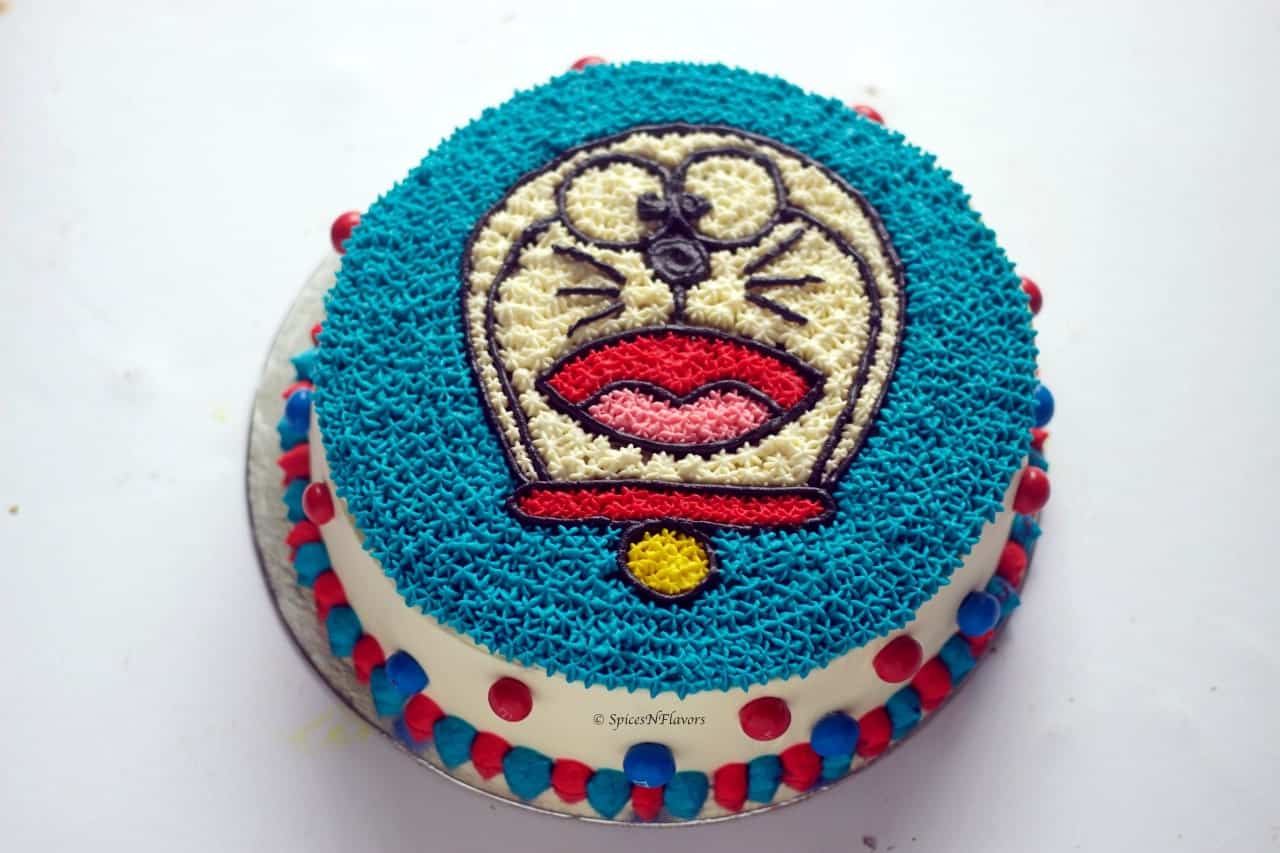
Yes, it is not a Doraemon 3d cake but nevertheless a beautiful, simple and adorable Doraemon cartoon cake.
Learn how to make Doraemon cake video format:
Forget buying monginis cake because making a Doraemon birthday cake at home is super easy; don't you agree?
Moreover, if you wish to make some other cakes using this same technique then here is a list for a head start:
spiderman cake
cinderella cake
batman cake
minion cake
mickey mouse cake
barbie doll cake
shark cake
barbie cake
hello kitty cake
dora cake
cake world
car cake
In case you missed here is the direct links to certain recipes that you would need to make this Doraemon cake:
1. Moist Eggless Chocolate Cake
2. Chocolate Whipped Cream
3. Stabilized Whipped Cream
Go ahead and plan your Doraemon theme birthday party with an entire DIY dessert table that would include this Doraemon Cake, Doraemon cupcakes, blue Instagramandy, Blue and red chocolate barks and many more.
If you like this tutorial and the idea then do let me know by tagging me, tweeting me or instagram me. I would love to follow you and your posts.. 😀
Pin this to your cake decorating board
I will see you soon with yet another one
Until then
Hugs
Sushma
Leave a Reply