You can’t beat the smell of freshly baked eggless cinnamon rolls in the morning. And when they’re this light, fluffy and soft? Oh Boy!! it doesn’t get much better than that. These cinnamon rolls without eggs are just as good as their normal counterparts and with that icing on top; you would be craving for more.
And the best thing? This post includes Step-by-step instructions along with ways to make it fresh for breakfast and steps to reheat and freeze are all shared in detail. So definitely consider bookmarking it!!!
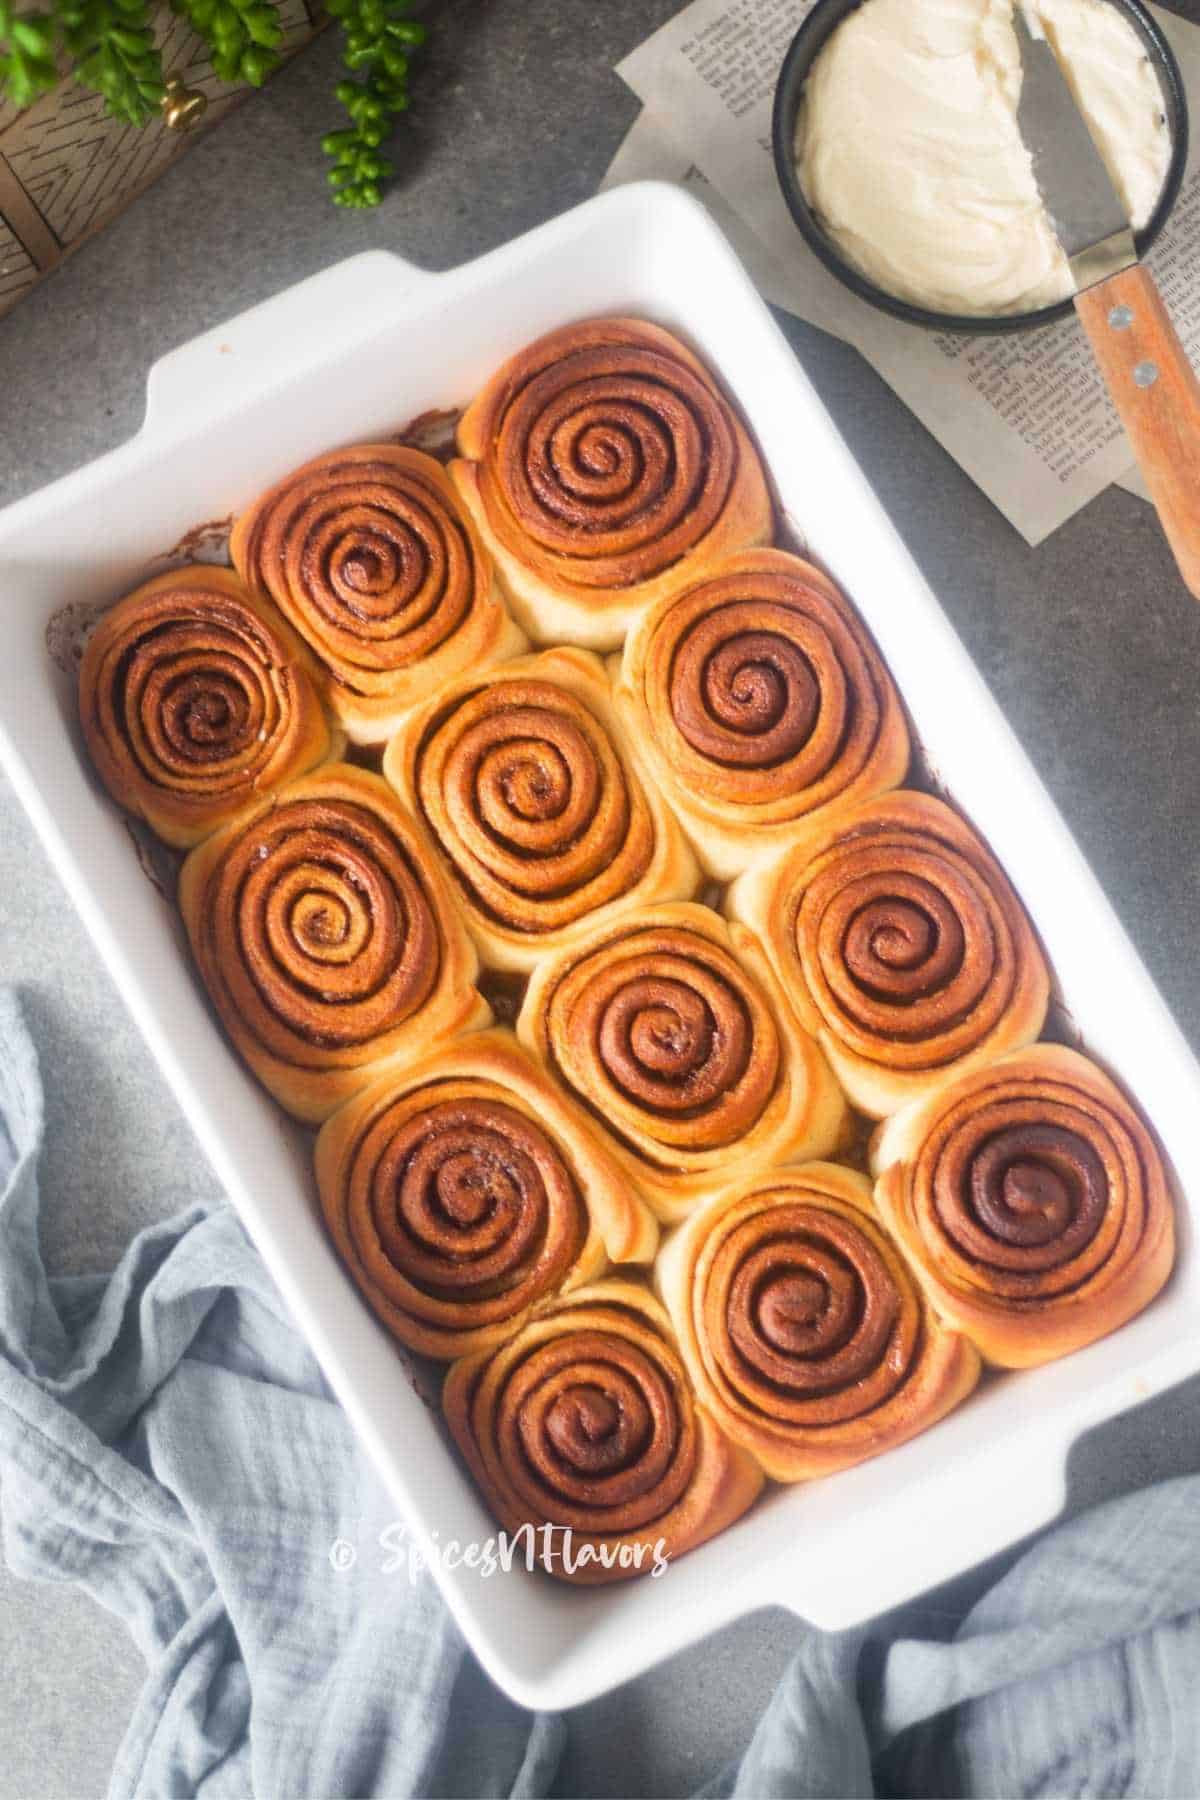
Can you make Cinnamon Rolls without eggs?
Yes, you can make cinnamon rolls without eggs! Eggs are not the rising agents when it comes to baking bread—that's yeast. However, eggs do add richness to the dough; it's an enriching factor to this eggless recipe. To mimic that we are going to knead our dough with milk and also add milk powder to get that richness quotient and a little extra butter to amp up the flavour profile.
And I promise if you try this exact same recipe you would never come to know that in these cinnamon rolls no eggs are present.
Combined with the delicious icing on top, you will keep coming back for more. Psst Psst.. you know right, it's a no cream cheese cinnamon roll icing recipe?
Ingredients
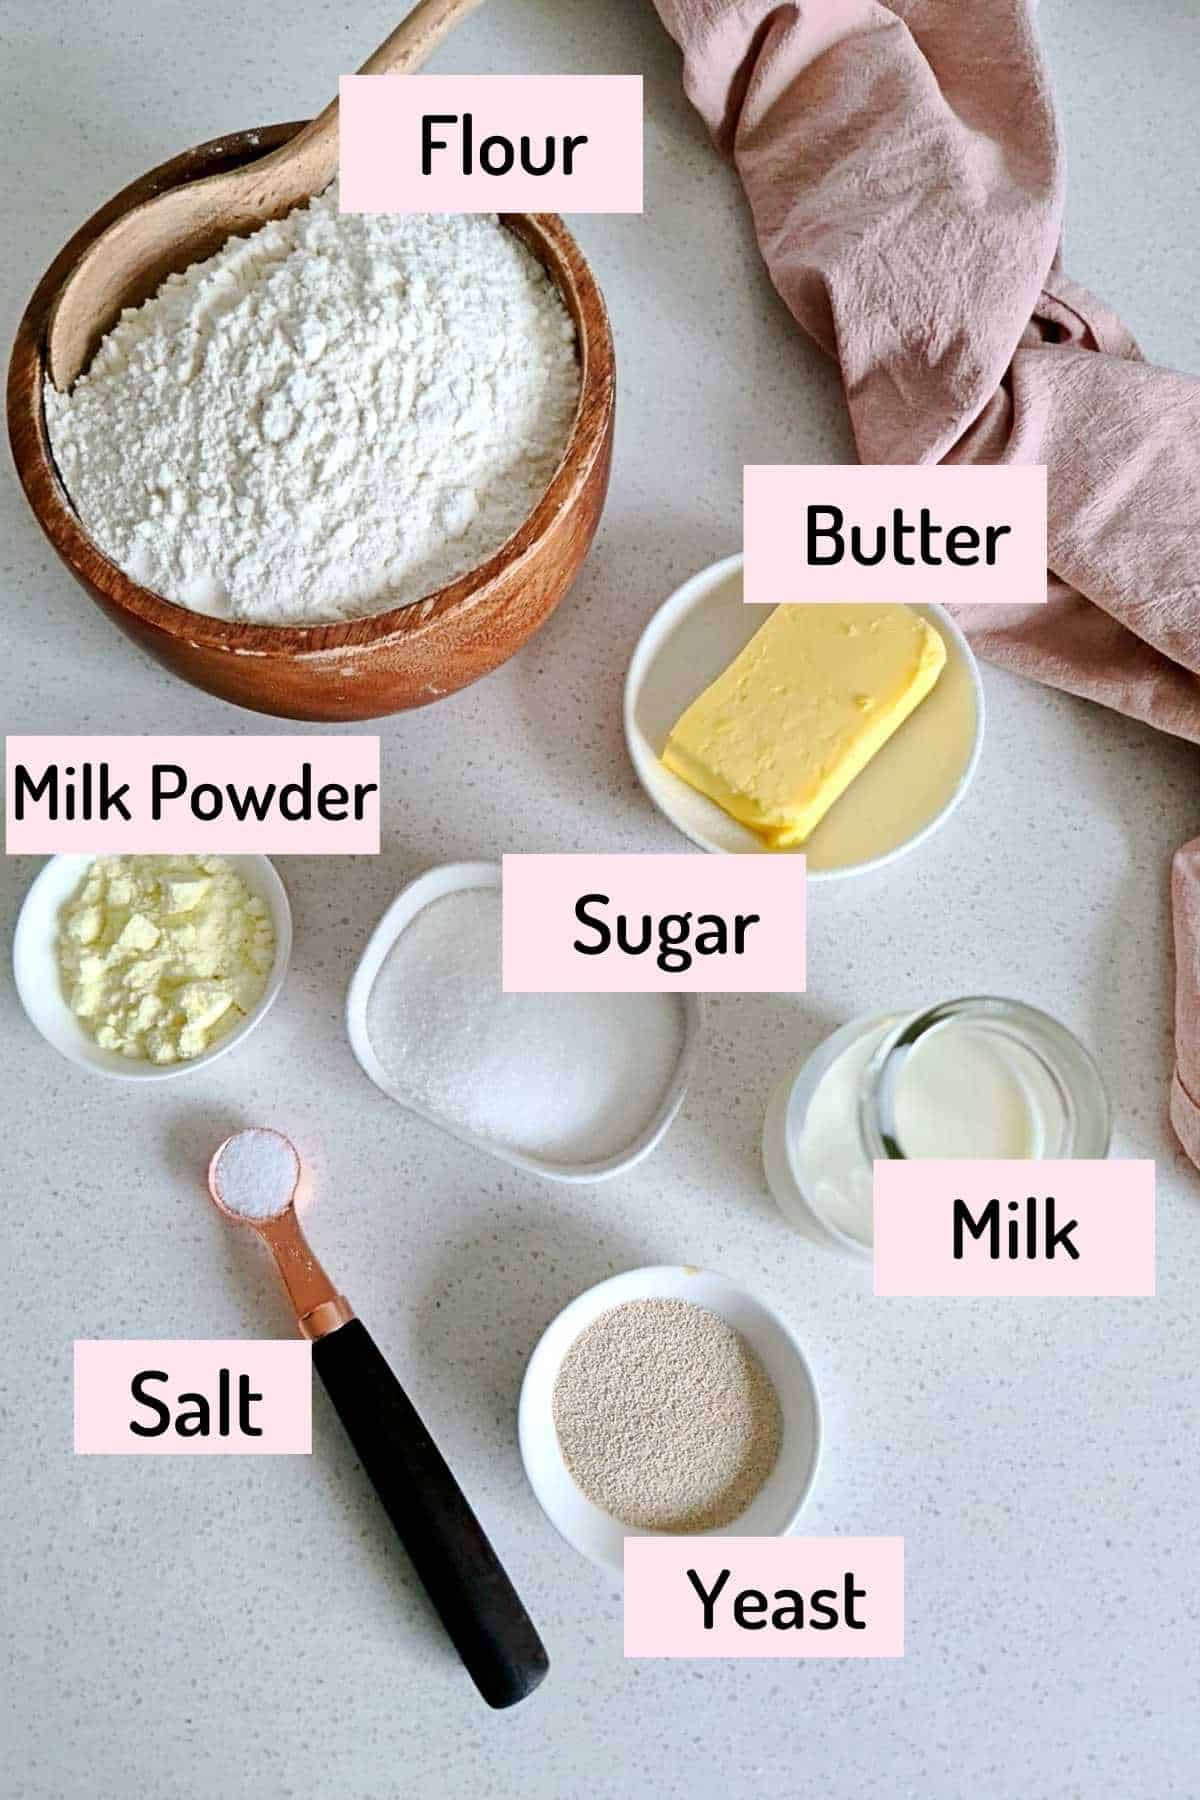
- 240 ml (1 cup) milk - Use lukewarm milk. Any regular milk of choice can be used.
- 2 tsp (1 packet) Instant Yeast - I recommend using Instant Yeast when it comes to baking but you can also use Active Dry Yeast if you prefer just make sure to activate it before using.
- 67 gms (1/3 cup) Sugar
- 420 -480 gms (3 1/2 cups to 4 cups) All-purpose flour /Plain flour/Maida - Bread Flour also works perfectly well.
- 1 tbsp Milk Powder - adds richness to the eggless bread dough.
- 1/2 tsp Salt
- 76 gms (1/3 cup) Butter that is soft to the touch.
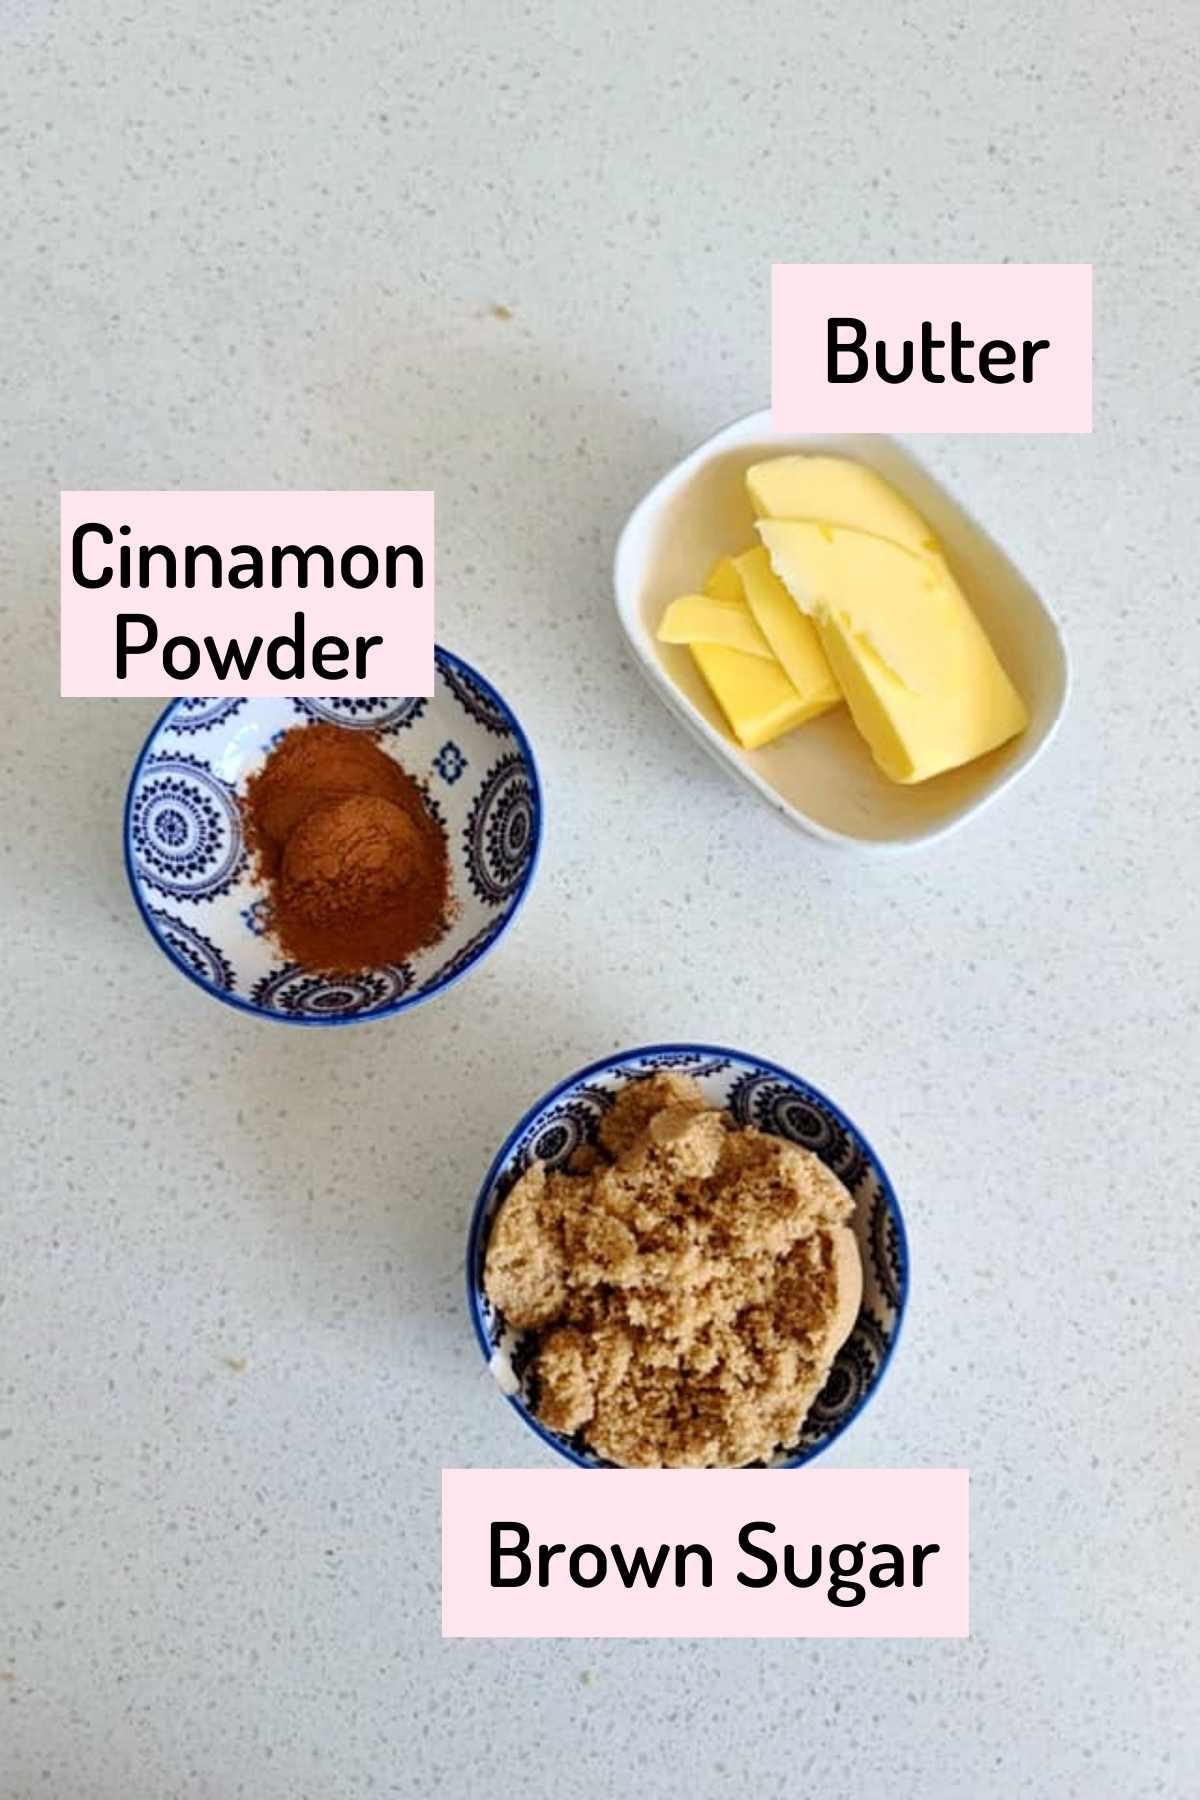
For the Filling:
- 8 tbsp Brown Sugar
- 1 tbsp ground cinnamon
- 1/4 cup (56 gms) butter - softened or room temperature.
For the Icing
- 1/3 cup Butter
- 1 to 1.5 cups Icing
- 2 tsp Vanilla
- 3 tsp Milk (more if needed)
For printable recipe jump to the end of the page.
Step-by-Step Instructions
Step 1 - Prepare the Dough
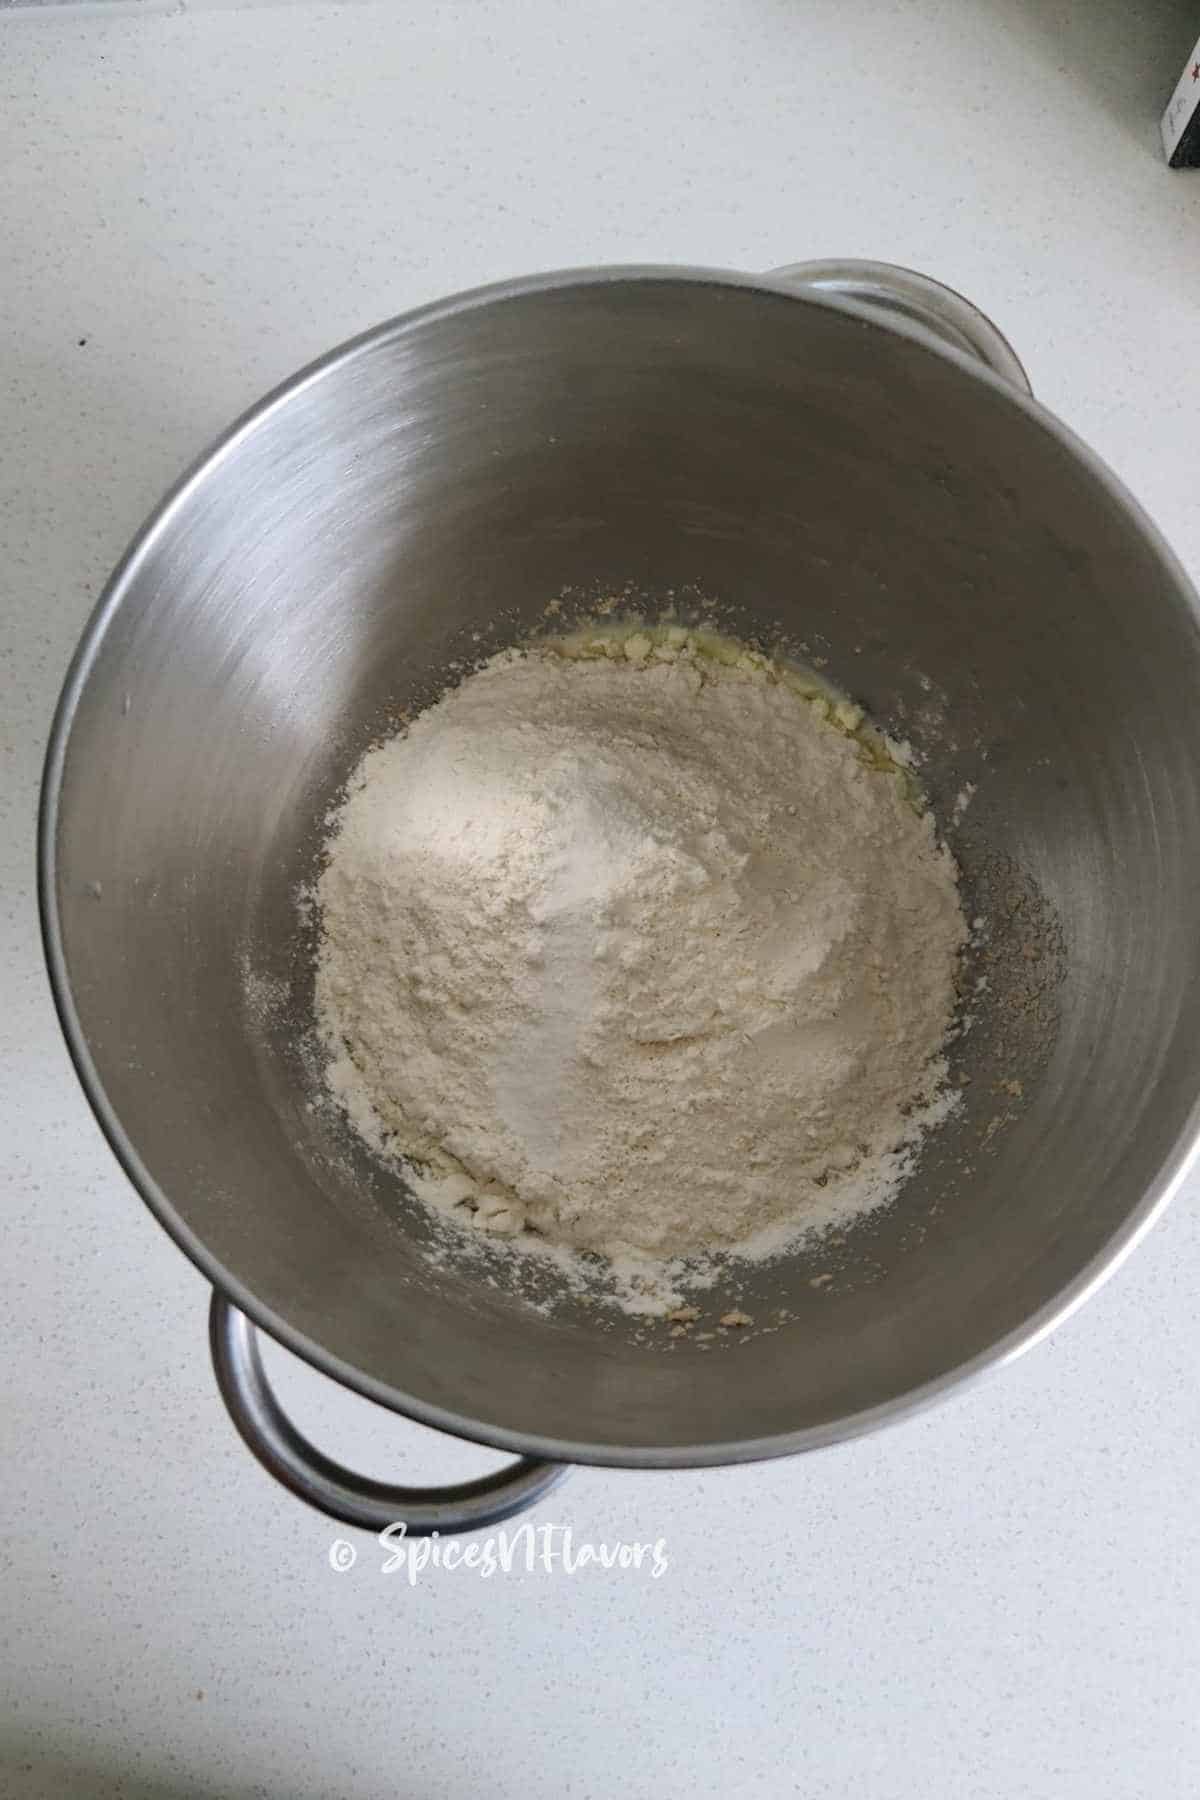
In the bowl of a stand mixer, add the milk sugar and yeast. Give a quick mix.
And add milk powder, 420 gms of flour and salt. Mix using the dough hook attachment.
Then start kneading the dough on low speed until it comes together then gradually increase the speed to med-high and knead for about 6 mins.
If you find that the dough is too sticky add more flour to adjust until it forms a solid mass of dough.

At this stage, you would have a dough that would be dry to touch and that is how it would be as we have not added the butter yet.
So finally add the room-temperature butter in and knead for another 4 mins.
The dough should not feel soupy or wet as seen in the image to the left rather it should feel dry and should have come together as a dough like an image on right.
Initially, the butter would stick to the sides of the bowl and look messy, but that is ok keep kneading on med-high speed and it will come together eventually.
And if you feel that the dough is wet and is sticking even after 4-5 mins. of kneading then feel free to add little extra flour (a tbsp at a time) to get the right consistency.
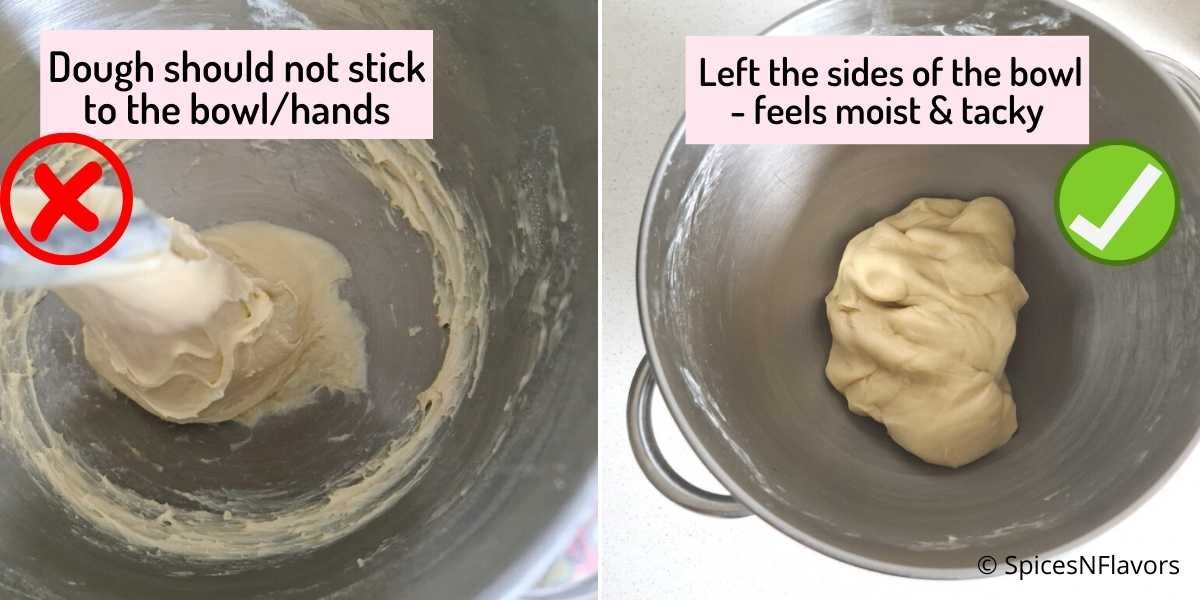
Once done the dough should feel moist but not wet that is it should not stick to your hands.
Take the soft dough out of the bowl, grease the same bowl with some oil or you can use any large bowl instead, put the dough back and allow for first proofing.
How to knead the dough using your hands?
If you do not have a stand mixer you can knead the dough using your hands too.
The steps remain the same.
In a medium size, bowl add all the ingredients in the same order except for butter and knead for about 10 mins then add butter and knead again for another 8 to 10 mins until you get the right consistency.
You can refer to our Pita Bread Post or Challah Bread Post for pictorials as well as video tutorials.
Step 2 - First Proofing.
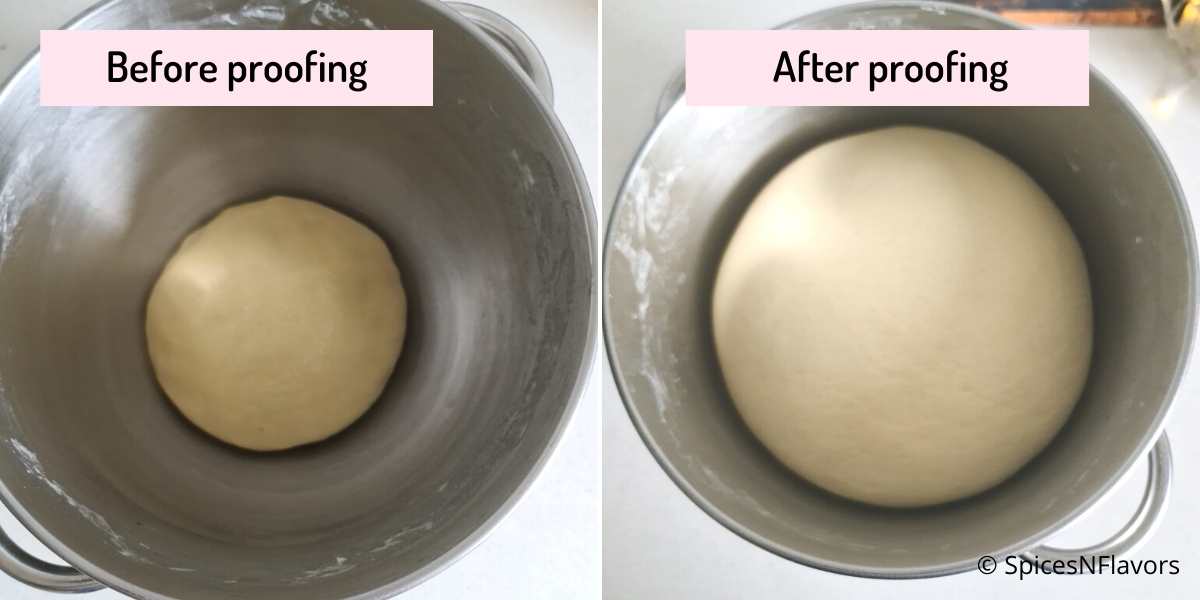
Cover the bowl with a cling wrap and place a tea towel on top.
Let the dough rise on the countertop itself for 1.5 hours until doubled in size.
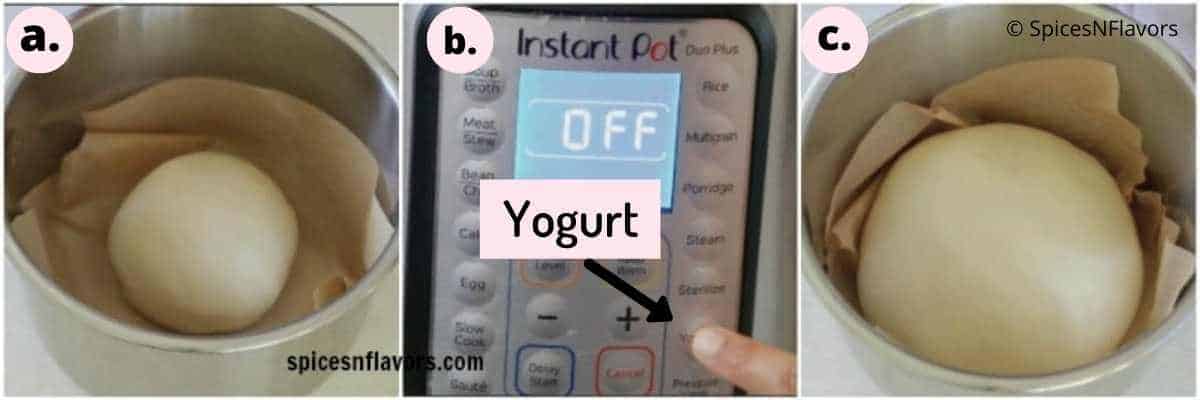
Alternatively to save time you can prove the dough in your Instant Pot too in just 45 mins using the Yogurt setting. Check out our post on Instant Pot Bread Proofing for more details.
Step 3: Prepare the Filling
While the dough is proving; in a small bowl mix together the cinnamon powder and brown sugar until homogenous and set aside.
Also, measure out the required butter and set it aside so that it softens by the time it is ready to be used.
Step 4: Shaping
Once proven punch down the dough to remove the gases and take it out of the bowl to a floured countertop.
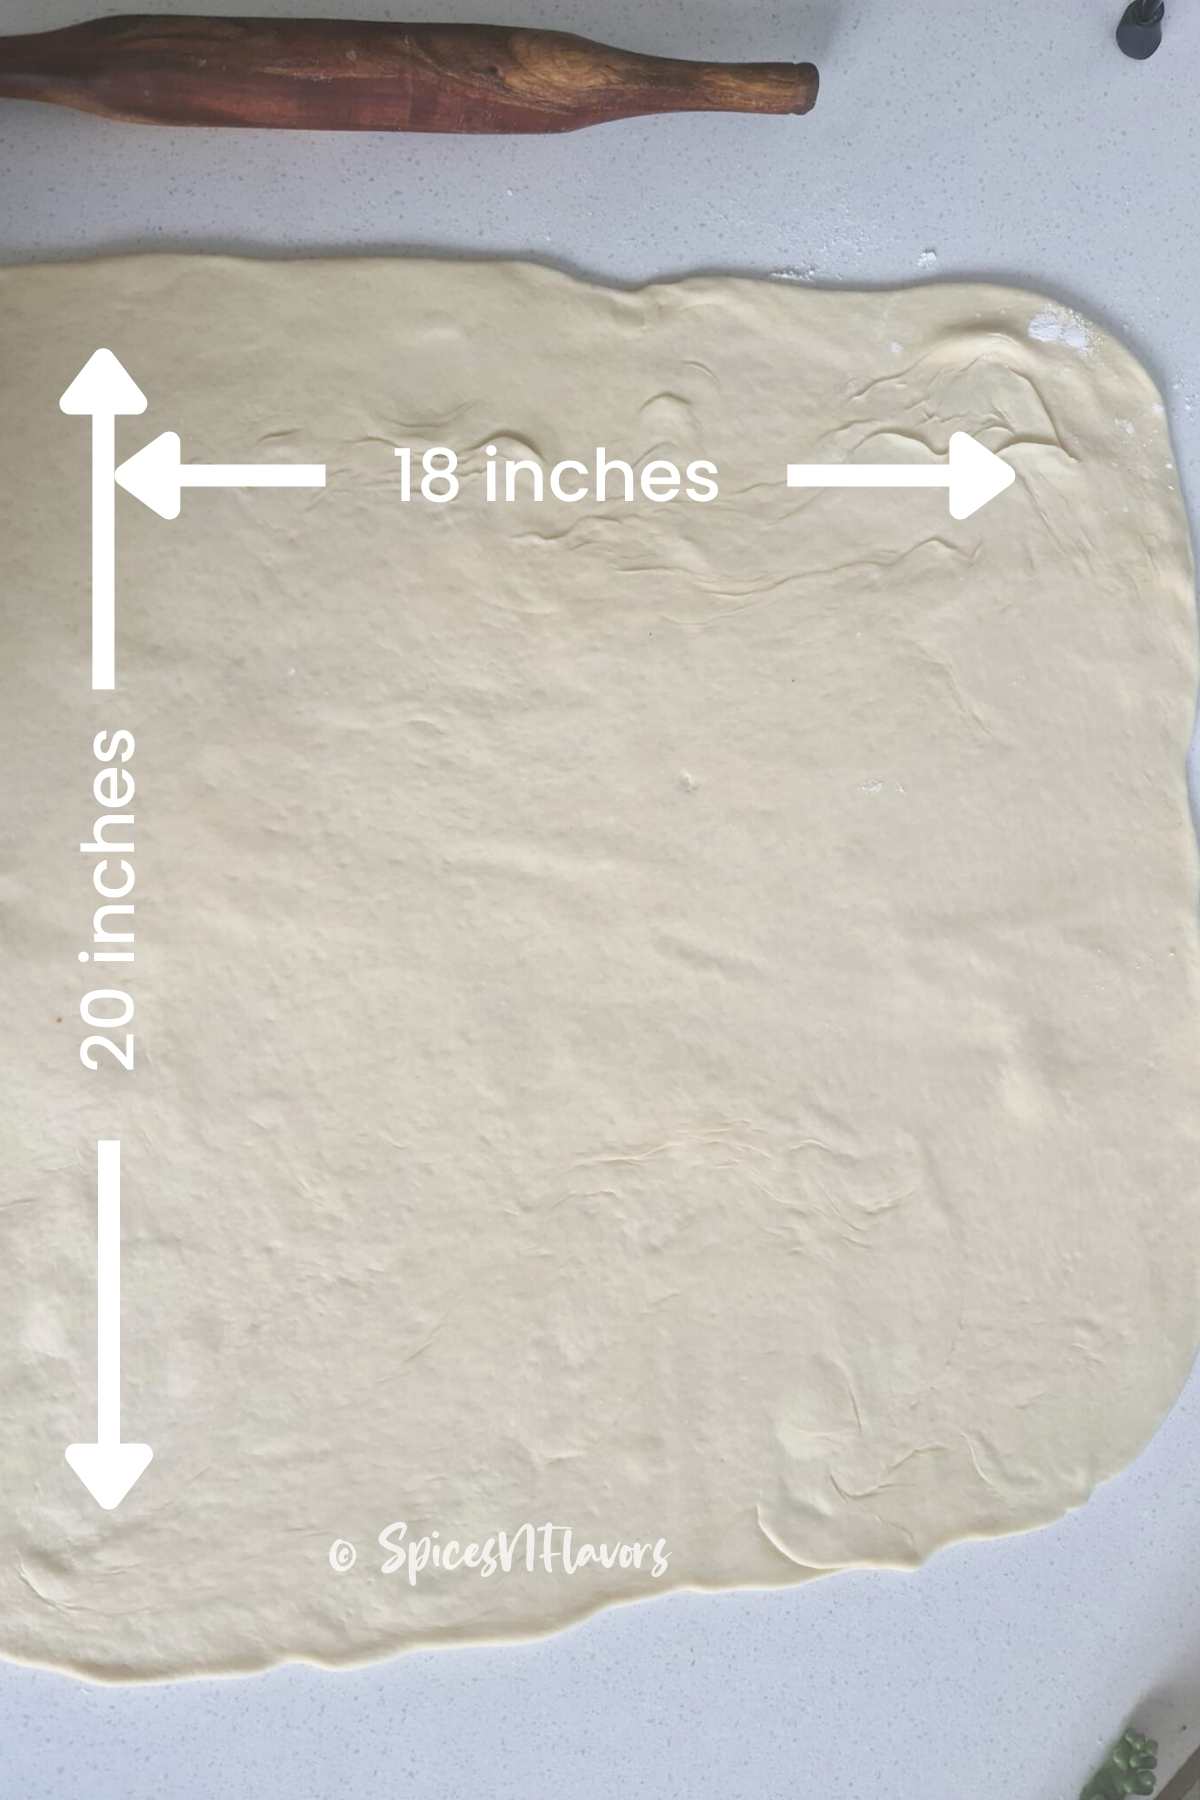
Roll into 20x18 inches rectangle using a rolling pin. (Please note the picture here is taken in a portrait shot rather than a horizontal shot so rolling into mentioned dimensions will be easier for you. Refer to the video tutorial for any doubts).
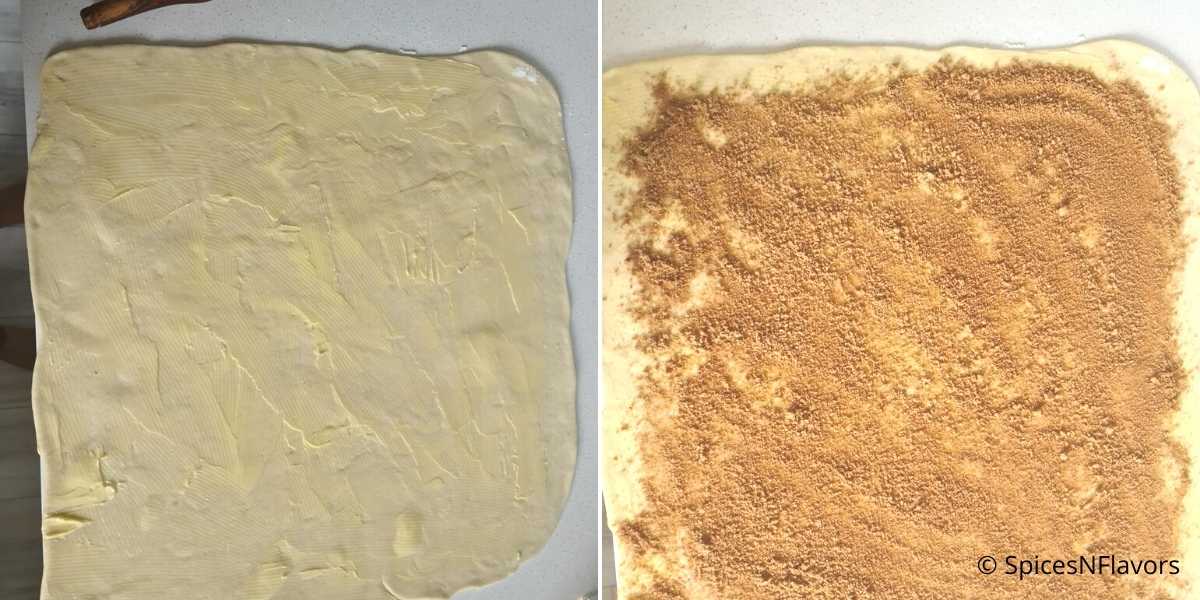
Smear the softened butter all through the dough and sprinkle the prepared cinnamon-sugar mixture on top.
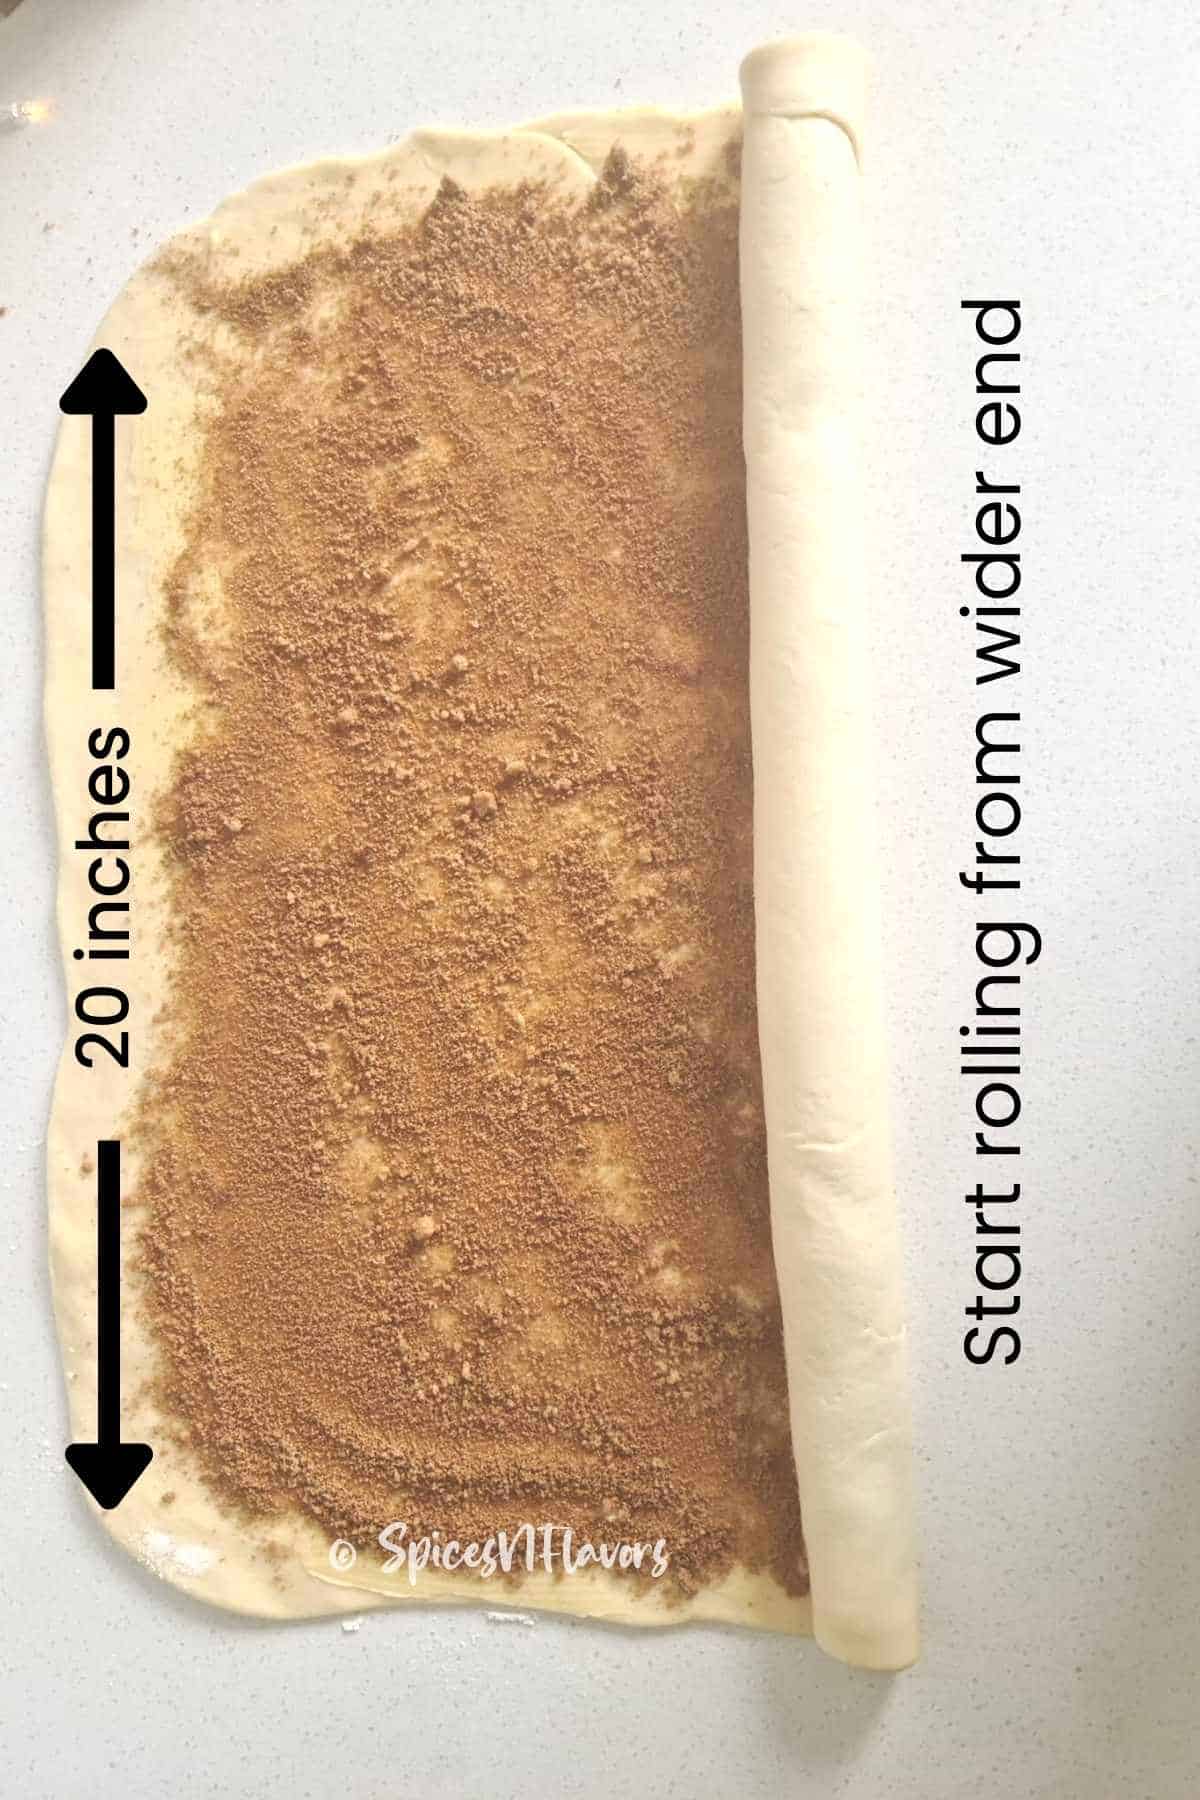
Roll from the longest side to form a tight cylindrical roll. Pinch the seams well.
Yes, make sure that you roll into a tight log as the tighter the dough the prettier it will look once cut.
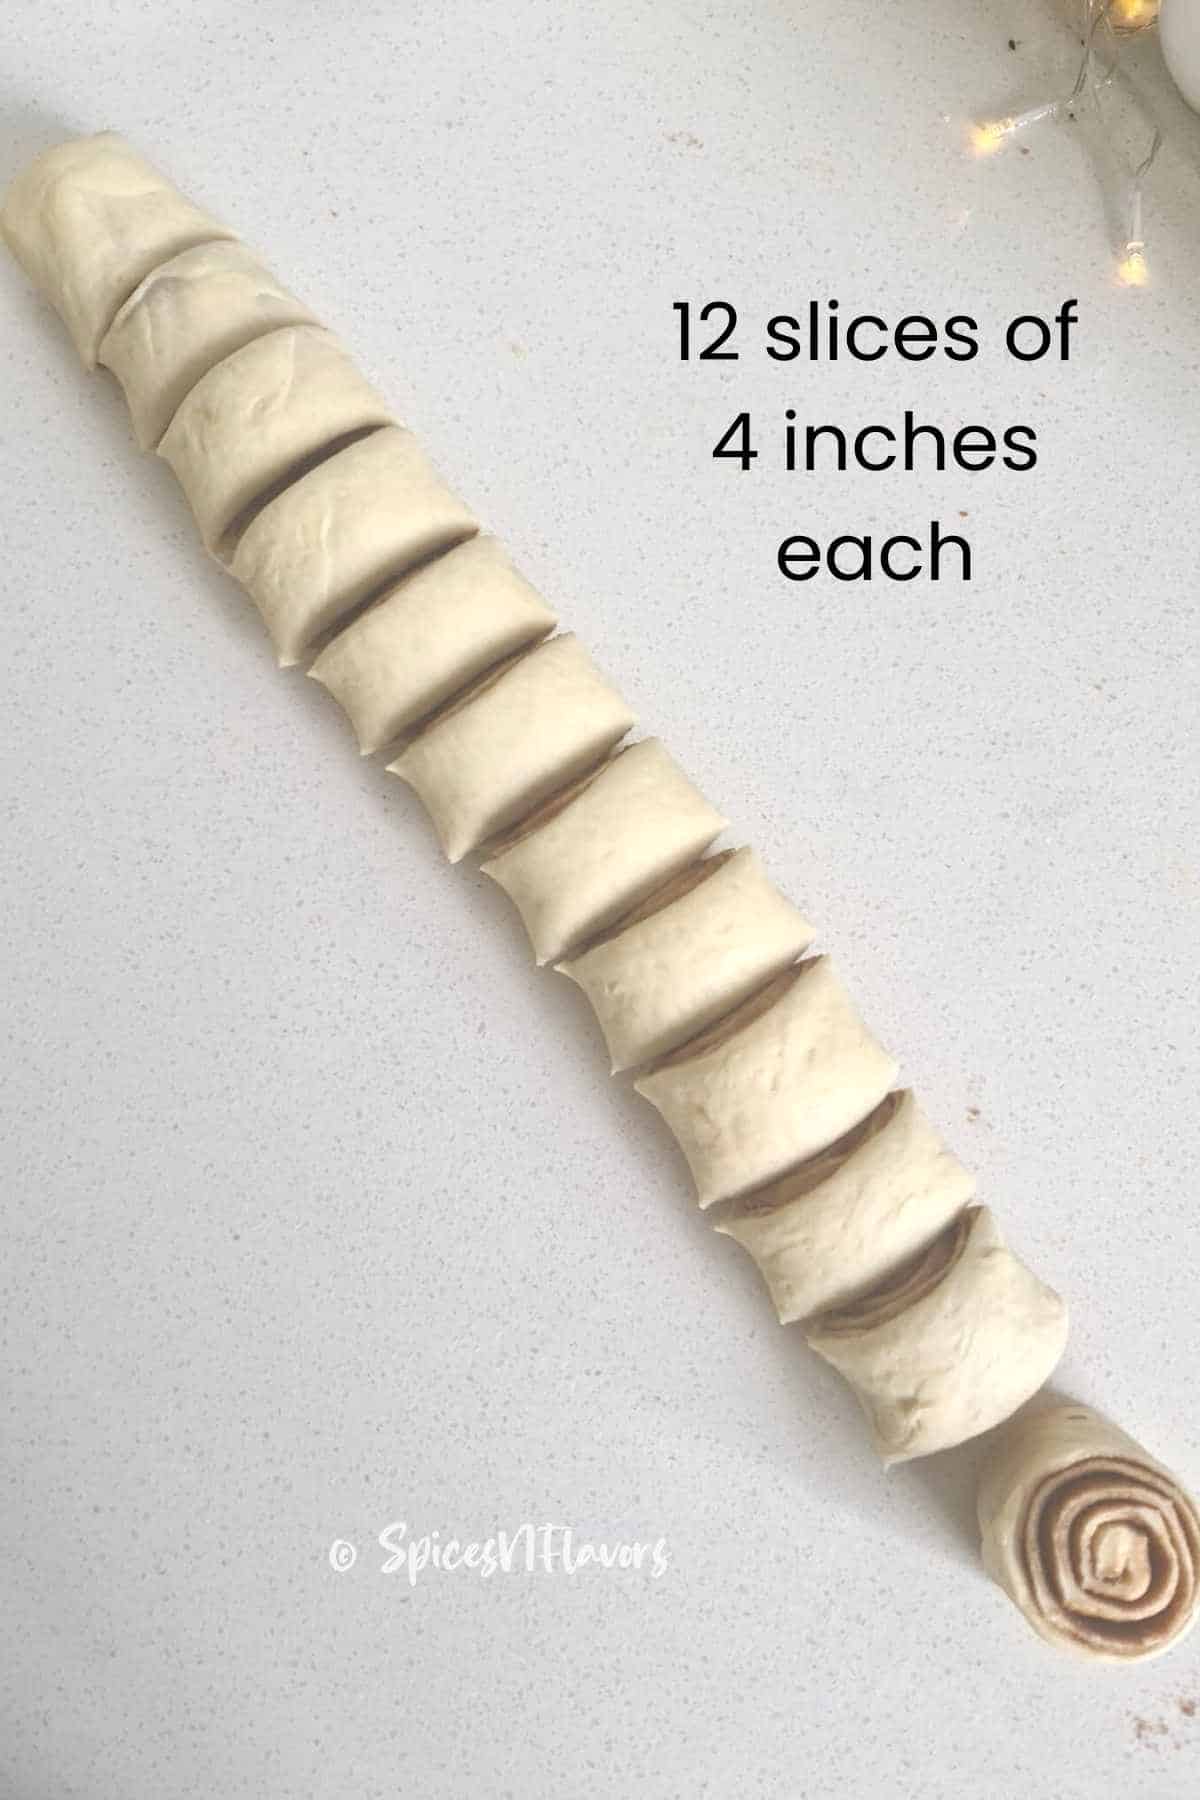
Then trim the edges from both sides and cut them into 12 pieces of approx 4 inches each using a bench scraper or sharp serrated knife.
You can also make use of unflavoured dental floss if you prefer.
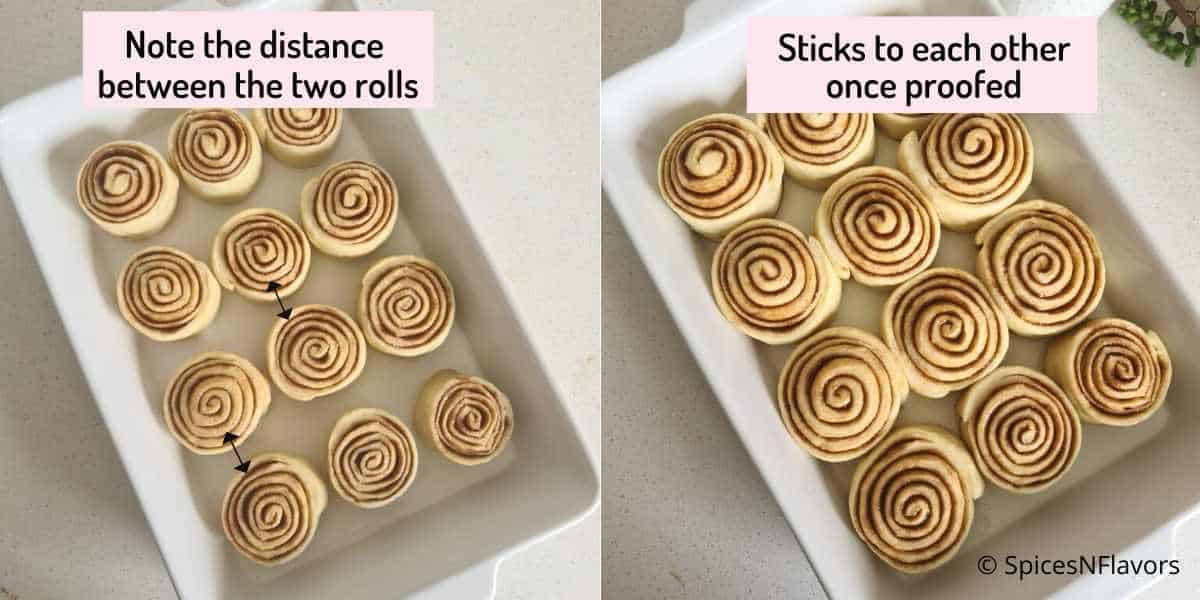
Grease a baking tray with some butter. I am using an 11x7-inch ceramic baking tray.
I found a few similar ones with like 11x9 and 13x9 inch baking trays that would work for this recipe.
Take one piece at a time and gently pat the edges to give it a circular shape and place it on the greased baking tray with the cut side down evenly apart.
Again cover with a tea towel and allow for second proofing until the individual circle rises and touches each other.
It would take around 40 mins but do not go by the time rather look for the dough to stick to each other.
Factors like the size of the tray and the temperature of the room would affect the proofing time.
Step 5: Baking
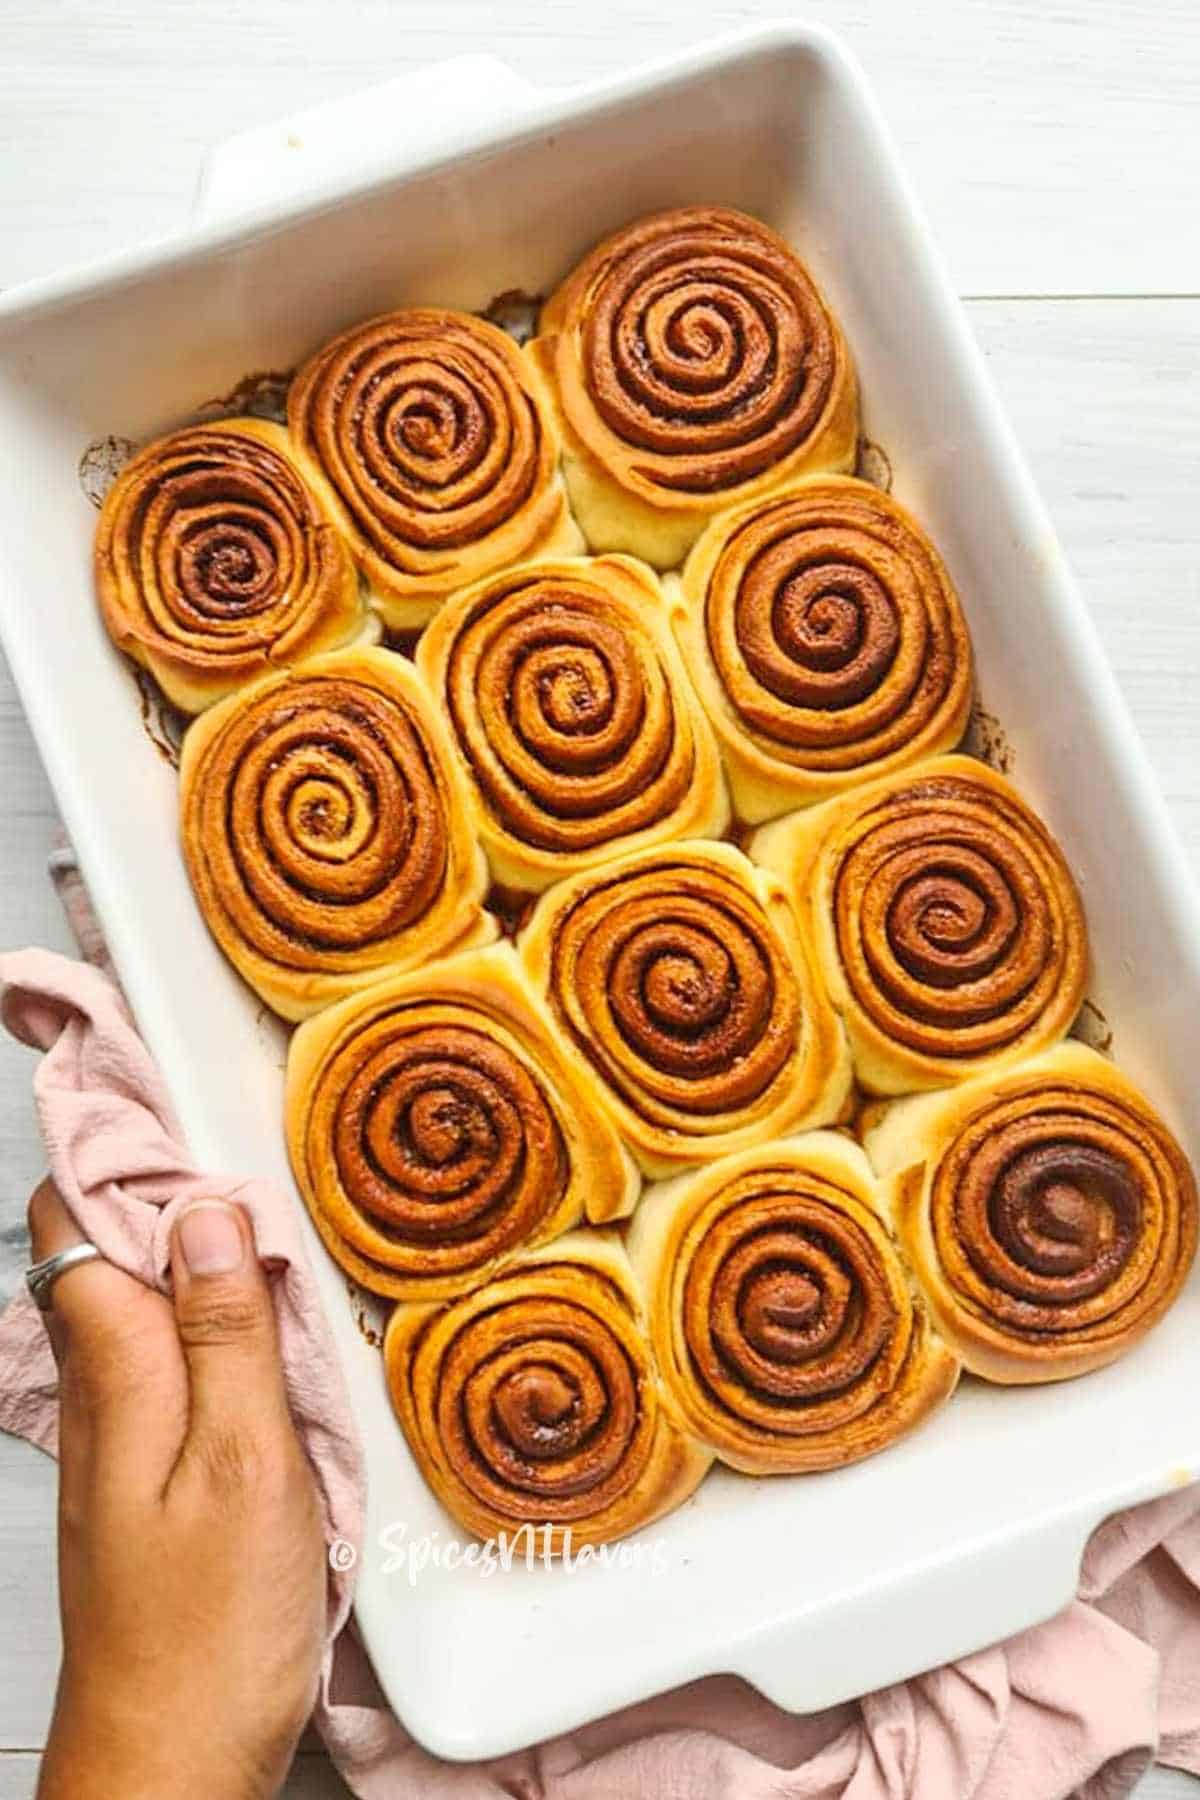
Once proven, bake the dough in the preheated oven of 190°C for 20-25 mins or until golden brown on top.
Step 6: Prepare the Icing
Using a hand-held mixer beat the softened butter, icing sugar and vanilla essence or vanilla extract until combined.
Add the milk a little at a time and beat it till it looks light and fluffy.
The detailed recipe on cinnamon roll icing with step-by-step instructions, tips, storage instructions plus much more is coming soon now up on the blog.
Step 7: Final Touches.
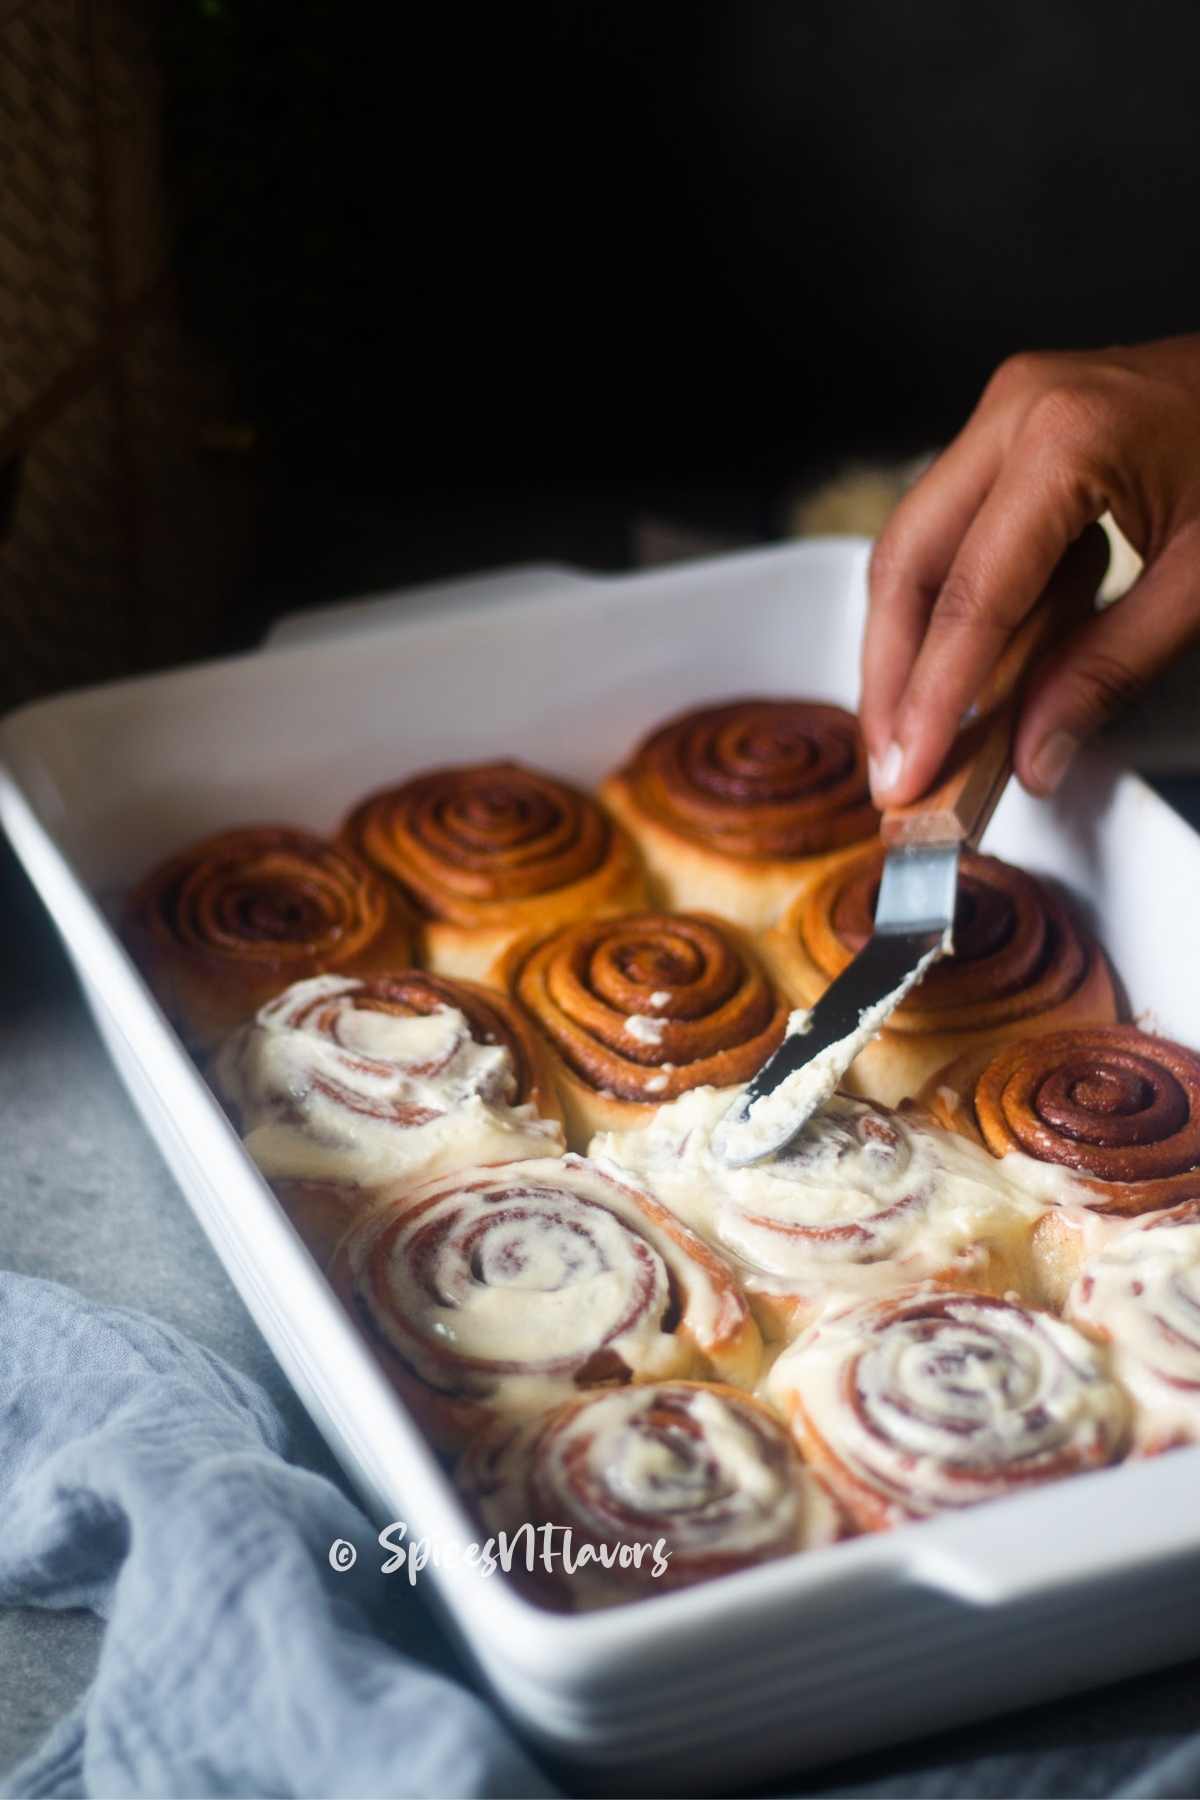
While the rolls are still warm (note warm and not hot) smear the icing on top and serve warm.
If you are looking for a classic cream cheese icing then our cream cheese glaze won't disappoint you 🙂
These eggless cinnamon rolls recipe is as good as those made with eggs.. I promise!!
Storing Instructions
For the most part, you have to keep these yummy cinnamon rolls away from moisture.
They’re best stored in a dry and cool place at room temperature.
Simply store in an airtight container or wrap the baking tray with a cling wrap and leave it on your countertop away from direct sunlight or gas stove for 2 days.
How to Store Cinnamon Rolls in the Fridge?
If you wish to store it for 2 to 3 days then put it in the fridge in an air-tight container or cling-wrapped baking tray.
Remember to take the cling wrap off when you decide to leave it on the countertop to thaw.
Condensation formed on top of the cling wrap can make the rolls go soggy.
Or change the cling wrap altogether if you forget it unattended on your countertop.
How to Freeze Cinnamon Rolls
Cinnamon Rolls are one of those types of bread that freezes so well.
In fact, this is my favourite way of storing the rolls as you can enjoy warm rolls for breakfast whenever your heart desires if you have a couple stored in the freezer.
It is super easy to warm up frozen rolls.
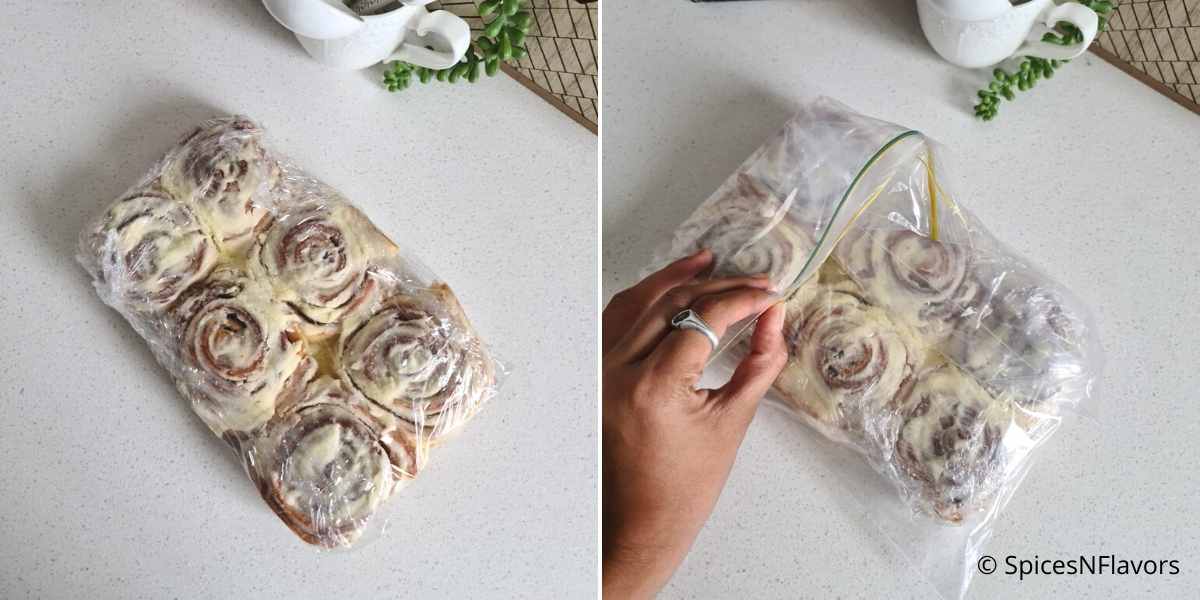
As for steps to freezing, I like to wrap the rolls tightly in a cling wrap. Then place it in a ziplock bag thoroughly labelled.
Now put it in the freezer it will stay good for 3 months.
Storing this way also does not occupy too much space in your freezer so it's a win-win.
How to Freeze Unbaked Cinnamon Rolls
Now, this is the step you need to follow if you want to make fresh homemade cinnamon rolls for breakfast the next morning.
The aroma of cinnamon flavor reminds me of the holiday season.. the best Christmas morning..
To freeze the unbaked cinnamon dough follow all the instructions till shaping the dough.
Then instead of allowing for second proofing on your counter top you would cling wrap the baking tray and put it into the fridge overnight.
Next morning take it out of the fridge and let it rise for 1-2 hours in a warm place (remember the dough should stick to each other before hitting the oven for baking)
Alternatively, you can also chuck the baking tray in the freezer. The dough stays good for 2 months.
The day before baking let it thaw in the fridge overnight and then allow for a second rising in a warm place to rise and then bake.
How to Reheat Leftover Cinnamon Rolls
If you have any leftover cinnamon rolls, don't let them go to waste!
Follow the above instruction on storing them so you can reheat these best eggless cinnamon rolls when your heart desires.
The only thing to note here is that you need to reheat the rolls individually.
Place a roll on a microwave-safe plate and warm it up in the microwave for 30 seconds at intervals of 15 sec each.
Or reheat for 7-10 minutes in a 350 F preheated oven (just before serving) to get that “fresh out of the oven” taste and softness to rolls.
Baker's Tips
- As a general rule of thumb, always remember to grease the baking pan and also pre-heat the oven temperature as mentioned in the recipe card.
- In terms of ingredients, too hot milk would kill the yeast. So use luke warm milk. Yeast should not be expired; check the date and viability before proceeding. Adding butter in a later stage helps to develop glutten. So follow these to make fluffy cinnamon rolls.
- Make sure to use room-temperature butter to knead the dough. Melted butter would make the dough wet and sticky. Too cold won't mix into the dough properly. Either way, there are chances you would end up adding extra flour and this would cause your cinnamon rolls to go hard especially in this case since we are making egg-free cinnamon rolls here.
- Learn to feel the dough in your hands. For this recipe, the dough should feel moist but not wet. It should not stick to your hands or else you will have difficulty shaping the dough later. You should have a supple, soft and smooth dough.
- Adding too much flour while kneading would make your cinnamon rolls hard.
- You can make use of dental floss for cutting the dough into perfect circles once shaped into a log. If doing it using a sharp knife or bench scraper like I have done then do remember to take some time out to give it a little circular shape before placing it on the greased baking tray.
- Never use a smaller size tray or try to fit all the dough in one single baking tray; that way the dough won't have enough space to rise and it will bulge in the centre like a pyramid.
- While second proofing instead of going by the time make the judgement based on the dough. The circles should proof and stick to each other and should also be soft to the touch as seen in the pics. Do not overproof as they might also cause bulging in the centre.
- Choose a ceramic or an aluminium baking tray. Glass trays conduct more heat causing the rolls to brown a lot especially the ones on the sides.
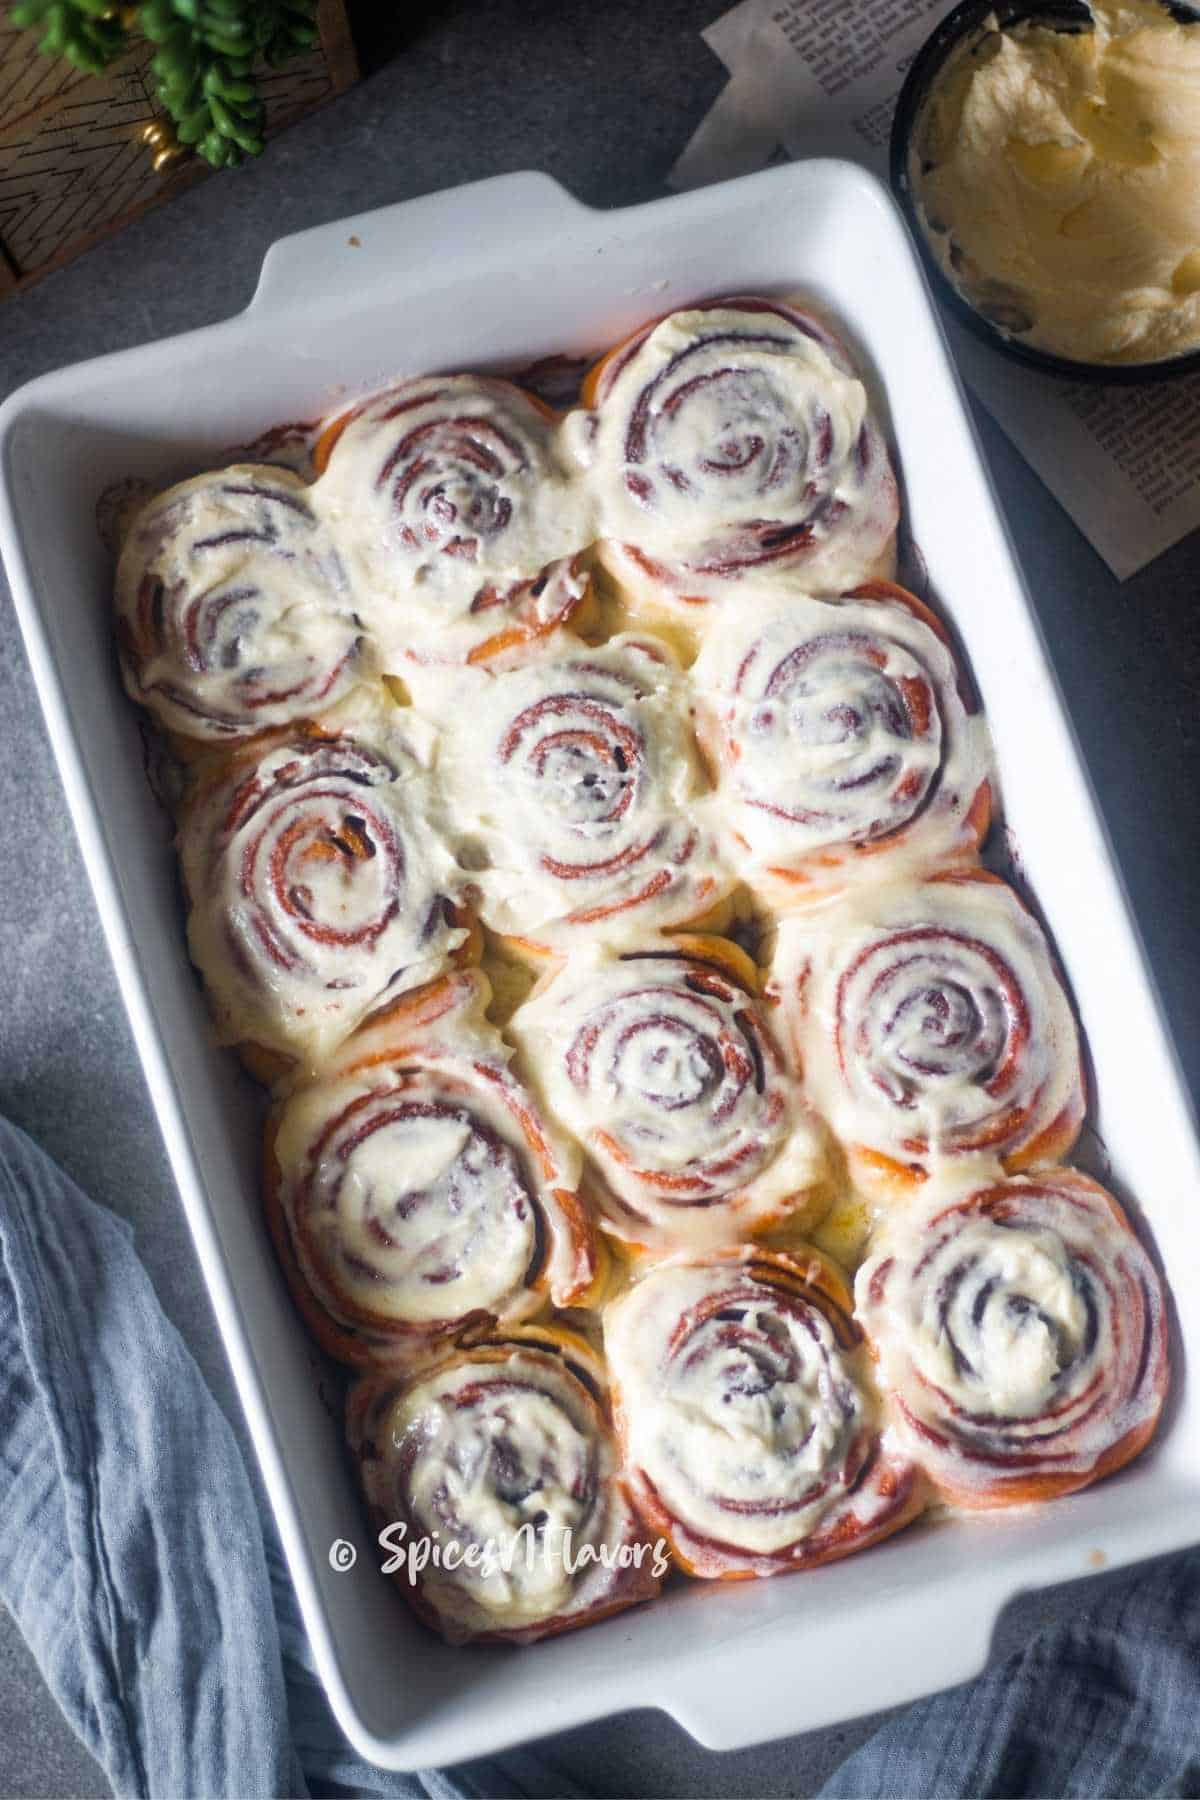
- Add the icing when the rolls are warm and not hot or else the butter will melt and ooze to the bottom of the tray rather than seeping into the rolls themselves.
Variations
Feel free to play with the recipe and come up with your own variations. Here are a few options for you.
- Add chocolate chips to the dough.
- Add orange zest to the dough for a citrusy kick!
- Use raisins or nuts in the fillings along with cinnamon sugar.
- Add some apple filling on top if you like.
- Or fruit puree of choice can also be used as a filling. Would be perfect for a summer bake!!
- Apart from the icing shared today you can use a simple eggless royal icing spread or classic cream cheese frosting from our carrot cake recipe can also be used.
Serving Instructions
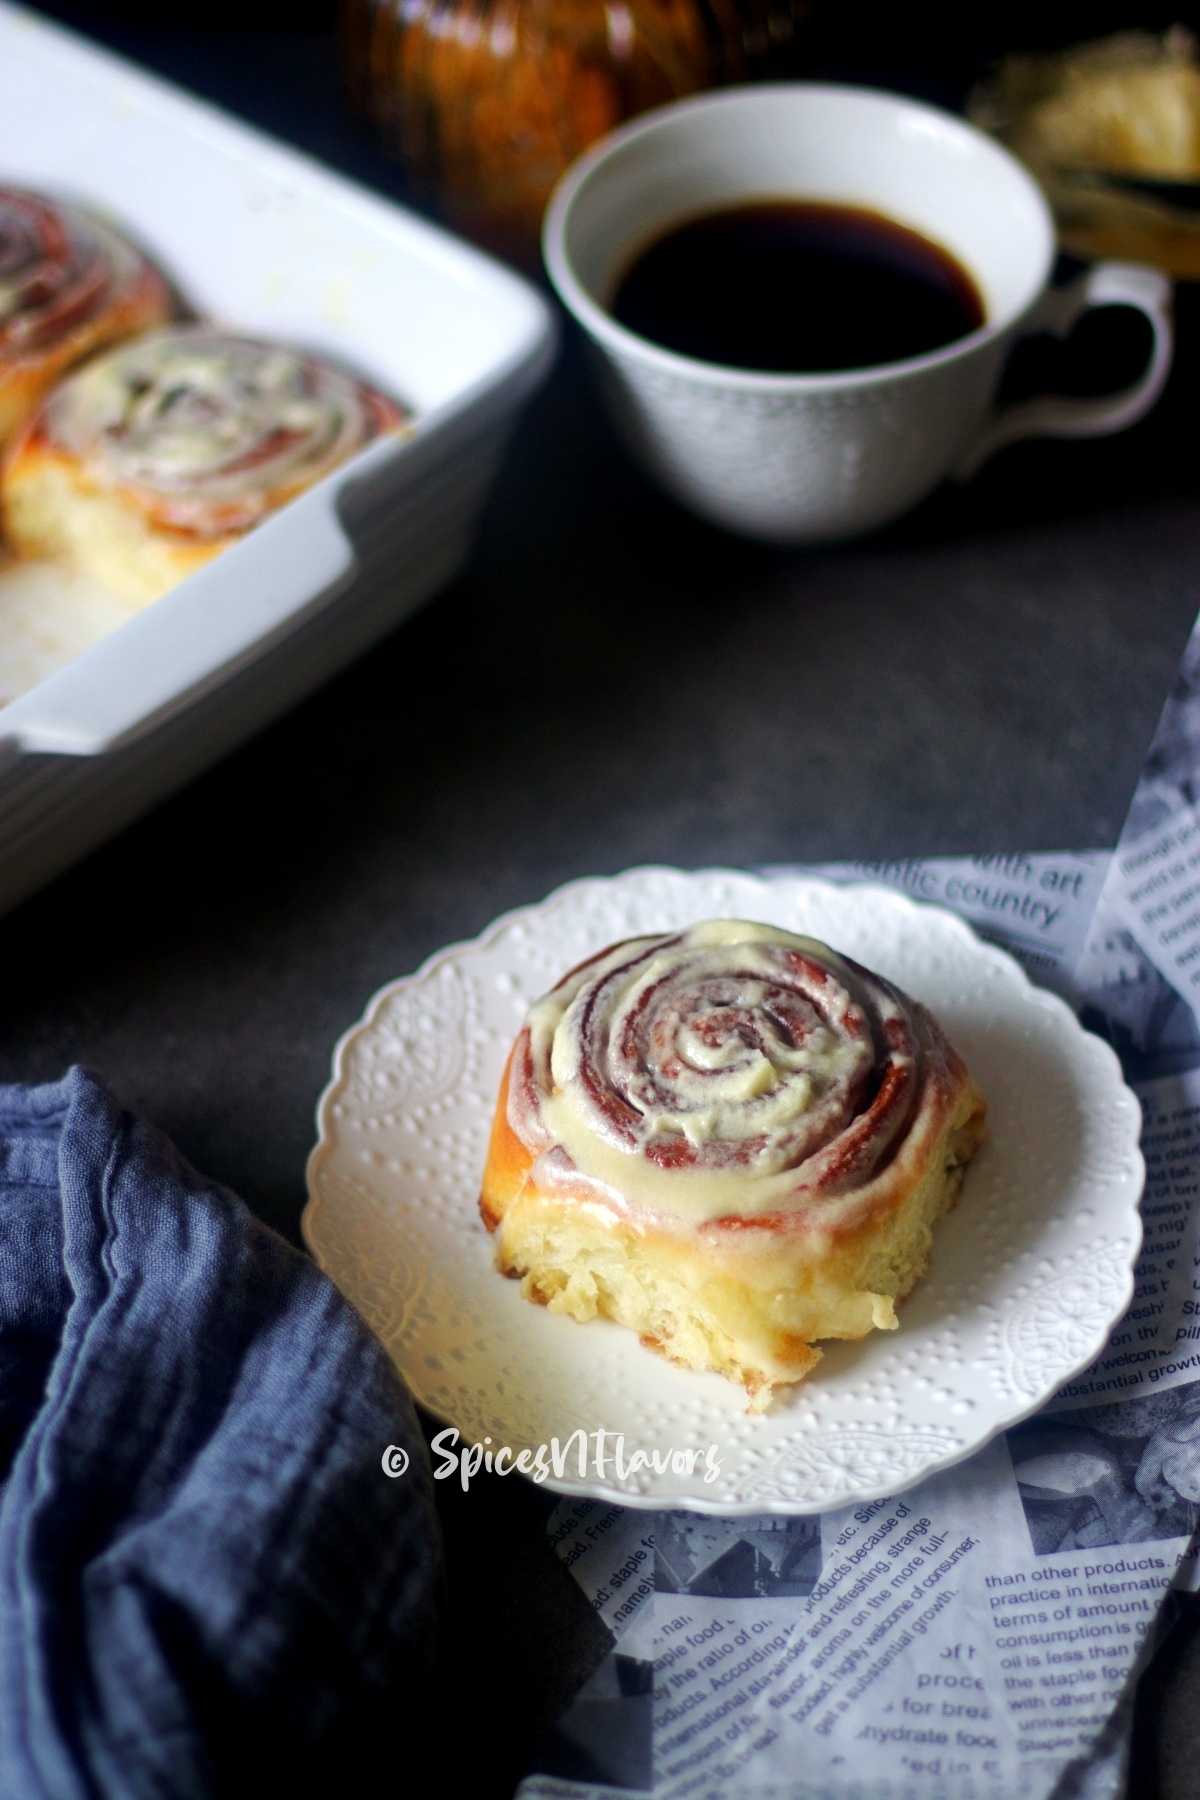
Serve the eggless cinnamon rolls warm with butter and your favourite coffee.
We like to enjoy them with pecan butter, but feel free to use whatever spread you like!
Warm cinnamon rolls with ice cream are a heavenly dessert combination to try.
Or you can also drizzle some chocolate sauce on top if you like.
Frequently Asked Questions
I always recommend using Instant Dry Yeast when it comes to baking Bread as you do not need to activate it beforehand. It can be added along with the dry ingredients itself.
There could be a couple of reasons for it like your yeast was not activated or there was no gluten formation at all. Here is the list of reasons that caused it and how you can fix it:
1. Your milk was not at the right temperature. Too hot would kill the yeast and too cold won't activate it and hence no rising so use luke warm milk.
2. Did you check the expiry date of the yeast? It might have expired. And hence no rising would happen.
3. Butter was added too soon and hence no gluten formation or the butter was too cold and hence was overmixed into the dough killing the yeast so no rise. Always follow the delayed fat method which is adding your butter at a later stage.
Avoid all these steps to give a nice rise to your dough and make the rolls light and fluffy.
1. Make sure that you are using the right size pan. If you do not have a larger size pan then use 2 smaller ones. Ultimately you want the dough to have enough space to spread out wider and stick to each other. If there is no space then the dough would rise in the centre and create that bulge-like a pyramid.
2. Overproofing is also the culprit. For the second rise make sure that rather than going by the time you check your dough. You want the rolls to stick to each other once done put it for baking, if allowed too long to prove then again it would rise from the centre.
Yes, you can, only the depth of flavour would be missing other than that it would have pretty much the same texture and taste.
Start from the wider edge and make small rolls. Sometimes when you roll it up the other edge would start unfolding so make sure you are going back and rolling it up again. Gently press it down if needed to secure it. Then continue rolling. This ensures there is a tight and even rolling.
Remember you add the icing when the rolls are warm. You want the butter to melt a bit and seep into the rolls. If too hot then the butter will melt and ooze out onto the tray instead of getting in the rolls.
This is the key to making good rolls. If the dough is wet and sticky you won't be able to shape them and it will be a disaster. If you feel it is sticky then add a little flour at a time and knead till it is combined. The dough should feel wet and tacky. Check our Pita Bread Post to understand how to check tackiness.
Related Recipes
- Eggless Churros Recipe
- Eggless Finger Doughnut
- Cinnamon Roll Icing
- Cream cheese Glaze for Cinnamon Rolls
Wish to Join US for the love of BAKING? Subscribe to our Youtube channel. Follow along on Facebook, Instagram, and Pinterest for all the latest updates!
The Best Eggless Cinnamon Rolls Recipe
Ingredients
For the Dough
- 240 ml Milk
- 8 gms (2 tsp/1 packet) Instant Yeast
- 67 gms (1/3 cup) Sugar
- 420-480 gms (3.5-4 cups) APF/Plain Flour/Maida
- 1 tbsp Milk Powder
- 1/2 tsp Salt
- 76 gms (1/3 cup) Butter softened
For the Filling
- 8 tbsp Brown Sugar
- 1 tbsp Cinnamon Powder
- 1/4 cup (56 gms) Butter softened
For the Icing
- 1/3 cup Butter soft
- 1-1.5 cups Icing Sugar
- 2 tsp Vanilla
- 3 tbsp Milk more if needed
Instructions
Step 1 - Prepare the Dough
- In the bowl of a stand mixer, add the milk sugar and yeast. Give a quick mix. And add milk powder, 420 gms of flour and salt. Mix using the dough hook attachment.
- Then start kneading the dough on low speed until it comes together then gradually increase the speed to med-high and knead for about 6 mins. If you find that the dough is too sticky add more flour to adjust until it forms a solid mass of dough.
- At this stage, you would have a dough that would be dry to touch and that is how it would be as we have not added the butter yet. So finally add the room-temperature butter in and knead for another 4 mins.
- Initially, the butter would stick to the sides of the bowl and look messy, but that is ok keep kneading on med-high speed and it will come together eventually.
Step 2 - First Proofing
- Once done, take the soft dough out of the bowl, grease the same bowl with some oil or you can use any large bowl instead, put the dough back and allow for first proofing.
- Cover the bowl with a cling wrap and place a tea towel on top. Let the dough rise on the countertop itself for 1.5 hours until doubled in size. Alternatively proof the dough in the Instant Pot for 45 mins using the Yogurt Mode.
Step 3 - Make Cinnamon Sugar Mixture
- While the dough is proving; in a small bowl mix together the cinnamon powder and brown sugar until homogenous and set aside.
- Also, measure out the required butter and set it aside so that it softens by the time it is ready to be used.
Step 4 - Shaping
- Once proofed, punch down the dough to remove the gases and take it out of the bowl to a floured countertop. Roll into 20x18 inches rectangle using a rolling pin.
- Smear the softened butter all through the dough and sprinkle the prepared cinnamon-sugar mixture on top.
- Roll from the longest side to form a tight cylindrical roll. Pinch the seams well.
- Then trim the edges from both sides and cut them into 12 pieces of approx 4 inches each using a bench scraper or sharp serrated knife.
- Grease a baking tray with some butter. I am using an 11x7-inch ceramic baking tray. Take one piece at a time and gently pat the edges to give it a circular shape and place it on the greased baking tray with the cut side down evenly apart.
- Again cover with a tea towel and allow for second proofing until the individual circle rises and touches each other. It would take around 40 mins but do not go by the time rather look for the dough to stick to each other.
Step 5 - Baking
- Once profed, bake the dough in the preheated oven of 190°C for 20-25 mins or until golden brown on top.
Step 6 - Make Icing
- Using a hand-held mixer beat the softened butter, icing sugar and vanilla essence or vanilla extract until combined. Add the milk a little at a time and beat it till it looks light and fluffy.
- While the rolls are still warm (note warm and not hot) smear the icing on top and serve warm.
- These eggless cinnamon rolls recipe is as good as those made with eggs.. I promise!!
Video
Notes
- As a general rule of thumb, always remember to grease the baking pan and also pre-heat the oven temperature as mentioned in the recipe card.
- In terms of ingredients, too hot milk would kill the yeast. So use luke warm milk. Yeast should not be expired; check the date and viability before proceeding. Adding butter in a later stage helps to develop glutten. So follow these to make fluffy cinnamon rolls.
- Make sure to use room-temperature butter to knead the dough. Melted butter would make the dough wet and sticky. Too cold won't mix into the dough properly. Either way, there are chances you would end up adding extra flour and this would cause your cinnamon rolls to go hard especially in this case since we are making egg-free cinnamon rolls here.
- Learn to feel the dough in your hands. For this recipe, the dough should feel moist but not wet. It should not stick to your hands or else you will have difficulty shaping the dough later. You should have a supple, soft and smooth dough.
- Adding too much flour while kneading would make your cinnamon rolls hard.
- You can make use of dental floss for cutting the dough into perfect circles once shaped into a log. If doing it using a sharp knife or bench scraper like I have done then do remember to take some time out to give it a little circular shape before placing it on the greased baking tray.
- Never use a smaller size tray or try to fit all the dough in one single baking tray; that way the dough won't have enough space to rise and it will bulge in the centre like a pyramid.
- While second proofing instead of going by the time make the judgement based on the dough. The circles should proof and stick to each other and should also be soft to the touch as seen in the pics. Do not overproof as they might also cause bulging in the centre.
- Choose a ceramic or an aluminium baking tray. Glass trays conduct more heat causing the rolls to brown a lot especially the ones on the sides.
- Add the icing when the rolls are warm and not hot or else the butter will melt and ooze to the bottom of the tray rather than seeping into the rolls themselves.


JayCee says
This recipe and the detailed notes are fantastic. I have made the rolls twice now and it will be my go to recipe for cinnamon rolls for the foreseeable future. 5/5 highly recommend!
sushma iyer says
Hi JayCee.. I am glad to hear this.. Thank you for sharing your feedback; this would motivate others to try it as well 🙂