How to Start and Feed your Starter?
There are only two things you need to start your starter:
Flour:
Using flour with a higher percentage of bran and husk will have more of their own wild yeasts and bacteria attached to the flour and hence is guaranteed to give you results.
That is why using a whole organic grain-like whole wheat or rye is recommended for starting a starter from scratch.
That being said you can use any type of flour that you have handy.
If you had seen our Instagram bake along series, you might be knowing that I tried making starter from bread flour, APF and also whole wheat flour with same results.
Water:
Use filtered water.
Chlorinated water can contaminate the starter.
Here is the recipe to make your own Sourdough Starter from scratch:
DAY 1:
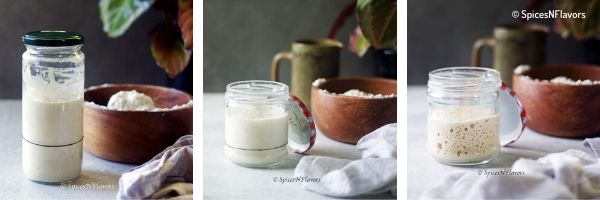
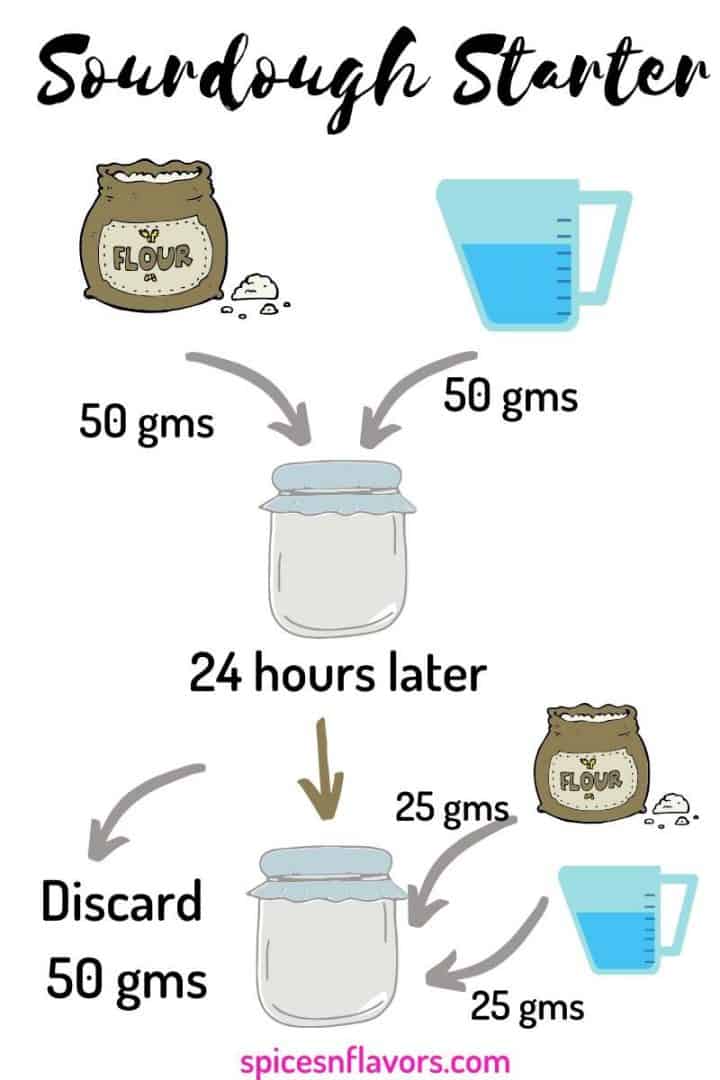
Weigh the glass jar. Press Tare.
Add 50 gms flour and 50 gms warm water.
Mix well so that you see no bits of dry well. Cover the jar loosely with a lid.
Set it in a warm place on your counter top itself.
If it is too cold in where you are living like I do.. It is winters in New Zealand now so I set it up in my oven with lights on but the oven was off.
Pat you back as you have just started your own Starter.
By the way now is the time to name your Starter.. I have named mine "Pebbles".
What is your Starter's Name?? Leave a comment below or share it with me on Instagram.
Day 2:
Come back on the same time.
So if you fed your starter at 8 am on Day 1 then come back at 8 am on Day 2.
You have to understand that Yeast is a live culture and just like your pet it gets trained to feed time too.
So select a time with which you can stick too for 7-15 days after that the YEAST will look after you 🙂
So on Day 2 -
Give a quick stir to degas the starter.
Remove (Discard) 50 gms of Starter.
Feed 25 gms Flour and 25 gms Water.
Give a mix and let it sit for 24 hours.
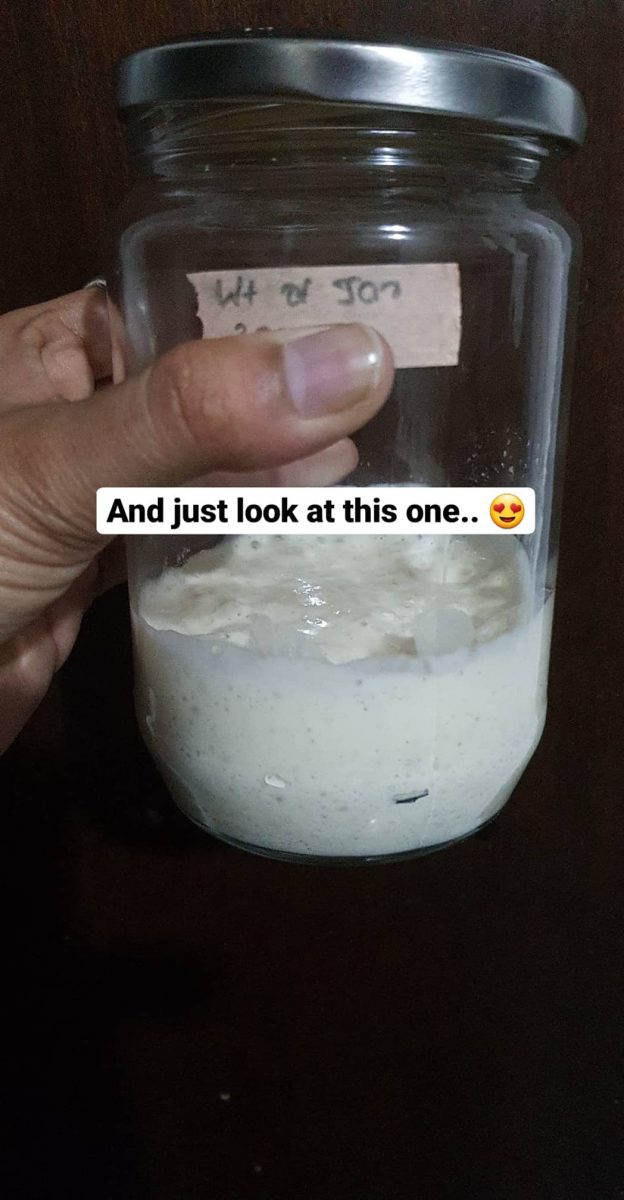
Observations:
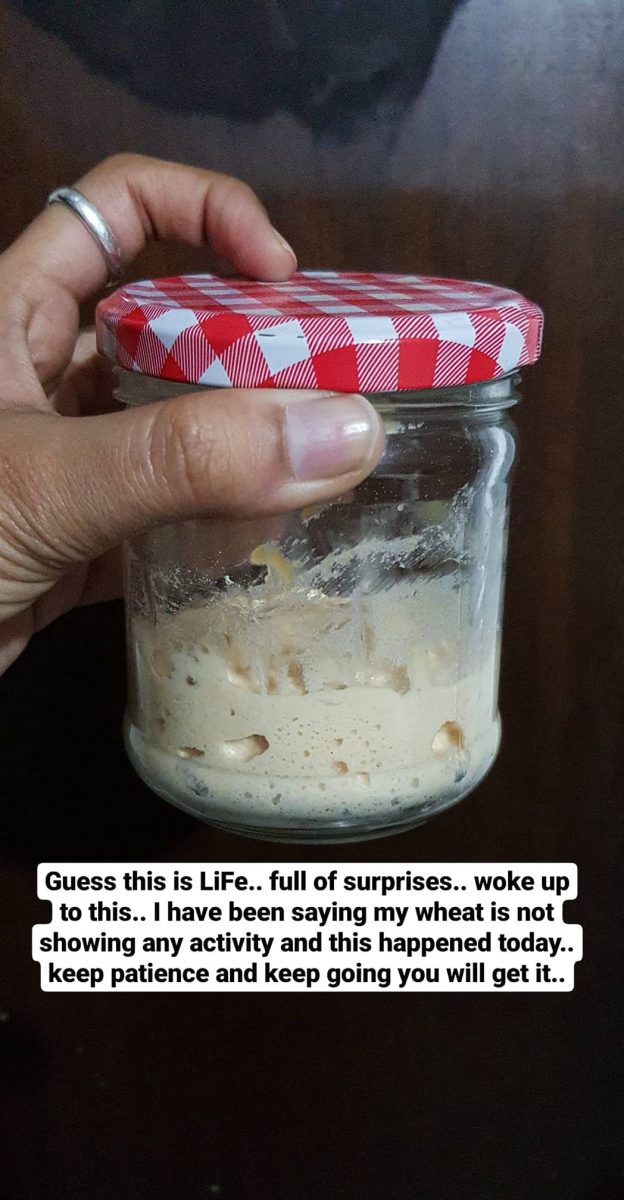
You might observe great activity on day 2 and day 3.. too much bubbling and rising of the dough..
It is actually the bad bacteria getting killed.
The smell of the starter will also indicate the same.
It smelled like dirty socks to me.. GROSS!!! But that's how it would be.. so unpleasant to begin with.
The consistency of the starter was also quite stringy
Day 3:
Give a quick mix to degas.
Discard 50 gms. Feed 25+25 and give a good mix. Set aside for 24 hours.
My Observations:
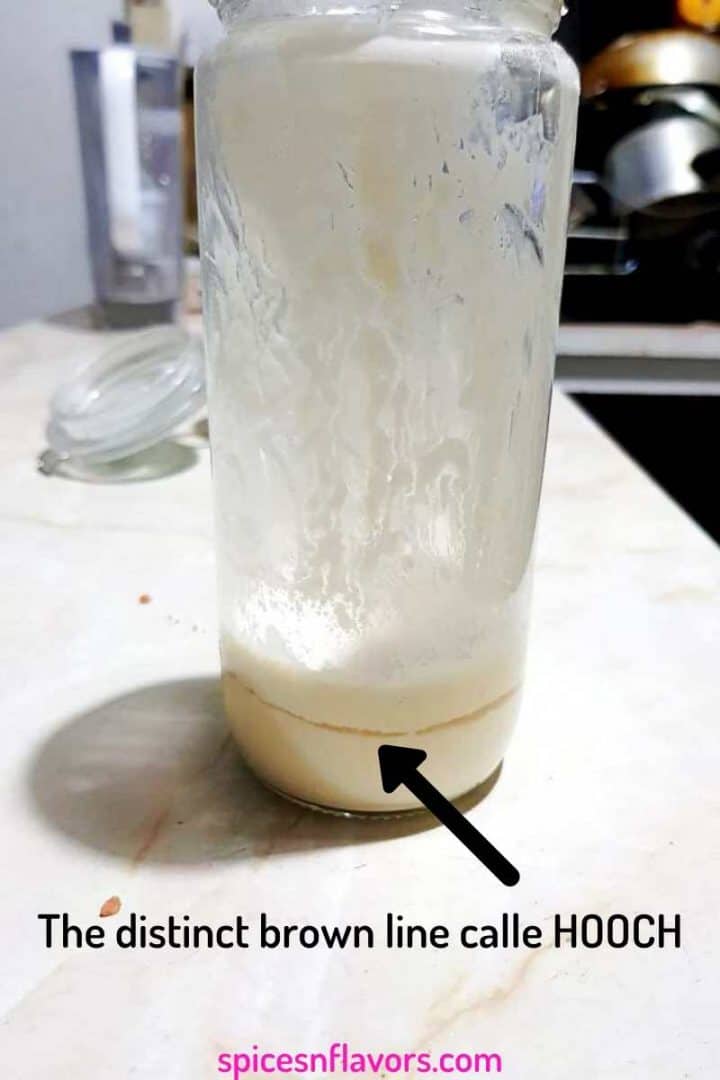
You may or may not observe a brown line on Day 3.
This is called as HOOCH.
It means that the starter is hungry and needs more feeding.
I got this line on Day 3 so I fed Pebbles twice a day on Day 3 but if you do not then simply continue feeding once a day.
Day 4
Degas. Discard 50 gms. Feed 25+25 Flour:Water.
My Observations:
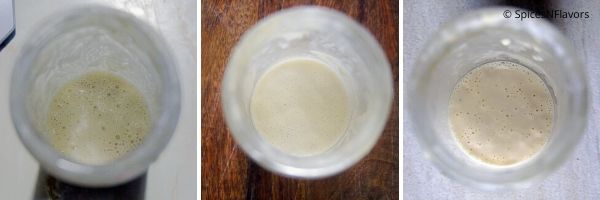
I observed very few small bubbles. But no rising and no major activity.
Since I observed HOOCH on Day 3 I fed Pebbles twice even today.
If you do not get the HOOCH continue feeding once a day.
Day 5-6:
Degas and follow the same procedure.
Discard 50 gms. Feed 25+25 Flour:Water.
Again I did not find any major activities going on. It had some bubbles on the surface indicating that it was alive.
No Rising was observed.
Day 7:
Follow the drill - Degas, Discard 50 gms, Feed 25+25 Flour:Water.
Some say your starter will be matured by day 7 and it is perfectly fine to use it.
But after reading multiple (in fact all the) blogs on the internet I learned that the starter needs a minimum of 10-15 days to mature completely.
So we will continue feeding the starter for 15 days.
On Day 7 it is said that you will start observing the same activity as you did on Day 2.
That is once you feed the starter in about 4-6 hours of the time the starter should double in size.
My Observations:
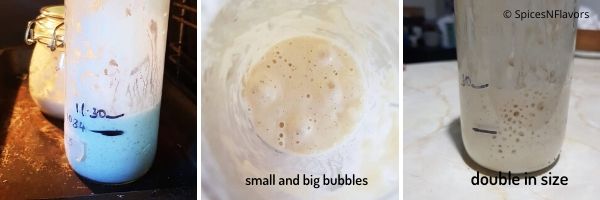
I did observe rising in the starter in the stipulated 4-6 hours time duration but only in my bread flour based starter and not in others.
There were also some big and small bubbles.
You may or may not observe rising or bubbling activity but just keep going.
The only thing changed was the smell.. It started smelling pleasant and more like a IDLI DOSA batter to me.
Day 8 - Day 14
We will now start feeding our starter twice a day in a span of 12 hours.
Yes it is now a toddler from baby stage 😉 and needs feeding twice a day.
The pattern remains the same.
Degas, Discard 50 gms and Feed 25+25 gms Water:Flour.
Only thing is you will now feed the starter at 8 am and 8 pm too as per the example that I stated above.
Observe the smell and rising each day.
You will notice that it is now starting to smell more bread like.
Day 15:
The final day of feeding.
Feed it twice as we did all these days.
After the second feed it is ready to go in the fridge to be stored forever or you can use it to make bread.
Check out How to store and care for the Starter section for the details on storing the Starter.
You also have to use the starter when it is at its peak.
Check out what is the peak stage from out FAQ setion.
I made my first bread using Starter from Day 13.
Make sure you download the tracker to make your life easier!!
Wish to Join US for the love of BAKING? Subscribe to our newsletter and follow along on Facebook, Instagram, and Pinterest for all the latest updates!
Tag us on Instagram: @spicesandflavors to get featured on our stories.
Pin this for later:
How to make Sourdough Starter
Ingredients
- 600 gms Flour of choice
- 600 gms Water
Instructions
Day 1 :
- In a clean glass container, add 50 gms Flour and 50 gms Warm Water.
- Give a good mix so that there are no dry bits of flour left out in the jar.
- Cover loosely and let it sit for 24 hours at room temperature. If it is too cold at your place you can place it under the oven lights with the oven being switched off.
Day 2 - Day 7 : Feed once a day
- On Day 2, stir the starter in the jar to degas.
- Discard 50 gms of starter and feed fresh 25 gms of flour and 25 gms of water.
- Give a quick stir so that there are no dry flour left out.
- Cover loosely and let it stand for 24 hours and then repeat the steps till day 7
Day 8 - Day 15: Feed twice a day
- On Day 8, Morning: stir the starter in the jar to degas.
- Discard 50 gms of Starter, feed 25 gms Flour and Water. Stir to mix and let is stand for 12 hours at room temperature.
- Day 8: Evening: Again follow the steps of degassing, discarding and feeding the starter.
- From Day 8 to Day 15 we will be feeding the starter twice a day in a span of 12 hours.
- Your starter is now ready to be used to bake bread.
Video
Notes
- After reading multiple (actually all the) blogs on the internet I have come to the conclusion that the starter needs at least 15 days of feeding to mature completely. In my personal experience too, the started showed activities only after day 10.
- Every starter is different so my observations might not match yours. But just keep in mind that unless you add hot water there is no chance of killing the yeast so just be patient and keep going.
- After day 7 you will start observing a slight rise in the starter and the smell would also change to fruity and alcoholic
- Check out the other sections on how to maintain and care for the starter.
- I observed hooch on day 3 so I fed my starter twice a day on day 3 and day 4 and from day 5 onwards continued with the recipe.
Conclusion:
All it takes is 2 ingredients and patience to make your own Sourdough Starter.
So what are you waiting for join us in this and you will have your own starter ready to be used in recipes of your choice
Susie says
Hi Sushma
I have tried a number of recipes and I am loving yours. Thank you so much. My question is when you feed your refrigerated starter once a week do you always use the whole wheat flour?
Thanks Susie
sushma iyer says
Hi Susie.. No you can use any type of flour - whole wheat or APF. I feed mine with APF
Shriram Parameswaran says
Very nicely structured and narrated post for a beginner like me in the sourdough journey.
Has anyone tried making the Sourdough starter with Aashirvaad Select (100% MP Sharbati wheat) flour?
sushma iyer says
Hi Shriram..
Thank you so much.. that was the whole point for this post.. For anyone to start their sourdough journey.. And yes I myself have made with Aashirvaad Atta.. The starter will be thick and paste like but as day passes it would become normal..
Regards
Sushma
Shriram Parameswaran says
Namaskarams
We are just going to commence our sourdough baking journey verybsoon, I hope.
Sourdough starter is getting ready and is eight days in the making. Eagerly waiting.
Chlorine in water and Iodine in Salt could kill the living organisms in the levain / starter, is what I hear and that makes sense.
So while we can use filtered and stored water (after chlorine has escaped) to get chlorine free water, which salt is recommended for sourdough baking.
Is the himalayan pink salt powder ok ?
And any idea which cast iron Dutch Oven is popular in India? Or is there any alternative to a D.O.?
We intend to start off with baking tins first for loaves and then graduate to a D.O. for Boules and Batards etc.,.
sushma iyer says
Hello Shriram..
Namaskaram..
So happy to learn your progress.. And your research on Sourdough is amazing. You are on the right track. Himalayan Pink Salt is absolutely fine. Works great.
Coming to D.O. You can check the LeCreuset India they have amazing collection. If you use Instagram you can check their page on Insta or do a quick Google Search too.
But if the shops are open I would say nothing like namma ooru iron pans so you can use iron skillet for both base and top. So not only for Boules you can use it in everyday cooking for making stir fry or dosas. I am talking about something like this in this picture that I found on google for you https://bit.ly/3aW0hy6 so you can buy these separately and use it for boules as well as everyday cooking
Hope this helps
Regards
Sushma
Shriram says
Namaskarams
And thank you for such a detailed response.
I just discovered a few days ago that Rock Tawa based in Coimbatore itself makes Dutch ovens . They have a 3 liter and 5 liter...https://rocktawa.com/rock-tawa-dutch-oven-pre-seasoned-best-cast-iron
Will pick one up soon after they are open up. Presently unresponsive due to Covid19 lockdowns I guess. Many thanks again.
By the way today is Day 11 and my Bubbles is still not active. Twice a day discard + feeding is going on at 0600 & 1800. Fingers and toes crossed.
sushma iyer says
Hehe.. I like toes crossed.. What flour are you using Wheat based aa??
Prescy Dias says
I am very happy you have taken so much trouble to explain this in detail and easy steps we can follow. I had some bad experiences years back and there was no one to explain or help out. One question..does the water have to be warm every time it is added. God bless you my dear and all your future endeavours.
sushma iyer says
Hi Prescy..
Thank you for your kind words.. so pleased to know that the information that I have shared is worth a read.. appreciate your feedback. and to answer your query Yes always use warm water.. Yeast loves warm conditions 🙂
Regards
Sushma
Archana Wani says
Hi Sushma,I am not able to understand the concept of changing starter percentage. Can you please help.
sushma iyer says
Hi Archana..
Baker's percentage is the term used to define the percentage of water in the dough aka bread. Flour is always 100 percent and all the other ingredients are calculated based on that. So if for eg: flour is 1000 gms then 70 percent dough means it has 700 gms of water in it.
For a beginner it becomes difficult to handle higher hydration dough like say 75% (750 gms of water as per the above example) or 80% (800 gms of water as per the example) as the dough tends to be sticky and runny.
This recipe is 70% which means the dough has 70 percentage of water in it. If you are not comfortable with the given amount you can use 68% and if you are a seasoned sourdough baker then you can also go for 75% that is what I have mentioned in the notes section.
I have tried this recipe with all the three hydration level and got good results. The more the hydration the better your bread will be.
Hope this helps
Regards
Sushma
Archana Wani says
Hi nice write up. Very comprehensive. I have a query is bulk ferment and bench rest same?
sushma iyer says
Hi Archana.. Thank you.. And to answer your query no they are not the same. You can read sourdough terminologies from here: https://spicesnflavors.com/beginners-sourdough-starter-recipe/3/
Regards
Sushma
Divya Nair says
Thank you Sushma for the detailed explanation. Even the minute details have been covered.
Reshma says
Thanks for amazing write up, very well written. I have a query can we use normal tap water to start with.
sushma iyer says
Hi Reshma..
Glad to know that you found the information useful. Thank you.
Coming to your query no normal tap water is not recommended. What you can do is boil the water well, allow it to cool till warm to touch and then use it..
Regards
Sushma
anisha mehul says
Good job!!
sushma iyer says
Hi Anisha.. Thank you 🙂
anisha mehul says
I am impressed with the level of research you have done and what is even more impressive is you took so much time to blog and share it with everyone.
sushma iyer says
Hi Anisha.. Thank you so much.. You are truly kind-hearted as not everyone can appreciate other's work. Thank you for those kind words.. I am glad that I could be of some help..
Regards
Sushma
Vijay says
Hey Sushma.....I am so happy to learn about your blog on sourdough. I have tried to get a starter going and buried some and eat resurrected some.
Am I glad to have made your acquaintance though.
I think the most important ingredient is flour.
For me APF has not been a 💯 . Where do you get your bread flour? I assume you live here in India.
My sour dough is like a pregnancy. Sometimes it's good sometimes I have miscarriages. HELP NEEDED
sushma iyer says
Hi Vijay..
I do not live in India, I live in New Zealand..
To answer your question I would say the flour really doesn't matter as I have had success with all the three types - Bread, Maida and Whole Wheat. I would say go for whole wheat in that case.. About sourdough failures I can understand I got my first success only in the third attempt.. It is all in the technique I would say.
Regards
Sushma
Rajalakshmy Varadarajan says
Hi I dodnt get my Sour dough tracker.
sushma iyer says
Hi Rajalakshmy..
You have to enter your email address in there and it would be sent to your inbox. Please shoot me a reply from your email address to [email protected] so that I can have look from my end.
Regards
Sushma